Blueberry Cobbler Time!

Love this cobbler for how quickly it goes together plus it takes less fruit than a pie.  And it is gluten free for all of you who must avoid gluten. I honestly thought I had posted a recipe for this treat a year or two ago. Shocked to find no such recipe in my blog archives. It be blueberry season so perfect timing to post this classic dessert.

This recipe is the same basic one I posted for peach cobbler and for rhubarb cobbler in the past; it is modified from a muffin dry mix in Bette Hagman’s book, More from the Gluten-Free Gourmet and uses a flour mix that will give you 4 cups of the dry ingredients.  One cup will make an 8×8 pan of cobbler topping.  I keep the rest of my dry mix in the freezer and a pan of cobbler can be thrown together in less than 10 minutes plus baking time.  What a time saver this mix is! I make all sorts of cobblers with it.

It’s best to always get the fruit part cooking before putting the topping together so the fruit is hot and ready for the topping and can go right into the oven.

I make this blueberry cobbler most every time we go camping; put the dry cobbler mix in a baggie labeled cobbler, topping mix of sugar and flour in a separate labeled baggie.  I bring a small mixing bowl and whisk; don’t recommend mixing the cobbler cake in a baggie: it is difficult to mix it properly.  I start the fruit cooking on the camp stove and then after I mix up the cobbler topping and it’s ready to bake, I cover the pot with foil and bake it on the grill over the campfire. Takes a bit longer to bake; keep checking it every 5 minutes once it has baked 30 minutes. Make sure your pot is fire proof…

Angie’s Blueberry Cobbler

Dry Cobbler Mix use one cup for this recipe and freeze the rest

2 ¼ cups white rice flour

½ cup potato starch (not potato flour!)

½ cup tapioca flour

1 tsp. baking soda

4 tsp. baking powder

1 tsp salt

1 tsp. xanthan gum

1/3 cup sugar

Fruit Filling

4 cups fresh blueberries; rinsed and stems removed

½-2/3 cup sugar –more or less depending on sweet tooth

2 tbsp. GF flour; I use tapioca flour

1/4 tsp cinnamon

Directions:

Place the fruit in a sauce pan. Stir together the sugar, cinnamon and flour and mix into the fruit.  Cook on the stove top for 5-10 minutes until it is thickened and hot.  Stir often so it doesn’t stick or burn. If you are worried it will burn, add a tbsp. of water to it and keep stirring. Pour into a buttered 8 inch square or round pan, top with big blops of the cobbler topping.

Cobbler Topping

1 cup dry baking mix

2 large eggs

2 tbsp melted butter or canola oil

¼ to 1/3 cup milk/buttermilk

½ tsp. vanilla  *optional

Mix the wet ingredients and then add to the dry mix in a big bowl.   Mix briefly: do not over-mix for best texture.  Use a big spoon to plop it right away on the hot fruit.  Bake immediately as baking soda and powder can’t stand around waiting or they lose their oomph!

Bake at 350 degrees for 25 minutes.  The top should be lightly browned and spring back when you poke it with your finger.  If it looks damp or squishy bake it 5 more minutes before removing from oven.  cobbler in dish

Let cool 5-7 minutes before serving as it will burn your mouth right out of the oven!  Some people love it with a scoop of vanilla ice cream.  This tasty cobbler is perfect just on its own.

Notes: I use canola oil most of the time but butter is great too. The original recipe was 1/3 cup milk but I have cut back to ¼ and I like it a bit better; less runny. I also use buttermilk for mine but you can use milk, fruit juice or even water for the liquid. Can’t say it will taste as good…but if you have to avoid dairy….

Yummy Bacon Quiche!

Quiche has sort of a clichéd reputation.  Something ladies eat for lunch. Something real men avoid.  A boring slice of eggy stuff. All NOT true. Well, except for it being a luncheon treat. I love a well crafted quiche. They can be pretty nasty though if not carefully made. I don’t want to go into negative details but what I aim for is a flaky crust, lots of fresh flavors and a creamy filling. I have an alternative crust if you are feeling lazy; you can butter the pie pan and lay down a single layer of buckwheat grouts (2/3 cup) and any left over go thinly over the first layer.  As it bakes they swell and create a sort of a crust. Nice, but today we are going for fantastic and that means real crust.  It is just like my fruit pie crust but minus the tablespoon of sugar.  You can use a store bought unbaked crust and no one will call you out.

To fill it I like mushroom slices, bacon and onions sautéed in the leftover bacon grease.   Totally yummy and a bit oinky especially when you add some cheese cubes. For this quiche I used fresh mushrooms which amped up the flavor quite a bit but generally the canned mushrooms are how I roll.

The egg/cheese part that holds it together; mine is a bit different than most. I use a mixture of cottage cheese, eggs and milk; blended in my blender. Easy peasy. I confess I never measure the cottage cheese but you might be more cautious so I gave an amount. My recipe adds cubes of cheese to amp up the cheese factor. I used Colby here but often I chose sharp cheddar, Swiss or Munster cheese.

If you are gluten free like me check the bacon package for a gf label as I have gotten quite ill from bacon that had gluten in it. I know…why would you put gluten in bacon? I guess it is in the brining solution? Or the spices?? No idea, but do be careful. I used four slices but if you are a bacon lover you could add two more slices and that will increase the pork factor a tad.

Sometimes I vary the filling a bit; sautéed chunks or slices of summer squash are nice.  Ham instead of bacon works nicely. Don’t use too much filling or it won’t hold together.


quiche slice
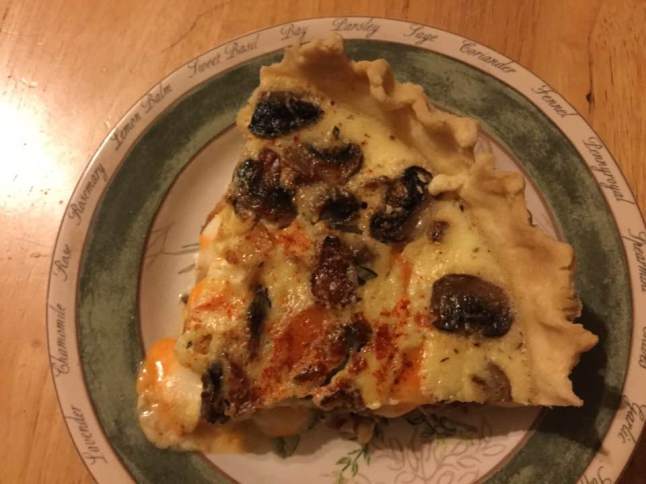
Bacon and Mushroom Quiche  six servings

 Crust:

1 c plus 2 tbsp brown rice flour mix (at bottom of recipe)

2 tbsp sweet rice flour

½ tsp xanthan gum

¼ tsp salt

6 Tbsp. cold butter cut into 8-9 chunks

1 lg egg

2 tsp fresh orange or lemon juice

Mix dry ingredients in bowl of stand electric mixer.  Add butter and mix until crumbly and resembling coarse meal.  Add egg and juice.  Mix until it comes together into big chunks.  Shape into a ball with your hands. Put it on a crust sized piece of parchment or wax paper (14 x 14 inches more or less), flatten the crust ball some; put on top of it another piece of parchment or wax paper and chill it all in your fridge for about 15 minutes. Make the filling while it chills.

Filling

4 slices gluten free bacon

1 small can mushroom slices or 1/3 lb fresh mushrooms

1 medium onion

1 ½ cup plain cottage cheese

3 eggs

1/3 cup whole milk or half and half

A chunk of bar cheese; about 2 inches of it: cheddar, Colby, muenster

Sprinkle thyme

Sprinkle paprika or smoked paprika

Filling preparation: cut the bacon into large dice; sauté in frying pan, stir often. Remove to a paper towel lined plate when nearly crisp.  Slice the onion in half rounds, not too thick and not thin and cook slowly in the bacon fat until soft but not browned; about 5-8 minutes.  Remove to a paper towel lined plate to drain a bit.  If using canned mushrooms drain them. If fresh; slice and sauté  in a clean fry pan in about a tbsp of butter and a tbsp. of olive oil until fairly cooked; about 5 minutes.

Heat oven to 350 degrees. I use my bottom heat oven for this recipe to bake the crust nicely.

Put cottage cheese, eggs and milk in blender; put lid on. Blend 10-15 seconds or until well mixed.

quiche blender

Cut the cheese chunk into small cubes.

Assembly: Roll out the pie crust; fit into 9 inch pie pan. Flute or crimp the edge. If you don’t have a bottom heat oven bake it about 8 minutes before filling. Gently spread the onion then mushroom, then bacon on the raw or par-baked crust. Pour in the blender mixture. Spread evenly all the cheese cubes over the top. Sprinkle with just a bit of dried thyme and a touch of paprika.  Bake for 35-40 minutes until the center is just barely giggly when you bump it.  Cool at least 30 to 60 minutes before slicing. That is non negotiable; it will be a mess and not taste great if you cut it hot.

Keeps about 3 days in the fridge if it lasts that long; I cover it tightly with plastic wrap. To reheat, I warm a slice in the microwave about a minute until the cheese starts to bubble. Enjoy!