Symon Says Chicken Goes Perfect with Olives and Orange

This recipe came out of a five ingredient cookbook by Michael Symon that I got out of the local library many months ago. The combination of olives, tomatoes and orange is very Mediterranean and a tummy warming bundle of yummy flavors. Don’t leave any of those three ingredients out; they are crucial to a great result. olives
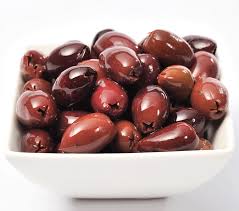
You gotta love how short the list of stuff to buy is. Well, this dish actually uses eight items but olive oil, garlic and red pepper flakes are three staples I (and most cooks) keep in the house all the time. So it is five, sort of! I had everything on hand but the chicken so I was in business after a stop for some high quality chicken thighs.

Chicken is a regular protein choice for dinner at my house, inexpensive, easy to make and it takes on the flavor of whatever you put it with. The thighs are my favorite chicken part as they stay moist and have a bit more flavor than breasts. Canned chopped tomatoes have great tomato flavor and are so convenient as well as pretty inexpensive.

navel oranges

I used a bit less olive oil than the original recipe – seemed like half of the quarter cup was quite enough. I have made this about 3 times in the past year. I believe the original recipe was made with boneless chicken thighs but I prefer them bone in. If you like boneless; cook it five minutes less. I stuck a thigh with my instant read thermometer and knew the poultry was done. Totally takes the guess work out.

This recipe is a keeper: it meets my criteria of inexpensive, quick to put together, gluten free and great tasting. That’s the quartet of food greatness in my recipe world. And that is why I am sharing it with you today!

chicken with olives 003

Symon Says Chicken with Orange and Olives

Ingredients

2 tbsp. extra virgin olive oil
4 chicken thighs (if small; 5-6)
2 sliced garlic cloves
1-2 tbsp. chopped fresh rosemary
1 14 ounce can chopped tomatoes
Grated zest and juice of one fresh navel orange
A pinch of red pepper flakes
1 cup chopped Kalamata olives (I opened a can of regular black ones and cut them up roughly – in half is fine)

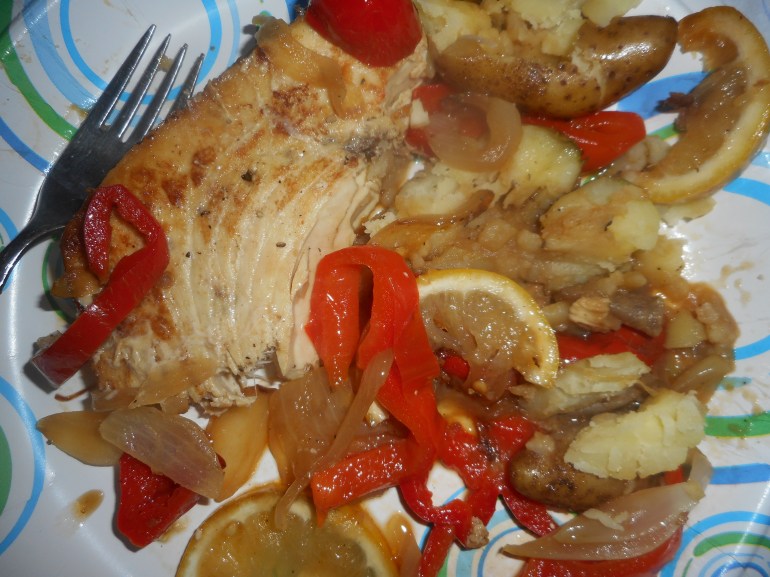
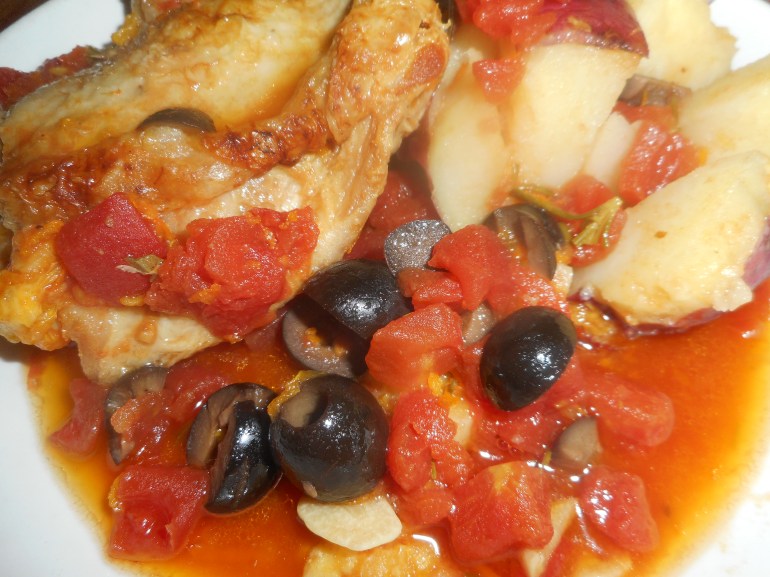
In a dutch oven heat the oil, add the chicken, skin side down, cook 8 minutes, turn using a pair of tongs, cook 8 more minutes. Add olives and rosemary; cook one minute. Add a half cup of water to de-glaze the pan and then add the rest of the ingredients. I like to hold half the olives and add them at the end, especially if you use the canned black olives which are softer than kalamata olives. Cook 20 minutes, test for doneness and add 5 more minutes if needed.

I served my chicken over a baked red potato, cut open and sliced somewhat. With a simple green salad you have a super supper. There is very little active time spent making this; but you can’t leave it alone for more than 8 minutes while each side browns. Still, dishes can be done, kitchen tidied or other chores completed while the chicken thighs brown. The dish goes together in just a few minutes of chopping garlic and olives. In a rush I have been known to tip the olives into a measuring cup and just cut with a paring knife stuck in the cup to roughly chop the olives.

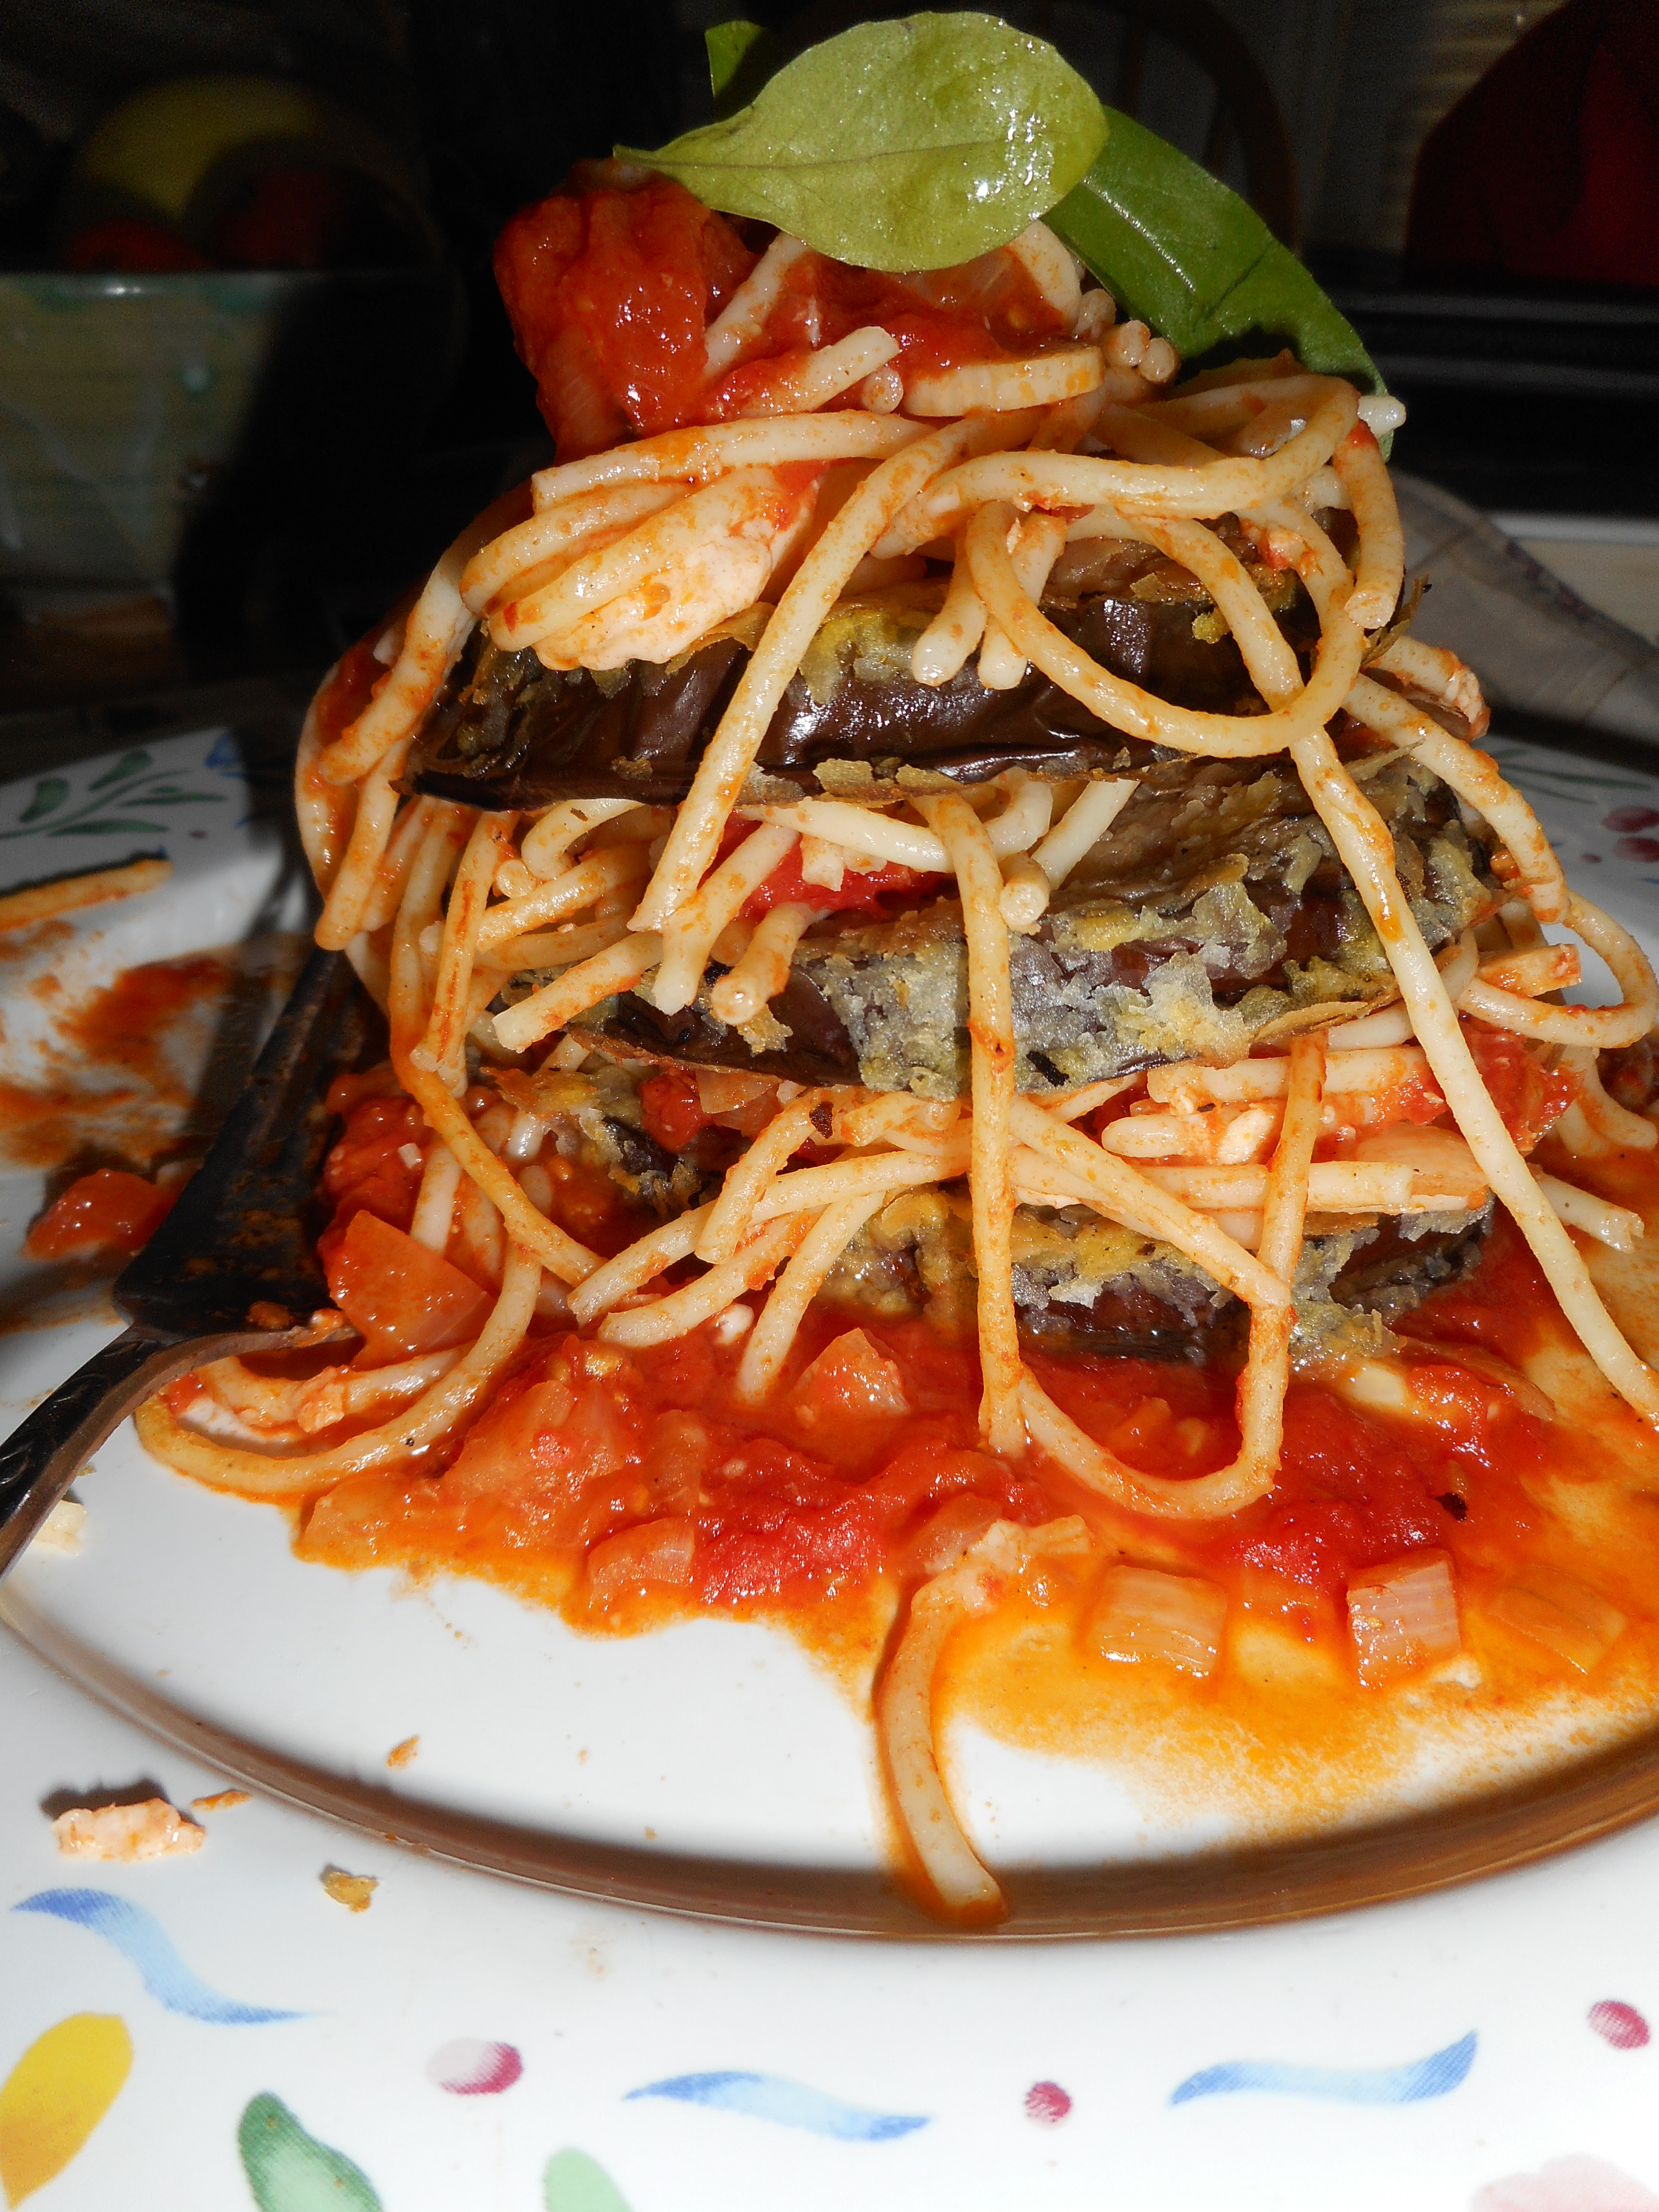
It is also nice with pasta; gluten free ziti comes to mind. Even rice would be great with this flavorful and naturally gluten free main dish.

Awesome Apple Crisp

Apples are the lynchpin of the fall harvest season. Some may think pumpkins wear the crown but I firmly believe the apple is king of autumn in America. Crisp, sweet, flavorful and so good for you. That old adage of an apple a day has some basis in fact. When you get tired of apples in the raw; try an apple crisp.  It is very simple because there is no crust to roll out or position over the apples.  Dump, sprinkle and bake: a 7 year old can make this if you cut up the apples for them.

jonagold apples pork tenderloin, banana choco cupcakes 004

If you can, get the organic ones as the sprays they use on growing apples are not at all good for you. I made this today with some Jonagold apples from a farm stand and it was very tasty indeed. I especially suggest you get your apples at an actual apple orchard if you want the most appley taste. South of Hellertown is Bechdolt’s Orchard which grows many apple varieties. Go there if you want the freshest tastiest apples in this geographic area. Apples grow all over the globe so you shouldn’t have problems getting them just picked! The variety is up to you but I would not suggest any that are not meant for baking; don’t use red delicious as they are for eating only, same for honey crisp apples.

This recipe is out of Gluten-Free Baking Classics Cookbook by Annalise G. Roberts with a few minor changes. I am betting you can use any GF flour mix in this recipe, crisp is not like a cake or other baked goods that have very specific flour requirements.

I have made the topping several ways. You can cut un-melted butter into the dry ingredients; it makes for a firmer crumb than the melted version below. I have made it egg free but it really somehow needs that egg to pull it together to mimic a wheat flour based crisp. The oats can be left out if you don’t like them or can’t eat them. I personally love oats in my crisp. A quarter cup of chopped nuts can be added to the topping; really a nice touch too. I don’t like it too sweet so I use the lesser amount of sugar. This is entirely a personal choice. You can up the nutritional value by adding flaxmeal to the dry mix; 2-3 tbsp.

pork tenderloin, banana choco cupcakes 007

For those who love ice cream, this recipe is absolutely perfect with a big scoop of vanilla ice cream next to it. I like it warm from the oven but it also is tasty cold the next day, if you have any left over that is!

Angie’s Apple Crisp

3/4 cup GF flour (mix below)
½ to ¾ cup sugar (I prefer brown sugar)
½ cup old fashioned gf oats
1 ¼ tsp baking powder
1 tsp cinnamon
Sprinkle of nutmeg
½ tsp xanthan gum
½ tsp. salt
1 large egg
6 cups thinly sliced apples
¼-1/3 cup butter, melted

Directions:   Heat oven to 350 degrees. If your oven seems slow make it 375 degrees. Put a rack in the center level of oven. Lightly butter a 9 inch square pan or spray with cooking spray.

Combine all the dry ingredients. Add egg and stir to mix well. Place apples in the baking pan, top with the dry mix and sprinkle with the melted butter. Bake 40-50 minutes until bubbly and the topping is lightly browned. Let cool at least 10 minutes before dishing out. Six servings.

Brown Rice Flour Mix (same as King Arthur’s GF blend)
2 c brown rice flour (finely ground)
2/3 c potato starch – Not potato flour!
1/3 c tapioca flour

French Apple Tart: Ooh La La!

Fresh ripe apples are everywhere from supermarkets to the farmer’s markets and orchard stores. This French apple tart is an old favorite of mine, been making it for years. I have no idea where I got the original recipe from so I can’t give credit for it, I lost my copy and had to replicate it. Plus, I had to change it a bit to make it gluten free but it tastes just as good as before. The cinnamon and lemon topping are what makes it so tasty.

applesIt should be made with an apple that keeps its shape; Granny Smith is the best choice in that regard. But Golden Delicious also works fine. Don’t use one that goes all squishy like Empire or Macintosh. You only need 3 large apples or 4 small ones. It should give you about 6-8 slices of tart. Lesser amount of slices if your family is piggy, the full eight slices if they are not big dessert eaters.

french apple tart

I use my favorite GF tart shell crust which is from Annalise Roberts’ book; Gluten-Free Baking Classics. It is very easy; hand pressed into your tart pan. I would say that this is a cookie crust; sweet, buttery and shortbread in texture, very yummy.

I rarely have any of this tart left over for more than 24 hours. It is very popular with everyone. I like it for how easy it is to make, how handsome it looks and that I can throw it together quickly with only 3 apples and a lemon.

apple tart 001

Crust
1 cup brown rice flour mix
¼ cup sugar
1 tsp. xanthan gum
5 tbsp. cold unsalted butter, in 5 chunks
1 tsp. vanilla extract

Mix the dry ingredients in a stand mixer, cut in the butter by mixing it at a med low speed until crumbly. Add vanilla and mix well. If it is really dry looking add a tbsp. of water. I don’t often do that; when you press it lightly in the pan it does stick together enough. Press (not too hard) into the bottom and up the sides of your tart shell as evenly as you can make it.  Too hard and it gets a bit concrete-like in hardness.

For this recipe I use an extra large 10 inch tart pan. Mine is ceramic so it doesn’t have a removable bottom. Bake it at 350 degrees for 10 minutes. If you have a bottom heat oven like I do you can skip that step.

Filling
3 large Granny Smith apples; peeled, cored and sliced – not thick or too thin. If small use 4 and cut them each into eight slices
2-3 tbsp. sugar
1 tbsp. GF flour

Lay the apple slices in concentric circles in the tart pan over the crust. Mix the sugar and flour and sprinkle over the apples. Cover loosely with foil and bake 25-35 minutes until the apples are soft if pricked with a fork. Do not bake until they collapse; should still hold their shape.

While the tart is just finishing its baking make the topping.

Topping
In a small heavy sauce pan place
2 tbsp. sugar and 1 tbsp. cornstarch and mix them.
Add ¼ cup fresh lemon juice
1 tsp. lemon zest (grate the zest and then juice the lemon)
½ cup water
½ tsp. cinnamon
Cook over medium heat, stirring it constantly with a small whisk or a spoon, until it boils and seems thickened and is no longer opaque. This should take less then five minutes. Remove from heat and pour the hot gloppy topping carefully over the hot apple tart taking your time so you cover pretty much the entire surface of the apples.

Let cool before serving.

This tart is perfect with a scoop of vanilla ice cream on the side. Don’t put it on top or it will not look so nice because of the French cinnamon topping.

Brown Rice Flour Mix (for the crust) FYI: this is the same as King Arthur’s gf blend.
2 c brown rice flour (finely ground)
2/3 c potato starch – Not potato flour!
1/3 c tapioca flour

Originally published in this blog in September 2014.  It is such a great recipe I knew I wanted to share it again this fall.

Roasted Swordfish with Red Peppers and Onions

Fall is red pepper season; green all summer…done ripening at last! They were on sale last week at the grocery store. They are a decent value right now because red peppers are ripe peppers and produce is always cheaper when plentiful. So I was thinking about making something with them. I wanted to create a special fish dish; as close as I could remember to something I enjoyed many years ago at a Hispanic restaurant in northern New Jersey. Big homey place, no one spoke English on the staff but the food was incredible and we had the best time there. I enjoyed a roasted swordfish with peppers that was so moist, a huge steak and really tasty. Been wanting to replicate it for a long time. Finally I tried and succeeded the first time!

I know, swordfish is pricey and some folks think it isn’t as good a health choice as say, wild salmon, but I like to vary my seafood. It isn’t like I eat swordfish that often; maybe once a year. I served this for a Sunday supper for my mom and she really enjoyed this meal. I loved the veggies and the flavor they gave to the fish. Delicate and moist; no dried out fillets for us! The lower oven temperature helps keep it from sizzling up. I allotted 4 ounces for each of us; not that pricey when you don’t serve over-sized portions. Bought it frozen and just defrosted it in cold water (vacuum sealed by the seller) – no marinating or other tricky stuff.

The lemon slices and potatoes are my additions to what I remember from that restaurant meal. I used my own homegrown fingerling potatoes: great flavor and they make the dish seem so elegant. Simple and delicious for a memorable dining experience for not that much money.

seafood pasta and swordfish 011seafood pasta and swordfish 013seafood pasta and swordfish 012seafood pasta and swordfish 015

Angie’s Swordfish with Peppers
Serves 2

1 swordfish steak; about 8 ounces
2 tbsp extra virgin olive oil
1 big red pepper cut in half and then thin strips
1 large yellow onion cut in long strips
6-8 fingerling potatoes
½ a lemon sliced thinly

1-2 Tbsp. white wine

Directions:

Sprinkle the swordfish steak with sea salt and pepper; about ¼ tsp salt and a good grind of pepper. Heat half of the olive oil in a fire proof pan that can go straight into the oven. Add the pepper and onion let them cook at a middle flame; stir occasionally. Cook until softened; 5-6 minutes. I like to add half the lemon slices and let them start to cook as well. Remove veggies from the pan to a covered plate, add the other Tbsp. EVOL to the same pan, let it heat until fairly hot but not smoking and add the swordfish, brown for 5 minutes on each side; until getting some decent color. Once the fish has been flipped add the fingerling potatoes to start cooking. If they are small potatoes, leave whole, cut larger ones down the length into two halves so they roast faster.

Heat the oven to 350 degrees while the peppers/onions/fish cook. Using a big spoon, heap some of the half cooked red peppers and onions on top of the fish and the rest around it in the pan. Sprinkle the lemon slices over the top of it all. Drizzle the wine over top.  Can use broth if you don’t like to cook with wine. Put the lid on tight. Bake for 25 minutes or so until the potatoes are done. Cut the fillet in half and serve on warmed plates. A green salad or some sliced cucumbers/tomatoes make an excellent side dish to this entrée. Enjoy!

Spaghetti Eggplant Turrets (Towers of Yumminess)

Spaghetti is an American classic.  I don’t make it enough, especially since going gluten free.  That may change since I started to read Mario Batali’s newest cookbook “America Farm to Table”.  I cooked up a storm this past weekend making his eggplant and angel hair turrets.  What’s a turret?  A tower of yumminess!farm to table cookbook

Having a surfeit of eggplants I was diving into all my eggplant recipes to determine the best way to utilize my crop of purple beauties. This one is a winner.

We devoured it by candlelight on my back porch the other Saturday night, bees wax candles to be exact.  I thought for a moment that my man was going to lick his dinner plate! It was rewarding to see him so enraptured by my cooking.

 2014-10-26 pasta tower 003

I made a few changes so this is an adaptation of the recipe.  I advise reading it through twice so you don’t screw it up! I used less red pepper flakes than the original recipe; up it to a tsp. if you dare!  Yes, it uses instant potato flakes and they work fantastically to coat the eggplant.    I used my own tomato sauce I had made the night before from the last of my fresh tomatoes.  This recipe serves 4.

2014-10-26 pasta tower 004

Eggplant and Pasta Turrets

4 tbsp. EOL

2 large eggs

1 cup instant mashed potato flakes

1 large eggplant or 2 medium ones

½ cup onion, diced

2 cloves garlic, sliced

2 oil packed anchovy fillets plus 1 tbsp. of the packing oil

1 28 oz can of tomatoes, crushed by hand plus all the can juice or your own homemade tomato sauce, unseasoned

½ tsp. red pepper flakes

Kosher salt

1  12 oz package gf spaghetti

½-2/3 cup shredded whole milk mozzarella cheese

Fresh basil leaves

Eggplant: Place the eggs in a wide shallow bowl, beat well.  Put the potato flakes into a second shallow bowl or a wax paper covered plate.  Slice the eggplant into 1/3 inch slices.  Dip into the eggs, let excess drip off and dredge in the potato flakes.

Heat a large Teflon pan, add 2 tbsp EVOL.  Let heat to medium hot, add the eggplant slices, cook 2-3 minutes a side.  Place cooked eggplants on a paper towel lined plate.  Do a second batch of slices.  I put my cooked slices on a small baking sheet and put them into a 350 oven which I then turned off.  They stayed hot and I felt a tad more sure that they were fully cooked.

Make the sauce: heat the remaining EVOL in a large pot, add the onion, sauté until slightly softened; 2 minutes, add the sliced garlic, red pepper flakes, mashed up anchovy fillets, oil of fillets and the tomatoes.  Cook, stirring often; 12-15 minutes.

Pasta: Cook the pasta in a big pot of boiling salted water. Drain it one minute before the package directions say it will be done. Save a cup of the pot water to thin the pasta.

Use the eggplant fry pan (wipe out the brown bits of crust) and ladle in 2-3 big scoops of the sauce and the pasta.  Cook one minute, turn off the stove and add the cheese, stir well.

Construction of the turrets:

Place a big spoonful of sauce on each plate.  Top with an eggplant slice (I used my biggest slices for the bottom layer) and then top with a big twirl of the pasta mixture.  Top with another eggplant slice and then another pasta twirl.  Do this again.  Top with a dab of the red sauce.  You can also top it with some hot pepper jelly which is a surprisingly good addition!  I did sprinkle our towers with a few torn basil leaves.

Dive in!  And check out this cookbook; chock a block full of great relatively healthy recipes. This was one of the more complex ones; most seem fairly straight forward and sound darn delicious.

Originally published in my blog October 2014.  I made this the other weekend and decided I just had to share it again.  Do use the red pepper jelly if you have any; it is amazing!