Perfect Pumpkin Cookies

Lots of people with celiac seem to live on processed gf foods, boxes of crackers, cookies and snack straight from a bag. I have been known to enjoy a great cracker and there is a certain brand of gf pretzels which is amazing. Still, I find that home made is generally better; worth the time and effort. Not to mention better for you.  But, I can’t seem to interest certain folks in baking homemade gf treats. This recipe may change your mind. Old fashioned pumpkin cookies sound okay but not exciting much less addictive. But they are just that. Totally brilliant in the flavor department and even better: easy to make.  Bonus: somewhat healthy. Which is the new trendy thing. Or so I read.  Anyway, they are the bomb and frankly couldn’t be much easier to make than this. Give them a whirl and you will wonder what took you so long to make homemade cookies.

They are adapted just slightly from the original recipe in “The Heirloom Collection” by Annalise Roberts. I am crazy about this book. I know, cookbooks are totally passé and superseded by Pinterest. I use Pinterest too (kinda more often than I want to admit here) but this wonderful cookbook is crammed with recipes that harken back to when my mom baked for me. Or what I baked for my kid before I went gluten free. Honestly these cookies remind me of a recipe from  “The Joy of Cooking” which I used to make many years ago for Kasey. The recipes in her 2014 volume are all gf of course but they taste like my childhood. Simply Brilliant. If you try these cookies and fall in love…there are many other great recipes to check out.

She puts a vanilla icing on them, I in the interest of avoiding sugar have left that off; feel free to ice yours!

 pumpkin cookies

Old Fashioned Pumpkin Cookies  (makes 3 doz.)

Ingredients:

½ cup softened butter

1 cup sugar (I used organic sugar from Aldi’s)

1 cup canned pumpkin

1 lg egg

1 tsp. vanilla extract

1 ¾ cup brown rice flour mix (recipe below)

¼ cup sweet rice flour

1 ¼ tsp. ground cinnamon

½ tsp. nutmeg

1 tsp. baking soda

1 tsp. baking powder

¾ tsp. xanthan gum

½ tsp. salt.

½ cup raisins (optional)

Preheat oven to 350 degrees. Lightly spray cookie sheets with cooking spray.

Mix all dry ingredients in a small mixing bowl.

Beat butter and sugar in stand mixer until well blended. Add egg and vanilla and blend well.  Stir in dry mixture on low speed. Blend well, add raisins if desired.  Drop by tbsp onto baking sheet. I used a soup spoon for that process. Bake 15-16 minutes. Let cool 2-3 minutes on sheet before removing them with spatula to a cooling rack.  They can be frozen for a couple weeks. I found the cookies to get a bit soft when stored in a cookie jar. Just enjoy them fresh and freeze leftovers. I eat them right out of the freezer…delish! Enjoy


Flour blend  (Same as King Arthur basic gf blend)

2 cups brown rice flour

2/3 cup potato starch

1/3 cup tapioca starch


Five Years Gluten Free and Fabulous!

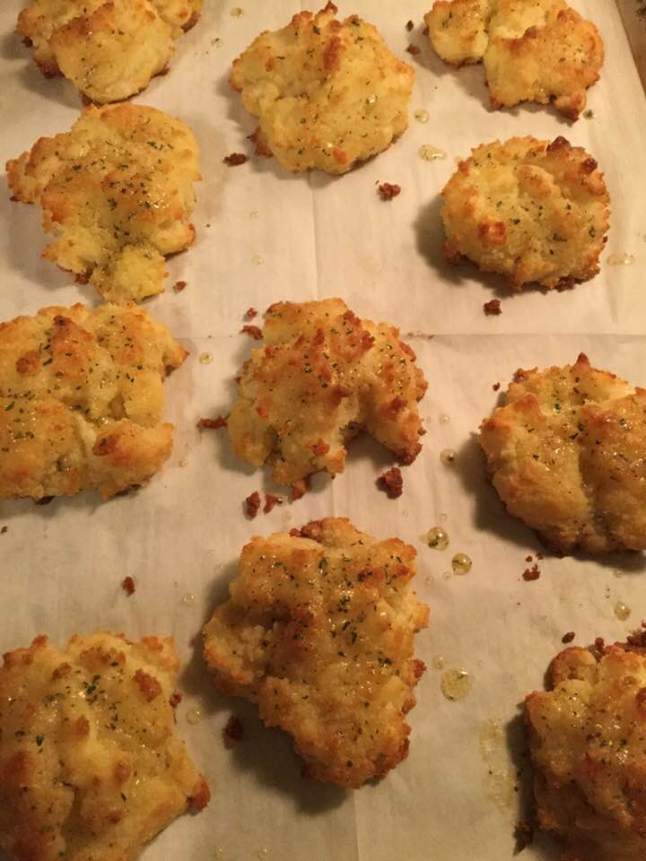
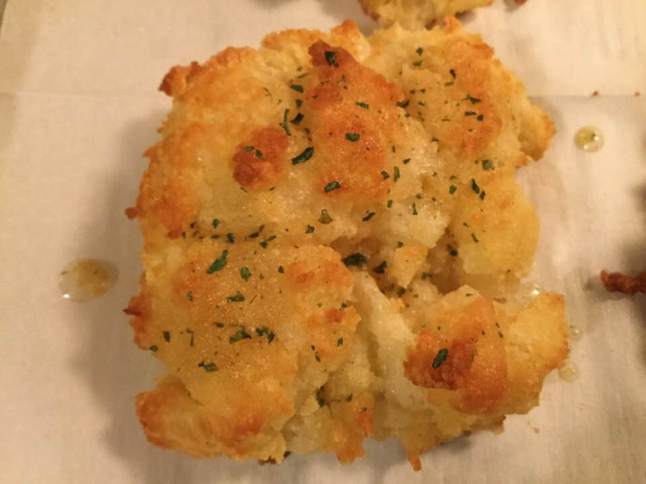
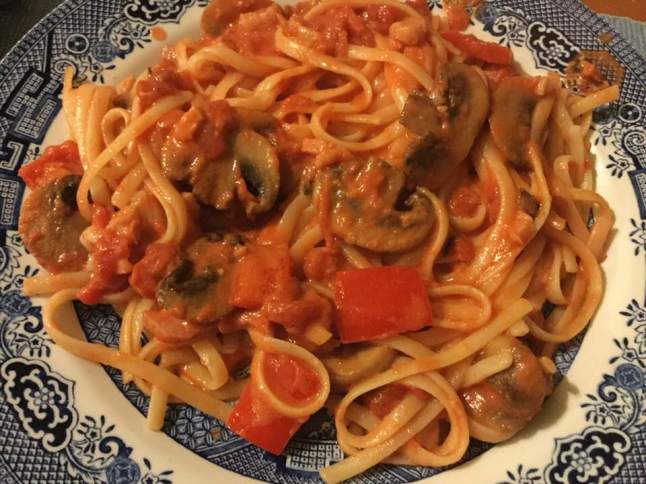
Today is a milestone for me.  Five years since I went gluten free. Five years since I gorged on regular pizza, bagels and pasta like an idiot.  Five years of tummy being mostly pain free. Five years of learning how to cook gluten free. Five years of figuring out gluten free baking. It has been great to be mostly free of gut pain, anxiety, and a host of other issues that have dogged me much of my life. I still eat well. I still love to bake. I feel I have adapted fairly well to this new diet. Lots of cooking though, as the premade stuff is expensive, not that tasty and full of crap I don’t want to put in my body.  I still make a pretty awesome pie I have to say. I have created incredibly yummy gf cookies and muffins. My mom doesn’t really think a lot of the baked goods are gluten free as they are too tasty in her mind! So far so good in the cooking realm.

kitchen sink cookies

blueberry ricotta tart

Writing this blog has been a wonderful experience. It will be five years for that in a week or so. I still enjoy this process of writing and sharing. I plan to keep at it for the foreseeable future.  Honestly, I often look up favorite recipes on my blog and cook off my tablet propped up in the kitchen.  It’s a very handy resource for me.


My family has been very supportive of my new diet. They bend over backwards to cook safely for me or to find safe restaurants for dinners out. I so appreciate their efforts and unstinting support.

chocolate-chip-pumpkin-muffins-011

My man has been awesome about it. Never complains, always supports me and seems to thrive on the meals I cook for him. He always wants baked goods to take home with him. He ca be somewhat finicky so I know they must be tasty if he wants leftovers! I appreciate his support more than I can express here.

flowers 005

Most of my friends have been really helpful and supportive. Countless tasty meals and thoughtful snacks. I am lucky to have them in my life.

barra rossa pizza

So I am already thinking of the new things I will cook and bake in this next gf year. Stay posted for some changes to my blog in the coming weeks. It’s gonna be awesome!

Pasta Perfection: Fettuccine with Shrooms

A great pasta dish is a gem to keep in your culinary pocket for future use.  This recipe has been a favorite of mine for a long time.  Only detriment is that I could never get the sauce thick enough. It was always on the edge of runny no matter how long I reduced it down.  I made it this week and one ingredient change made a huge difference. Instead of a can of whole tomatoes in thin juice that you break up before cooking, I used a can of crushed whole tomatoes with thick sauce. So, I started with a thicker tomato product and that really changed the sauce results. This is an easy dish to compile. I usually use baby bella mushrooms but pretty much any type will do. This time it was plain old white mushrooms sliced thickly.  Do not slice them thin; just not meaty tasting then. Sometimes I quarter the small bellas for this; but I do think thick sliced is my favorite cut.

The dish may seem simple in flavor but it is a delightful balance of all these fresh ingredients. The original recipe came from “Italy Al Dente” by Biba Caggiano with some small changes by me. This cookbook is hands down my favorite Italian cooking bible; so many great pasta recipes plus super soups and wonderful risottos.  Even has polenta recipes.  Highly recommend getting it if you cook Italian often.

Notes: use the best EVOL you have for this; it seems like a lot of oil but it combines with the tomatoes and cream to make a luxurious creamy sauce.

Fettuccine with Mushrooms in Creamy Sauce, 4 servings

Ingredients

3-4 Tbsp. EVOL

½ lb. fresh mushrooms like baby bellas, shiitake, white buttons, cleaned

Half a big red pepper cut in large dice

1/3 lb. pancetta or prosciutto (I have used either; this time pancetta from Aldi’s already diced)

1 garlic clove minced

4-5 shredded fresh sage leaves

1 28 oz can Italian tomatoes, crushed in thick sauce

¼ cup heavy cream

Salt and pepper to taste

Fettuccine; most or all of a 12 oz box of dried gf pasta cooked until barely al dente. Cook while the sauce thickens; try to time it so it gets done when you have added the cream to the sauce.

Directions:

Heat the oil in a large skillet, add the mushrooms which you have thickly sliced.  Stir and cook about 3 minutes until they turn golden. Add the red pepper, pancetta, garlic and fresh sage (can use parsley but sage is so great in this sauce) and stir for a minute.  Add t he tomatoes and season with some salt/pepper. Once it reaches boiling, turn down and simmer about 10 minutes; it should thicken a bit. Stir a few times as it cooks. Add the cream, stir and simmer 2-5 more minutes. Do not boil. Turn off heat and add hot pasta, Stir a minute or two. Double check whether you need more salt/pepper and serve.

pasta plated with mushroom sauce

The original recipe didn’t have the red pepper but I think it is a great addition; leave it out if you don’t care for red pepper. Enjoy!

Super Simple Cloud Bread


Finding or baking decent gf bread can be problematic.  Poor texture (think crumbly), slightly odd flavors, big holes in the middle of the loaf, leaden or brick like baked products, high prices and lots of ingredients which must be compiled exactly according to the recipe.  It adds up to a fair amount of stress as to just having a sandwich.

A year ago I made some really interesting bread/rolls.  The name is “cloud bread” (also called oopsie bread) and it has no flour, no oats nor any grains.  I was intrigued when I saw this cloud bread popping up in my support group messages and just had to try it. My recipe has five ingredients but three should be in your pantry already.  It was very easy, quick and yes; tasty.  So it made a super bread for a ham and cheese sandwich and a ham/turkey and cheese sandwich.  I ate one warm out of the oven, also enjoyable. Great with a little jam or jelly on top.  Posted it back last March and sharing again so you who missed it can give it a try.

I added a couple toppings which add a lot to the flavor and look of it.  I recommend them but it sure can be made plain.   You have to use full fat cream cheese to make it work, only a few tablespoons so don’t get all freaked out over that issue!

Cloud Bread/Rolls

3 eggs, separated

3 ounces cream cheese at room temperature

1 tsp. baking powder

1 tsp. honey

Pinch salt

Toppings; sesame seeds and a tbsp. of chopped fresh rosemary.


Directions

Beat the egg yolks with the cream cheese until it is very smooth, lemon yellow. Add the baking powder and honey, beat in.

Beat the egg whites until foamy, add a sprinkle of salt. Beat until stiff peaks form.  Fold together with the yolk mixture until mostly blended together.

While the egg whites were beating I lined a big baking sheet with parchment paper and sprayed it lightly with Pam.  Heat oven to 300 degrees. Some people heat the pan in the oven before spreading the dough; I didn’t bother but feel free to preheat your pan.

Using a big spoon spread the bread mixture on in six big circles spaced 1-2 inches apart.  Sprinkle with sesame seeds and or finely chopped fresh rosemary. Bake until golden brown between 20 and 30 minutes.  Using a spatula separate them from the parchment paper. Let cool.  Store in a ziplock bag overnight; they will get soft and be ready for sandwiches.  Keep them in the fridge. I put slices of wax paper between them to avoid sticking.  They keep about 3 days there and a week in the freezer.  Wonderful for sandwiches: I used one for the top and a second one as the bottom of the sandwich.  Did I mention they are virtually no carbs in this bread? Yeap; great for my low carbing friends!

Originally published in 2016. Minor changes to text.

Brownies To Love!

Image     Trying to figure out a special valentine dessert? Let me suggest a brownie recipe that every one falls in love with; especially the delicious flavor and perfect texture of these bars.  Plus, bonus points as it is really easy to make.  All of the ingredients can be purchased at a regular grocery store.  I like to use really great quality chocolate like Ghirardelli for the best flavor.

Everyone who tastes these falls in love and begs for some to take home! Making them to please my special someone for a Valentine dessert this weekend.

Perfectly Easy Brownies

Ingredients:
– 2/3 c brown rice flour mix
– ½ tsp salt
– ½ tsp baking powder
– ½ tsp xanthan gum
– 2 oz unsweetened chocolate
– 4 oz semisweet chocolate
– ½ c butter
– 1 ¼ c sugar
– 1 tsp vanilla extract
– 3 large eggs
– ¾ c chopped walnuts

Directions:
Heat oven to 325 F, with rack in middle of oven. Line bottom and side of 8 inch square pan with foil, spray with cooking spray. Mix dry ingredients in small bowl. Melt chocolates and butter in heavy medium sauce pan over low heat. Remove from heat, whisk in sugar and vanilla. Whisk in eggs one at a time. Whisk until mixture is smooth and glossy. Add flour mixture and whisk just until incorporated. Stir in nuts. Pour into prepared pan, bake 45 minutes until test (I use a steak knife or my fancy long tester skinny metal stick) in middle of pan comes out with wet crumbs. Cool in pan on rack for 5 minutes, remove from pan by lifting out foil. Cool completely on rack and then cut into squares. Store in fridge for up to 5 days or freeze-wrapped in plastic wrap and foil.

Frankly, you won’t have much left over by the end of the second day! I dare anyone to think these are GF until you tell them!

Note: I sometimes add a 1/4 to 1/2 tsp cinnamon to the flour mix to add extra kick to these kick ass brownies.

Flour Recipe
Ingredients
– 1 c brown rice flour
– 1/3 c potato starch (not potato flour)
– 3 tbsp tapioca flour

Posted originally in June 2014, some changes made for this posting.  This recipe comes from Gluten Free Baking Classics by Annalise G. Roberts.

Image