Orange and Red Lentil Soup

This soup did not disappoint me with its unusual flavors and I enjoyed every naturally gluten free spoonful. I think you will too.

I did modify it somewhat from the original recipe, of course!  I changed the cilantro for parsley as I am not fond of cilantro and there is a reduced amount of garlic and of orange juice.  I love the bright flavors in this potage and as a bonus it is very healthy with the fresh orange juice, lentil beans, garlic and onions. If you love cilantro, sub it in for the parsley by all means.

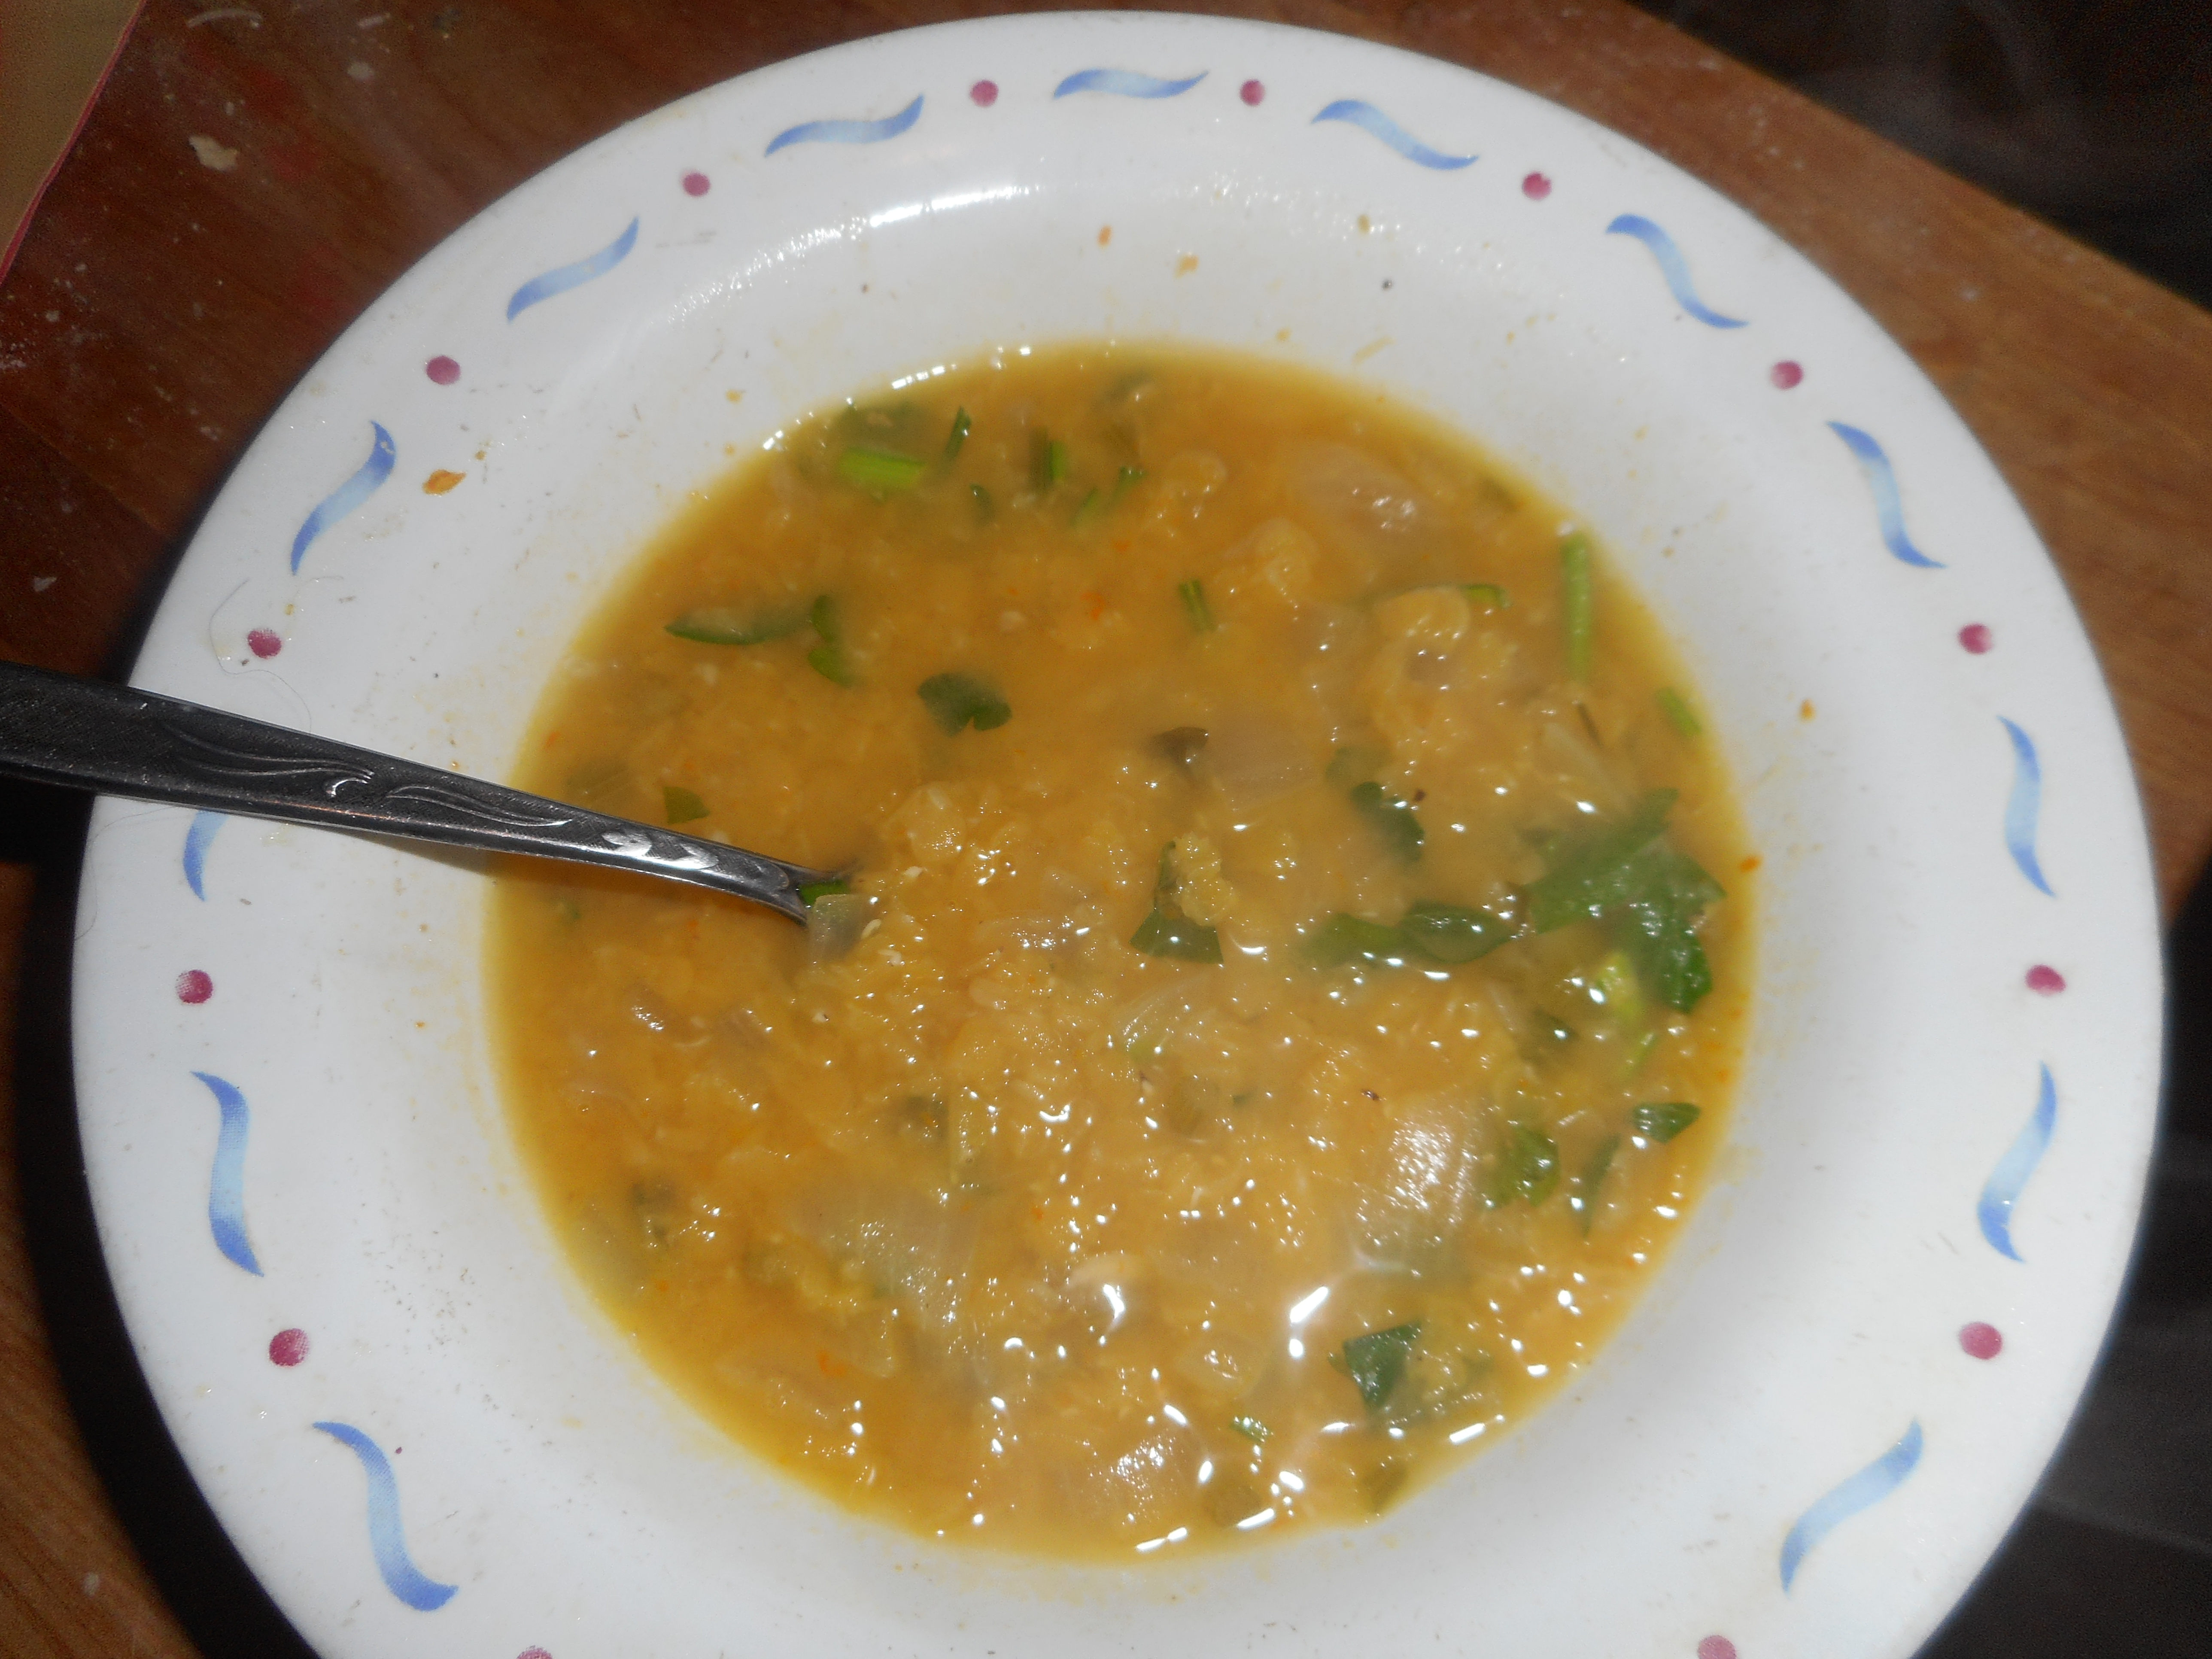
Note, the red lentils, which you can get at the health food store, turn a soft maize color when cooked.  I think some brands are more orange in color but mine usually turns that soft yellow. red lentils

This recipe is a bit spicy but light as there isn’t any dairy or meat in this soup.  You will find this a great spring soup. If you use veggie broth it becomes vegetarian.

quiche 002

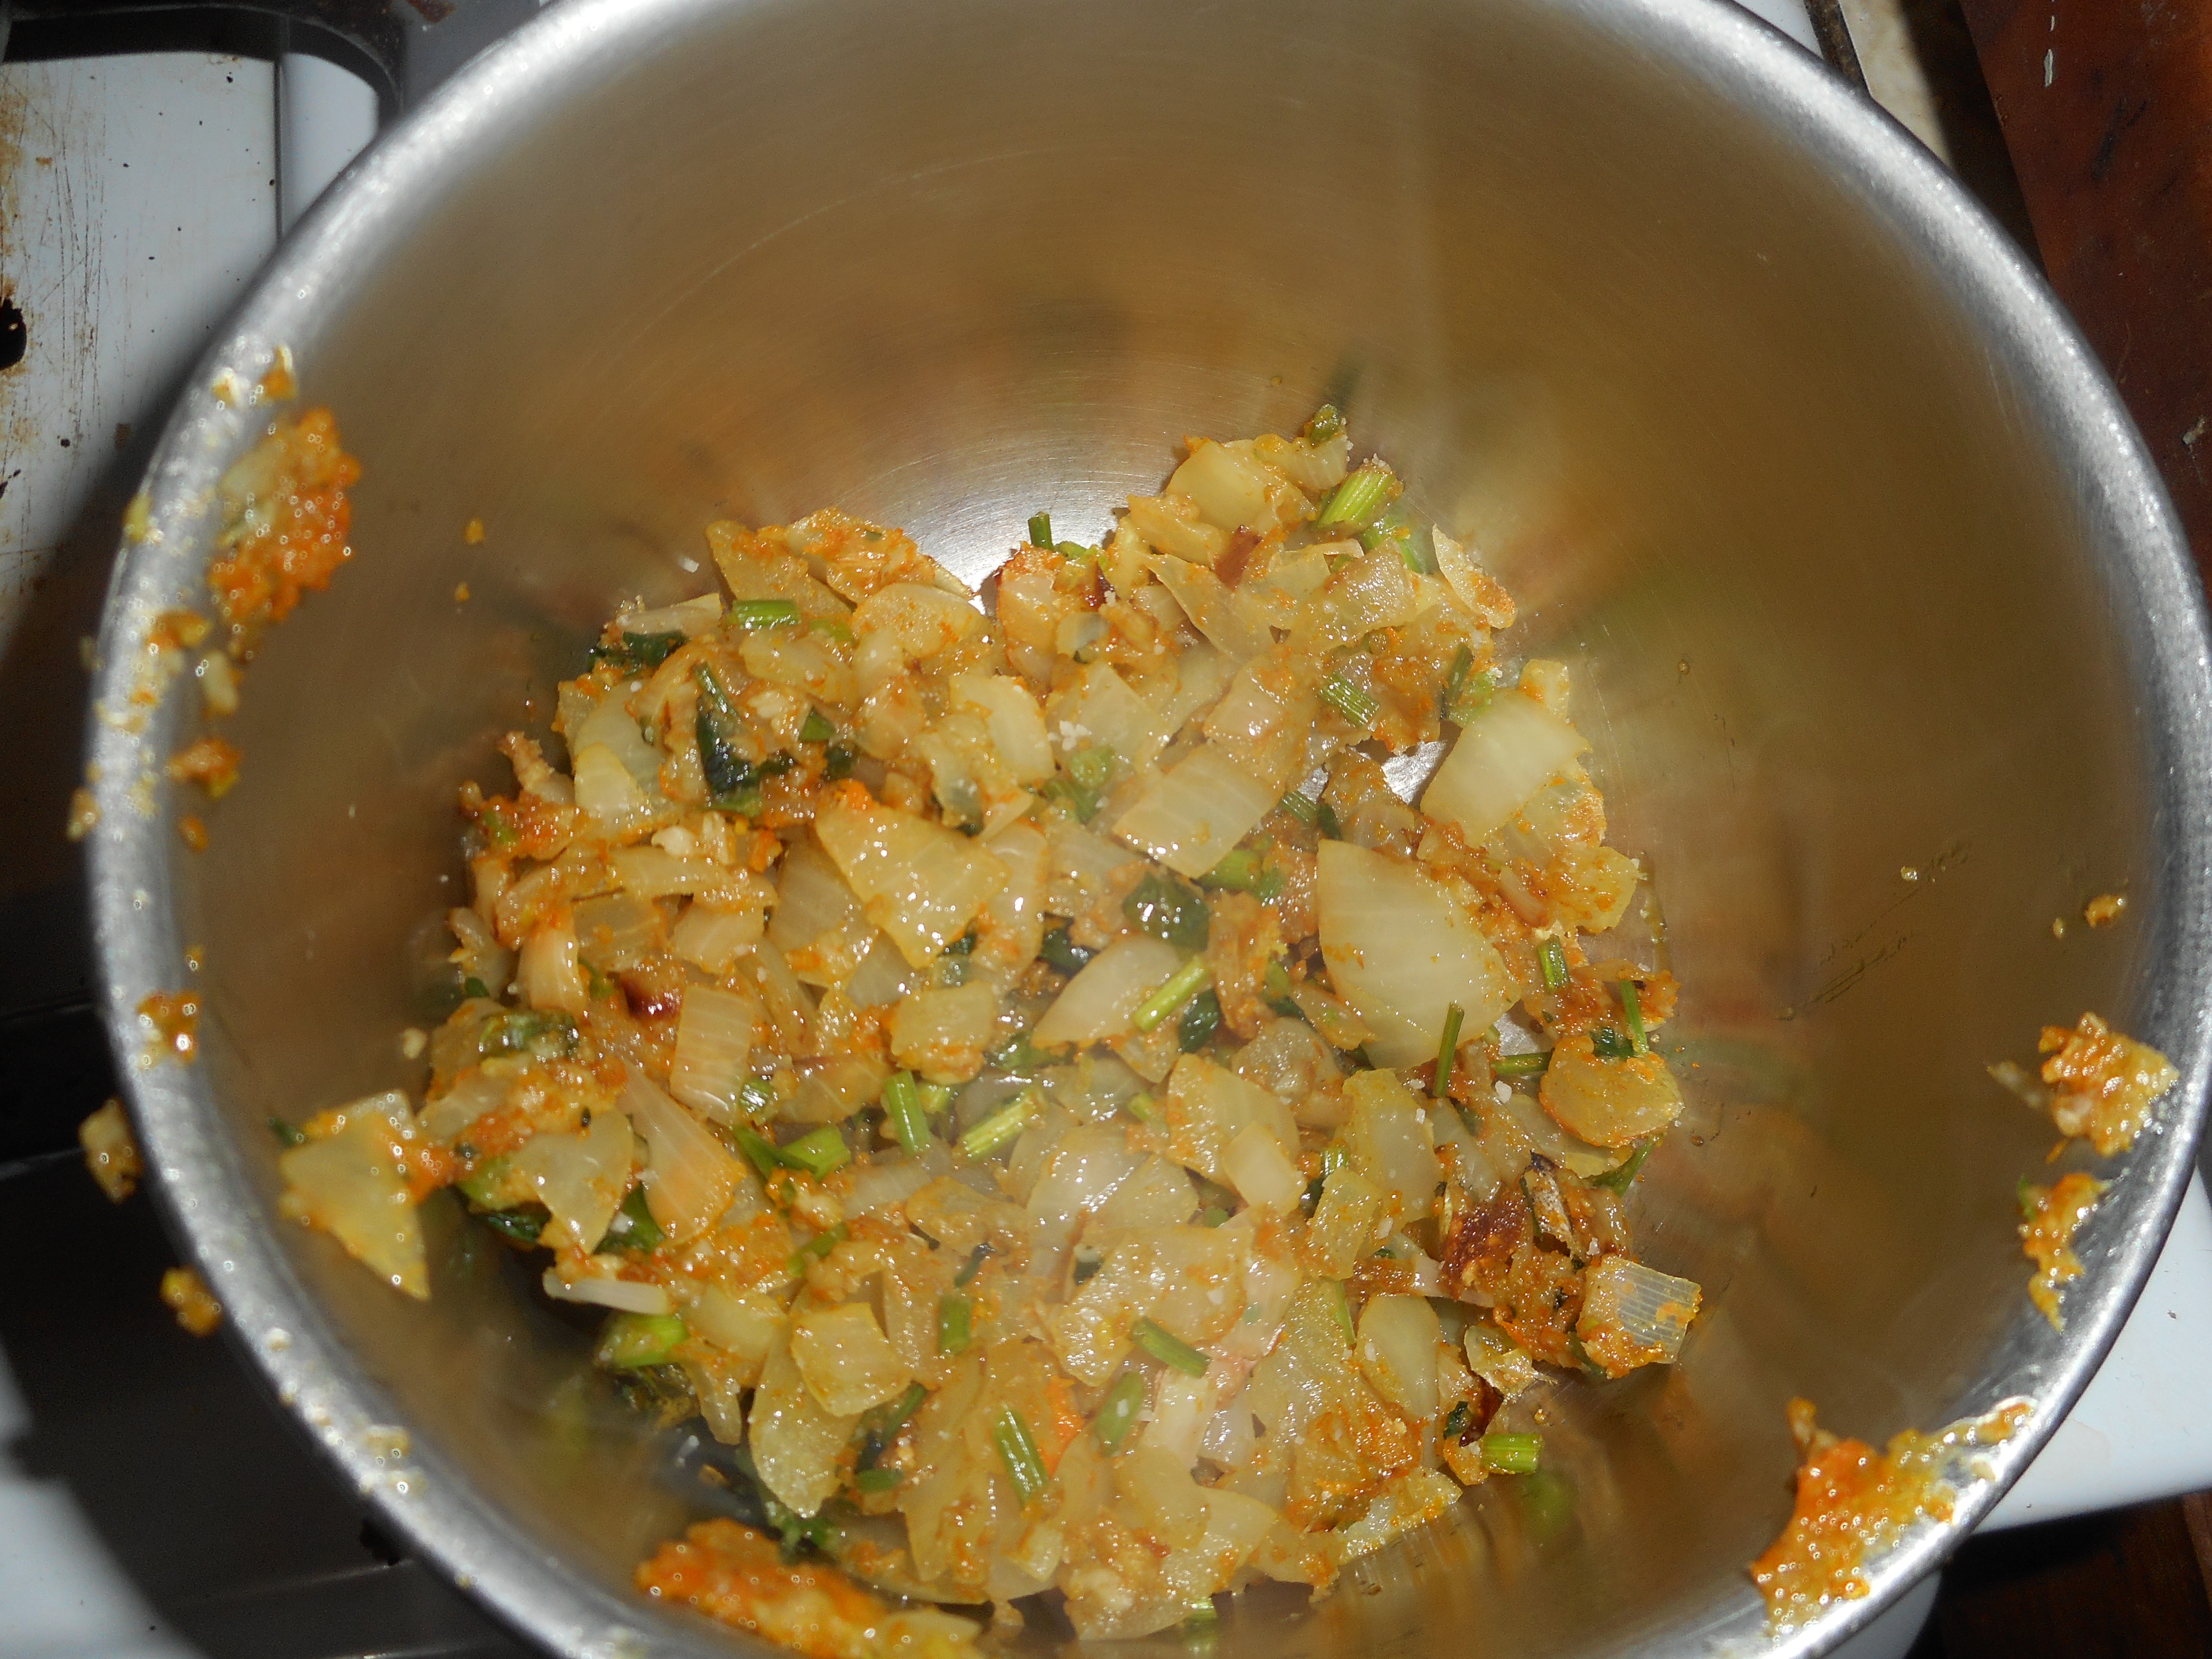
These are the sauted onions resting in a bowl before going back into the soup.


quiche 001

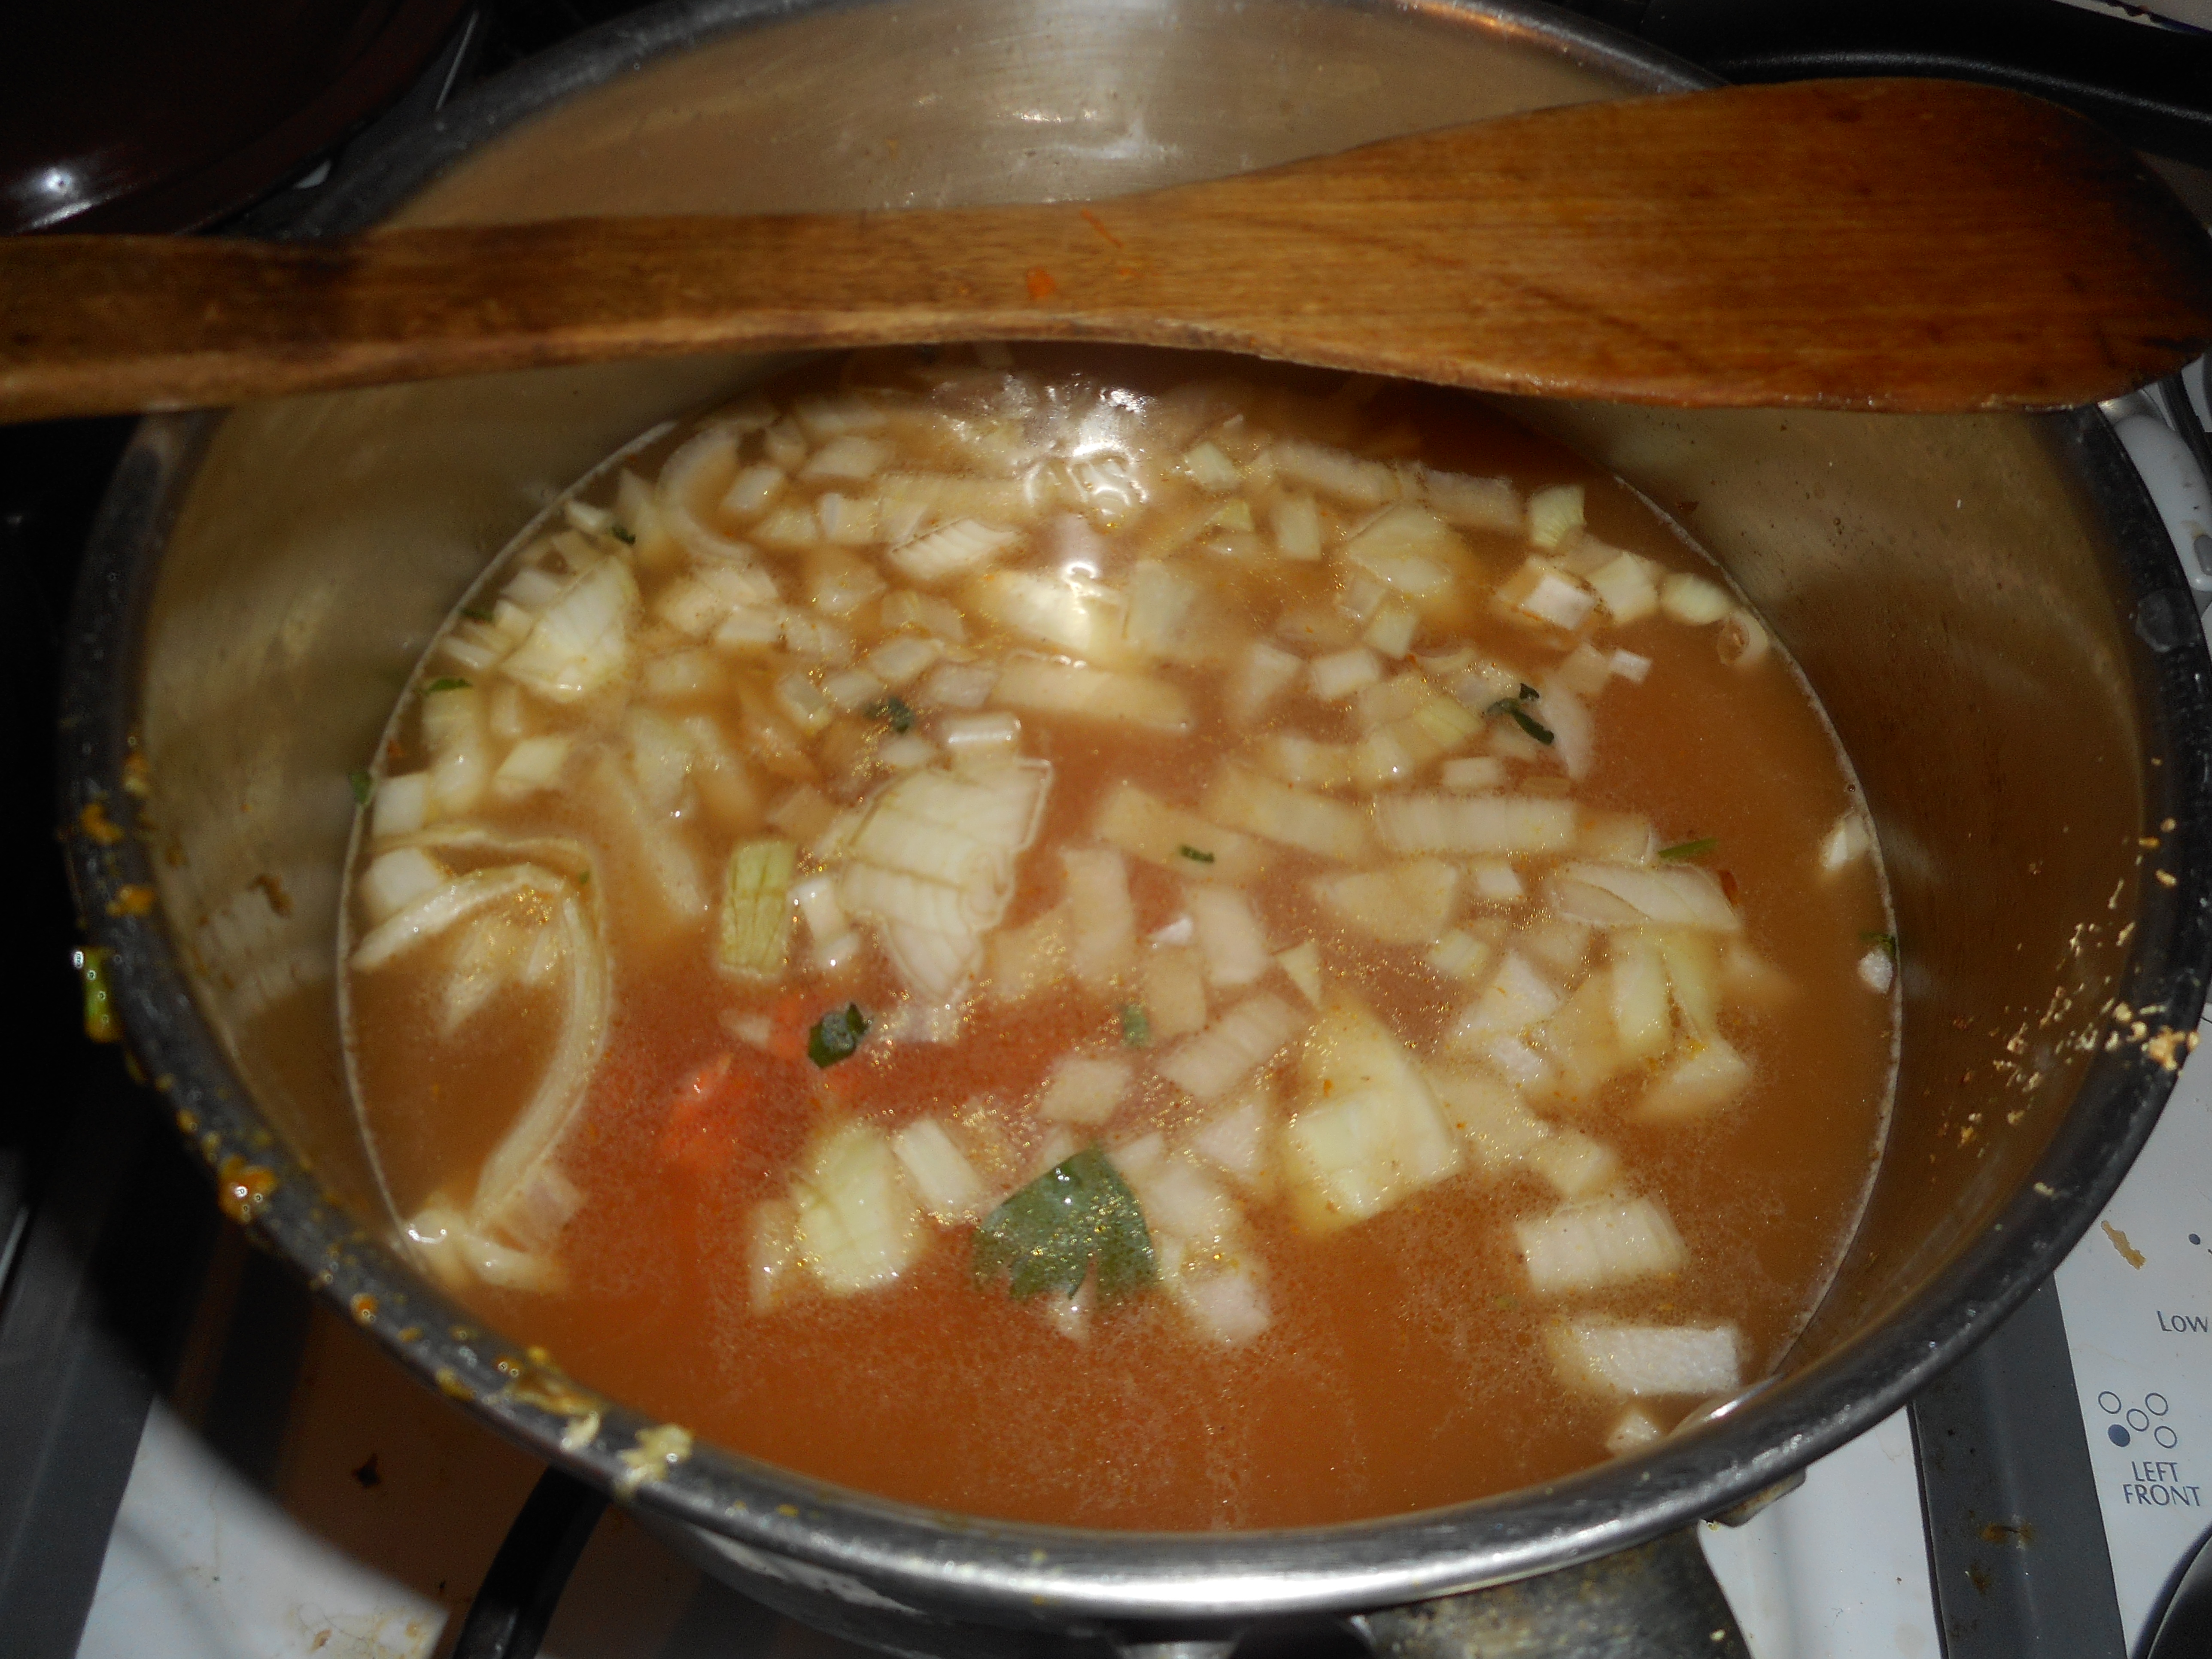
Broth in the soup, lentils are low in the pot!

quiche 005

Red Lentil and Orange Soup

Ingredients

  • ½ a bunch (1-inch-diameter bouquet at stems) fresh parsley
  • Extra-virgin olive oil
  • 3 medium onions, chopped into 1/4-inch dice
  • Salt and fresh-ground black pepper
  • 2large garlic cloves, fine chopped
  • One1/2-inch piece fresh ginger, peeled and fine chopped
  • 2 teaspoons ground coriander seed
  • Zest and juice of 1 medium orange
  • One 14-ounce can chicken or veggie broth
  • 2-1/2 cups water
  • 3/4 cup red lentils, rinsed and sorted
  • Juice of 1/2 to 1 lemon

Instructions

Wash and dry the bunch of parsley. Cut off the bottom 2 to 3 inches of the stems and chop them fine. Set them aside. Coarse-chop half of the remaining parsley leaves, refrigerating the rest for another dish.

Generously film the bottom of a 3 quart saucepan with olive oil – like two or  three tablespoons and heat it over high heat. Stir in two-thirds of the onions, and season with salt and pepper. Sauté until the onions just begin to brown. Blend in the parsley stems, half the parsley leaves which you chopped, garlic, ginger, ground coriander seed, and the orange zest. Sauté all of that for about 20 seconds over high heat, until the pan smells fragrant. Scrape out into a bowl and set aside.

Pour the broth, water, lentils, and remaining onions into the same saucepan. Bring to a gentle bubble, partially cover, and simmer for 7 to 10 minutes, or until the lentils are nearly tender. Add the sautéed onions and seasonings and additional salt and pepper to taste. Cover the pot tightly and simmer for another 15 minutes to blend the flavors.

Stir in the juice from half a lemon, the juice of the zested orange, and additional water, broth or orange juice to taste, starting with 2/3 cup. Then warm and sample the soup for salt, pepper, and lemon juice, adjust them as needed.

Scatter the remaining parsley tops over the soup, and ladle it into deep bowls.

The original recipe before modifications came from The Splendid Table’s How to Eat Supper by Lynne Rossetto Kasper and Sally Swift, Clarkson Potter, 2008.

Originally posted March 2015. No changes to recipe.

Buckwheat Gnocchi with Clams and Rabe

Anyone who eats at my house knows my deep love of authentic Italian food.  I love many different dishes from spaghetti with meatballs to risotto to homemade pasta and sauce.  This post is about gnocchi. Specifically gnocchi made with ricotta cheese rather than potato.  I love their delicate flavor, light texture and how much easier they are to make than the potato version. I make plain ones with rice flour and will share that recipe some other post. Just don’t ask me how to pronounce gnocchi!

These are buckwheat gnocchi and are served with clams and broccoli rabe.  Yeah buckwheat.  No wheat in it; buckwheat is a relative of rhubarb and it has a homey or earthy flavor that somehow matches perfectly with the clams and bitter greens.  I have been making this dish for more than ten years; gf the past five years.  It is a traditional spring dish at my house and much loved by my daughter. Not that tricky, I promise you can make it, no fancy pasta machine required. No long process.  Roll, cut, press with fork and briefly boil.

It is a spring dish as broccoli rabe is best right now, bright green, snappy flavor and so good for you.  I cook it a few minutes in boiling water before draining and sautéing briefly in olive oil and garlic. Yumm!

You could use fresh clams but I never bother; if you do – please get tiny ones and save a bit of the cooking water to add to the sauce.  If you want to make it not gf; just use all purpose flour for the white rice flour. Most grocery stores now carry buckwheat flour; store the bag in your freezer please so it keeps longer.

giant muffin and buckwheat gnocchi 010

Buckwheat Gnocchi with Clams and Rabe

For the gnocchi

1/3 cup buckwheat flour mixed with

½ cup white rice flour or any blend

1 15 ounce jar of ricotta (whole milk is best but I have used the part skim successfully)

¼ cup fresh grated Parmesan cheese; fine grater side

1 ½ tsp. sea salt

Sauce:

1 lb broccoli rabe

1 large can tiny whole clams or 2 small cans chopped/minced clams

¼ cup EVOL

2 garlic cloves minced

1 tbsp. butter

Salt and fresh ground pepper

Directions: Heat a big pot of salted water.  While it heats, rinse the broccoli rabe and remove any yellowed leaves.  Cut the very bottom of the stems off and discard.  Cut the stems into 1 inch lengths. Do the same for the rest of the rabe; I set aside the stems and cook them one minute extra.  Throw the rabe stems in the boiling water, cook one minute and add the rest.  Cook maybe 3 more minutes; you don’t want it overcooked but not firm either; you will cook it a bit more lat er.  Drain and set aside.

Mix all the gnocchi ingredients in a small mixing bowl. Turn out onto a rice floured bread board, knead briefly to form a dough. Do not add a lot of flour or your gnocchi will not be light and pillowy. Take a half cup or so at a time and roll it out on a rice flour dusted bread board; as thick as your middle finger (read ¾-1 inch).  I usually only roll out 5-6 inch lengths at a time.  They don’t have to be perfect looking, a bit irregular is just fine. Cut into 1 inch lengths (one knuckle long).  Using two forks press gently on the top and bottom to form small ridges.  This will somewhat flatten the gnocchi but the ridges are to hold sauce. If you slightly roll the gnocchi you can press it again and almost square it so each one isn’t as flat. Lay them on a cutting board that you dusted with rice flour. Don’t pile them on top of each other; one layer so they don’t stick together. Form all the dough while a big pot of salted (1 tsp) water heats.  I like a wide pan so I can easily fish out the gnocchi with my flat skimmer.  Put ¼ of the gnocchi in the bubbling water.  Let them slowly rise to the top; I leave them in about 2-3 minutes. I put them into a glass mixing bowl as I do the batches.

While they are cooking, heat the olive oil in a big sauce pan. I like to use my mini wok for this.  It is great for finishing a lot of pasta dishes.  Add the garlic and stir, cook 1 minute.  Add the drained greens, cook 1-2 minutes, adding the clams as it cooks, all the can juices too. Add the cooked gnocchi, the butter and if they seem dry; add a bit of the pot water; maybe ¼ cup. Taste and add salt and pepper as desired.

Note: you can add extra clam juice if you use canned ones; sometimes I add half a bottle of the stuff as I like it brothy. I made some this week and I took to eating it in a low wide bowl using a soup spoon to be able to really sample that broth.

Dive in! broc and rab in pan

They warm up nicely for a meal the next day, keeps 1-2 days in the fridge.

The original recipe is from Italy Al Dente by Bibi Caggiano; adapted to be gf by me. I love this cookbook, use it often; my fav Italian cookbook.  SO many good recipes; she has many great risotto dishes in it as well as homemade pastas and sauces and recipes that use factory pasta.  I have found that every single one works quite well with gf pastas.

Originally posted in spring 2016.

Chocolate Cloud Pie…Oh My!


I have a fantastic cookbook, all pies, nothing else. By Farm Journal, published in 1981 but it has the vibe of the 1950’s. Lots of interesting combo fruit pies and chiffon pies like you never heard of. I found this recipe for a chocolate rum pie. The pre-made cookie crust could sub in for a traditional pie crust which the recipe called for. I had all the ingredients except the crust ….but I thought it sounded tasty and worth a trip to the grocery store for the crust cookies, gluten free of course!

chocolate pudding

It was not hard to make either. I threw it together in three easy steps. It was one of those recipes where the sum of the ingredients is far tastier than the components would lead one to believe. Everyone devoured their slice. People took slices home. My mom was eager to keep a second slice….for tomorrow. This enthusiastic audience caused me to mention it on facebook. I got all these likes and a few hungry comments. The buzz of happy responses led me to decide to share my version of chocolate rum pie. I have renamed it Chocolate Almond Cloud Pie. That was four years ago….

The name came from the fact that it is as light as a fluffy cloud and from my love for my older sister who died five years ago. Margie’s love of pie was renown in our family and I am absolutely sure she would have adored this pie. Whip some up this week and woo your family with chocolaty goodness that should please everyone. choco cloud pie slice (2)

Notes: I used french brandy instead of rum as I was out of dark rum. I think cognac would be nice too. .I used 3/4 cup almonds as that’s all I had; worked great; I put 2 Tbsp. aside for topping and rest went on top of the baked cookie crust. You can just buy a crust.

I posted this back in the spring of 2014 and hadn’t made it since; a matter of just forgetting how amazing it tastes.  Like eating a chocolate cloud….with puffs of cream and the crunch of toasted almonds. I used a hybrid crust when I made it yesterday; I was tired of my gf oreos; so I scraped out and discarded the filling and crunched up the cookies, I thought I was a bit short on cookies so I added 7-8 gingersnaps I still had from my last cookie crust. Crunched up and mixed with butter, baked into what became a flavor delight of a cookie crust! One of the best pies I have ever made. And I make a lot of pies….


Chocolate Almond Cloud Pie

Ingredients
1 pre-made chocolate cookie crumb crust, GF
1 pkg chocolate pudding, the kind you have to cook
2 cups whole milk
1 tbsp cornstarch
1 tbsp cocoa

1 tbsp dark rum
1 cup slivered almonds, divided
1 1/3 cup heavy cream, divided

4 Tbsp. powdered sugar

Pour the almonds into a frying pan, no oil and toast them, stirring constantly. Alternately you could do this in the oven at a low temperature but I prefer the frying pan. Stop when they are medium brown, try not to let too many get black on the sides.

Cook the filling; put 2 cups whole milk into a medium sized and heavy sauce pan, Then add the dry pudding mix, the corn starch and the cocoa. Stir with a whisk as it heats. Once the mixture is bubbling all over the surface turn off the heat and add the rum. Pour into a bowl, cover with plastic wrap and chill until cooled. Take ½ cup heavy cream and whip. Add this to the pudding and whisk until blended. Take 3 tbsp of almonds and set aside for garnishing the pie later. Sprinkle the rest of the toasted almonds over the chocolate pie crust Gently spoon the filling into the pie shell on top of the toasted almonds. Chill at least 2 hours until set and cold. Whip the rest of the heavy cream in a chilled bowl, adding the sugar near the end of the whipping. Gently put dollops of it all over the pie top. Sprinkle the reserved almonds on top. Enjoy!

choc cloud pie

Originally posted March 2014. No changes to recipe.

Instant Pot Advice for My Peeps

If you haven’t heard of an Instant Pot electric pressure cooker, you will now! I got mine almost a year and a half ago.  Bought it on Black Friday for almost half price; great deal! Purchased a cookbook and a glass lid for slow cooking.  I was very excited and not a little bit scared of using the big black device.  Mine is a six quart 7 in one, lots of features, some I still haven’t used. One of my girlfriends had been bugging me to investigate and get one as she knows how much I love to cook. It was slightly daunting to use it at first. But I tried out recipes from the little cookbook it came with and my full sized one I got for ten bucks. Almost everything I have made has been a resounding success.  I have used it infrequently as a slow cooker – I think it runs a bit hotter than my old slow cooker which was only about 2-3 years older and now resides in the basement on a shelf.

instant pot 2

So, let me tell you some of the things I love to make in it. I use it a lot with bone-in chicken thighs; it cooks them in about 16 minutes once it comes to pressure.  That means that when I lock the lid down it takes a bit of time to fully heat up and get pressurized; that time is not counted in the recipe cooking time.  Some people put frozen meat in recipes and so it can add quite a bit of time to the process. Once you lock it and it starts the process you can walk away and do any chore or activity you like. I also often saute things before starting the pressure cooking process. Yes; it sautes! This is a favorite task the IP does for me. I regularly saute onions/celery and such for a bit then add meat to cook for a while before the next step of pressure cooking or I do that in reverse; brown meat; remove it while I cook veggies then I add the meat back in as well as water or broth. Which brings me to one other important fact; it must have a cup of water or broth for it to pressurize.  I generally cook enough for 4-6 meals so I have enough but if you cook small amounts there is a 3 quart model; a friend of mine recently acquired one of those and loves it for her smaller needs. The other day I made rice pilaf in it which it does very well, I forgot a portion of the water and the rice came out a bit crunchy; I added the missing water and pressured it for 5 more minutes and it was fine.  Lesson learned; make sure you put in the right measure of liquid.

sausages in soup

Sausages in a soup base

In the back of my cookbook are charts for how long to cook meats, grains, etc.  They are invaluable. I use them all the time. Now that the IP has been in my kitchen for a while I adapt non-pressure cooker recipes to it. The charts help me judge how long to cook.

gumbo

Sausage gumbo


Other things I make in the IP are ribs; I cook them on the trivet that came with it and then lay them on foil on a baking sheet, slather in BBQ sauce and pop them in the oven or broiler for 10-15 minutes, so tender and delish! I have done baby backs, spare ribs and beef short ribs which do not get the oven step.  I have made some yummy stews and soups in there: beef vegetable stew, chicken noodle or rice soup or other soups. It cooks the beef really quickly. I have used it to make bean soups as well. Beans cook pretty quickly under pressure.  You can make a rotisserie style chicken in it; love that one!

There are settings for stewing and rice as well as a few other things. I do love rice made in it; perfect and fluffy, never burnt, never runs out of water.

shrimp-risotto

I’ve made risotto in it a few times and it is great as no stirring needed. If you don’t have the patience for risotto on the stove top this is a super alternative cooking method.

The other food I like to make is yogurt. I started doing that fairly recently, as I realized it would actually save me money and my sister who got one for Christmas says it tastes wonderful. So, with a bit of advice from her I did just that and found out it was indeed creamy and delightful. I get organic milk from Aldi’s to make mine and it makes a big difference. Great flavor and texture and once you’ve done it a couple of times it is quite simple.  I add a spoonful of jam or marmalade and I have a healthy and delish yogurt for lunch or a snack. And I get to use my glass lid for a change, LOL!

I haven’t used it for sweets yet, although I plan to; just ordered a small cheesecake pan; 7 inch size to fit inside the inner pot as my other latch cheesecake pans are too large for it. I plan to use it for several other things that can be steam baked like this recipe for caramel custard I discovered in my new IP Indian cookbook!

Folks in my IP Community fb group say IP cheesecakes are fantastic. Plan to test that and see if it’s true.

So, if you are thinking of buying an electric pressure cooker, I do recommend it for a number of things. It is one more great way to cook. I love that I can set it and go out to the yard and it finishes and keeps warm until I am ready to eat. That is my favorite thing about my IP!

Shrimp Risotto Made Easy

I love this recipe: fast, easy and delish. We all want easy recipes that taste great, don’t use too many pots/pans and are budget friendly.  I needed something quick that would use my instant pot electric pressure cooker (IP) as my  sisters were down for Easter and we were hoping to make supper in our mom’s assisted living room.

I had some shrimp in the freezer and all the usual ingredients for risotto.  I had read lots of comments on how good IP risotto was but had resisted until I tried this recipe…. being a lover of the traditional endless stirring method.  It still took as long as hand stirred risotto to make but was much easier for a meal made outside my kitchen and it was fresh and ready to enjoy.

Note: I made this again recently using Asiago cheese and was not a real big fan of that flavor; a good quality chunk of Parmesan is what you need for the best result. Other than that it came out with a perfect texture; for that version I put the peas right in the risotto after releasing it; stirred for a minute and it was ready to serve!

shrimp-risotto

IP Shrimp Risotto, serves 4

1 lb large to extra large shrimp; thawed and shelled

4 tbsp. butter divided

1 small yellow or red onion finely chopped

1 ½ cups Arborio rice

2 tbsp. vermouth or dry white wine

4 ½ cups low sodium great quality chicken broth

1 tsp. sea salt

¼-1/2 tsp. fresh ground black pepper

2 minced garlic cloves

Finely grated rind of one small lemon

¼ cup finely chopped fresh herbs like parsley, rosemary, tarragon, thyme or

2 tsp dried herbs (same ones)

1/3 cup freshly grated good quality parmesan cheese

Directions: Heat IP and add 2 tbsp. butter, melt and add onion, cook 4 minutes, add rice and cook 1 minute, add vermouth and cook 30 seconds, add 3 cups room temp chicken broth, salt and pepper and put lid on. Seal it and set for 9 minutes on manual pressure, do a quick release, add the minced garlic and then the shrimp the rest of the broth. Stir well and cook 5 minutes on Sauté.  Stir frequently. Turn it off and then add the zested lemon and the herbs, stir.  Add the cheese, stir and serve.

Notes: I think you might be able to cut ¼ cup broth; mine seemed just a tad too loose/wet. It was not quite as creamy as hand stirred but the process was a lot easier and a quick clean up.  We had a side serving of a salad.  The result was a gourmet meal that could be made anywhere; perfect for our situation. Enjoy!


Revised from original post from Spring 2017. No recipe changes.