Apple Berry Crumb Pie

This is my spring apple pie when the apples get sort of sad; they are not as crisp or flavorful by spring so I add some berries to brighten up the mixture. This recipe uses cranberries. I used frozen ones I had saved at Christmas time. They taste like cherries in this pie! My guy was sure these were tart cherries!! Yay; that means they are a good addition.  I bet you could use other berries or cherries from the freezer case.

I have made this pie before but with a rolled out crust cutout with big circles. That version had ginger in it. This one is a bit more traditional in the flavors and easier without rolling out a second crust.

The filling  is cooked briefly on the stove top to keep the pie from settling too much in the oven.  There are three main components but don’t be scared; this is an easy pie to create.

apple cranberry crumb pie out of ovenCrust:

1 c plus 2 tbsp brown rice flour mix (at bottom of recipe)

2 Tbsp sweet rice flour

1 Tbsp. granulated sugar

½ tsp xanthan gum

¼ tsp salt

6 Tbsp. cold butter cut into 6 chunks

1 lg egg

2 tsp fresh orange or lemon juice

Spray 9 inch metal pie pan with cooking spray, dust with white rice flour.

Mix dry ingredients in bowl of stand electric mixer.  Add butter and mix until crumbly and resembling coarse meal.  Add egg and juice.  Mix until it comes together into big chunks.  Shape into a ball with your hands. Put it on a pie bag or on a crust sized piece of wax paper (14 x 14 inches more or less), flatten the crust ball some; put on top of it another piece of wax paper and chill it all in your fridge 15-20 minutes while you prepare the crumbs and the filling.  I have a wonderful pie bag made by OXO that is non stick, sturdy construction and just awesome! I have used nothing else but that bag since it was gifted to me a year and 3 months ago.

Crumbs:

¾ c brown rice flour mix

½ c sugar

½ tsp xanthan gum

5 Tbsp.  cold butter cut into 6-8 chunks

Put all four ingredients in the same mixing bowl you made the bottom crust in and mix well with mixer paddle until crumbs form.

Filling:

4-5 cups sliced fresh baking apples

1/2 cup 2/3 c sugar (use the higher amount if you like it sweeter)

2 cups fresh or frozen cranberries

1/4 tsp cinnamon

1 tsp. fresh orange rind and a Tbsp orange juice

2 tbsp. butter at room temp

2 tbsp. instant tapioca or tapioca or rice flour

Raw or big/fancy crystal sugar to sprinkle on top

Directions: Mix the fruit, spices and sugar in a large bowl, Add the butter to a large sauce pan and melt; dump in the fruit mixture, cook about 6-8 minutes until apples soften and the cranberries are bursting. Then add the rind, juice and tapioca or rice flour, stir.  Let cool a few minutes to room temperature.

Heat oven to 400 degrees.

Pour cooled filling into pie shell, top with crumbs; use them all; sprinkle with your fingers. Top with a Tbsp big crystal sugar if you have any – a nice finishing touch.

Place on baking sheet to catch drips (I have a pie drip pan I love!)  Bake for 30 min and turn down the oven to 375 degrees and bake 20-25 more minutes: until crust is golden and you can see the filling bubbling.  Cut it short or lower temperature if crumbs are browning too much. Cool on rack for at least 1-2 hours before serving.  Enjoy! apple cranberry crumb pie slice

Oven Roasted Spanish Chicken with Olives and Lemon

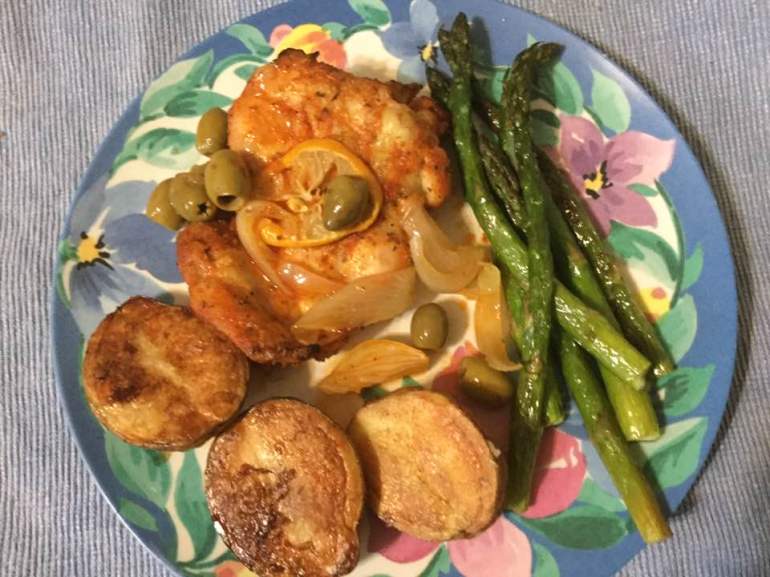
I’m always on the lookout for a tasty easy chicken recipe.  Particularly one made with chicken thighs. They are everyone’s favorite around here; what’s not to like? Juicy; flavorful and tender. The spice rub is awesome; I used both smoked paprika and some real Spanish paprika; a Christmas gift from my goddaughter who picked it up in Europe for me.  The homegrown lemons added so much fragrance and zing – made this dish soar!

This recipe is an adaption from one on californiagrown.org. I cut it in half since there are only two of us and reduced the spice amounts quite a bit plus I used boneless thighs instead of bone in.  It was licking the plate delish! The sum of these ingredients is far more than you might expect. Simple but the flavor interplay of these ingredients was perfection. Even the 8-year-old adored it!

chicken with olives in pan

Spanish Chicken with Lemons, Olives and Paprika


Serves 4

Ingredients:

4 boneless, skinless thighs

1-2 Tbsp EVOL

———

1 tsp sea salt

1 tsp. paprika

½ tsp. smoked paprika

1 tsp. dried oregano

1 tsp garlic powder

———

1 medium onion, yellow or red

1 lemon, particularly great if you can use Meyer lemons

½ cup green olives, no pimentos; I used jarred Manzanilla olives

Directions: Put the thighs in a bowl; add half the olive oil. Mix around. Mix the dry ingredients in a small dish and rub/pour over the thighs. Cover with plastic and refrigerate up to 8 hours; I did one hour in fridge and 10 minutes on counter to warm a bit.

Line the bottom of a 9×12 baking dish with aluminum foil. Drizzle with a bit of the olive oil. Cut up the onion from top to bottom in thin wedges. Lay in pan, slice the lemon thin and sprinkle slices around. I actually made 4 oblongs of the lemon and onion and laid my 4 thighs on top. Bake at 400 degrees for 20 minutes, turn thighs over and add olives in the center of the pan, corralled by the chicken thighs; bake 10 more minutes. Let rest 5-10 minutes before serving.  chicken with olives on plate

Side dishes: I took a separate sheet pan; sprayed with olive oil spray and laid halves of small russet potatoes, cut side down and baked along with the chicken. When the 20 minutes of baking time went off I added a pound of whole asparagus spears with bottoms snapped off to the potato pan. Drizzled them with EVOL and sprinkled entire pan with kosher salt. Let it cook until chicken has rested; good if you can flip the potatoes and asparagus spears when you take out the chicken.

Notes; amazing if you have the fragrant Meyer lemon for it. Easy to double. I had some special European paprika which I used; very flavorful; made it amazing tasting. If you want it much spicier visit the original recipe but I wanted a more nuanced version and it was perfection! Enjoy.

Black Forest Cake 2.0 Version

In these difficult days we sometimes need a little cake. This is a quick and easy version of Black Forest Cake, hence the 2.0 my shorthand for easy peasy version. Made with a chocolate mix from Aldi’s. You can use a box mix of any kind you like. It is a lush and sensuous dessert worthy of a special occasion but great when you are in a low place emotionally. The whipped cream and cherries are a real treat together with the dark rich chocolate layers. The sides have grated chocolate on them and the top is a pool of cherry yumminess. I think these flavors together are timeless. I am wondering why I haven’t made it in years. Maybe I was inhibited by the seemingly complex nature of this layer cake. I actually baked it in a single size petal cake pan and cut it into two layers using toothpicks stuck half way up the sides as a guide but you can use 2 8 inch round pans at much less effort.

black forest cake
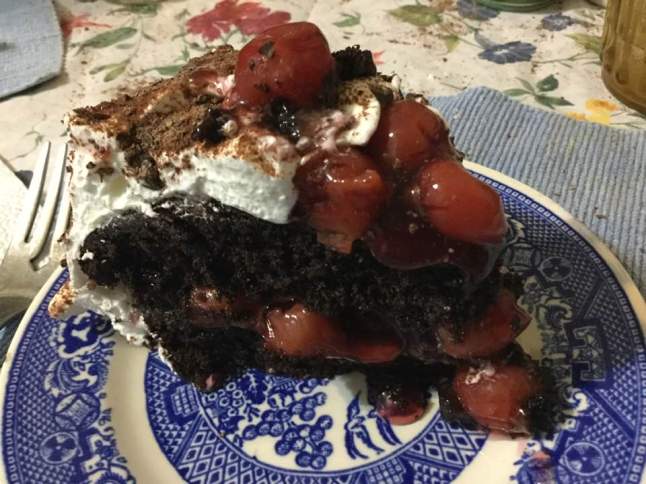
Black Forest Cake 2.0 (easy version)

Ingredients:
1 chocolate cake mix plus the add ins. I used an Aldi’s mix; added 3 eggs, ¼ cup melted butter and the milk the recipe says (it says ¾ cup water but I always use milk for added moistness and better texture)…use the gf mix you prefer.

Toppings/fillings
1-2 Tbsp chocolate syrup
1 can cherry pie filling
2 cups whipping cream
1/3-1/2 cup powdered sugar
2 oz of dark or semisweet chocolate grated

Directions: Make and bake cake according to box directions. Let cool completely after removing from pan. Put bottom layer on a wide cake plate. Top with brushed on chocolate syrup. Pour cherry pie filling on; do not put to the edges; leave ½-1 inch perimeter to allow for squishing out once you lay the top layer on. Put top layer of cake on. Whip cream to soft peaks. Add powdered sugar and beat just a bit more; not too hard or it will start to turn (to butter). Spread cherry filling over the top center of the cake; about half way out. Then spread the whipped cream over the rest of the top and down the sides. I used a cake spatula to smooth it a bit. I had grated the chocolate by hand while the cake baked. You have to get it on the sides. You can toss it at the cake, blow it on or flick it at the cake with your gloved fingers. Not an easy task. But you get to lick your fingers when you are all done! Put a few cherries plucked out of the pie filling on top around the edges to decorate. Serve cold.

black forest cake slice

Excuse the messy background. We were celebrating my guy’s birthday so I didn’t have time to make things neat. It was a glorious birthday cake for sure!Enter a caption

We actually found it tasted even better the next day. It is far easier to make than it looks. Makes a spectacular adult birthday cake! Enjoy.