Three Years Gluten Free and Still Baking

Right about now it is three years since I first felt the wonderful moment when my tummy made its happiness known to me.  I had been totally gluten free for about two weeks.  It came to me that something was missing and that something was the pain in my gut that never ever went away.  It was a revelation.  So I am mostly pain free, still some issues.  I do get glutened by accident upon occasion, usually rarely. Once, several times in a month: which left me in a state of nearly constant nausea.   Thankfully that hasn’t happened in over a year. In fact, my blood work in October 2015 was totally normal for my liver levels and celiac markers.  That doesn’t mean I don’t have celiac, just that I am eating very safely. Yay!

I was a baker since my childhood; stirring up batches of Christmas cookies.  I’ve cooked meals since I was 14 or so and have been a lover of good food all my life.  So I had a good foundation of cooking skills and knowledge before having to change my lifestyle to totally gluten free. I thought it was like a death sentence being denied my bread and pasta.  I hear that sentiment sometimes from acquaintances who blurt it out upon hearing what I can’t eat anymore. I make no response most of the time to such negativity.  Occasionally I do respond with something to the effect that, Nope, it’s okay: I am doing great and enjoying eating tasty food.  And that, my friends, is the honest truth.  I am doing great and I really do eat a lot of delicious food, all gluten free. pretzels 011
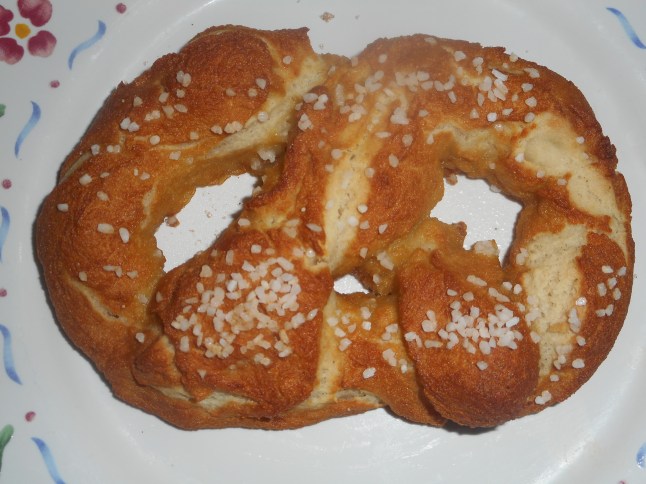
I can honestly say I have not knowingly eaten gluten, not more than a scrap of cheese ball (3 Christmases ago) which had a tiny amount of blue cheese that was possibly a tiny bit wheat. It did teach me a lesson and I am very careful on my blue cheese; FYI: most American blue cheese is safe.

I have learned to be a more careful baker; I follow recipes for baking much closer with consistent results. I blend up my own gf flour mixes, saves a lot of cash.  I actually enjoy the self sufficiency of baking my own cookies, muffins, pies and quick breads.  I have enjoyed adventures in making my own gf foods including pasta, soft pretzels, breads, muffins and healthy things like raw sauerkraut,

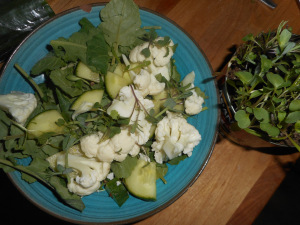
my own kefir and I have just started creating kombucha tea starter. These last three items are specifically for gut health and they can be pricey so I make my own which is very satisfying and is about a quarter the cost of readi-made.  DIY is fun and saves cash.  It helps me avoid saturated and hydrogenated fats as well as a heap of sugar and salt.  Processed gf foods are full of such and I am glad to avoid most of it. My focus is more and more on seasonal produce and fresh meats in small portions with the addition of grains like quinoa or rice.  I especially love stir fries which combine lots of veggies, great flavors like ginger and toasted sesame with small servings of meat or fish.  Served over rice they are perfect suppers.  Sometimes I make rice noodles to stir into the dish for a light touch that soaks up the flavor of the stir fry.

skinny quinoa sticks
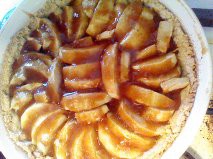
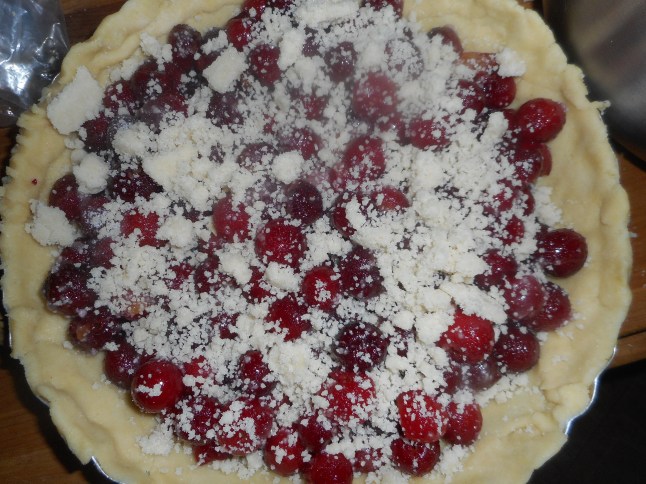
Don’t get me wrong, I eat snacks, even store gf cookies and chips at times but they are limited to occasional, even rare treats.  I am not depriving myself, lots of homemade cookies and muffins in the freezer keeping fresh and tasty.  I love baking pies and tarts – this is my year of pie on this blog and it is heartfelt love.  My dad, gone 15 years adored pies, so did my sister Margie, gone almost 3 years.  Actually, she urged me to start this blog to get over the trauma of my diagnosis and the loss of my dear friend Wheat.  She would be pleased at my success at baking and cooking gluten free and would be smiling as she read these words.  My blog is almost three years old and it has been so much fun.  I plan to continue sharing recipes, restaurant experiences, gf products and advice to help those who must live gluten free and for their families and friends who want to bake/cook for them.

I wish you much happiness in your gluten free life style.  To be sure that is what I have found as well as peace in knowing how to take good care of my body.  I am so glad to have been diagnosed in less than a year; many folks with celiac struggle for years to figure out what is wrong inside them.  I am happy to eat healthy, yummy food.  I am not the least deprived when I cook. When I visit family they cook gluten free for me or select restaurants with a gluten free menu so I never get glutened when I am with them. I am very thankful that they seem to understand and do their best to keep me safe in what they serve for meals. They ask for seconds of my gf breads and desserts which makes my heart happy. My guy is just as careful as my family to keep my food safe when we eat out. He gets my need for totally gluten free foods and that makes it less stressful for choosing where to eat out and what to cook.

bella signbigbites

It is still tough to eat out but I have enjoyed some wonderful meals, particularly at Bellas right here in town. I also love Big Bite’s in Quakertown for their gf BBQ foods; eaten there many times; yummy and safe for celiacs. Food is a bit difficult at functions and parties. I tend to not go as it is just easier sometimes.  When I do attend, I eat only the fresh fruit at dessert tables and I bring a gf sandwich to luncheons at church so I know I am eating safely. Maybe someday, the places we get the catering from will  provide safe gluten free choices for people like me.  I hope so!  Peace and happy healthy eating to all who read my blog. Three happy gluten free years and counting…

French Apple Tart…ooh la la

This French apple tart is an old favorite of mine, been making it for years.  I have no idea where I got the original recipe from so I can’t give credit for it, I lost my copy and had to replicate it. Plus, I had to change it a bit to make it gluten free but it tastes just as good as before.  The cinnamon and lemon topping are what makes it so tasty.

It should be made with an apple that keeps its shape; Granny Smith is the best choice in that regard or Golden Delicious.  Don’t use one that goes all squishy like Empire or Macintosh.  You only need 3 large apples.  It should give you about 6-8 slices of tart. Lesser amount of slices if your family is piggy, the full eight slices if they are not big dessert eaters.french apple tart

I use my GF tart shell crust which is from Annalise Roberts’ book; Gluten-Free Baking Classics.  It is very easy; hand pressed into your tart pan.  I would say that this is a cookie crust; sweet and short, very yummy.

I rarely have any of this tart left over for more than 24 hours.  It is very popular with everyone.  I like it for how easy it is to make, how handsome it looks and that I can throw it together quickly with only 3 apples and a lemon. Sorry for the lack of photos.  Wasn’t thinking about pictures when I was making it…

French Apple Tart

Crust

1 cup brown rice flour mix

¼ cup sugar

1 tsp. xanthan gum

5 tbsp. cold unsalted butter, in 5 chunks

1 tsp. vanilla extract

Mix the dry ingredients in a stand mixer, cut in the butter by mixing it at a med low speed until crumbly.  Add vanilla and mix well.  If it is really dry looking add a tbsp. of water.  Press into the bottom and up the sides of your tart shell as evenly as you can make it.

For this recipe I always use an extra large 10 inch tart pan.  Mine is ceramic so it doesn’t have a removable bottom.   Bake it at 350 degrees for 10 minutes. Let it cool while you peel and slice the apples.

Filling

3 large Granny Smith apples; peeled and sliced – not thick or too thin

2 tbsp. sugar

1 tbsp. GF flour

Lay the apple slices in concentric circles in the tart pan over the crust. Mix the sugar and flour and sprinkle over the apples.  Cover loosely with foil and bake 25-30 minutes until the apples are soft if pricked with a fork.  Do not bake until they collapse; should still hold their shape.

While the tart is just finishing its baking make the topping.

Topping

In a small heavy sauce pan place

2 tbsp. sugar and 1 tbsp. cornstarch and mix them.

Add ¼ cup fresh lemon juice

1 tsp. lemon zest (grate the zest and then juice the lemon)

½ cup water

½ tsp. cinnamon

Cook over medium heat, stirring it constantly with a small whisk or a spoon, until it boils and seems thickened and is no longer opaque.  This should take less then five minutes.  Remove from heat and pour the hot gloppy topping carefully over the hot apple tart taking your time so you cover the entire surface of the apples.

Let cool before serving.

This tart is perfect with a scoop of vanilla ice cream on the side.  Don’t put it on top or it will not look so nice because of the French cinnamon topping. Or some plain organic yogurt goes well and is far healthier…just saying.

Brown Rice Flour Mix (this is the same as King Arthur’s gf all purpose blend)
2 c brown rice flour (finely ground)

2/3 c potato starch – Not potato flour!

1/3 c tapioca flour

Originally posted in September 2014.  I bake this tart quite often; it is definitely a go to tart at my house.


Cherry Crumb Pie…More Pie!!

Pie is a classic American dessert, what guy doesn’t like a fat slice of juicy pie? Cherry pie is perfect for the weeks before and after the Fourth of July or anytime you can get frozen sour cherries. Like this past weekend for a belated President’s Day pie.  My sister sometimes uses jarred cherries but I prefer fresh or frozen sours.  You can make it gf easily with this recipe – my crust is really tasty; my family practically cheers when I serve homemade pie and the rest of my family does not eat gluten free.

Fresh tasting, locally sourced fruits are exactly in the spirit of summer.  I picked mine this past July at an orchard down in Bucks County near the Turnpike along Limekiln Pike, about 20 minutes from Hellertown. Froze some of my pickings and here they are in this yummy treat; like a taste of high summer.

The sugar, cinnamon and almond extract create an intense cherry flavor but it will still be very cherry without the extract; left it out in the pie I made Saturday.  If you prefer a lattice it can be made by doubling this pie crust and some careful construction work.  I tend to go the easy route of the crumb as everyone loves it. You could make a smaller 8 inch pie; use a cup less fruit and cut the sugar some, ditto for the tapioca. This pie is fantastic with a scoop of vanilla ice cream on the side.  It is also yummy with some good quality plain organic yogurt, really!  Very healthy, tasty and no guilt with this treat.kolrabie 025

This recipe is a blending of my own pie filling and the pie crust and crumb recipes from Annalise Robert’s cookbook, Gluten-Free Baking Classics.  I used a touch less sugar, more fruit, and made a few other changes to create my own special pie.  Her cookbook is a fabulous resource and I can’t recommend it enough to anyone trying to bake gluten free for a family member.  There is nothing like the classic desserts that we used to enjoy seasonally to comfort a celiac who can’t eat what they used to.

 kolrabie 017

Angie’s GF Cherry Crumb Pie

Crust:

1 c plus 2 tbsp brown rice flour mix (at bottom of recipe)

2 tbsp sweet rice flour

1 Tbps. granulated sugar

½ tsp xanthan gum

¼ tsp salt

6 Tbps. cold butter cut into 6 chunks

1 lg egg

2 tsp fresh orange or lemon juice

Directions:

Spray 9 inch metal pie pan with cooking spray, dust with white rice flour.

Mix dry ingredients in bowl of stand electric mixer.  Add butter and mix until crumbly and resembling coarse meal.  Add egg and juice.  Mix until it comes together into big chunks.  Shape into a ball with your hands. Put it on a crust sized piece of wax paper (14 x 14 inches more or less), flatten the crust ball some; put on top of it another piece of wax paper and chill it all in your fridge 15-20 minutes while you pit the fruit.

Filling:

6 cups pitted fresh sour cherries: place in medium bowl (If frozen do not defrost and bake the pie maybe ten to fifteen extra minutes until good and bubbly)

Mix the following in a small bowl and pour over the cherries.  I used my frozen fruit and poured the following right into the bag and squished it around a bit before pouring into the pie crust.

¾ cup granulated sugar

4 tbsp. tapioca flour

½ tsp. cinnamon

1/2 tsp. almond extract

Directions:

Roll out pie crust between two sheets of wax paper or in a pie bag; try to get the thickness even, no thick middle! Peel off one side of paper and place in pie pan, centered.  Remove other slice of wax paper.  Crimp edges all around.  Fill with sweetened fruit mix.  Sprinkle the crumb topping (1 to 1½ cup) evenly over this mixture.  The more crumbs the thicker the crust they will form; for a really thick crust use all the crumbs from the recipe below.

If you love your pie really sweet add another ¼ cup granulated sugar to the dry mix part of the filling.  I found the pie to be plenty sweet but everyone has their own sweetness level.

Bake in a preheated 400 degree oven for 30 minutes with a piece of aluminum foil on top of the pie, then 20 more minutes uncovered until bubbly and the crust is light brown, longer if you are using frozen fruit.  Cool at least 2 hours before serving at room temperature.

Note: I bake pies in my bottom heat pizza oven and it gives me a great browned crust.  If your oven isn’t bottom heat you might want to pre-bake the crust 10 minutes before filling and topping the fruit.

Crumb topping

Put all four ingredients in the same mixing bowl you made the bottom crust in and mix well with mixer paddle until crumbs form. Don’t over mix or you will get a soft dough; not a good thing…done it and not happy with myself…still usable; just big crumbs.

¾ c brown rice flour mix

½ c granulated sugar

½ tsp xanthan gum

1/3 c cold butter cut into six chunks

———-

Brown Rice Flour Mix  (Same as King Arthur All purpose GF Blend)
2 c brown rice flour

2/3 c potato starch

1/3 c tapioca flour

Originally posted by me here in July 2015.  Minor revisions made.

Gluten Free Rye Bread: YES!

Oh the quest for tasty gluten free bread continues. Missing rye bread has been one of the tougher things to deal with as I loved it back in my pre-celiac diagnosis days.  FYI: Rye flour has gluten in it and no other flour will give you the actual taste of rye.  Caraway seeds in the bread do help but to get rye flavor? I found but one solution: rye flavor powder.  Yeap; such a thing exists. Sold only by one company as far as I can tell; Authentic Foods.  You get a small shaker the size of a bottle of spices for about $6 but the kicker is the $8.99 shipping charge. rye flavor

  I hemmed and hawed for a long time (read two plus years) but finally chose to pay it.  I did get a bag of gf lemon cake mix which did not increase the shipping charge and was reasonably priced plus hard to find at a grocery store.  Still this was pricey; just under $21 for those two items plus shipping. I asked myself, will this rye bread be worth this cost for just a small bottle of flavoring?

The recipe I used came from Annalise Roberts’ Gluten-Free Baking Classics, Second Edition.  I made it just according to the recipe which uses her bread flour mix.  It is composed of several flours including brown rice flour, tapioca flour and potato starch as well as millet.  I already had some in my freezer. Bing bing bing, the recipe is very straightforward, nothing tricky.  I let it rise in my 8.5 x 4 inch metal bread pan and baked it.  Not much rise in the oven but it didn’t fall either!  rye bread and cassoulet 022

The flavor and texture were outstanding. I used half the caraway seeds as it seemed like a lot.  Next time I plan on the full amount just to see how it tastes.  This bread gave me back my rye.  Now, I did see a few comments on the Authentic Food’s related selling website: http://www.glutenfree-supermarket.com/p-48-rye-flavor-all-natural-ingredients.aspx.  People quarreling whether this could possibly be gluten free.  I used it, I found it not to make me ill and therefore I feel it is less than 20 ppm of gluten.  It is labeled gluten free and for my purposes it seems to be just that. Nuff said by me on that issue. I know folks who will argue on this topic for hours but I am comfortable with the safety of this product and will buy it gain when I run out.

I suggest that if you are missing rye bread this recipe is exactly what the doctor ordered! I was and now I have back my rye bread.  So can you.  Just fork over your cash and get that powder! I suspect you could put it in any basic gf bread recipe and if you want the bread seeded; add them too.  The recipe book is widely available; Amazon, Ebay, book stores; only $4 on Ebay!  gluten free baking classics I use many, many of these recipes and this is definitely a keeper cookbook you will turn to over and over again.  It’s the source for my flaky pie crust, cookie crusts, muffins, cookies, quick breads, wickedly great brownies and very tasty Irish soda bread.  It is fairly inexpensive. If you are going to bake gluten free it is a must own cookbook.  The muffins and brownies are very easy and always turn out great. I can’t recommend it enough.

Time for some gluten free rye toast…had some the other day with my breakfast eggs. Yumm!

Micro Greens Are In My Salad!

Microgreens…what the heck is that?  Well…it is just basically sprouts grown in dirt.  Today for my lunch salad I used some baby kale and the first of my micro greens which I started a couple weeks ago.  As well as some burpless cucumber and cauliflower.  I poured some homemade vinaigrette over it.  It was awesome!

kale and micro greens 024

This post is a revised version of one I posted a few years ago. Being as it is mid winter and thus too cold to plant my peas I am very glad for my microgreen crop which is growing in a small pot. A few years ago I grew them in a tin can that once held bamboo shoots! Just poke a few holes in the bottom and you have the perfect shallow container to grow them.

I got my seed mix from superseeds.com a/k/a Pinetree Seeds of Maine, a family business which has been around since 1979.  I have found it to be a great place for inexpensive, good quality seeds and plants.  I get most of my seeds there. They happen to have a book on sale there about microgreens; see picture in this post.

Anyhow, last winter I bought a packet of these microgreens from Pinetree. I chose the kitchen sink variety; a mixture of many greens and veggies.  I planted them 1/3-1/2 inch deep in seed starter medium.  Watered them well, and waited. In just 7-8 days the first shoots appeared.  I made one for my neighbor Grace who’s house is warmer than mine and hers sprouted in only 4-5 days! I was thrilled with the more than 95% germination rate.  That meant that my pot was packed solidly with tiny shoots.  Maybe a tad too tightly……. I put them in the kitchen window sill.  Watered them almost daily and turned them around every other day. Some grew extra fast; pea shoots that were nearly 2 inches taller than the rest of the plants.

micro greens, orchids, lemon coolers 009

Grace’s plants grow much faster in her warm kitchen and were soon ready to snip but I had a bit of a time getting her to see that they were for eating now! Grace, a retired florist is elderly and must not have heard my initial directions fully as she thought they were for planting out in the garden.  Eventually she took my advice and snipped off the pea shoots which were like 6 inches tall and enjoyed them in salads. 

In less than three weeks I was getting out my kitchen scissors and snipping off a section of my shoots to toss on a just made salad. This boosted the nutritional value of my salad considerably.  Not to mention the interesting flavor of all those tangy sprouts!

Sprinkled on my salad they added lots of phytonutrients, vitamins and minerals.  They are a great flavor booster for your side or main salad.

Phytonutrients are what you say?  Well, one definition, courtesy of Wiki links is this:

The term is generally used to refer to those chemicals that may have biological significance, for example antioxidants, but are not established as essential nutrients.[1] Scientists estimate[citation needed] that there may be as many as 10,000 different phytochemicals having the potential to affect diseases such as cancerstroke or metabolic syndrome.   From: http://en.wikipedia.org/wiki/Phytonutrients.  FYI: Wiki Links uses phytochemicals as a synonym of phytonutrients.

According to medterms.com: Currently, the terms “phytonutrient” and “phytochemical” are being used interchangeably to describe those plant compounds which are thought to have health-protecting qualities.

Anyhow, definitions aside, microgreens are chock full of those healthy phytonutrients as well as crunch and flavor.  A small handful would be perfect in a spring salad or on top of a burger.

So, if you are not much of a gardener but want fresh salad stuff that is cheaper, fresher and healthier for your body than you can buy just about anywhere, get some packets of microgreens and start planting!

If you don’t have any pots lying around most any container with drainage will do.  I used a shallow empty tin can from oriental veggies. Last winter I used a half and half container scrubbed clean and laid on its side with the uppermost side cut off and a few holes punched in the bottom.  I filled it with potting soil.  Do avoid soil mixtures with Miracle Grow in them.  In a few short weeks you will be able to cut and enjoy your own super sprouted greens. Go forth and sprout!

My World Without Wheat

microgreensMicrogreens…what the heck is that?  Well…it is just basically sprouts grown in dirt.  Today for my lunch salad I used some baby kale and the first of my micro greens which I started a couple weeks ago.  As well as some burpless cucumber and cauliflower.  I poured some homemade olive oil vinaigrette over it.  It was awesome!

kale and micro greens 024

This post is a revised version of one I posted last May. Being as it is still too cold to even plant my peas I am very glad for my microgreen crop which is growing in a tin can that once held bamboo shoots! Just poke a few holes in the bottom and you have the perfect shallow container to grow them.

I got my seed mix from superseeds.com a/k/a Pinetree Seeds of Maine, a family business which has been around since 1979.  I have found it to be a great place for…

View original post 589 more words