Darn Good GF Pizza You can Bake at Home

Sometimes you just need a pizza! And there is time to make a crust or grate cheese or any of that. Just a decent gluten free pizza, that’s all I’m asking…but, not that easy unless you are willing to pay about $13-16 for the same or even a smaller size that is half the price for regular wheat flour-based pizza!  Major bummer. But, fret not, Aldi’s to the rescue; they had some by Mama Cozzie in the refrigerator case. I got a pepperoni and mott pizza to test it; $6…not a bad price!  Baked it two days later; put the cold pie directly on hot oven shelf as requested.  In 11-13 minutes it is done; let it cool 2-3 minutes! Otherwise, it is a wicked way to burn your mouth.

aldi pizza box

I should admit I doctored it up with some dried basil and oregano, garlic powder and store grated parmesan cheese. It was so good; thin crust. Great flavor from the pepperoni and the add-ons I sprinkled over it deepen ed the flavor significantly. So I am definitely getting it next time I see – the package says you can freeze it; so maybe buy a few and freeze all but one.

aldi pizza slice

So that’s a big yes to this Mama Cozzie pizza; about 15 inches in diameter unbaked. It says 4 servings but unless they are small kids it is really more like 3. Great quick lunch or worry-free Friday night meal. Add a salad and you are eating healthyish!

Strawberry Baked Alaska Pie

Remember baked Alaska? A fancy frozen dessert from the 70’s? Made out of a round layer of yellow cake topped with a mound of ice cream and then covered with a thick layer of meringue which was briefly baked in the oven to brown the meringue lightly. Well, this is 2018 and we have improved that to the Baked Alaska Pie! I posted a recipe for it in April using a gingersnap crust.  My family was crazy for it.

This time I am using a pre-made graham crust, strawberry ice cream and the traditional meringue topping. It’s a better balance of flavors than the old baked Alaska because the pie crust is ¼ the thickness of the layer of cake in a standard baked Alaska so it is just a touch of crust. The strawberry ice cream pairs with that more traditional graham cracker crust exceptionally well. My guy was pretty impressed with the look of it when I pulled it out of the freezer to serve dessert. I am betting chocolate ice cream would be crazy good too! Next version…

This is remarkably easy to do but you must have patience as there are several steps and a lot of chilling in the freezer. You will be rewarded with an impressive looking dessert although it can get kinda sloppy when you serve it especially if you didn’t chill it again after the meringue browning step. Which I kinda did when I made this pie; it was late and we couldn’t wait; only chilled it 10-13 minutes…..still delish!

Baked Alaska Pie, Strawberry version – serves 6-8

Ingredients

Pre-made gf graham cracker crust

Most of a standard big carton of strawberry ice cream

5 egg whites, room temp.

½ tsp. cream of tartar

Pinch of salt

1/3-1/2 cup granulated sugar

Directions:

Let the ice cream warm a few minutes so it isn’t rock hard and is easily scooped.  Fill the pie crust with the ice cream; spread it to cover evenly and mound it slightly.  Put in freezer for 2 to 3 hours.

Make the meringue: put the room temp egg whites in a mixing bowl, add the salt and the cream of tartar. Beat until it is in soft peaks. Add the sugar a spoonful at a time while it beats to the stiff peak stage. It should be glossy and hold a stiff peak of curled meringue. Get the pie out of the freezer and quickly mound the meringue over the pie making absolute sure you cover every bit of ice cream with lots of meringue which will act as insulation.  Chill for 2-4 hours in freezer. Heat oven to 400 degrees. Slide the frozen pie in for 6-8 minutes until lightly browned, return to freezer for 30-60 minutes. You can serve it immediately but it will be a bit squishy; best to chill it again. Cut into wedges with a sharp knife and dig in. Enjoy!

strawberry pie slice

A bit squishy as I only chilled for 10 minutes after browning; couldn’t wait to enjoy it!


strawberry pie cut

Messy but totally nummy good!

Strawberry Shortcake….the Real Deal!

strawberry shortcake

Strawberry shortcake is a classic and no one turns down a slice of it at at a family gathering. I am not sure where I got the gf shortcake recipe; maybe my old Bette Hagman Gourmet Cookbook. I used to make shortcake a lot when I could still use all purpose flour but my gf biscuit version is pretty tasty. But there is one thing, you gotta make it with the best freaking strawberries you can find.  None of those ultra firm ones with whitish cores that are shipped in from far away.  You need juicy ripe scented red berries that are served over a gluten free short bread.  Yes, my local season is done but it can be done with other than local produce – the riper the better and it will taste great!

My mom always made a gorgeous version of strawberry shortcake. When I was a kid she would serve it as an entire meal.  I have done that and it is kinda cool.  Pre gluten free I generally made a huge oval biscuit with a smaller topping biscuit that I split off and buttered the split area before topping with berries and the smaller biscuit and topped with more ripe berries and a pillow of softly whipped heavy cream.  Oh berry perfection!  Now I bake it in two separate pans but the construction of the final product is the same otherwise. The pictures on construction are a couple of years old but the process is the same; just made some this past weekend; came out perfect.

Mom’s Strawberry Shortcake, GF2.3

Biscuit dough

1 cup white rice flour

2/3 cup potato starch flour

4 tsp. baking powder

1 tsp. baking soda

2 tbsp. sugar

½ tsp. salt
½ tsp. xanthan gum

6 tbsp cold butter

1 medium egg

2/3 cup buttermilk

2-3 tsp. sugar (optional)

2 tsp. soft butter

Other ingredients:

2 quarts ripe strawberries

½ cup sugar

2-3 tbsp. Karo light syrup

1 cup heavy whipping cream

½ tsp. real vanilla

2 tbs. powdered sugar (if you like your cream sweet)

Directions
Heat oven t0 400 degrees. Mix the dry ingredients in a medium mixing bowl. Cut in the cold butter until it is small pebbles.  Add the egg and most of the buttermilk.  Mix with a spoon; add rest of buttermilk if you need it.  It should be a bit sticky, don’t over mix; just until dry is blended in.  Spray the inside of an eight inch cake pan and a 6 inch cake pan with cooking spray.  If you don’t have a small pan just use two 8 inch ones.  Pat ¾ of the dough into the 8 inch; make it about ¾ to 1 inch thick and try to smooth the top and side edges a bit.  Put the rest of the dough in the smaller pan and do the same smoothing.  Make that one ½ to ¾ inch thick.  Optional: take 2-3 tsp. of granulated sugar and sprinkle it over top of them. I think it gives a great finish to the shortcake. Bake them about 20 to 25 min; the smaller one should be done in 20 minutes; a golden light brown. Set on a cooling rack for a few minutes.

While it bakes, get the berries ready.  Hull 2 quarts of fresh ripe berries.  Place them in a glass mixing bowl; chop through them a few strokes with a sharp knife.  Add ½ cup sugar and about 2-3 tbsp. Karo light corn syrup to the berries.  Stir well and refrigerate until the shortcake is baked.  You could do this berry preparation up to two hours in advance.  No more or they will start to disintegrate.

Place the fairly hot bigger layer on a large platter, one big enough to hold the shortbread and still have room for a generous overflow of strawberries. Butter lightly if you wish.  Top with several big spoonfuls of berries.  Don’t worry if there is juice in the berry bowl; there should be; melted down sugar and Karo syrup with berry juice will give you a delish berry liquid.  Top with the second smaller biscuit and then more berries.   Cut into chunks.  Top with freshly whipped cream; beat a cup of heavy whipping cream until it is softly whipped.  Add ½ tsp. vanilla and ¼ cup sugar if you wish it sweet.  Be sure to pour the berry juice over your shortcake; it soaks in and adds to the strawberry experience.

My dad liked to pour unbeaten cream over his shortcake. My mom usually set out the whipped cream, a jug of cream and some whole milk so you could chose how to finish off your personal shortcake.  I might add that I grew up on a farm so this was raw milk from grass pastured cows; fantastic cream equaling a freaking perfect shortcake topper.  We also grew our own berries; no chemical sprayed on them ever.’

Notes: Karo is sugar syrup; I know, I know its not very healthy but it is only a bit and it improves the berries to have some. Just do it. And while I am being bossy: please use real whipped cream. So easy to make and if you are going to the trouble of a scratch shortcake you need the real deal topping. It is hugely worth it.  I actually stored some whipped cream in the fridge overnight and it was still decent the next day although the texture is a bit softer than it originally was. Strawberry shortcake is a decadent treat but honestly no more so than a sundae you get at an ice cream place. SO go ahead and indulge. Enjoy!

shortcake, one serving

If there is any left over it makes a great breakfast the next morning!

Originally published in June 2014. Minor text changes this time.

Rhubarb Crisp For Dessert…or Breakfast.

It’s still rhubarb season, at least at my house and garden! The last three desserts I made were this recipe. It was super easy and super yummy. I swear it tasted like there were cherries in there! My brain can hardly believe I never made rhubarb crisp; make apple crisp all the time in the fall and winter…so glad I tried it this spring. Hence, my sharing of this tasty quick dessert with you.  Makes a yummy breakfast too!

It keeps about 3 days depending on humidity. I have a glass baking dish with a plastic lid for keeping things fresh; works great.

Notes; any gf flour blend will do, I use King Arthur blend.  You can use sliced or slivered almonds. Or no nuts! Tried it with both nuts and I prefer walnuts.  I think the walnuts add a hint of cherry flavor to the result. But great with no nuts too…

Rhubarb Crisp

Ingredients

Fruit layer

4-5 cups rhubarb cut into ½ inch bits (I do 5 cups)

¾ cup sugar (could use up to a cup if you like it sweeter)

¼ cup tapioca starch (or cornstarch if you chose)

3/4 tsp. cinnamon

Topping

½ cup gf flour blend

1 cup gf oats (not quick ones!)

½ cup brown sugar

½ tsp. cinnamon

¼ cup brown sugar, not packed

¼ cup butter, cold

½ cup walnuts (optional)

DIRECTIONS:

Heat oven to 350 degrees. Spray inside of 8×12 glass baking dish; any dish roughly that size will do. In a large mixing bowl dump all the dry ingredients; sugar, starch and cinnamon. Mix a bit; add rhubarb, mix well. Dump into baking dish.

Dump all dry ingredients left except nuts into bowl of stand mixer, blend briefly. Add butter which you have cut up into about 12 or more tiny bits; a few cuts with a knife do it quick. Blend a minute or so until you can’t see the butter. Add nuts. Pour over the rhubarb. Bake on middle shelf for 35 to 40 minutes; the thicker the layer of fruit is the longer it takes; you want it bubbling and the top lightly browned. Let cool at least 15 or 20 minutes.  Great with vanilla ice cream or plain Greek yogurt on top. Store with a tight lid on top. Enjoy! rhubarb crisp in dish

Chocolate Chip Banana Nut Muffins

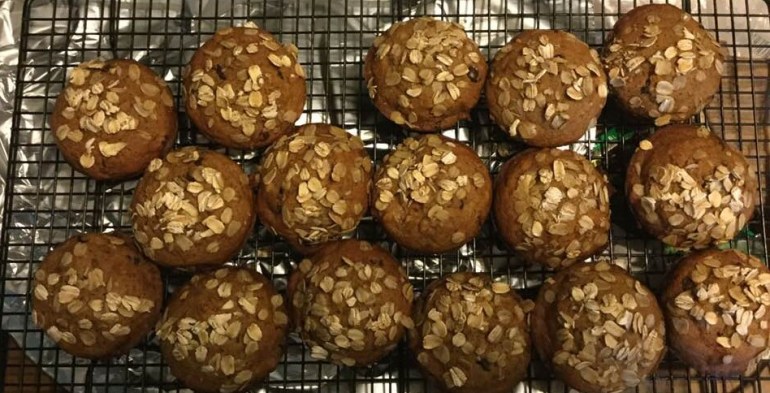
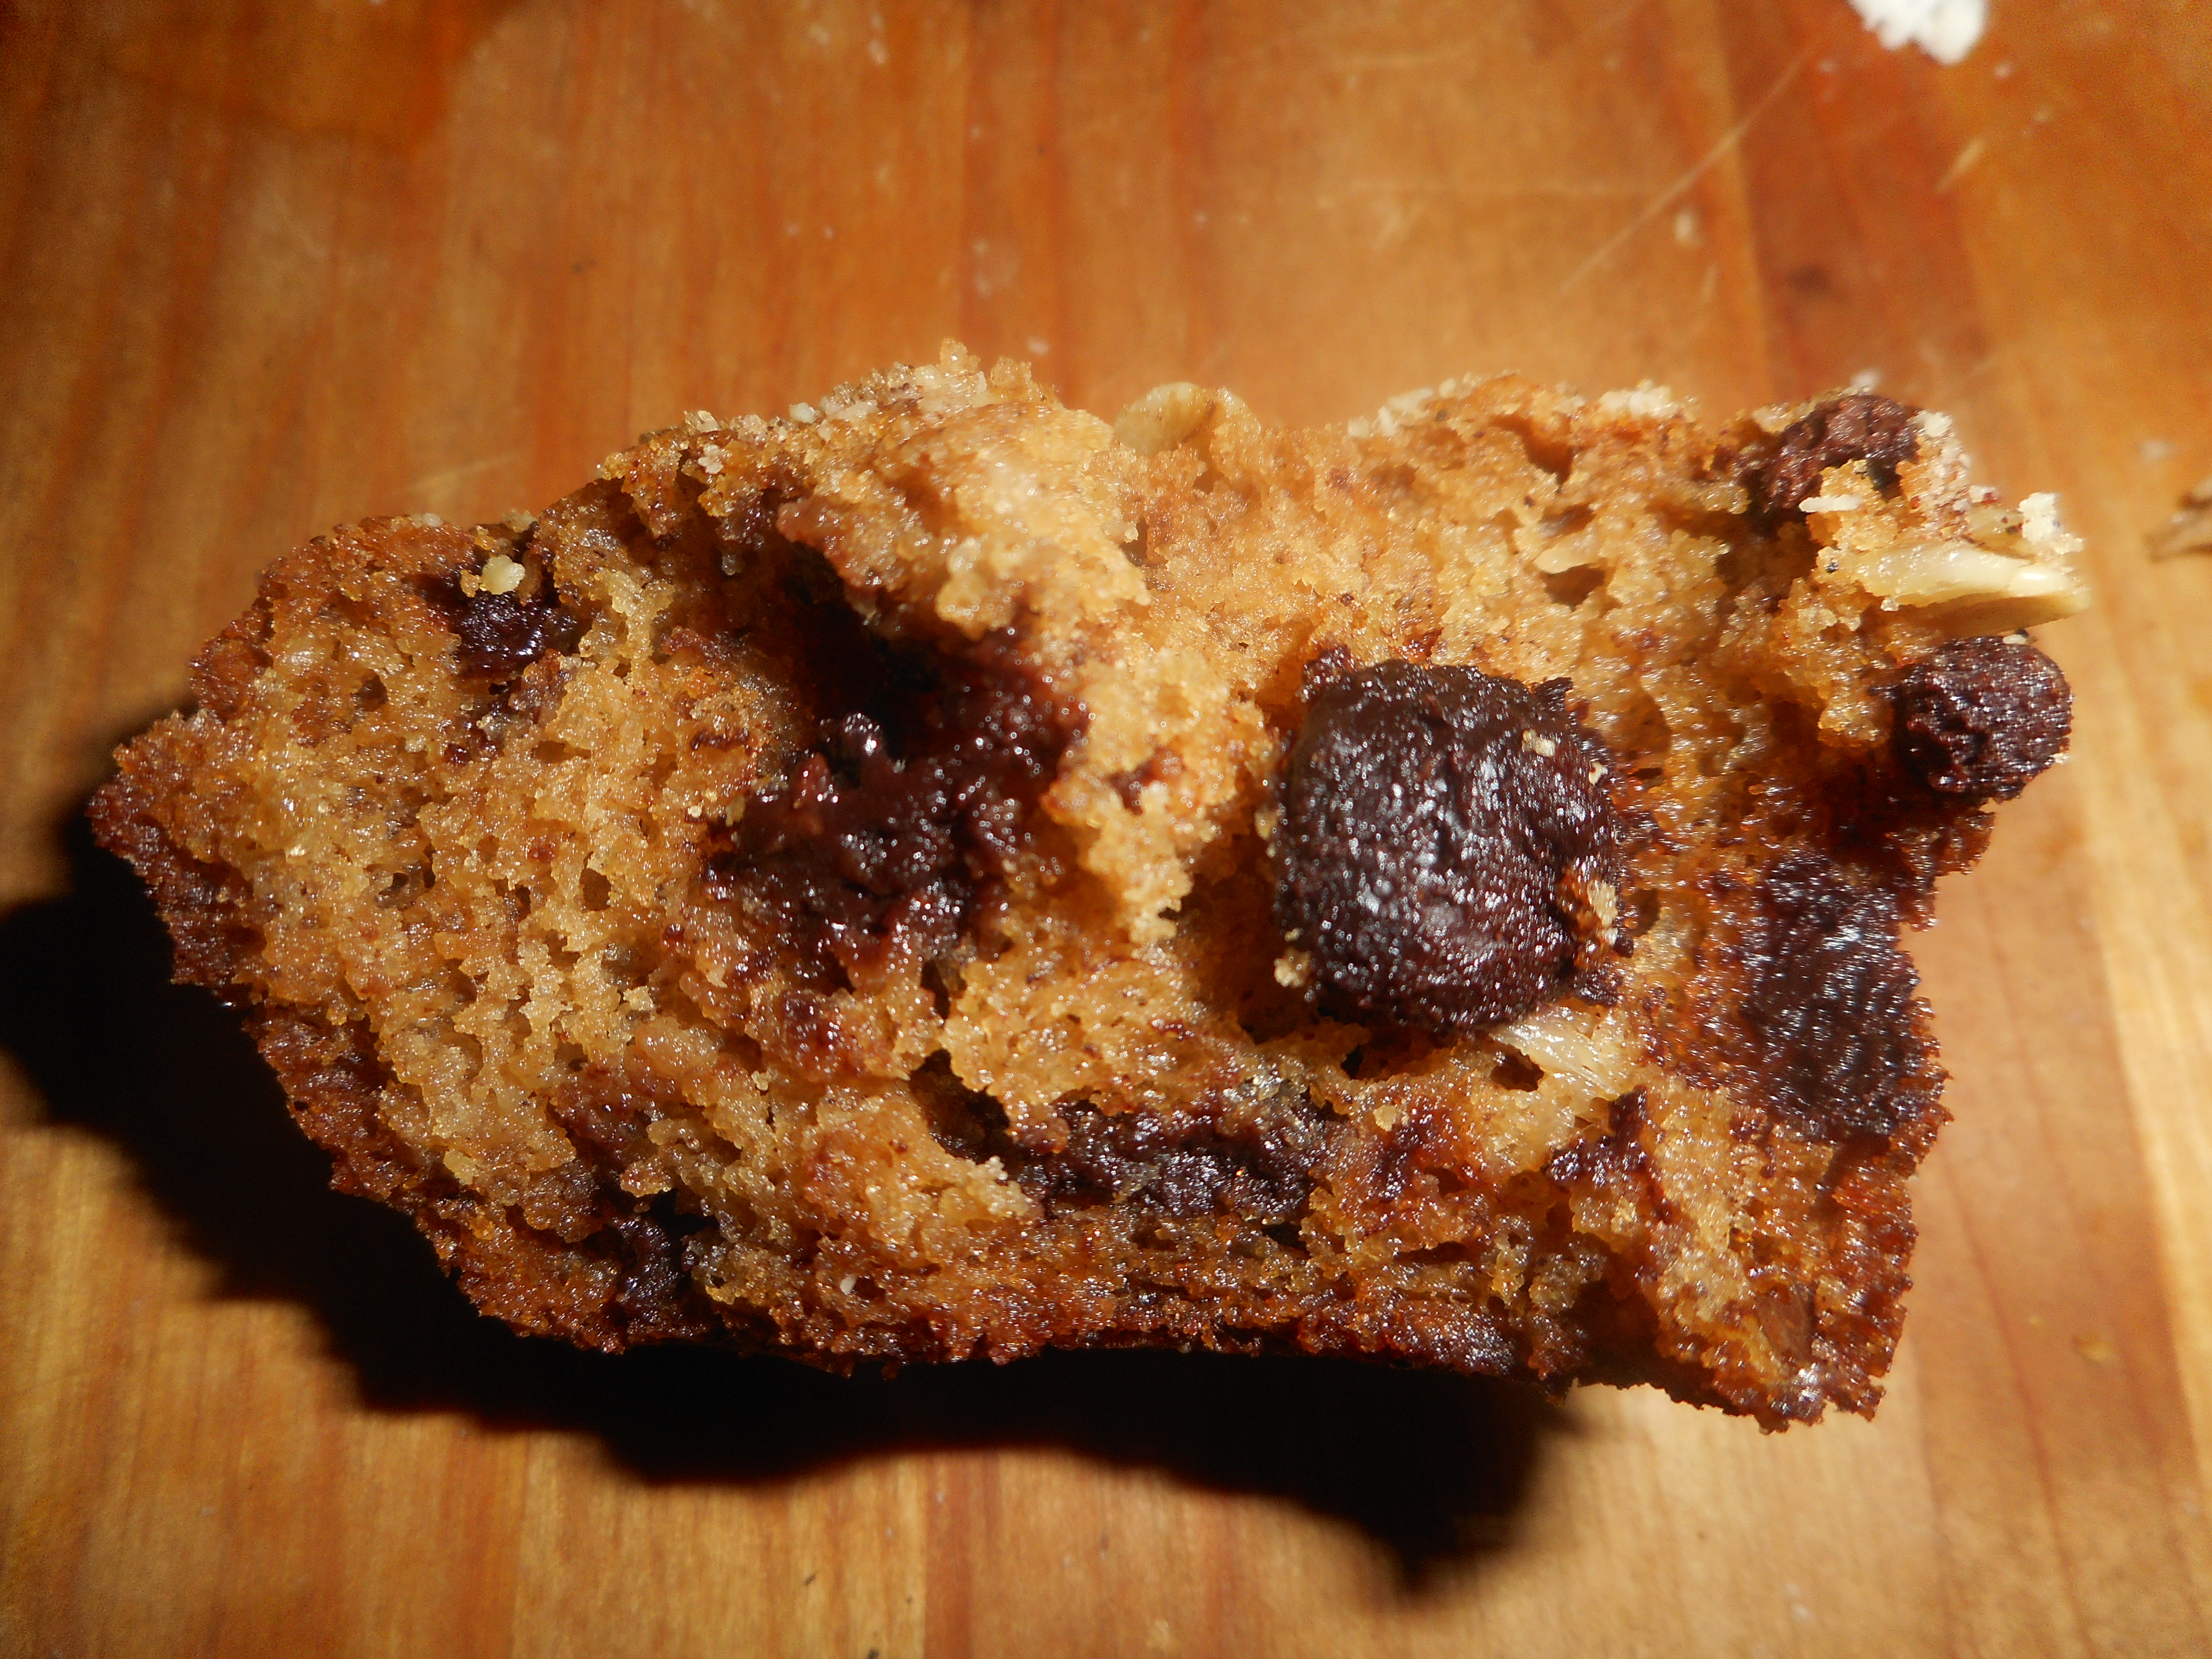
I love trying new versions of things; a few years ago I cam up with this magical idea: I combined my chocolate chip muffins with my classic banana nut muffins.  Muffin heaven is here and I baked this afternoon so there are a couple in my muffin jar for snacks!  The rest go in the freezer to stay fresh for a sweet chocolatety banana muffin treat.

goodbyes and choco chip banana nut muffins 013

goodbyes and choco chip banana nut muffins 012

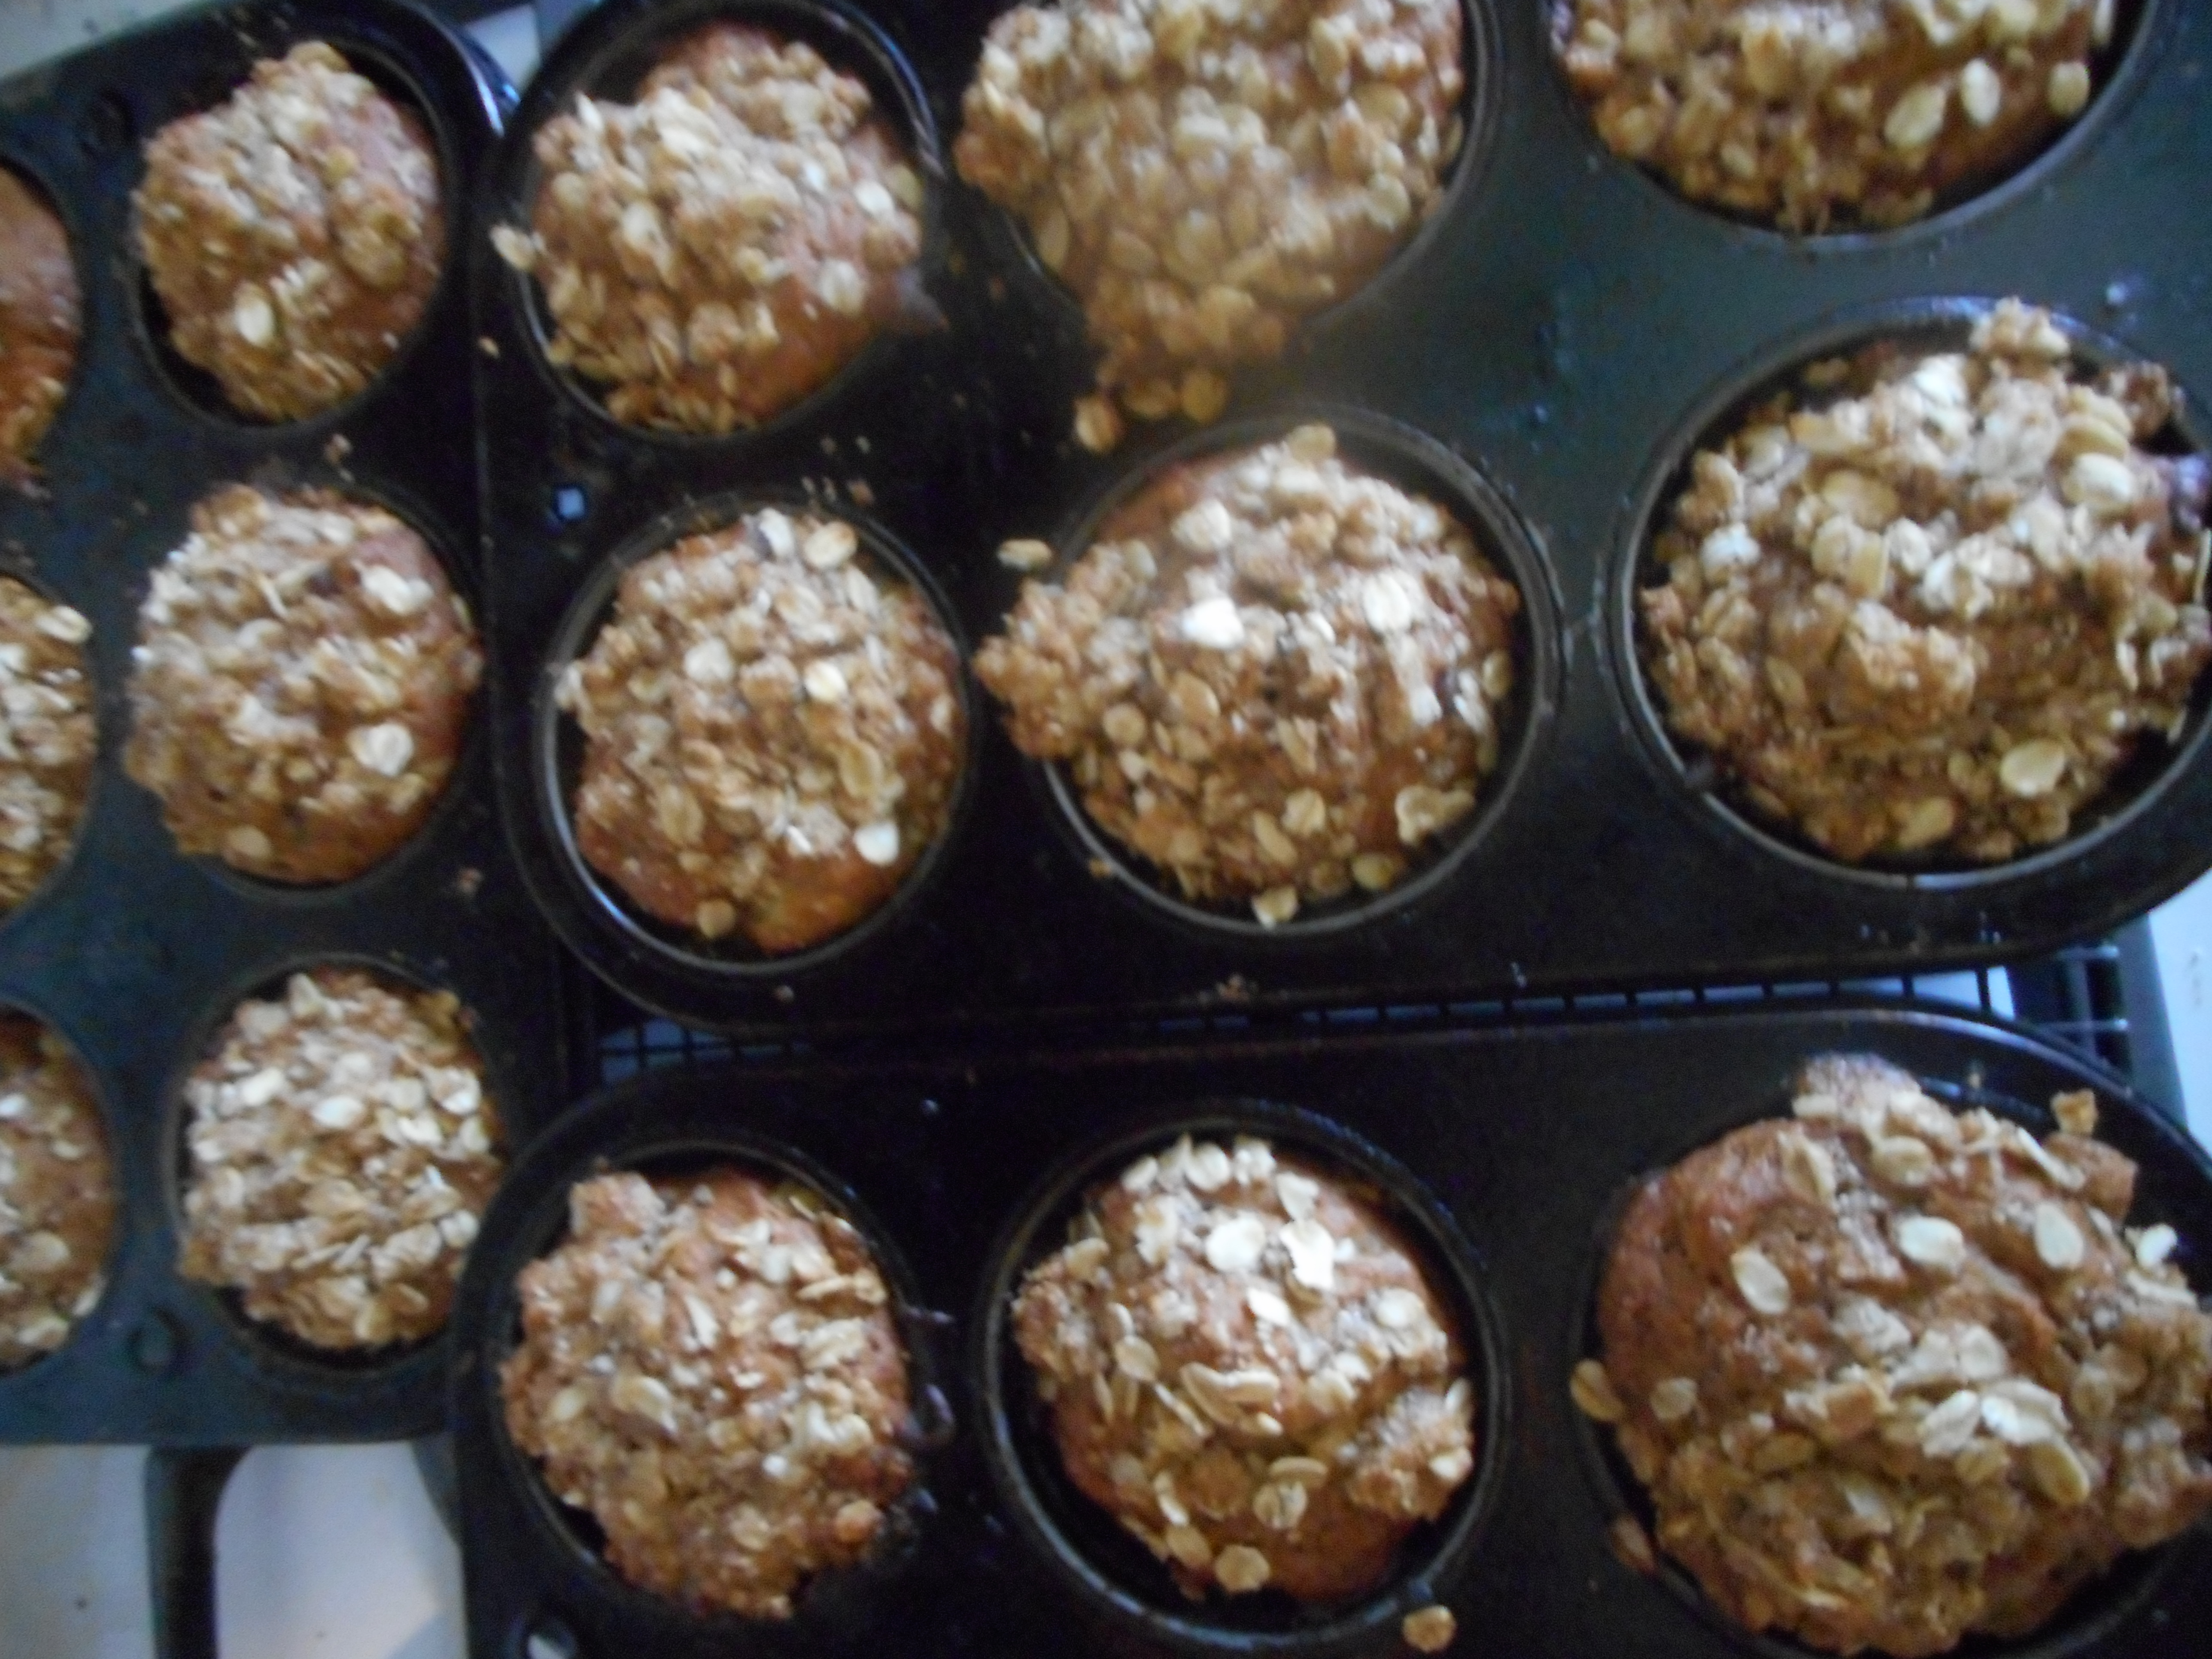
They are perfect in texture, moisture and totally yummy. I put a streusel topping on them but a good measure of it fell off; do try to press it in firmly, I guess I wasn’t firm enough!  They are good even without the streusel topping if you like less on top, could instead sprinkle with chunky sugar for a nice finished appearance.  And if you only have one kind of chocolate chips I am sure they will still be fantastic. I just loved the contrast of big dark chips with small semi-sweet ones.

goodbyes and choco chip banana nut muffins 006goodbyes and choco chip banana nut muffins 007goodbyes and choco chip banana nut muffins 008goodbyes and choco chip banana nut muffins 010goodbyes and choco chip banana nut muffins 011

Chocolate Chip Banana Nut Muffins

2 cups brown rice flour mix (see below)

2/3 c granulated sugar or coconut palm sugar

1 tbsp. baking powder

1 tsp. baking soda

¾ tsp xanthan gum

¼ tsp salt

1 tsp cinnamon

3/4 c packed ripe mashed banana

½ c coarsely chopped walnuts

¼ cup mini chocolate chips

¼ cup dark chocolate chips

2 lg eggs beaten

½ c milk plus 2 tbsp extra if you use coconut sugar, 1 or 2 percent

½ c canola oil

————————————-

Topping

½ cup oats

¼ cup brown sugar

2 tbsp. almond flour

½ tsp. cinnamon

2 tbsp. butter

Mix topping dry ingredients, rub butter in with your fingertips.

Or just use 1/3-1/2 cup gf oats sprinkled on top; this lower calorie topping is my go to these days.


——————————–

Muffin directions:

Heat oven to 350 degrees, placing the rack in middle of oven.  Spray muffin pans with cooking spray.  One batch makes about 16 or 17 muffins.

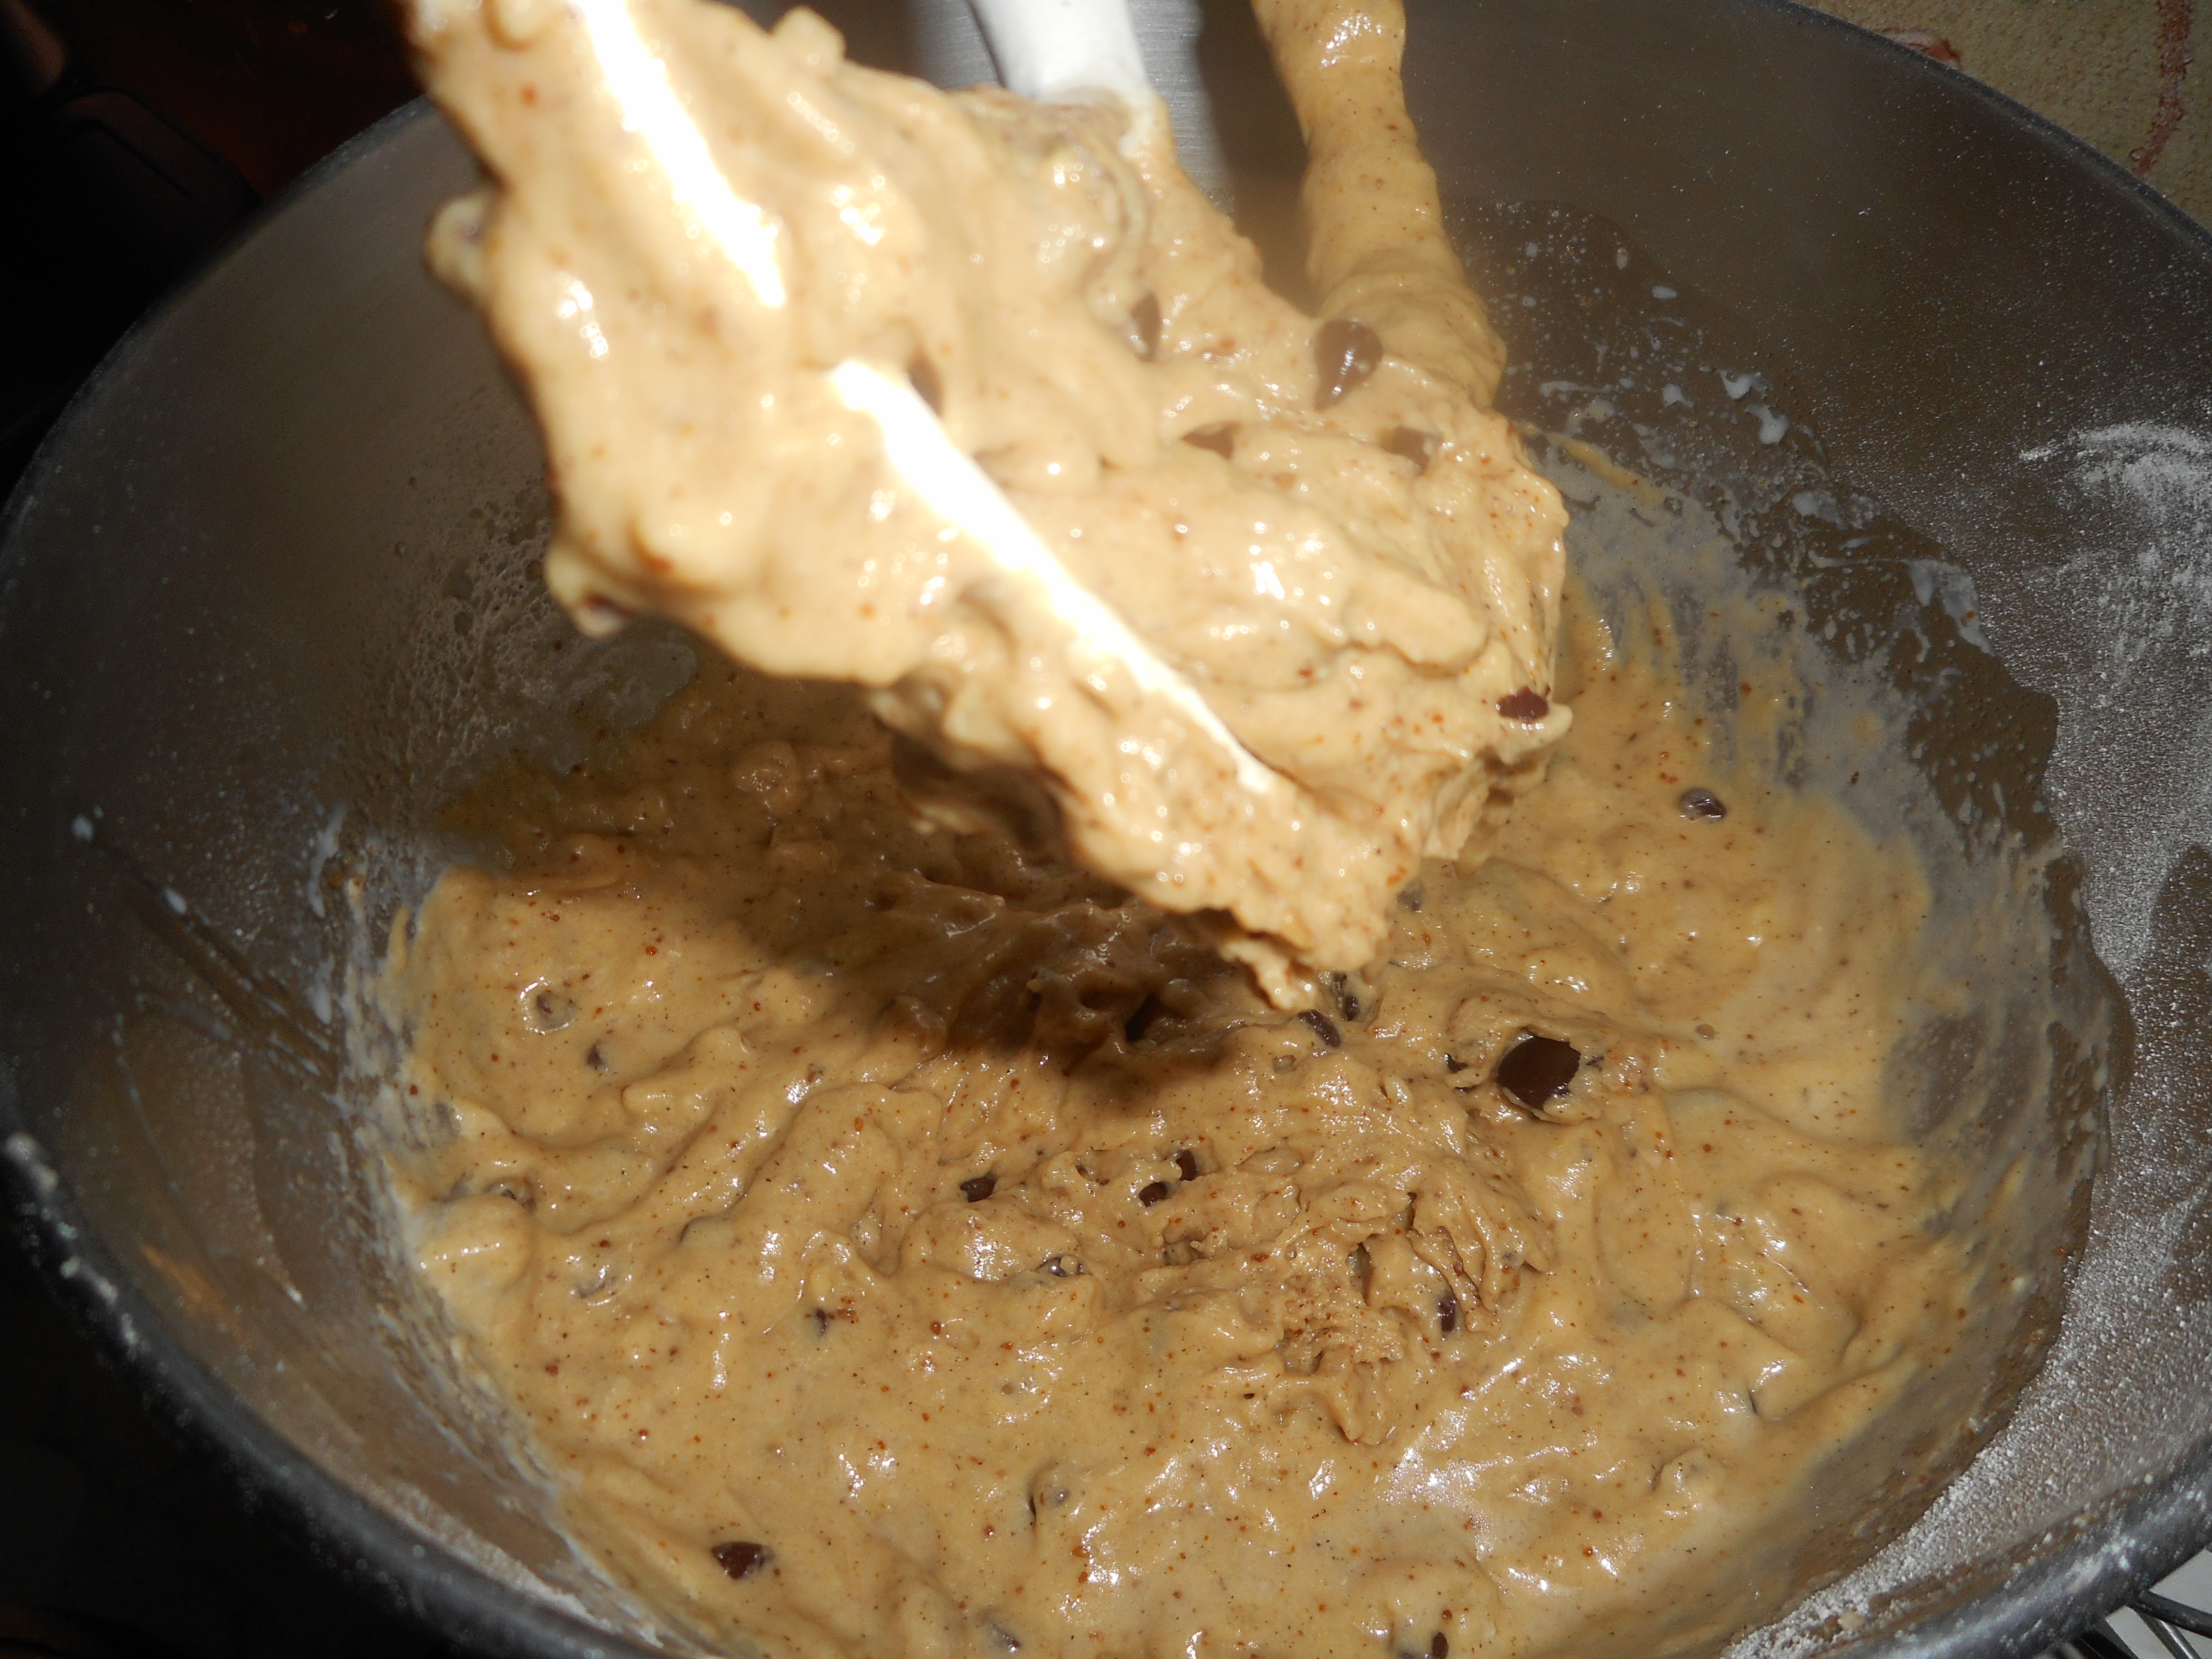
Mix all dry ingredients in bowl of stand mixer or big bowl.

Add bananas and walnuts; stir to coat them with dry mix, then add the chocolate and stir briefly.

Combine milk and oil.  Add liquids and the two eggs to bowl. Stir on low until well blended.

Fill muffin pans 2/3 full.  Sprinkle with topping and press in carefully if you do the streusal. Bake 20-24 min until golden brown. Do not overbake or they get dry.  Remove from oven and let cool 2-3 min before gently turning them out from the pans to cool on a rack. I use a butter knife to release them by running it around the edge once before tipping them out. They freeze well for up to 3 weeks.  They keep in my ceramic muffin/cookie jar for a few days. muffins 001

Brown Rice Flour Mix *same as King Arthur’s GF flour blend
2 c brown rice flour

2/3 c potato starch

1/3 c tapioca flour

Note: This muffin recipe is my version of the muffins from Annalise Roberts’s wonderful cookbook: Gluten Free Baking Classics.

Post originally put up by me in 2015, minor changes to text.