Banana Cake, GF But Delish!

There are desserts I really miss.  Leading a busy life it is hard to find time to bake. Not made cake in many months but my taste buds were craving old school banana cake. Of course it has to be gluten free for me. yet it has to taste yummy for all of us. My grandson helped dump in ingredients and he smashed the bananas up with a fork the first time I made this recipe; I used dead ripe bananas I had frozen a month ago and really wanted to put them to good use. Gotta say, this was a wonderful choice! I let them thaw partially before Aiden went to town with his fork. This recipe is simple and I subbed in my favorite all purpose gf flour from King Arthur and it worked great. My family loved the results!

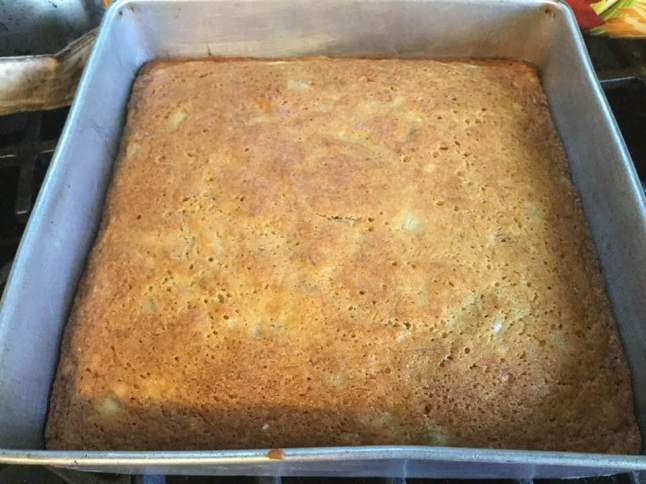
I made the cream cheese icing in the original busy bee  recipe, but I doubled the vanilla (the amount below is the doubled amount) as I like it with more of that delicious stuff!  It was a big hit and really finishes off the flavor of the cake. This is made in a nine inch square cake pan. I did put my cake strips around it as it was browning unevenly. They helped to even the baking out.The bake temp is 350 degrees for 35 minutes. If you have no eggs you could do the flax eggs (2 Tbsp. ground flaxseed and 5 Tbsp. water; mix and let sit 5 minutes) or do 1/3 cup unsweetened applesauce. In these pricy egg days these two alternatives become very attractive!

Making this cake early tomorrow morning so we can enjoy this classic cake later after work is done.

banana cake in pan

Ingredients:

2 cups GF flour (I used KA Basic GF flour)

1 tsp. baking soda

1/8 tsp sea salt

3/4 tsp. xanthan gum

1/2 cup canola oil

3/4 cup sugar

1/4 cup brown sugar packed

2 lg eggs

3 ripe bananas

1/2 tsp. vanilla


Frosting:

8 ounces cream cheese at room temp (I used light cream cheese; really like it best for icings.)

1/4 cup butter softened to room temp

1 cup confectioner’s sugar

1 tsp. vanilla

banana cake

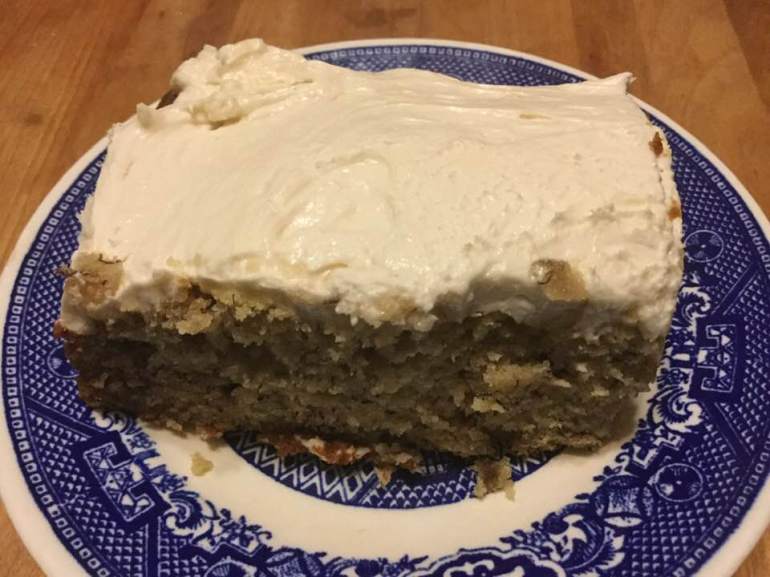
A big hunk of banana cake.

See recipe at theprettybee.com for directions. If you love banana cake and have to be gf; this recipe is simple and delish! Enjoy.

Original post Feb 2019 updated with minor changes and clearer information.

Moroccan Chicken and Chickpea Tangine

I was craving chicken and chickpeas. My older sister used to make a casserole of them, but I have lost the recipe. And worse, I cannot remember the seasoning of it. So, I decided to make something totally different than that special memory. This has a lot of healthy eating habits in it; chickpeas, garlic, turmeric, fresh garlic and fresh spinach. It is delicious over steamed brown rice; double starch; gives a lot of protein and healthy things. Frankly a healthy powerhouse of stuff so no guilt and you will feel better for it! Plus it is very filling. I love a tangine; it is basically a Moroccan casserole. I have 2-3 chicken ones; this is definitely a keeper; first time enjoying it tonight. Couldn’t wait to share it and didn’t want to forget this new recipe’s proportions.

I combined bits of several recipes together to make it with what ingredients I had and what I wanted in the flavor profile. You could change out the carrots for green beans or some other veggie like cauliflower. Swap the spinach for kale or just leave out the fresh spinach if you wish. Serve over the rice, on mashed potatoes or by itself.

It is rather brothy; I kinda wish I had plated it differently; in a shallow wide bowl; that broth is amazingly flavorful. I used a can of chick peas, you can cook your own if you wish; I didn’t have time for that. I used chicken thigh, boneless. You could use breast meat if you prefer. Go with what you like. Enjoy

Ingredients

4 Boneless chicken thighs

2-3 Tbsp sunflower oil

1 large onion, halved, sliced and halve the slices

2 large garlic cloves minced

3 thin rounds of fresh ginger minced

1/2 cup coarsely chopped carrots (I used up some baby carrots but I would suggest one carrot diced)

1 tsp. oregano

1 tsp. tumerick

1 tsp. paprika

1 tsp. cumin

1 tsp. sea salt

1 14 oz can diced tomatoes

1 1/4 c chicken broth; heated

1 can chickpeas, drained

4-5 cups fresh spinach (be sure to wash it)

Directions: Dice the chicken; cut into inch wide strips and then across to make 1 inch squares. Heat oil in large skillet over medium heat. Add half the chicken; brown on both sides. Remove to a plate; do second half of chicken; you may need to add another tbsp. oil. Remove browned chicken to plate. Add onion and cook 2 minutes, add garlic cook another 2 minutes. Add ginger, stir, add all dry spices, stir well and cook another minute. Add the tomatoes, salt and stir. Add broth. Cook 15 minutes, Add chickpeas, stir well. top with the fresh spinach/ Be sure to wash the spinach; even if it says triple washed it still could have bacteria or grit in it. Let it all cook a minute and then start folding in the spinach, so it cooks quickly. taste and adjust the salt. Serve over steamed brown rice. Enjoy!

Shoo Fly Pie (Shoe Fly Pie at my house!)

This sweet pie is a Pennsylvania Dutch tradition. It is quick to go together, needs neither refrigeration, nor a long chilling down before consuming it, pleases most everyone and best of all it can be made in any season; no fruit needed.  It wasn’t too hard to change from my old recipe to a gluten free version.  I recommend it for celiacs who miss that old time flavor of shoe fly pie.  Note: some folk say shoo fly pie but my recipe used the spelling you see in this post.  I believe either is appropriate.

I know folks who shy away from gluten free baking thinking it is too complicated.  Well, a couple years ago I featured pies and this is the easiest pie around so I dedicate this to a few friends who have been too scared to bake gf.  You can do this one! If you want, buy a ready made uncooked crust but I swear that with a stand mixer this is the easiest and best gf crust around.

This shoe fly pie recipe is a blending of the filling I have used for years, (my sister Margie gave me the recipe a long time ago) and the pie crust and crumb recipes from Annalise Robert’s cookbook, Gluten-Free Baking Classics.  Her cookbook is a fabulous resource and I can’t recommend it enough to anyone trying to bake gluten free for a family member.

My shoe fly pie is considered a “wet bottom” pie; not too crumbish.  If you want it drier use ½ cup molasses and ½ cup water.  I love it soft and moist so my version always is a wet bottom shoe fly pie.

Angie’s Shoe Fly Pie

Crust:

1 c plus 2 tbsp brown rice flour mix (at bottom of recipe)

2 tbsp sweet rice flour

1 Tbps. granulated sugar

½ tsp xanthan gum

¼ tsp salt

6 Tbps. cold butter cut into 6 chunks

1 lg egg

2 tsp fresh orange or lemon juice

Spray 9 inch metal pie pan with cooking spray.

Mix dry ingredients in bowl of stand electric mixer.  Add butter and mix until crumbly and resembling coarse meal.  Add egg and juice.  Mix until it comes together into big chunks.  Shape into a ball with your hands. Put it on a crust sized piece of parchment or wax paper (14 x 14 inches more or less), flatten the crust ball some; put on top of it another piece of parchment or wax paper and chill it all in your fridge 15-20 minutes. Make the crumb topping while it chills.

Crumb topping

Put all four ingredients in the same mixing bowl you made the bottom crust in and mix well with mixer paddle until crumbs form.  You will only use 1 ½ cups of the crumbs; put it in a jar and store it in the fridge until your next pie; it keeps well for several weeks.

¾ c brown rice flour mix

½ c granulated sugar

½ tsp xanthan gum

1/3 c cold butter cut into six chunks

Next, roll out pie crust between the two sheets of parchment or wax paper; try to get the thickness even, no thick middle! Peel off one side of paper and place in pie pan, centered.  Remove other slice of wax paper.  Crimp edges all around.  Then make filling and pour half into the crust, careful not to splash it out.

Filling:

2/3 cup molasses, I used Grandma’s

¾ cup boiling water

½ tsp. baking soda

1/4 tsp. cinnamon

Mix the ingredients in a medium mixing bowl with a spoon until blended. It will foam up a bit as the baking soda mixes with the molasses! Gently pour half of the molasses mixture into the raw pie shell.

Then pour half the crumb topping (1 1/4 to 1½ cup total) evenly over this mixture.  Add the rest of the molasses liquid and sprinkle the rest of the crumbs on top.

Bake in a preheated 350 degree oven for 30-35 minutes Cool at least ½-1 hour before serving or let cool to room temperature.

Note: I used to bake pies in my bottom heat pizza oven and it gaveme a great browned crust. No longer have that oven so I put the wire rack as close to the bottom as possible and it really helps the bottom of my pie to brown.  One other option: if your oven isn’t bottom heat you might want to pre-bake a gf crust 10 minutes before filling.

Brown Rice Flour Mix (King Arthur’s basic gf blend)
2 c brown rice flour

2/3 c potato starch

1/3 c tapioca flour

** This blog post first appeared in March of 2016, revised slightly in 2023 to clarify the directions.  Enjoy!

Winter Fun: Making Cheese in my IP!

So I got this cookbook last year from my dear friend Paula who had edited it and thought it was right up my alley. I have made about 4 cheeses from it and it is sure interesting; title is “Instant Pot Cheese” by Claudia Llucero. This past weekend I made the queso blanco on the cover of it.

The Instant Pot is used for precise heating of milk and makes the process easier and more approachable. You also should get an instant read thermometer and perhaps a smaller IP metal liner; I have a 6 quart pot and I got a 3 qt liner which perches on my metal trivet in a cup of water for heating up to a half gallon of milk.

To make queso blanco it takes a half gal of whole milk, 1/4 cup cider vinegar and a bit of cheese salt; a finely textured salt that I bought about a pound which will probably last me forever. It was fun although I first used a thick rubber trivet which raised my liner pot and I couldn’t get it open for 4 hours. When I finally got it open, I dumped out the milky water in the bottom; rinsed the liner and used my skinny wire trivet which worked perfectly. Less than an hour later I had placed the cheese curds in a plastic mold and it was ready for consumption. So delicious and so fresh! Great on crackers, excellent in Mexican cooking and tasty in Brazilian tapioca rolls.

I’ve made a few different cheeses and hope to do some mozzarella sometime soon. They tell you what kind of milk to use for each recipe; stay away from ultra pasteurized and homogenized milk… apparently it doesn’t do cheese. If you are into, do it yourself and you like cheese and you have an IP this cookbook is perfect for you!

Here’s a shot of my cheese and crackers Saturday night; my Friday night snapshot didn’t pan out so it is rathe champed on!