There is this lovely Italian dessert that I haven’t had in a decade, it was my favorite back when I didn’t have to worry about gluten. Sure do miss it…. Well, while we were on vacation in Delaware we discovered Schar gf ladyfingers in a grocery store. Immediately my brain thought tiramisu! So, we snagged that package and brought it back to my kitchen.
I understand there are various ways to make tiramisu; this is the way I did mine; with fresh real whipped cream, some folks use beaten egg whites. Maybe next time. Just know that my tiramisu was just so creamy and rich…. It was addictive in all ways possible. You could make your own ladyfingers but it was easier to use store made. ones.
Notes: I used a single use coffee bag and about 2/3 cup boiling water; let it stand 10 minutes and it was ½ cup which is what I needed. Easy! Or make some expresso and go full Italian! And one last important tip: do not warmup the mascarpone cheese at all before using; it will turn to butter in the blink of an eye! Trust me!

GF Tiramisu; makes 9 medium sized servings
Ingredients
1 package gf ladyfingers
2 egg yolks
3 Tbsp. sugar
2 Tbsp marsala for the egg mixture
1 cup mascarpone cheese
———–
¾ cup COLD heavy whipping cream
½ tsp. vanilla
————
½ cup strong coffee cooled to room temp- could use up to 2/3 of a cup should be cold
1 Tbsp. marsala for the coffee mixture
1 Tbsp cocoa powder
Instructions: Make the coffee and let it cool. Put the sugar and egg yolks in the top of a double boiler. Do not let the water in the bottom half reach the top pan. Stir constantly with a whisk until the sugar is totally dissolved in the egg yolk 4-5 minutes on low heat. It should be a pale yellow, silky smooth when done Add the marsala and whisk. Remove from heat, cool to room temperature.
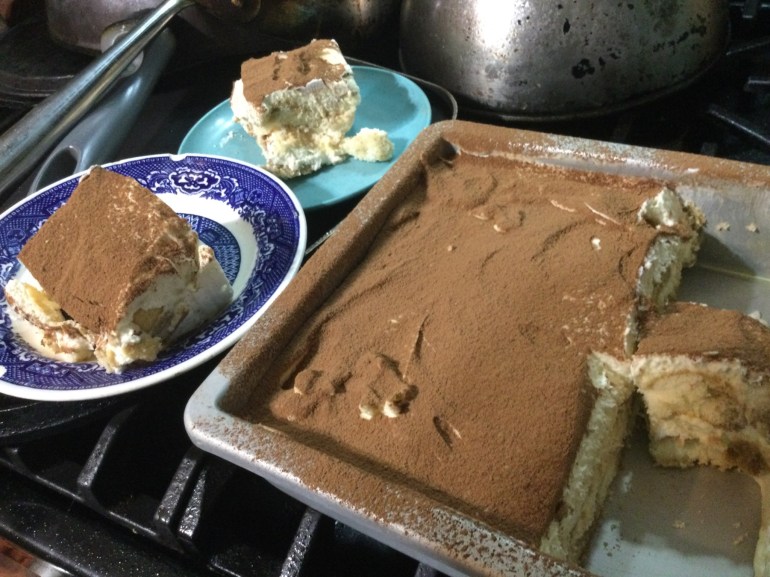
When the egg mixture and the coffee are both cooled you can put it together. I used a 7 inch square pan; I think an 8 inch will work too; will be thinner. Spray the pan lightly with cooking spray. Put the mascarpone cheese in a large bowl, beat briefly to make it smooth. Add the whipping cream and beat until stiff peaks form; 3-4 minutes. Add the vanilla and mix in briefly. Fold in the egg/sugar mixture until smooth; do not beat any more than necessary
Put the coffee in a low wide bowl; mix in the marsala. Doing one ladyfinger at a time dunk in the coffee briefly and lay in the pan to cover the bottom. Pour half the pudding mixture on top of the ladyfingers and smooth the top. Repeat the ladyfinger layer and top with the rest of the pudding. Put in fridge for 6-10 hours before serving. Sift cocoa on top with a sieve before cutting and serving. Enjoy!