Blueberry Tartlets, Love Em!

Blueberries rule my universe right now; still fairly plentiful and still sweet.  The flavor can’t be beat. My guy loves them and I have to agree; they are the tastiest and healthiest fruit.  I am in love with these tartlets. The crust to fruit ratio is perfect and I made them with a minimum of sugar as these ripe berries are already quite sweet. I got my fruit at Aldi’s for a great price; every grocery store has blueberries by the pint. They are very good for your body; full of fiber, low in sugar, and full of other nutrients. They are especially you have blood sugar issues.  See http://www.medicalnewstoday.com/articles/287710.php for more information.

Tips: Try not to bake in a hot kitchen; it makes it hard to roll out dough or even make the crumb mix. If it gets above 76 degrees you should turn on the air to keep your crust from acting weird.  I had to put mine in the freezer for a bit to help it hold the desired shape.

Don’t eat these tartlets fresh from the oven; they should be cooled to just warm or room temperature or even a bit chilled. They were perfect, just like a big pie only tiny each is one individual dessert.  You could certainly serve them with vanilla ice cream. We had them that way the other night and that was a treat indeed.

My apologies: these pictures were taken in a hurry; hot day and there was no spare time so they are looking rustic and crumbs dot the baking pan but frankly rustic tartlets are lovely. Be as tidy as fits your needs.


Angie’s GF Blueberry Crumb Tartlets: makes 6

Crust:

1 c plus 2 tbsp brown rice flour mix (at bottom of recipe)

2 Tbsp. sweet rice flour

1 Tbsp. granulated sugar

½ tsp xanthan gum

¼ tsp salt

6 Tbsp. cold butter cut into 6 chunks

1 large egg

2 tsp fresh orange or lemon juice

You will need 6 flat bottom 4 inch tartlet pans if you make them all at once. My pans are 4 in an attached group. I baked 4 one day and 2 the next day

Mix dry ingredients in bowl of stand electric mixer.  Add butter and mix until crumbly and resembling coarse meal.  Add egg and juice.  Mix until it comes together into big chunks.  Shape into a ball with your hands. Put it on a crust sized piece of wax paper (14 x 14 inches more or less), flatten the crust ball some; put on top of it another piece of wax paper and chill it all in your fridge 15-20 minutes while you prepare the filling.

Filling:

2 1/3 cups fresh blueberries, place in medium bowl

Mix with:

6 Tbsp. sugar

2 Tbsp. quick tapioca

¼ tsp. cinnamon

Let stand while you prepare the crumb crust. This is important so the tapioca can soften and absorb some juices before baking. If you like things tart add a tsp or two of fresh lemon juice to the berries.

Tartlet construction: Break dough into a large ball and a small one. Roll out big ball in a pie bag or between the two sheets of wax paper, try to get the thickness even and somewhat thin, no thick middle! Peel off one side of paper and place in 4 set tartlet pan, centered.  Remove other slice of wax paper.  Cut into 4 pieces with a sharp knife. Mold the crust to fill each tartlet shape with no holes or thin spots. Do the same with the smaller ball and create 2 more tartlet crusts. If you only have one pan you can refrigerate the dough and make the two other tartlets later.  Fill each tartlet with fruit mixture to the top of the dough… after you have the crumb topping ready to go.

Crumb topping

Put all four ingredients in the same mixing bowl you made the bottom crust in and mix well with mixer paddle until crumbs form. If you let them go extra long you get big fat crumbs if you want that look.

¾ c brown rice flour mix

½ c sugar

½ tsp xanthan gum

1/3 c cold butter cut into six chunks

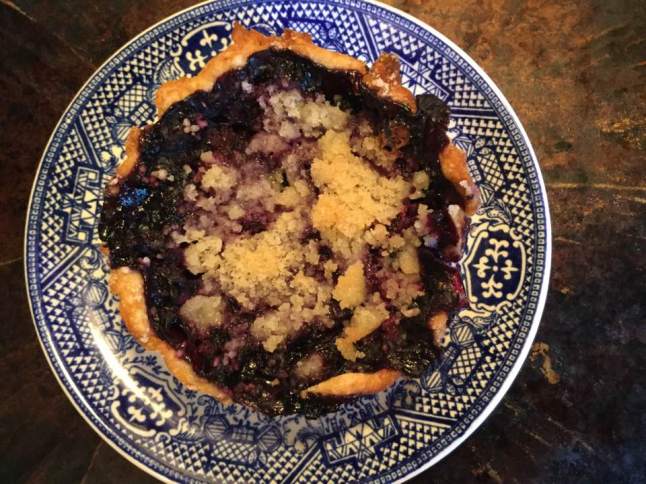
Sprinkle the top of each tartlet with crumb mix; use as much as you like.  I didn’t measure; just sprinkled until the fruit was barely visible through the crumbs. Up to your personal taste… It sinks partially into the fruit mixture and adds lots of sweetness and eye appeal.

Bake in a preheated 375 degree oven for 30-32 minutes until bubbly and the crumb crust is light brown.  Cool at least a half hour before serving at room temperature.  I think it is best served the same day you make it, or no more then 12 hours after baking for optimal flavor.  The crumbs will get soggy if too much time passes. Mine was still very good the next day; just not as great as when really fresh.
blueberry tartlet 2017

Note: if you find your bottom crust is not browning enough bake it empty at 375 degrees for 5-8 minutes before filling it with the fruit.  I have a bottom heat pizza style oven which gives me perfect pie crust so I don’t ever have pale pie crust. This is a big benefit of having this type of oven; it is a two oven range with a full sized lower oven.

Brown Rice Flour Mix (Same as King Arthur GF All purpose blend)
2 c brown rice flour

2/3 c potato starch – Not potato flour

1/3 c tapioca flour

Note: the crust and crumb recipe are out of Annalise Roberts cookbook, Gluten Free Baking Classics, Second Edition. Adaptation and filling recipe are mine. Originally posted summer of 2017. No changes made to recipe.

Peach Tartlets = Peach Perfect!

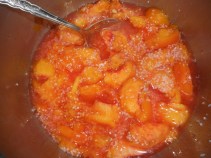
It is the peak of peach season so get some peaches and whip up a delicious gluten free peach pie. I wanted individual tarts so everyone would feel special; that I baked them their own mini pie; easy to do!  If you don’t have these deep dish pans you can use the flat-bottomed tartlet pans; probably won’t hold quite as much filling. mass upload 8-22-16 563

Please make every effort to use local fruit; can get peaches at orchards like Bechdolt’s near Springtown, at most farm stands and at farmer’s markets; one on Saturdays in Easton or Sundays in Hellertown.  This pie really showcases great tasting peaches. If you use lousy peaches your result will lack great flavor. But here’s the thing: store peaches can be poor in flavor and texture due to improper chilling, so I strongly suggest you get locally grown, sweet, ripe peaches to make your pie.  I love when they have a pink blush; it makes the pie so pretty and perhaps even tastier.

To peel; do it old school: heat 3 inches of plain water in a wide pot, drop the peaches gently in 4-5 at a time and blanch them 2-3 minutes, two if very ripe, 3 if less ripe.  Allow to cool somewhat before peeling.  I like to do that over a bowl to catch the juices as I slice each peach. Or just use a potato peeler and slide off the skins. Slice thin and you are ready to use the peaches! If they are quite ripe this works well. Less work, less heat in the kitchen.

Don’t eat these tartlets hot; should be cooled to just warm if you like it so or room temperature or even a bit chilled. They were perfect, just like a big pie only tiny and making one individual dessert.  You could certainly serve them with vanilla ice cream.  And this recipe, like all peach desserts, works perfectly with fresh nectarines, bonus: no peeling required!

Sorry I have not been posting much lately; dealing with illness.  Makes it hard to focus on my blog but these tartlets were just too good to not blog about.

Angie’s GF Peach Crumb Tarlets: makes 7

Crust:

1 c plus 2 tbsp brown rice flour mix (at bottom of recipe)

2 Tbsp. sweet rice flour

1 Tbsp. granulated sugar

½ tsp xanthan gum

¼ tsp salt

6 Tbsp. cold butter cut into 6 chunks

1 large egg

2 tsp fresh orange or lemon juice

———————

You will need 7 deep dish 4 inch tartlet pans if you make them all at once. I actually froze my dough and made the second batch of 3 a day later. Adjust the filling to the number of tartlets you are baking.

Mix dry ingredients in bowl of stand electric mixer.  Add butter and mix until crumbly and resembling coarse meal.  Add egg and juice.  Mix until it comes together into big chunks.  Shape into a ball with your hands. Put it on a crust sized piece of wax paper (14 x 14 inches more or less), flatten the crust ball some; put on top of it another piece of wax paper and chill it all in your fridge 15-20 minutes while you prepare the filling.

Filling:

6-7 cups sliced fresh peaches, peeled and cut in thick slices, place in medium bowl

Mix with:

½ cup sugar

1/4 cup quick tapioca

Notes: I made it in two parts; used 7-8 smaller peaches for each batch. Adjust the sugar and tapioca accordingly.  Let the filling stand while you prepare the crust. This is important so the tapioca can soften and absorb some juices before baking.

Construction: Break dough into 7 small equal balls.  Roll out each tiny crust in a pie bag or between the two sheets of wax paper, try to get the thickness even and somewhat thin, no thick middle! Peel off one side of paper and place in pie pan, centered.  Remove other slice of wax paper.  Crimp edges all around.  Or not; I left mine kinda rough but it worked! Place the crust lined pans on a baking sheet with a rim to catch any spills. Fill each tartlet with fruit mixture after you have the crumb topping ready to go. Fill to a tad less than the top edge of the crust.  Do not overfill; they will bubble and spill if you take the filling right to the top edge.mass upload 8-22-16 560

Crumb topping

Put all four ingredients in the same mixing bowl you made the bottom crust in and mix well with mixer paddle until crumbs form. If you let them go extra long you get big fat crumbs for when you want that look, they work great!

¾ c brown rice flour mix

½ c sugar

½ tsp xanthan gum

1/3 c cold butter cut into six chunks

Sprinkle the top of each tartlet with crumb mix; use as much as you like.  I didn’t measure; just sprinkled until the fruit was barely visible through the crumbs. Up to your personal taste… It sinks partially into the fruit mixture and adds lots of sweetness and eye appeal.

Bake in a preheated 400 degree oven for 35 minutes until bubbly and the crumb crust is light brown.  Cool at least 1 hour before serving at room temperature.  I think it is best served the same day you make it, or no more then 12 hours after baking for optimal flavor.  The crumbs will get soggy if too much time passes. Mine was still very good the next day; just not as great as when really fresh.

Note: if you find your bottom crust is not browning enough bake it empty at 375 degrees for ten minutes before filling it with the fruit.  I have a bottom heat gas oven which gives me perfect pie crust if I put the pie down on the lowest possible level so I don’t ever have pale pie crust. I used to have a two oven range with a full sized lower oven. and an upper pizza oven that I called the Pie Oven!    I miss it a little but I am managing just fine to have perfectly browned pie crusts.

mass upload 8-22-16 562

Brown Rice Flour Mix (Same as King Arthur GF All purpose blend)
2 c brown rice flour (finely ground)

2/3 c potato starch – Not potato flour

1/3 c tapioca flour

Note: the crust and crumb recipe are out of Annalise Roberts cookbook, Gluten Free Baking Classics, Second Edition. Adaptation and filling recipe are mine.

First published in Summer 2016. No changes to recipe in this posting.

Blueberry Cheese Tart

In search of a dessert that used up a crust I had in the freezer, and some blueberries in the fridge. Just needed the ricotta cheese. I added some lemon extract and zest to the filling because I love lemon and blueberry together.

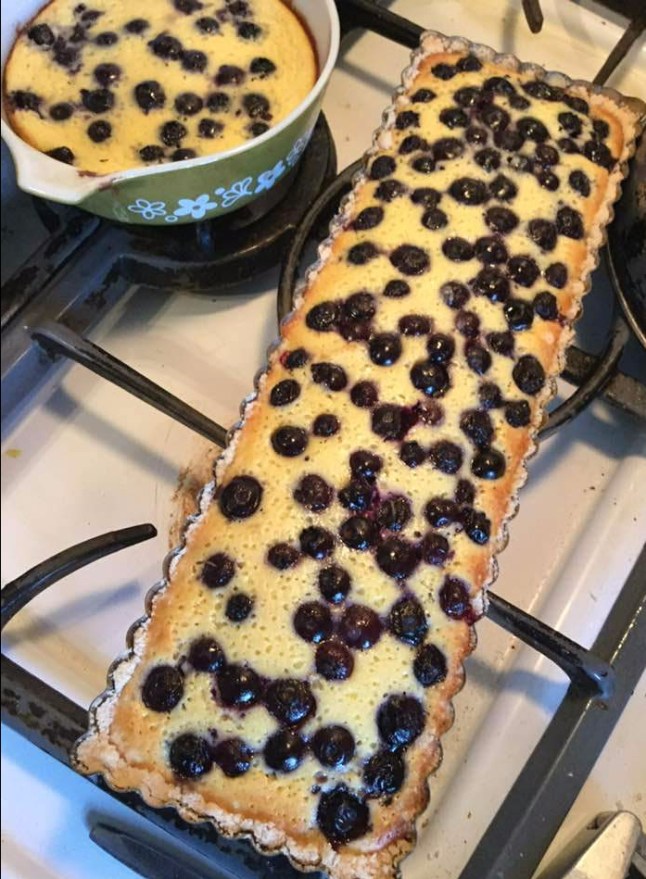
I used a long rectangular pan to create mine but you can use a round one if that is what you have. I just enjoy the rectangular pan as I can cut it across into bars; easy to eat with fingers if you cut your bar in half to make two squares. Plus it looks awesome…. blueberry ricotta tart


This time I used a redi-made gf pie crust my sister had bought; it made two crusts and she only used one so we froze it; thawed it for this tart and it worked great; similar texture to my standard gf pie crust. Or use the cookie crust below. Yeap; that’s a bit of extra custard I baked with blueberries; it was really tasty even minus a crust.

Notes; you can leave out the lemon extract if you don’t want that flavor. I use King Arthur’s basic gf flour blend when I make a homemade crust, the one that is just flours, no xanthan in it. I used blueberries but I am sure you could make this with raspberries or a mixture of the two.

The ricotta was in a 15 ounce container so I have a little leftover. Might make a tiny bit of dip for crackers. Or maybe an egg custard for breakfast tomorrow…hmmm.

Ricotta Blueberry TartCookie crust:

1 cup brown rice blend

1 tsp. xanthan gum

¼ cup sugar

5 Tbsp. cold butter cut into 10 pieces or more

1 tsp. vanilla extract

1-2 tsp. water

Mix the dry ingredients in stand mixer bowl.  Add the butter, mix until fine like sand.  Add extract and water. Blend briefly.  Spray pan with cooking spray.  Sprinkle in the mixture into the pan and spread evenly. Press lightly in with your hands. DO not press too hard or it becomes way too firm.


Or, roll out that glutino crust and fit into your pan; trim off extra crust. Fill.

Filling:

12 ounces of ricotta cheese, whole milk is best but any will do.

3 eggs

2/3 cup sugar

1 tsp. vanilla extract

½ tsp. lemon extract

2 Tbsp. cornstarch

Pinch sea salt

1 1/4 cup fresh or frozen blueberries

1 tsp. lemon rind grated

Mix ricotta with eggs and rest of ingredients except fruit; can use same bowl with your stand mixer.  Carefully pour into the tart crust. Top with the berries. If you have too much liquid filling as I did: pour rest into a small low casserole and top with ¼  cup more of the berries; bake that small pan about 25-30 minutes. Bonus treat!

Bake tart 50 min at 375 degrees. It should be fairly firm in the center.  Let cool before slicing.  You can sprinkle it with powdered sugar if desired. I was so eager to try it I totally forgot to do this! Enjoy.

GF Flour blend (if you want to make it yourself)

2 cups brown rice flour

2/3 cup potato starch

1/3 cup tapioca starch

Rhubarb Peach Pie, Yeap…It’s Doable!


Generally, my rhubarb is done long before I see fresh peaches in my neck of the woods. Not that I actually live in the woods. Just happen to like that idiom and it fits.  I think the peaches I bought at Bechdolt’s Orchard were imported from the Carolinas and it is the end of picking my rhubarb but they came together beautifully in this lush pie.  I was kinda curious how these two fruits would taste in one pie: in one phrase: lush and delicate. It is a version of my rhubarb custard pie.

It goes together rather quickly especially if you have a stand mixer and had leftover crumbs in the fridge as I did. Suggest you use a  potato peeler to cut the skin off the peaches and sliced them on the thin side. Saves the effort of hot water bath poaching which is kinda hot; you will only need 3-4 peaches depending on their size.

This pie is for all the pie lovers who love a fat slice of juicy homemade pie!

Rhubarb Peach Custard Pie

Crust:

1 c plus 2 Tbsp. brown rice flour mix (at bottom of recipe)

2 Tbsp. sweet rice flour

1 Tbsp. granulated sugar

½ tsp xanthan gum

¼ tsp salt

6 Tbsp. cold butter cut into 6 chunks

1 lg egg

2 tsp fresh orange or lemon juice

Directions:

Mix dry crust ingredients in bowl of stand electric mixer.  Add butter and mix until crumbly and resembling coarse meal.  Add egg and lemon juice.  Mix briefly until it comes together into big chunks.  Shape into a ball with your hands. Put it on a crust sized piece of wax paper (14 x 14 inches more or less), flatten the crust ball some; put on top of it another piece of wax paper and chill it all in your fridge 15-20 minutes.  Then roll out and put on the parchment lined pan; put back in the fridge while you prepare the filling.

Filling:

4 cups chopped rhubarb (use 3 if your pan is 9 inch)

2 cups fresh peaches, sliced and sprinkled with 1 Tbsp. fresh lemon juice

2/3 cup sugar

¼ cup tapioca flour

¼ tsp. cinnamon

Sprinkle nutmeg

Zest of ½ a lemon, optional

Mix all dry ingredients; pour over fruit and stir up and pour carefully into crust that you rolled out and placed into a 9 or 10 inch pie pan.   Top with the following custard mixture you beat in a small mixing bowl:

2 eggs. 1/3 cup whole milk, ¼ tsp. almond extract.

Then top with crumbs:

In stand mixer: ¾ cup brown rice flour mix, ½ cup sugar, ½ tsp. xanthan gum and 1/3 cup cold butter cut into six chunks. Mix until the butter is in fine crumbs well blended with the dry ingredients. I use about half a batch of crumbs on top of my crumb pies; you can use as much or as little as you like. Don’t press on them; just lightly sprinkle over top of fruit mixture.

Bake at 375 degrees for about 55 to 60 minutes; should be bubbling and lightly browned. Let cool and set for at least 2 hours before cutting.

rhubarb peach pie just out of oven

rhubarb peach pie sliceBrown Rice Flour Mix (same as King Arthur basic gf blend you can buy at Giant)
2 c brown rice flour

2/3 c potato starch – not potato flour!

1/3 c tapioca flour

The crust recipe is from Annalise Roberts great cookbook, GF Baking Classics, Second Edition.

Pavlova: A Symphony of Delish!

My sister Elaine makes this dessert all the time. It is a specialty of hers. I think it is her go to company dessert when nothing else comes to mind. When she first described it I was not impressed. I wasn’t even looking forward to it at our family dinner party she throws every summer when I come up to visit. So I was surprised when I bit into my slice of it. Clearly this is a case of the results being far more than a simple sum of the ingredients. It is light, sweet, airy, fruity and basically melted in my mouth. I have had it at her house many times and have made it a few times myself. It is easy to construct and it can be varied in the fruit topping.

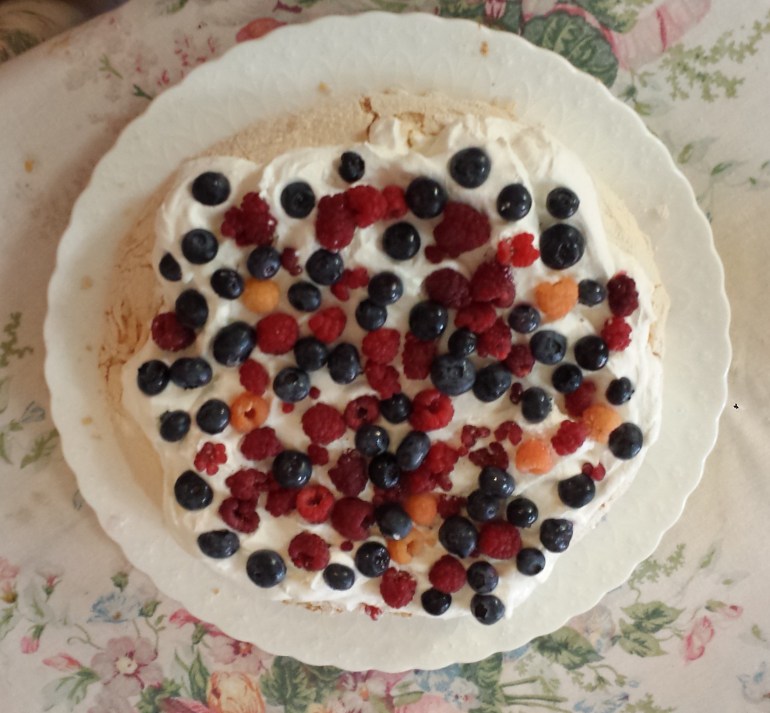
The old school classic topping is fresh passion fruit. Elaine mostly serves it with sliced fresh strawberries, perfection! It is decent with blueberries too. I once used a mixture of ripe summer fruits; peach, nectarine, blueberries, mango and kiwi. That was really memorable. Ripe local strawberries would be super tasty too. Go with what is ripe and flavorful when you are shopping for fruit. I used blueberries and raspberries for this latest version but you decide what works for you. No canned fruit though, only fresh will do.

My sister got the recipe from Food network – a 1999 recipe. It is naturally GF so no one will ask where the wheat is! Don’t leave out the red wine vinegar; totally necessary.

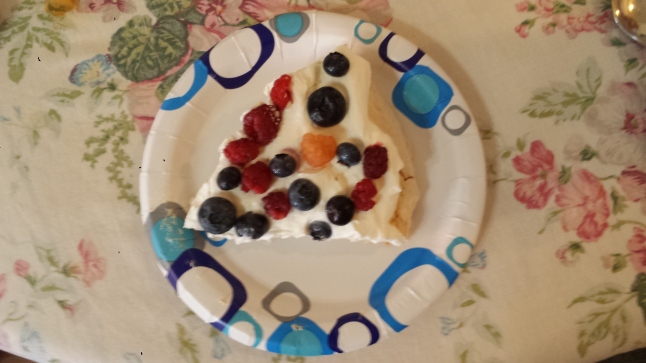
20180708_133046

Slice today; sorry it is on a paper plate but it  was luscious!

Pavlova

Ingredients:

1/2 cup egg whites at room temp (about 4-5 eggs)

1/8 tsp. cream of tartar

1/8 tsp. salt

1 cup granulated sugar

1 1/2 tsp. cornstarch

1 Tablespoon red wine vinegar

1/2 tsp. vanilla extract

1 1/4 cups heavy cream

2 T light brown sugar packed or white sugar

1 pt. fresh strawberries for top, sliced and 1 cup fresh blueberries

or 3-4 oz fresh raspberries and half a pint of blueberries

or 2 sliced ripe peaches and some raspberries or blueberries

DIRECTIONS:

Preheat oven to 350 degrees

In a mixer fitted with a whisk attachment whip the egg whites, cream of tartar and salt in a clean, dry bowl until foamy. Add the granulated sugar, cornstarch, vinegar and vanilla and continue whipping until stiff, smooth and glossy, about 7-8 minutes more.

On a sheet of parchment paper cut to fit a sheet pan, use a pencil to draw or trace a 9 inch circle in diameter. Line the sheet pan with the parchment, pencil side down (you should be able to see the circle). Spoon the egg whites in the circle, using the back of the spoon to smooth the top and sides of the disk. Make it high rather than wide; it will settle after baking. Bake in the center of the oven for 10 minutes, then reduce the heat to 300 degrees and bake until the meringue has puffed up and slightly cracked on the top and the surface is highly browned to the color of a latte coffee, about 45 minutes more. Turn off the oven, prop open the oven door, and let it cool in the oven at least 30 minutes, to room temperature. This ensures a gradual cooling, which protects the delicate meringue.

Whip the cream and brown sugar (sometimes I use white sugar) until stiff. spoon it in the center of the cooled pavlova and spread out to within 1/2 inch of the edge, arrange the slices of strawberry in the middle. Sprinkle the blueberries around the edge of the strawberries. To serve, slice into wedges with a serrated knife.

So make a pavlova and make everyone happy; it is beautiful to look at and even better to eat. Enjoy!

Originally published July 2014. Recipe slightly changed, minor editing to text.