Perfect Peach Pie

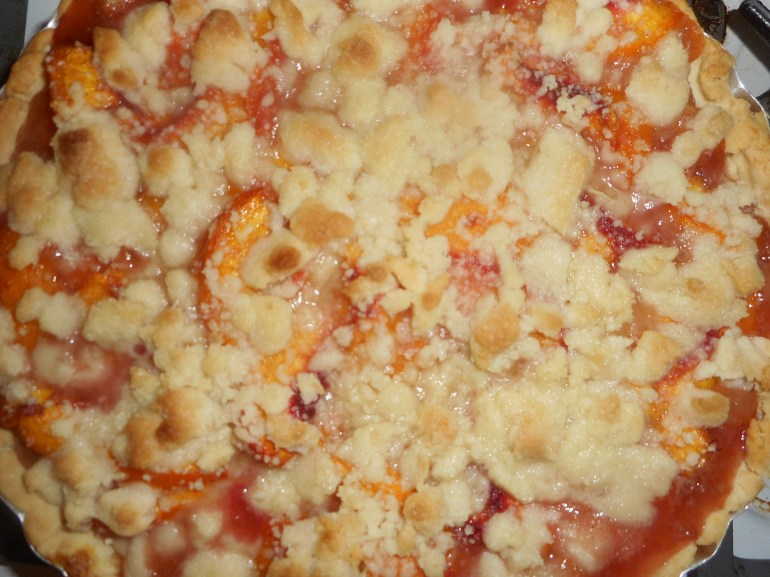
Peach season is here so get some ripe juicy peaches and whip up a delicious gluten free peach pie.   This is an easy pie to create.  Slice and dump together the filling, crumb topping made in unwashed mixer bowl you used for creating the bottom crust. You can store any leftover crumb mixture in a sealed container in the fridge; it keeps a few weeks.  Sometimes I let the mix spin in the stand mixer for extra big crumbs for this pie; love that look. If you prefer a solid crust just double the crust part and top your pie with it.  Be sure to cut some slits for steam escape! I think a lattice crust would be fantastic, if a bit more time consuming to construct.

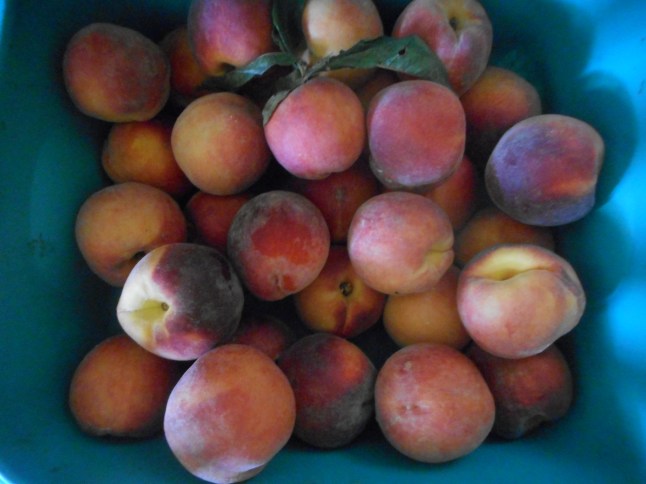
Please make every effort to use local fruit; can get peaches at orchards like Bechdolt’s near Springtown, at most farm stands and at farmer’s markets; one on Saturdays in Easton or Sunday’s in Hellertown.  This pie really showcases great tasting peaches. If you use lousy peaches your pie will be lack luster. But, here’s the issue I want you to think about: store peaches can become quite poor in flavor and texture due to improper chilling during transport or storage so I strongly suggest you get locally grown, nearly ripe peaches to make your pie.  I love when they have a pink blush; it makes the pie so pretty and perhaps even tastier!  You might have to let them ripen a bit so plan ahead and buy them a few days before you want to make that spectacular late summer peach pie.
mass upload 8-22-16 557

Some peaches I bought a week ago at Bechdolts’ Orchard

To peel peaches for a pie (and you really must peel them); heat 3 inches of plain water, drop the peaches gently in 4-5 at a time and cook them 2-3 minutes.  Use the lesser time for more ripe peaches. Allow to cool somewhat before peeling.  I like to do that over a bowl to catch the juices as I slice each peach.

Bake and enjoy late summer in a pie in just a few minutes of work.  Don’t eat it hot; it should be cooled to just warm if you like it so or room temperature or even a bit chilled.  You could certainly serve this with vanilla ice cream.  And this pie works perfectly with fresh nectarines, bonus: no peeling required!


GF Peach Crumb Pie

Crust:

1 c plus 2 tbsp brown rice flour mix (at bottom of recipe)

2 Tbsp. sweet rice flour

1 Tbsp. granulated sugar

½ tsp xanthan gum

¼ tsp salt

6 Tbsp. cold butter cut into 6 chunks

1 large egg

2 tsp fresh orange or lemon juice

Spray 9 inch metal pie pan with cooking spray, dust with white rice flour. I forget to do that most of the time so you can too!

Mix dry ingredients in bowl of stand electric mixer.  Add butter and mix until crumbly and resembling coarse meal.  Add egg and juice.  Mix until it comes together into big chunks.  Shape into a ball with your hands. Put it on a crust sized piece of wax paper (14 x 14 inches more or less), flatten the crust ball some; put on top of it another piece of wax paper and chill it all in your fridge 15-20 minutes while you prepare the filling.  The warmer your kitchen the better chilled your crust dough should be or it will surely stick to the paper/plastic.

Filling:

6 cups sliced fresh peaches, peeled and cut in thick slices, place in medium bowl

Mix with:

½ cup sugar

1/4 tsp. cinnamon

1/4 cup quick tapioca


Add and stir in

1 tbsp. fresh lemon juice

¼ tsp. almond extract *(optional but it does add a lot of flavor)

Let stand while you prepare the crust.

Roll out pie crust in a pie bag or between the two sheets of wax paper, try to get the thickness even, no thick middle! Peel off one side of paper and place in pie pan, centered.  Remove other slice of wax paper.  Crimp edges all around.  Fill with fruit mixture.

Crumb topping

Put all four ingredients in the same mixing bowl you made the bottom crust in and mix well with mixer paddle until crumbs form. If you let them go extra long you get big fat crumbs if you want that look and I did!

¾ c brown rice flour mix

½ c sugar

½ tsp xanthan gum

1/3 c cold butter cut into six chunks

Sprinkle the top of the pie with crumb mix; use as much as you like.  I like about a heaping cup of the mixture.  Up to your personal taste… It sinks partially into the fruit mixture and adds lots of sweetness and eye appeal.

Bake in a preheated 400 degree oven for 45-50 minutes until bubbly and the crumb crust is light brown.  Cool at least 1 to 4 hours before serving at room temperature.  I think it is best served the same day you make it, or no more then 12 hours after baking for optimal flavor.  The crumbs will get soggy if too much time passes. Mine was still very good the next day; just not as great as when really fresh.

mom's new watch 013

Note: if you find your bottom crust is not browning enough bake it empty at 375 degrees for ten minutes before filling it with the fruit.  I have a bottom heat pizza style oven which gives me perfect pie crust so I don’t ever have pale pie crust.

Brown Rice Flour Mix (Same as King Arthur GF All purpose blend)
2 c brown rice flour (finely ground)

2/3 c potato starch – Not potato flour!

1/3 c tapioca flour

Note: the crust and crumb recipe are out of Annalise Roberts cookbook, Gluten Free Baking Classics, Second Edition. Adaptation and filling recipe are mine.  This blog post was originally published in August 2014.


Peach Tartlets, Peachy Keen

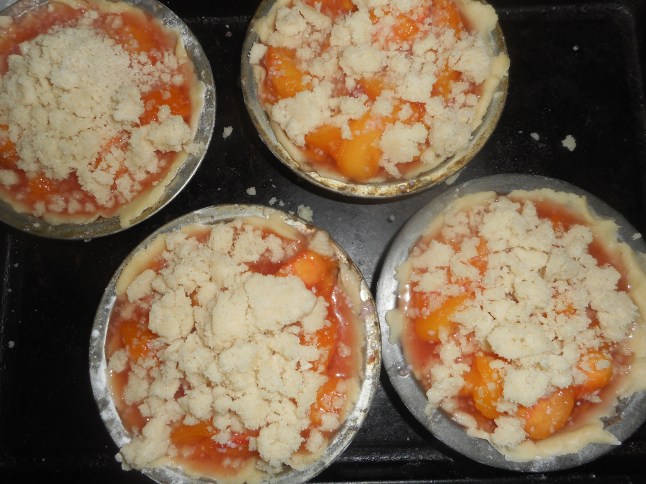
It is the peak of peach season so get some peaches and whip up a delicious gluten free peach pie. I wanted individual tarts so everyone would feel special; that I baked them their own mini pie; easy to do!  If you don’t have these deep dish pans you can use the flat bottomed tartlet pans; probably won’t hold quite as much filling. mass upload 8-22-16 563

Please make every effort to use local fruit; can get peaches at orchards like Bechdolt’s near Springtown, at most farm stands and at farmer’s markets; one on Saturdays in Easton or Sunday’s in Hellertown.  This pie really showcases great tasting peaches. If you use lousy peaches your result will lack great flavor. But, here’s the thing: store peaches can be poor in flavor and texture due to improper chilling so I strongly suggest you get locally grown, sweet, ripe peaches to make your pie.  I love when they have a pink blush; it makes the pie so pretty and perhaps even tastier.

To peel; heat 3 inches of plain water in a wide pot, drop the peaches gently in 4-5 at a time and blanch them 2-3 minutes, two if very ripe, 3 if less ripe.  Allow to cool somewhat before peeling.  I like to do that over a bowl to catch the juices as I slice each peach.

Don’t eat these tartlets hot; should be cooled to just warm if you like it so or room temperature or even a bit chilled. They were perfect, just like a big pie only tiny and making one individual dessert.  You could certainly serve them with vanilla ice cream.  And this recipe, like all peach desserts, works perfectly with fresh nectarines, bonus: no peeling required!

Sorry I have not been posting much lately; a little (2.5 day) vacation, a family crisis and a dear friend passing away.  Just been hard to focus on my blog but these tartlets were just too good to not blog about.

Angie’s GF Peach Crumb Tarlets: makes 7

Crust:

1 c plus 2 tbsp brown rice flour mix (at bottom of recipe)

2 Tbsp. sweet rice flour

1 Tbsp. granulated sugar

½ tsp xanthan gum

¼ tsp salt

6 Tbsp. cold butter cut into 6 chunks

1 large egg

2 tsp fresh orange or lemon juice

———————

You will need 7 deep dish 4 inch tartlet pans if you make them all at once. I actually froze my dough and made the second batch of 3 a day later. Adjust the filling to the number of tartlets you are baking.

Mix dry ingredients in bowl of stand electric mixer.  Add butter and mix until crumbly and resembling coarse meal.  Add egg and juice.  Mix until it comes together into big chunks.  Shape into a ball with your hands. Put it on a crust sized piece of wax paper (14 x 14 inches more or less), flatten the crust ball some; put on top of it another piece of wax paper and chill it all in your fridge 15-20 minutes while you prepare the filling.

Filling:

6 cups sliced fresh peaches, peeled and cut in thick slices, place in medium bowl

Mix with:

½ cup sugar

1/4 cup quick tapioca

Notes: I made it in two parts; used 7-8 smaller peaches for each batch. Adjust the sugar and tapioca accordingly.  Let the filling stand while you prepare the crust. This is important so the tapioca can soften and absorb some juices before baking.

Construction: Break dough into 7 small equal balls.  Roll out each tiny crust in a pie bag or between the two sheets of wax paper, try to get the thickness even and somewhat thin, no thick middle! Peel off one side of paper and place in pie pan, centered.  Remove other slice of wax paper.  Crimp edges all around.  Or not; I left mine kinda rough but it worked! Place the crust lined pans on a baking sheet with a rim to catch any spills. Fill each tartlet with fruit mixture after you have the crumb topping ready to go. Fill to a tad less than the top edge of the crust.  Do not overfill; they will bubble and spill if you take the filling right to the top edge.mass upload 8-22-16 560

Crumb topping

Put all four ingredients in the same mixing bowl you made the bottom crust in and mix well with mixer paddle until crumbs form. If you let them go extra long you get big fat crumbs for when you want that look, they work great!

¾ c brown rice flour mix

½ c sugar

½ tsp xanthan gum

1/3 c cold butter cut into six chunks

Sprinkle the top of each tartlet with crumb mix; use as much as you like.  I didn’t measure; just sprinkled until the fruit was barely visible through the crumbs. Up to your personal taste… It sinks partially into the fruit mixture and adds lots of sweetness and eye appeal.

Bake in a preheated 400 degree oven for 35 minutes until bubbly and the crumb crust is light brown.  Cool at least 1 hour before serving at room temperature.  I think it is best served the same day you make it, or no more then 12 hours after baking for optimal flavor.  The crumbs will get soggy if too much time passes. Mine was still very good the next day; just not as great as when really fresh.

Note: if you find your bottom crust is not browning enough bake it empty at 375 degrees for ten minutes before filling it with the fruit.  I have a bottom heat pizza style oven which gives me perfect pie crust so I don’t ever have pale pie crust. This is a big benefit of having this type of oven; it is a two oven range with a full sized lower oven.

mass upload 8-22-16 562

Brown Rice Flour Mix (Same as King Arthur GF All purpose blend)
2 c brown rice flour (finely ground)

2/3 c potato starch – Not potato flour

1/3 c tapioca flour

Note: the crust and crumb recipe are out of Annalise Roberts cookbook, Gluten Free Baking Classics, Second Edition. Adaptation and filling recipe are mine.


Banana Blueberry Muffins

The other day I was thinking of making banana nut muffins…short one banana.  So I added blueberries to make enough fruit.  An instant classic!

I know, they look just like a banana muffin but they have a secret inside, juicy flavorful blueberries! The streusel topping looks gorgeous and adds an extra layer of flavor.  There are walnuts in them to so you get some really great nutrients from the fruit and nuts.  You can swap the white sugar for coconut palm sugar which is very low as far as raising blood sugar; important if you are pre-diabetic as I am.   I did add an extra tbsp. of milk because of the coconut palm sugar. They come out slightly darker if you use that special sugar.  banana blueberry muffin 002

I love how healthy these muffins are and the convenience of freezing most of them for use as daily snacks.  They defrost during the morning and are ready just when I need a pick me up. It’s great how being gluten free can be so yummy and easy when you plan ahead and bake your own snack treats. I freeze all muffins I won’t eat in two days time; a zip lock freezer bag works great.

Banana Blueberry Streusel Muffins

2 cups brown rice flour mix (see below)

2/3 cup granulated coconut palm sugar or granulated sugar

1 tbsp. baking powder

1 tsp. baking soda

¾ tsp. xanthan gum

¼ tsp. salt

1/2 tsp cinnamon

¾ cup mashed bananas

1/2 cup fresh or frozen blueberries

1/3 cup chopped walnuts

2 large eggs

½ cup milk, 1 or 2 percent plus 1-2 tbsp more if using the palm sugar

½ cup canola oil

Topping: Mix the following in a bowl, make sure the butter is in tiny pebbles; use your fingertips to blend.

½ cup rolled oats

¼ cup brown sugar

2 tbsp. almond meal

1½ tbsp. butter

¼ tsp. cinnamon

——-

Directions: Heat your oven to 350 degrees, placing the rack in middle of oven.  Spray muffin pans with cooking spray.  One batch makes 14-16 muffins.  I got 16 when I made them.

Mix all dry ingredients in bowl of stand mixer or big bowl. Add fruits and walnuts; stir to coat them with dry mix.  Combine milk and oil.  Add liquids and eggs to big bowl; stir just until fully blended.  It is a very thick batter.  I like to let it stand ten minutes to allow the batter to thicken; makes a better and higher muffin.

Fill muffin pans 2/3 full.  I use a big serving spoon and fill it about half way to dump batter into each muffin space. Sprinkle the top with the topping. Press it in a bit so it won’t all flake off after baking. Bake 21-23 min until golden brown. Do not over bake or they will taste dry.  Let stand 6 or 7 minute and then remove from the pans and cool on a rack. I often use a fork to help pry them out; the streusel can get stuck on the edges to the muffin tin.  They freeze well for a few weeks, if they last that long.  Keeps in fridge (well wrapped) or an airtight cookie jar for 2-3 days.

Brown Rice Flour Mix base mix 

(This mix is the same as King Arthur’s gf blend)
2 c brown rice flour

2/3 c potato starch

1/3 c tapioca flour

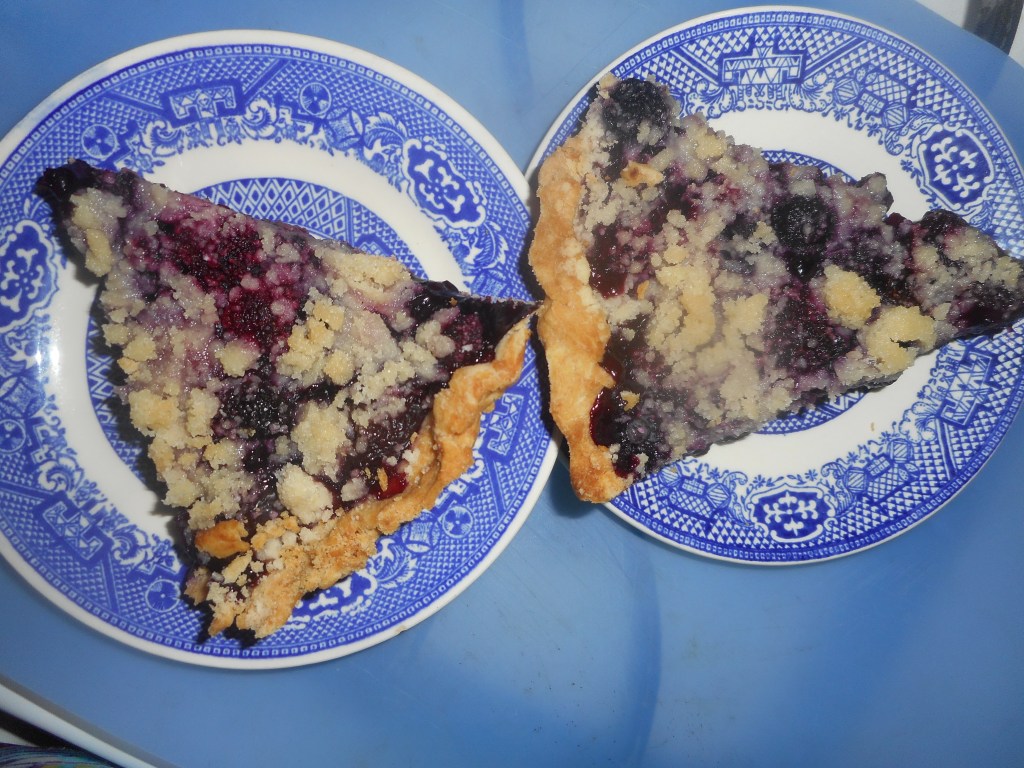
Blueberry Crumb Pie – Delish!

It is blueberry season and the Fourth of July is Saturday. I just made a gorgeous blueberry pie and I was feeling the need to share!

This pie is really easy to create.  Slice and dump together the filling, crumb topping gets quickly made by dumping ingredients in the mixer bowl you used for the bottom crust. You can store any leftover crumb mixture in a sealed container in the fridge; it keeps a few weeks.  This GF crumb topping is perfect for most any fruit pie.

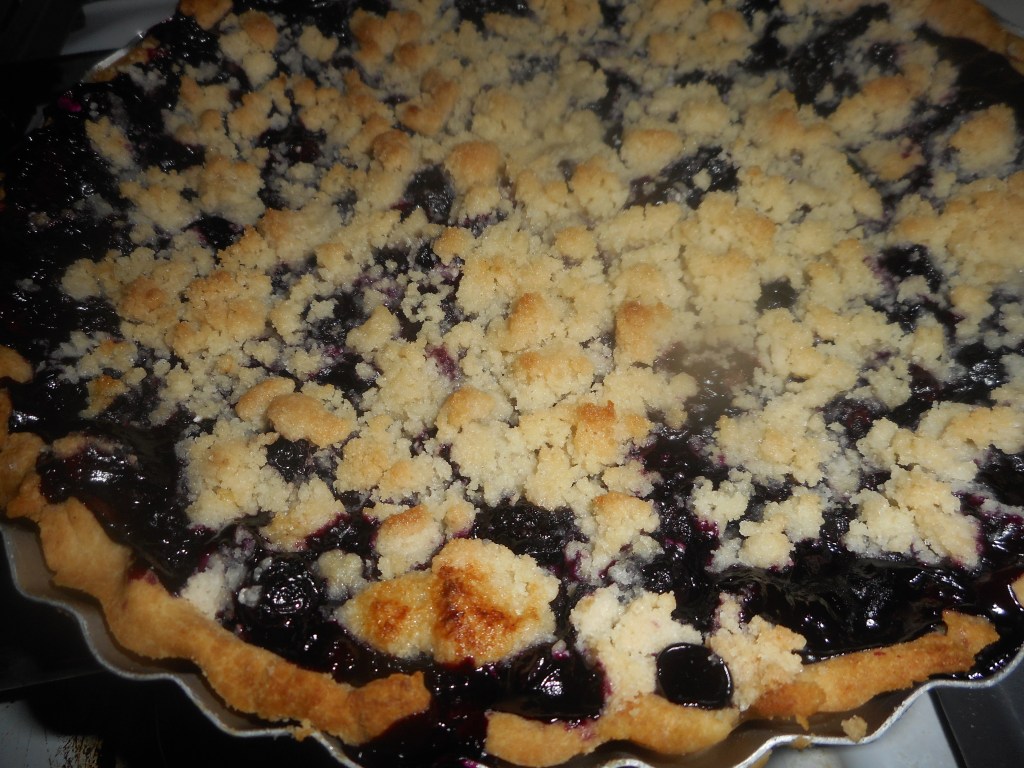
Bake and enjoy summer in a pie in just a few minutes of work.  Don’t eat it piping hot; it should be cooled to room temperature.  You could certainly serve this with vanilla ice cream or any other vanilla topping.

Angie’s GF Blueberry Crumb Pie

Crust:

1 c plus 2 tbsp brown rice flour mix (at bottom of recipe)

2 tbsp sweet rice flour

1 Tbps. granulated sugar

½ tsp xanthan gum

¼ tsp salt

6 Tbps. cold butter cut into 6 chunks

1 lg egg

2 tsp fresh orange or lemon juice

Spray 9 inch metal pie pan with cooking spray, dust with white rice flour.

Mix dry ingredients in bowl of stand electric mixer.  Add butter and mix until crumbly and resembling coarse meal.  Add egg and juice.  Mix until it comes together into big chunks.  Shape into a ball with your hands. Put it on a crust sized piece of wax paper (14 x 14 inches more or less), flatten the crust ball some; put on top of it another piece of wax paper and chill it all in your fridge 15-20 minutes while you prepare the filling.

Filling:

5 cups fresh blueberries – place in medium bowl

Mix with: ½ cup sugar

1/4 tsp. cinnamon

3 tbsp. quick tapioca

Add and stir in

2 tsp. fresh lemon juice

Let stand while you prepare the crust.

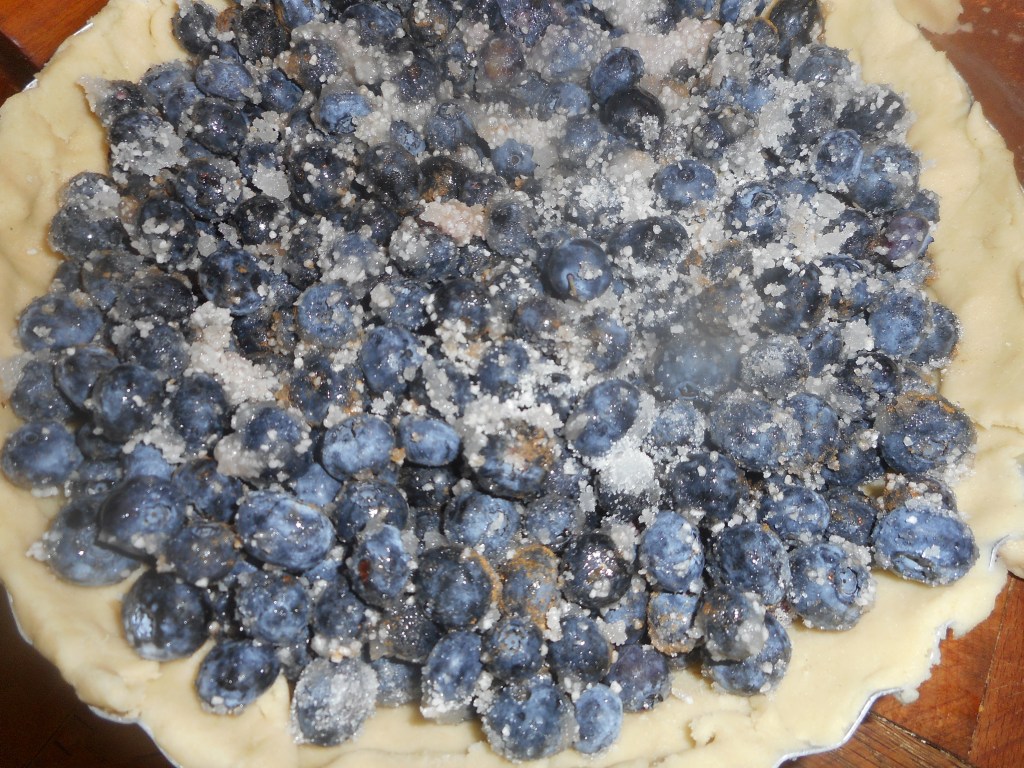
Roll out pie crust in a pie bag or between the two sheets of parchment paper, try to get the thickness even, no thick middle! Peel off one side of paper and place in pie pan, centered.  Remove other slice of parchment paper.  Crimp edges all around.  Fill with fruit mixture.

Crumb topping

Put all four ingredients in the same mixing bowl you made the bottom crust in and mix well with mixer paddle until crumbs form.

¾ c brown rice flour mix

½ c sugar

½ tsp xanthan gum

1/3 c cold butter cut into six chunks

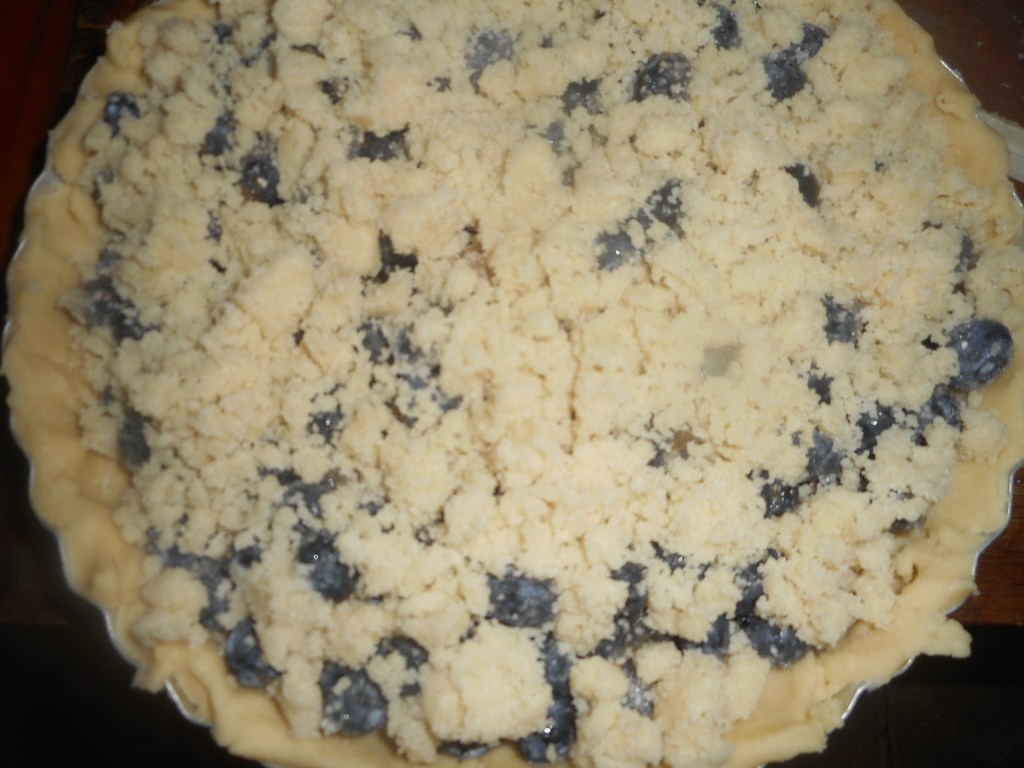
Sprinkle the top of the pie with crumb mix; use as much as you like.  I like about three quarters of the mixture.  Up to your personal taste… It sinks partially into the fruit mixture and adds lots of sweetness and eye appeal.

Bake in a preheated 375 degree oven for 50 or so minutes until the blueberries are bubbly and the crumb crust is light brown.  I put a piece of aluminum foil on top for the last ten minutes if the crumbs are getting too browned.  Cool at least 2 to 4 hours before serving at room temperature.  I think it is best served the same day you make it, or no more then 12 hours after baking for optimal flavor.  The crumbs will get soggy if too much time passes.

Note: if you find your bottom crust is not browning enough bake it empty at 375 degrees for ten minutes before filling it with the fruit.  I am lucky to have a bottom heat pizza style oven which gives me perfect pie crust so I don’t ever have pale pie crust.

Brown Rice Flour Mix (same as King Arthur basic gf blend)

2 c brown rice flour

2/3 c potato starch – not potato flour!

1/3 c tapioca flour

***************************************

The crust and crumb recipes are from Annalise Roberts great cookbook, GF Baking Classics, Second Edition.

Little Cherry Cake

Cherry pie…yes, I’m still obsessing on cherries.  The other week I did make something with the few sour cherries I still had in the freezer.  A small six inch cherry cake. It was so easy; a basic cake batter made with my portable mixer and you sink some sour cherries into the batter, sprinkle with cinnamon sugar and bake.  The batter swallows up the cherries and they bake in the cake creating a wonderful, sweet, little treat.  I know… trying to eat less sugar but I really wanted a smaller cake to share with my mom and it was wildly successful.  Subtle cherry flavor in a tender golden blanket of cake.  Totally yummy and really not that much sugar.

The recipe is by Annalise Roberts and the original can be found on her blog.  I changed it a bit for my small cake version. She uses sweet cherries and I prefer sour.  This little cake serves four.  It goes together quickly and makes a great dessert for a small group.  Guessing vanilla ice cream would be fantastic on it but never got to that!

Little Cherry Cake

Heaping 1/3 cup c. sugar

¼ c. butter, room temperature

½ brown rice flour mix

¾ tsp. baking powder

¼ tsp. xanthan gum

Pinch of salt

1 large egg, room temperature

½ tsp. almond extract

¼ tsp. vanilla extract

¾ to 1 cup pitted sour cherries (if frozen do not fully defrost)

1-2 tsp. cinnamon sugar

Directions: Heat oven to 350 degrees.  Put rack in center to lower center of oven.  Spray a six inch cake pan with cooking spray.

Cream the butter and sugar in a bowl using an electric hand held mixer, not a standing mixer as that is too powerful.  Blend until smooth. Add the eggs, dry ingredients and extracts, beat 2 min at medium speed.  Pour batter into pan.  Place cherries evenly around the top; push them in a bit so they are not just laying on the surface. Sprinkle with the cinnamon sugar. Bake for about 35 minutes; test to see if the batter is set.  Cool on rack before cutting. Store leftover cake tightly wrapped (if there is any!)

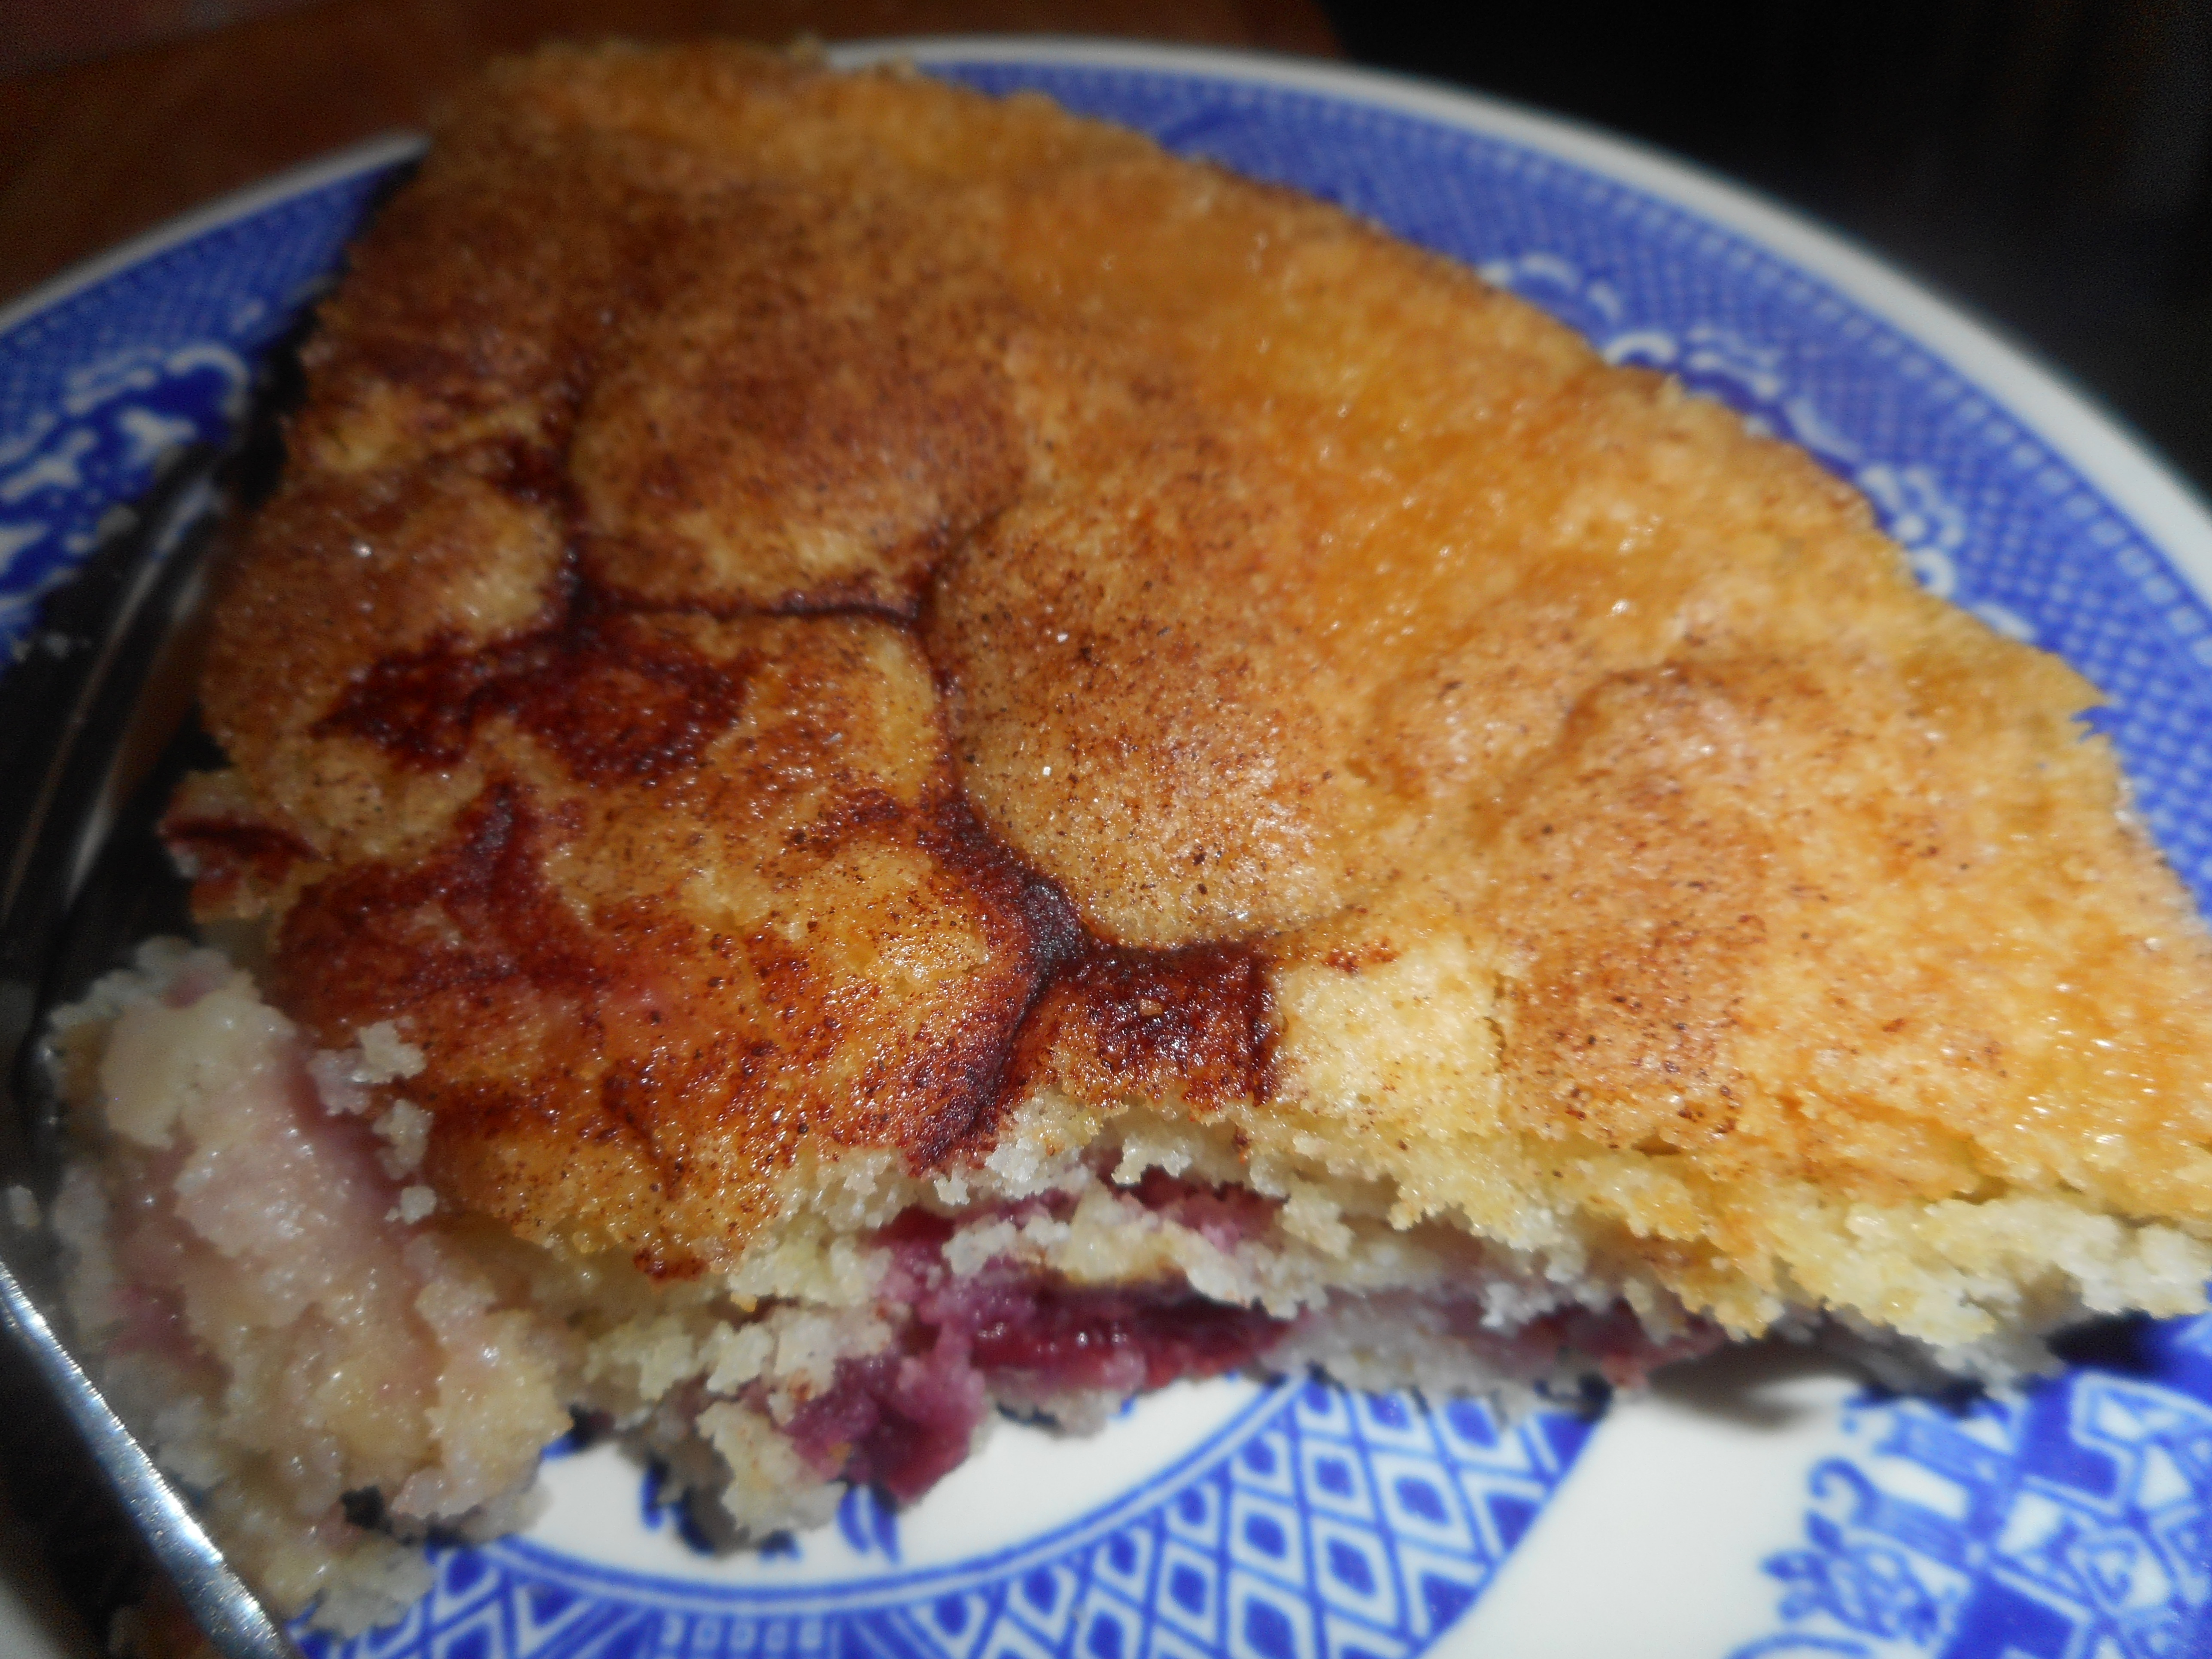
cherry torte 001

Not the prettiest cake slice; a quarter of it.  It tasted better than it looks here!

Brown Rice Flour Mix  (Same as King Arthur GF blend)
2 c brown rice flour

2/3 c potato starch

1/3 c tapioca flour