Oh, the scent of fresh apples baking in my oven. We are in the thick of apple season. So many tasty baking apples are available if you go to an orchard or farm stand. I like my local orchard Bechdolt’s. The apples are grown right there. Crazy fresh which is best plus it is wonderful to support your local apple farmer. I have gone to pick your own orchards and in the early fall the smell of the ripe apples on the trees is amazing. I made this dessertwith the golden delicious variety. You need an apple that won’t mush up like an Empire apple but you don’t want it as firm as a Granny Smith. Golden Delish are just right and honestly you can get them everywhere so with three apples you can make this delightful and fancy looking fall treat.

I saw this recipe in Bon Appétit magazine and thought I could make it, just a little simpler. Feel free to check it out on line. http://www.bonappetit.com/recipe/salted-butter-apple-galette-with-maple-whipped-cream

I liked how it looked: the shape of it and all those skinny slices. What the heck is a galette? I goggled it and the term can refer to a French free form cake or a free form tart that is sort of between a pie and a tart. It should be less work than a pie or a fancy tart. This one is a rectangular shape which I loved. Not that tough to shape. You can do it!
For more galette info; check this New York Times article with a great video: http://www.nytimes.com/2014/08/27/dining/the-galette-forgives-you.html?_r=0
Anyway, it was easy to make and gorgeous to look at and even tastier to eat! My crust was enhanced with a touch of cinnamon which I highly recommend. Impress your family – they will think it took hours to make. Leaving the skin on the apples makes them easier to slice thin, they hold their shape better and you save time. Plus you get the bonus of all the fiber and nutrition of the apple skin and the layer right below it.


First, make the crust and chill it a bit while you slice the apples.
GF Tart Crust:
1 c plus 2 tbsp brown rice flour mix (at bottom of recipe)
2 Tbsp. sweet rice flour
1 Tbsp. granulated sugar
½ tsp. xanthan gum
¼ tsp. salt
6 Tbsp. cold butter cut into 6 chunks
1 lg egg
2 tsp. fresh orange or lemon juice
½ tsp. cinnamon (optional)
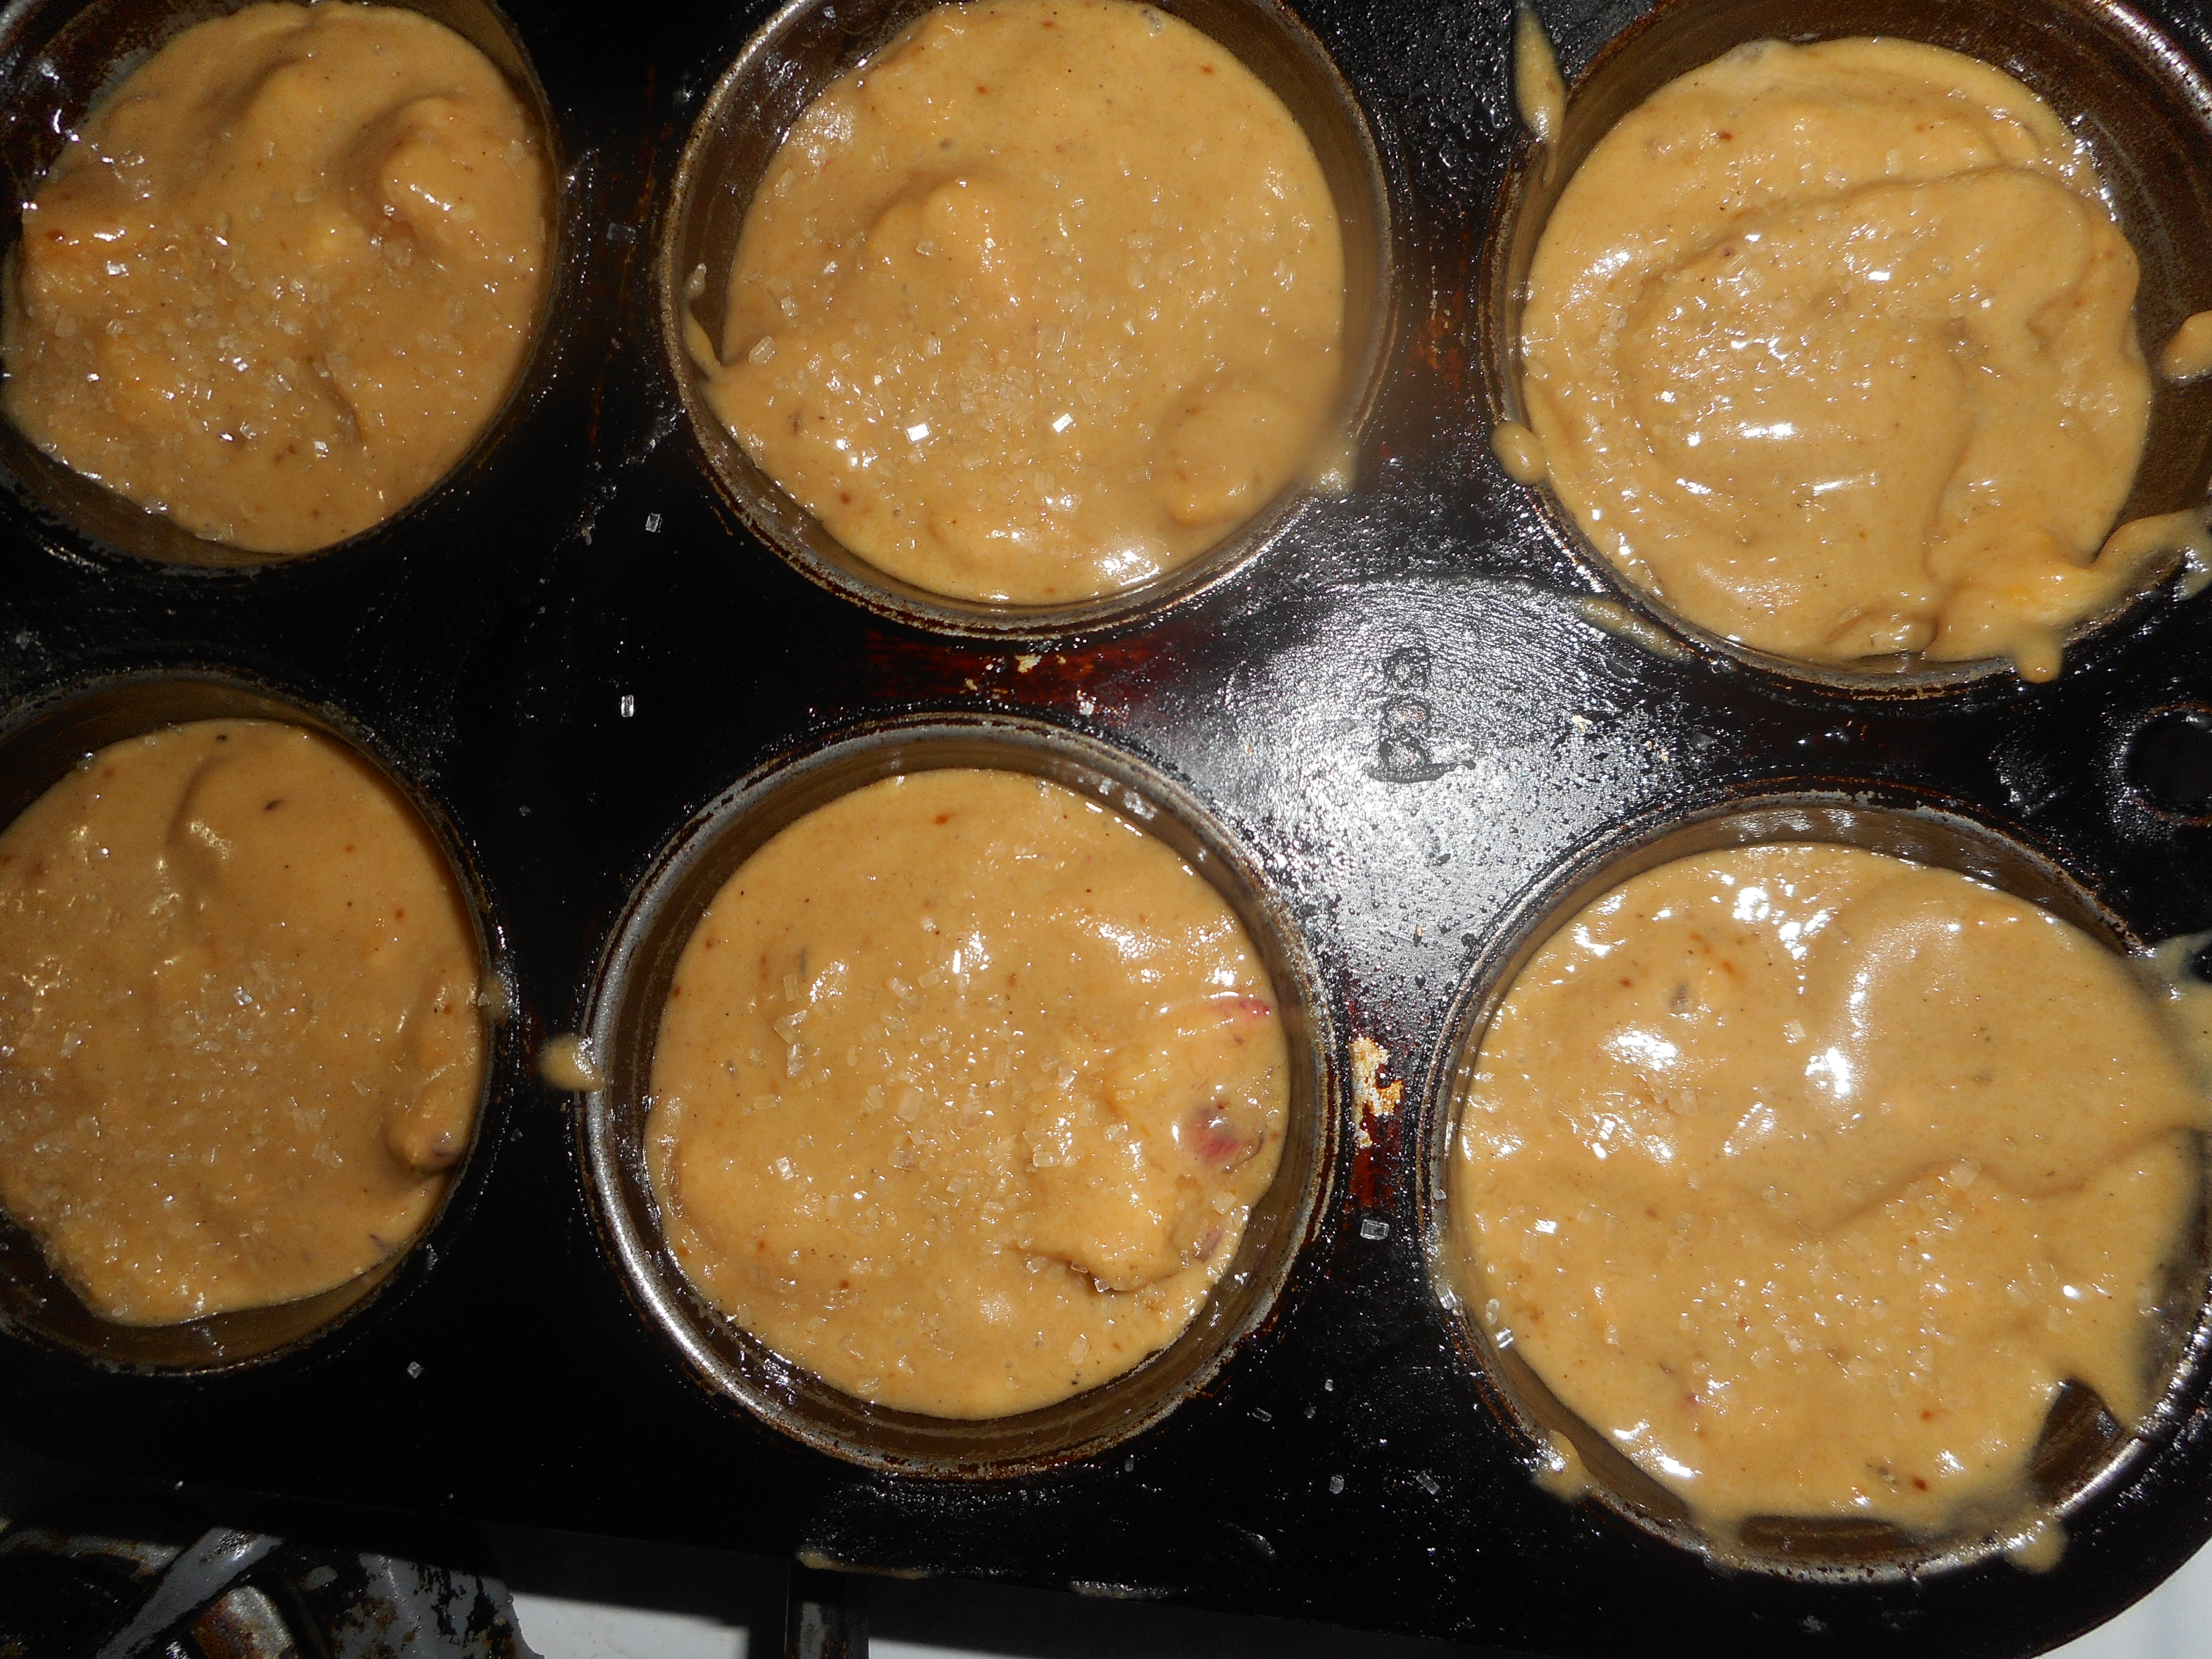
Mix dry ingredients in bowl of stand electric mixer. Add butter and mix until crumbly and resembling coarse meal. Add egg and juice. Mix until it comes together into big chunks. Shape into a ball with your hands. Put it on a crust sized piece of wax paper (14 x 14 inches more or less), flatten the crust ball some; put on top of it another piece of wax paper and chill it all in your fridge 15-20 minutes
Baking pan: Spray 10 x 14 inch metal baking pan with cooking spray, dust with white rice flour or line with parchment paper or a silicon mat (unsprayed).
Filling:
3 apples – a pound or a bit more
2-3 tbsp. salted butter
3 tbsp. dark brown sugar
1 large egg
1 tbsp. granulated sugar or coarse raw sugar
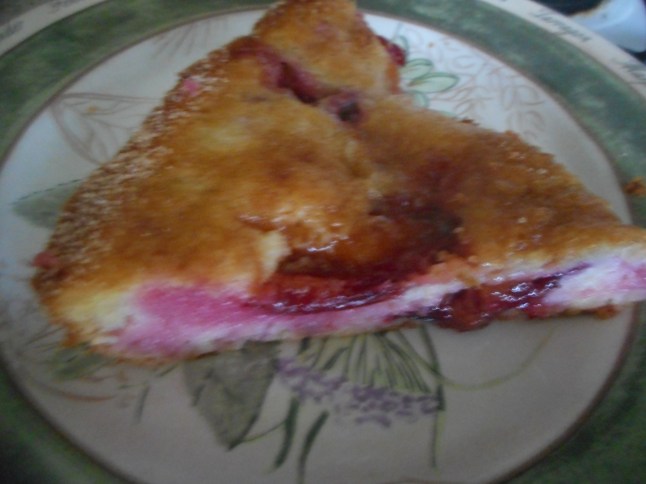
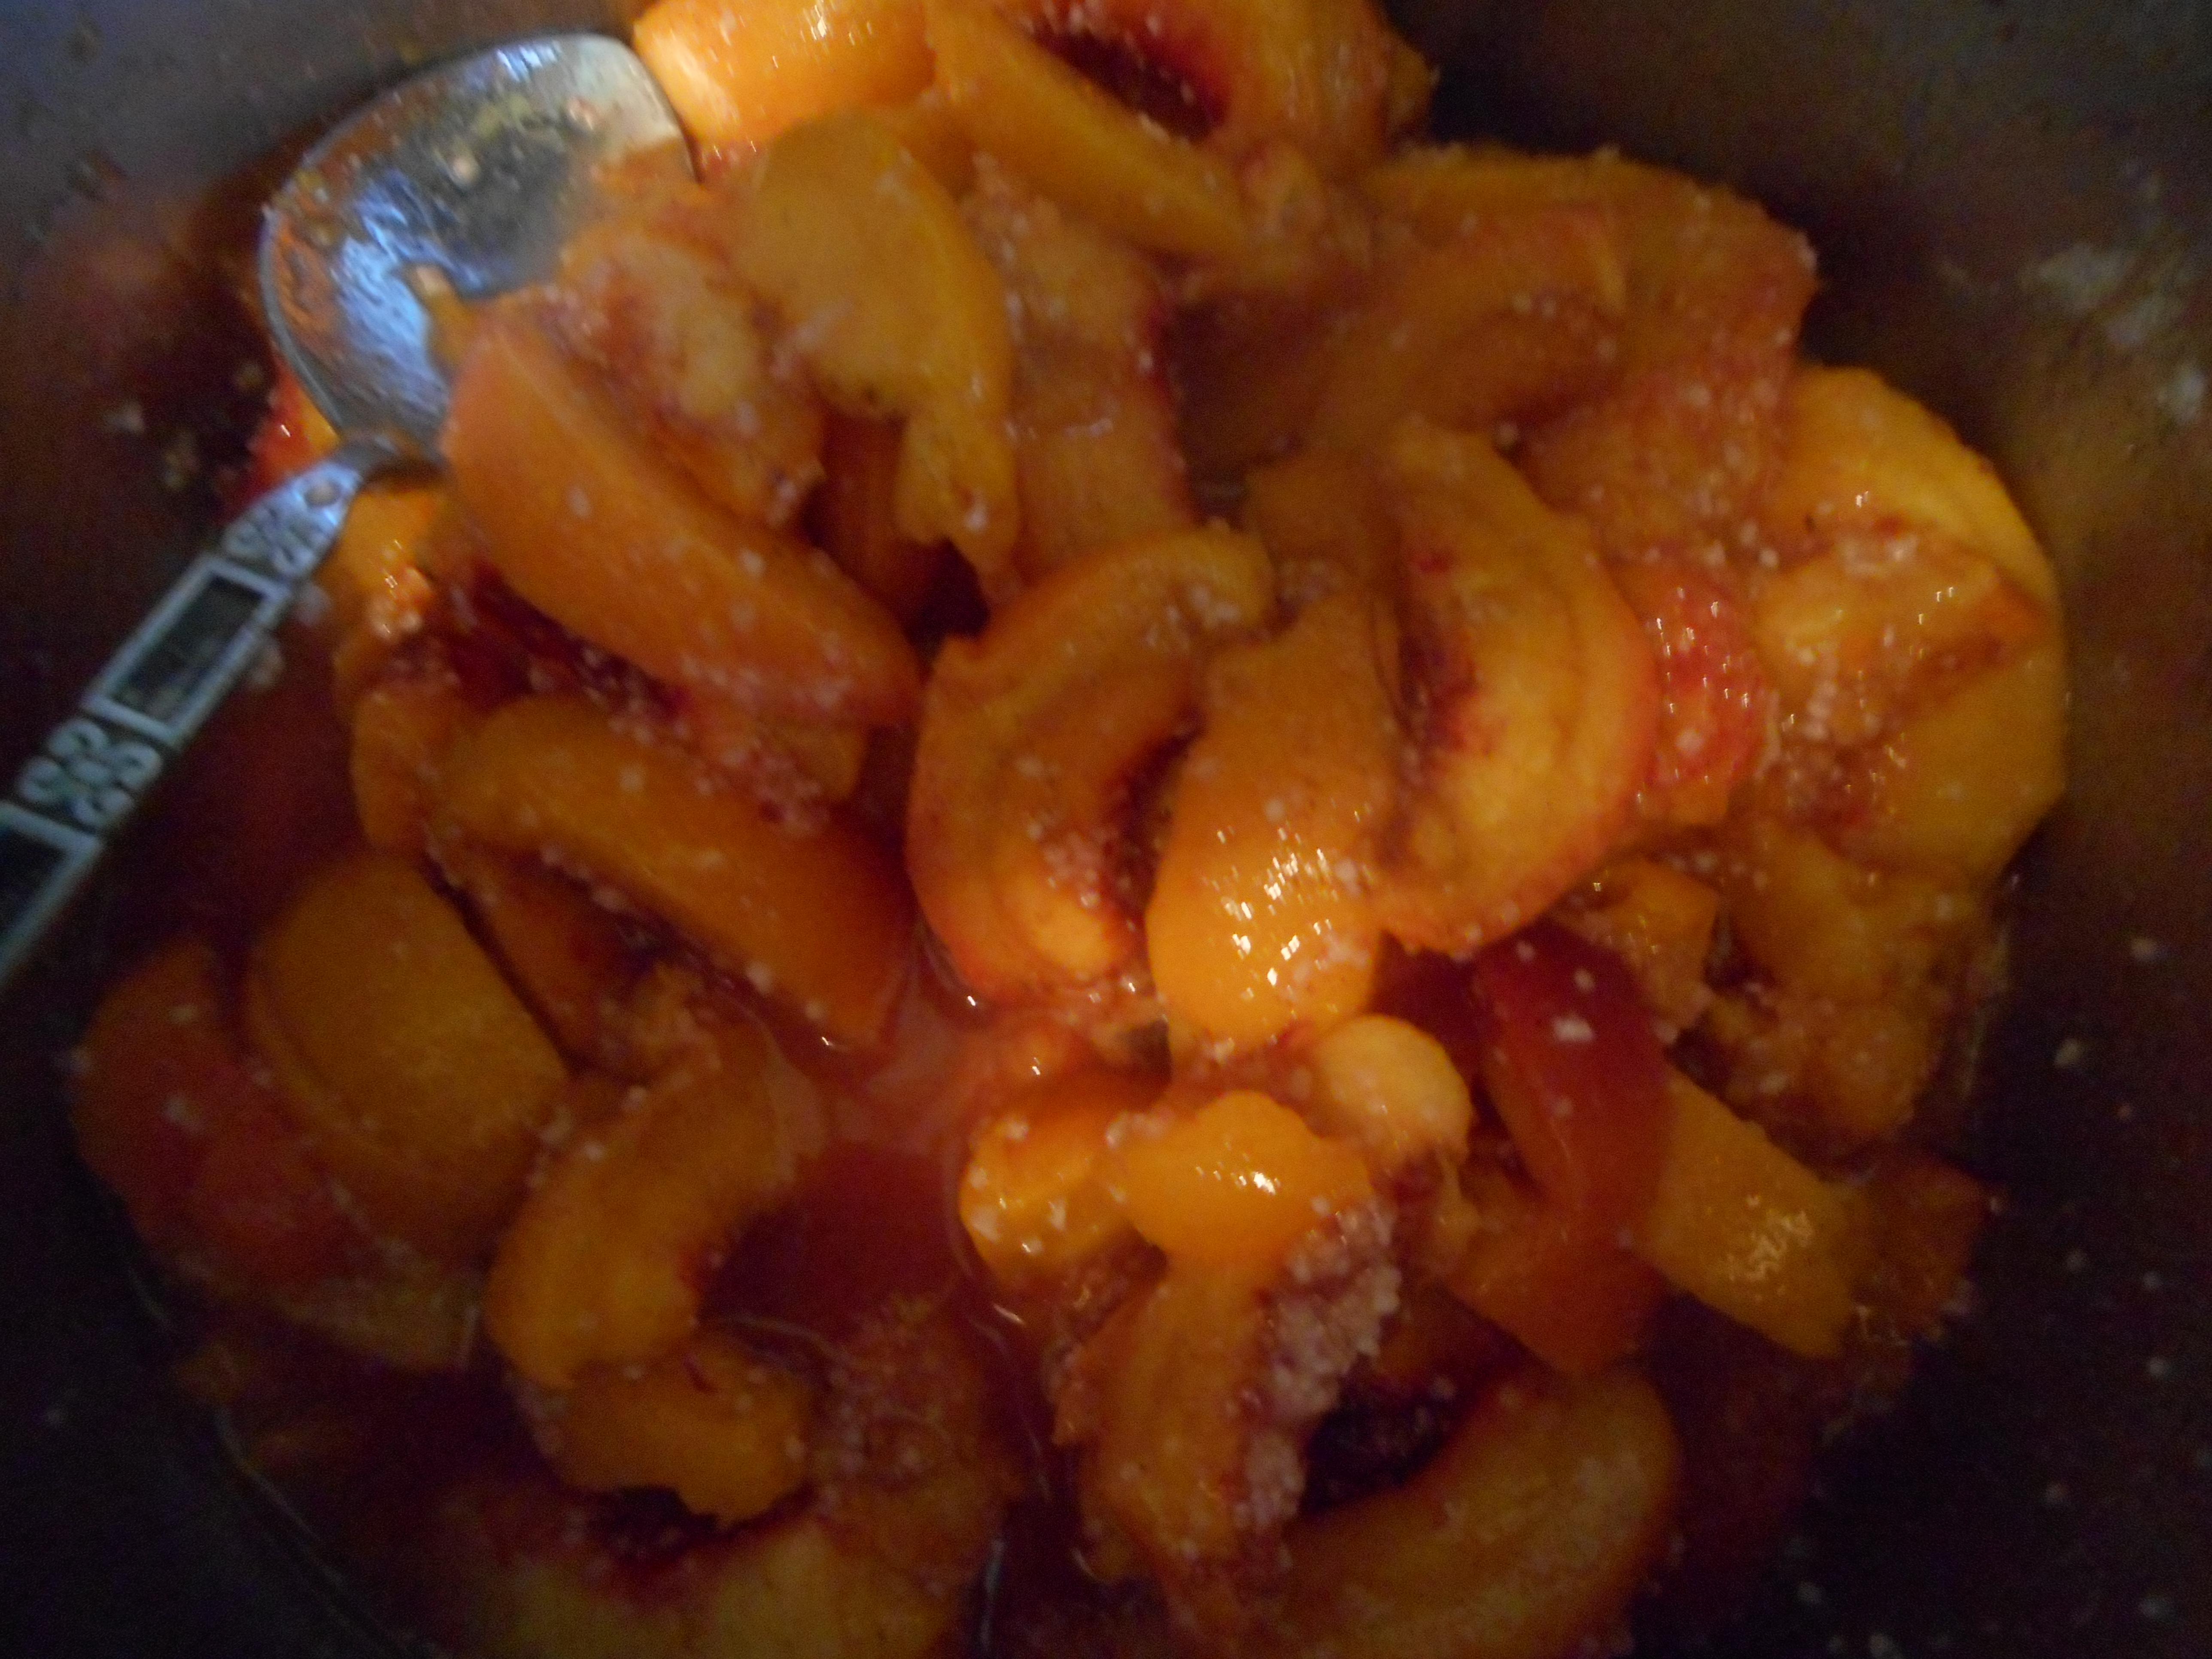
Wash and dry three large firm cooking apples. I used golden delicious that I bought at an orchard store. So fresh when you get them from where they grew. I cut them in half and cut out the core with my knife. I put the cut side down and cut the apple half into skinny1/8 inch slices. Leave them all close together still shaped like an apple half. Cut them all like that. I ate the end pieces that were rounded or otherwise less than perfect!
Take 2 tbsp. salted butter and heat it in a sauce pan until it is browned, watch closely or it will burn. Pour it into a small bowl to cool a bit. It will brown a touch more even out of the pan so take it out at a medium brown.
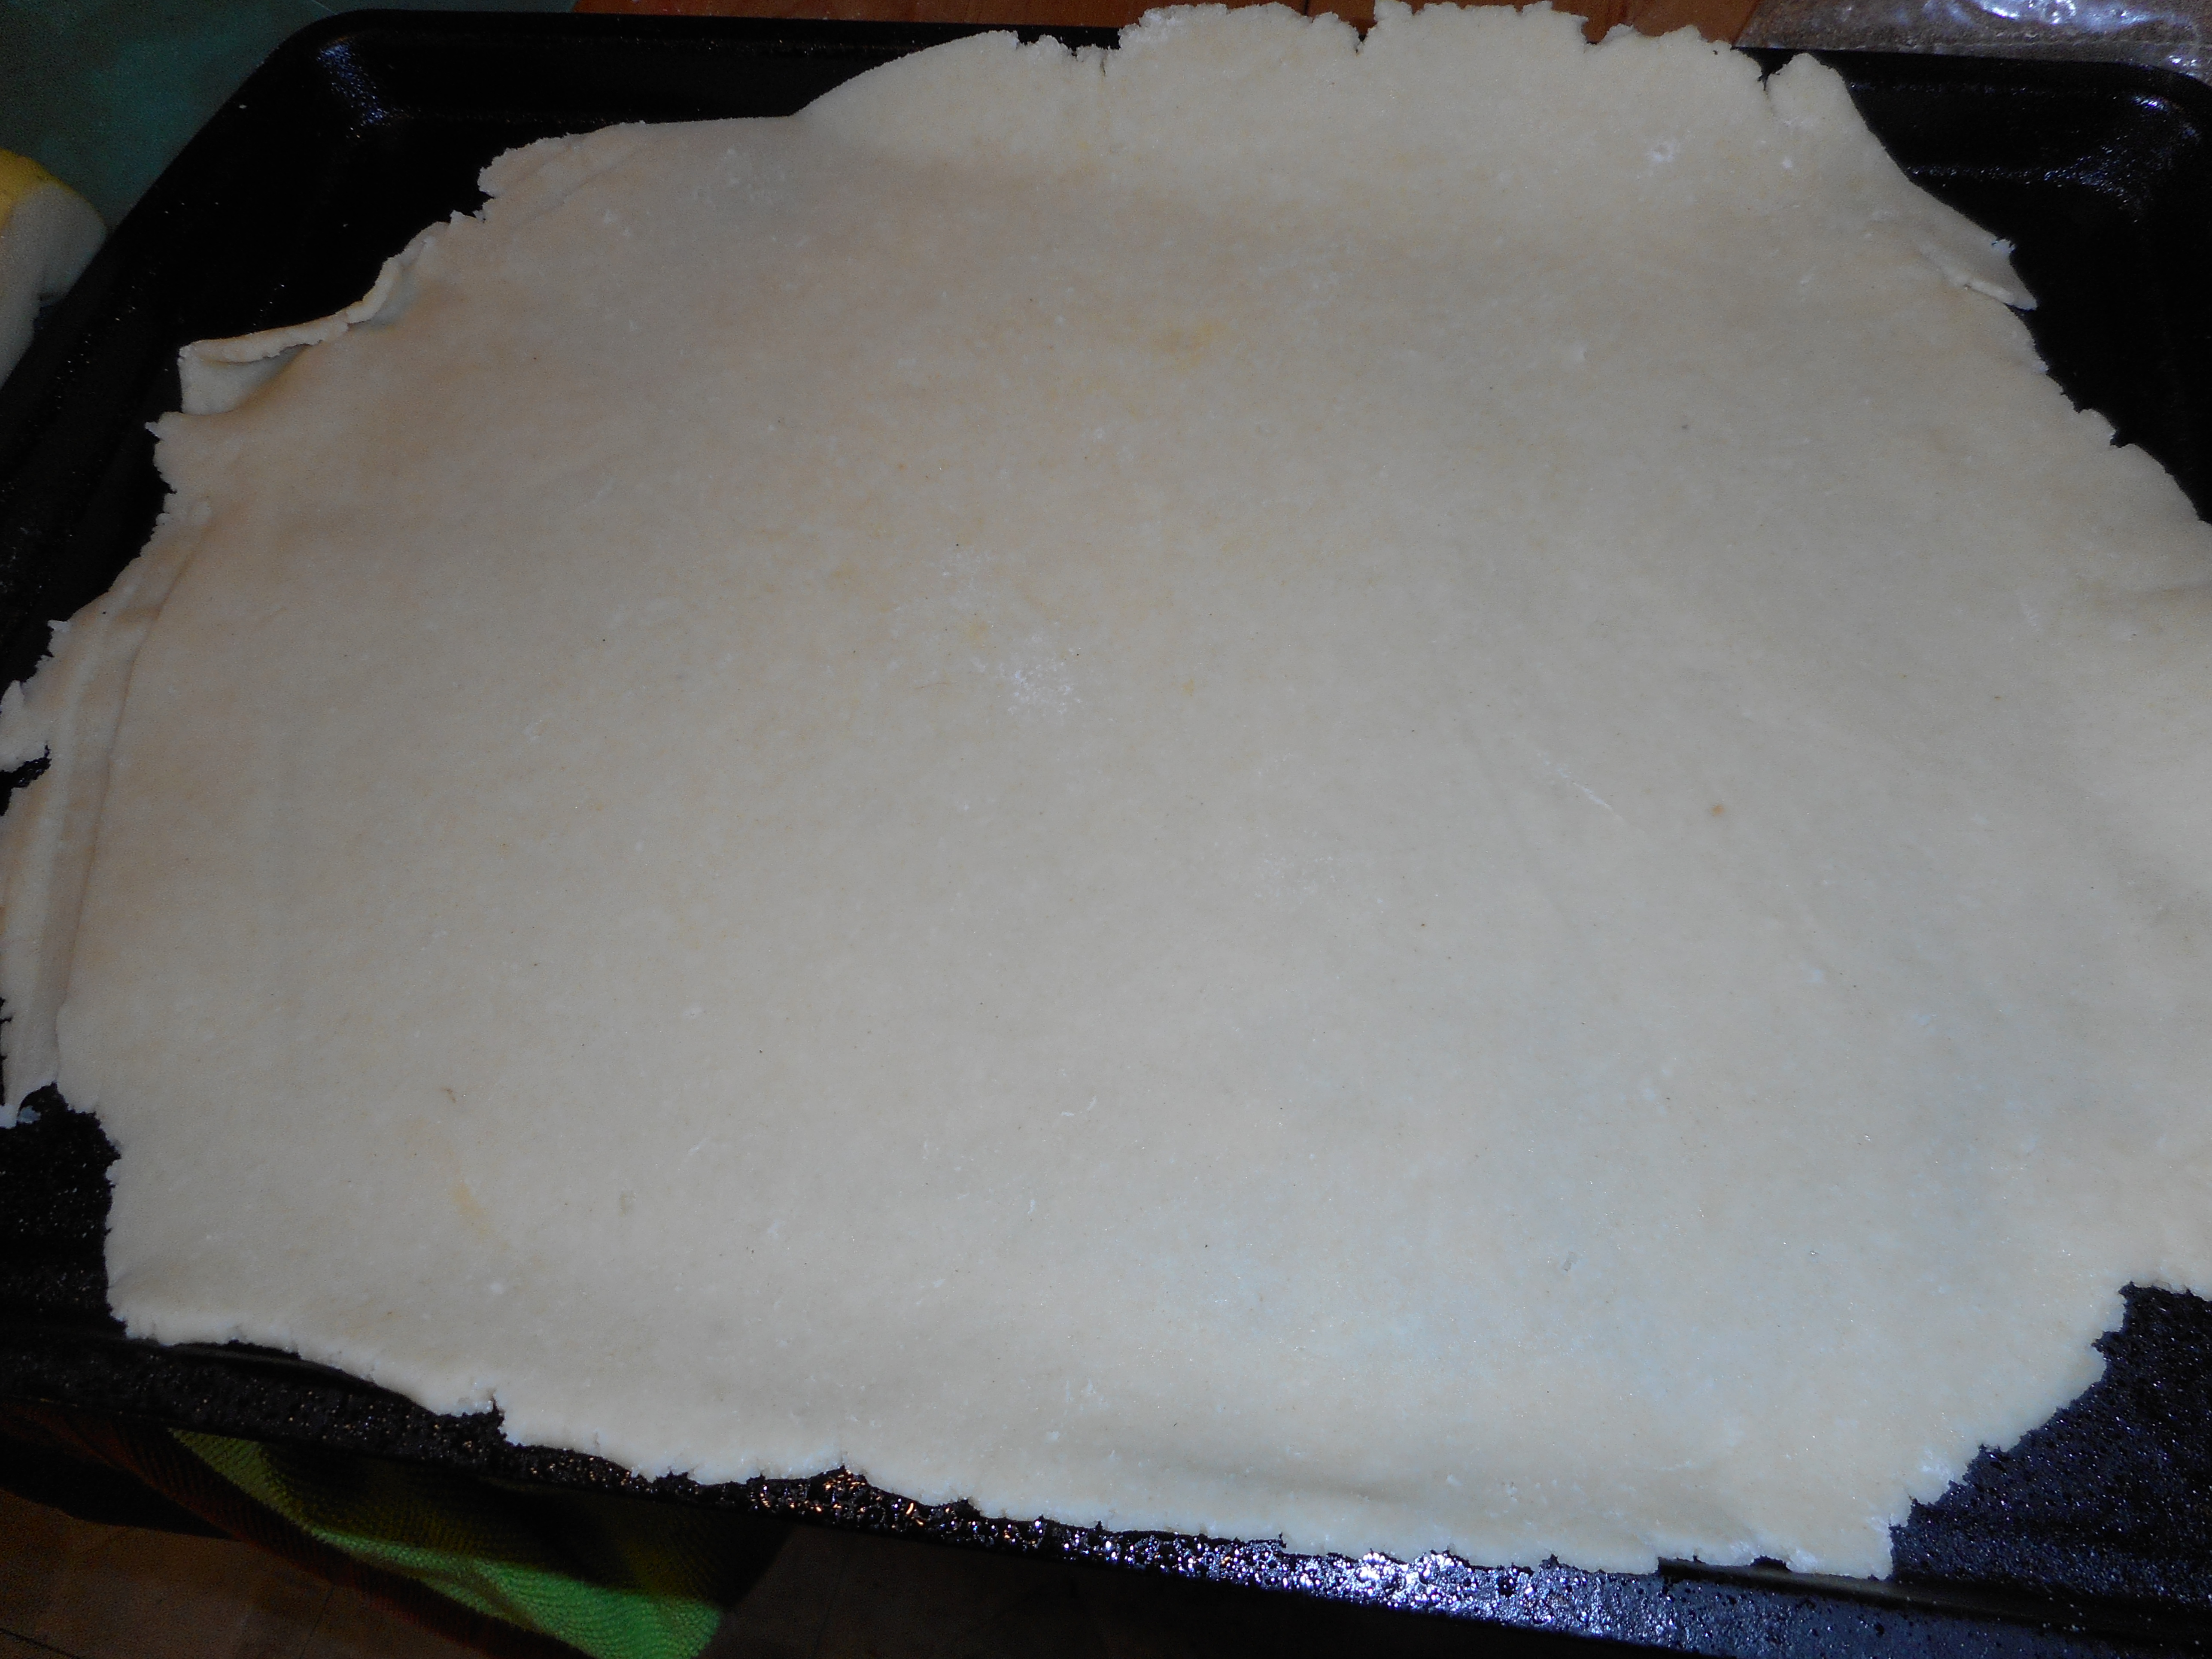
Roll out the somewhat chilled crust between the two sheets of wax paper into a rectangle; about 9-10 by 12-14 inches, try to get the thickness even, no thick middle! I use my pie bag as it works great even for weird shapes. Peel off one side of paper and place on a baking sheet pan that you sprayed lightly with cooking spray, centered. Remove other slice of wax paper. I have also placed on a silicon baking sheet on top of the pan. Works great.
Place your skinny sliced apples skin side up on the crust, separating them slightly. I made two long rows and put a few slices down the sides. Leave a 1 ½ inch border of crust untouched all around the fruit. Pour the brown butter all over the fruit. Sprinkle with the dark brown sugar. Fold up the border of dough to form rustic sides; connect at the corners, no need to make it perfect; it is a galette! You can fold up the dough first and then add the brown butter and sugar; done it both ways so do what you prefer. Beat the egg well with a small whisk and add one tsp. water. Brush the entire tart shell and fruit with it. Sprinkle with that spoonful of regular sugar.
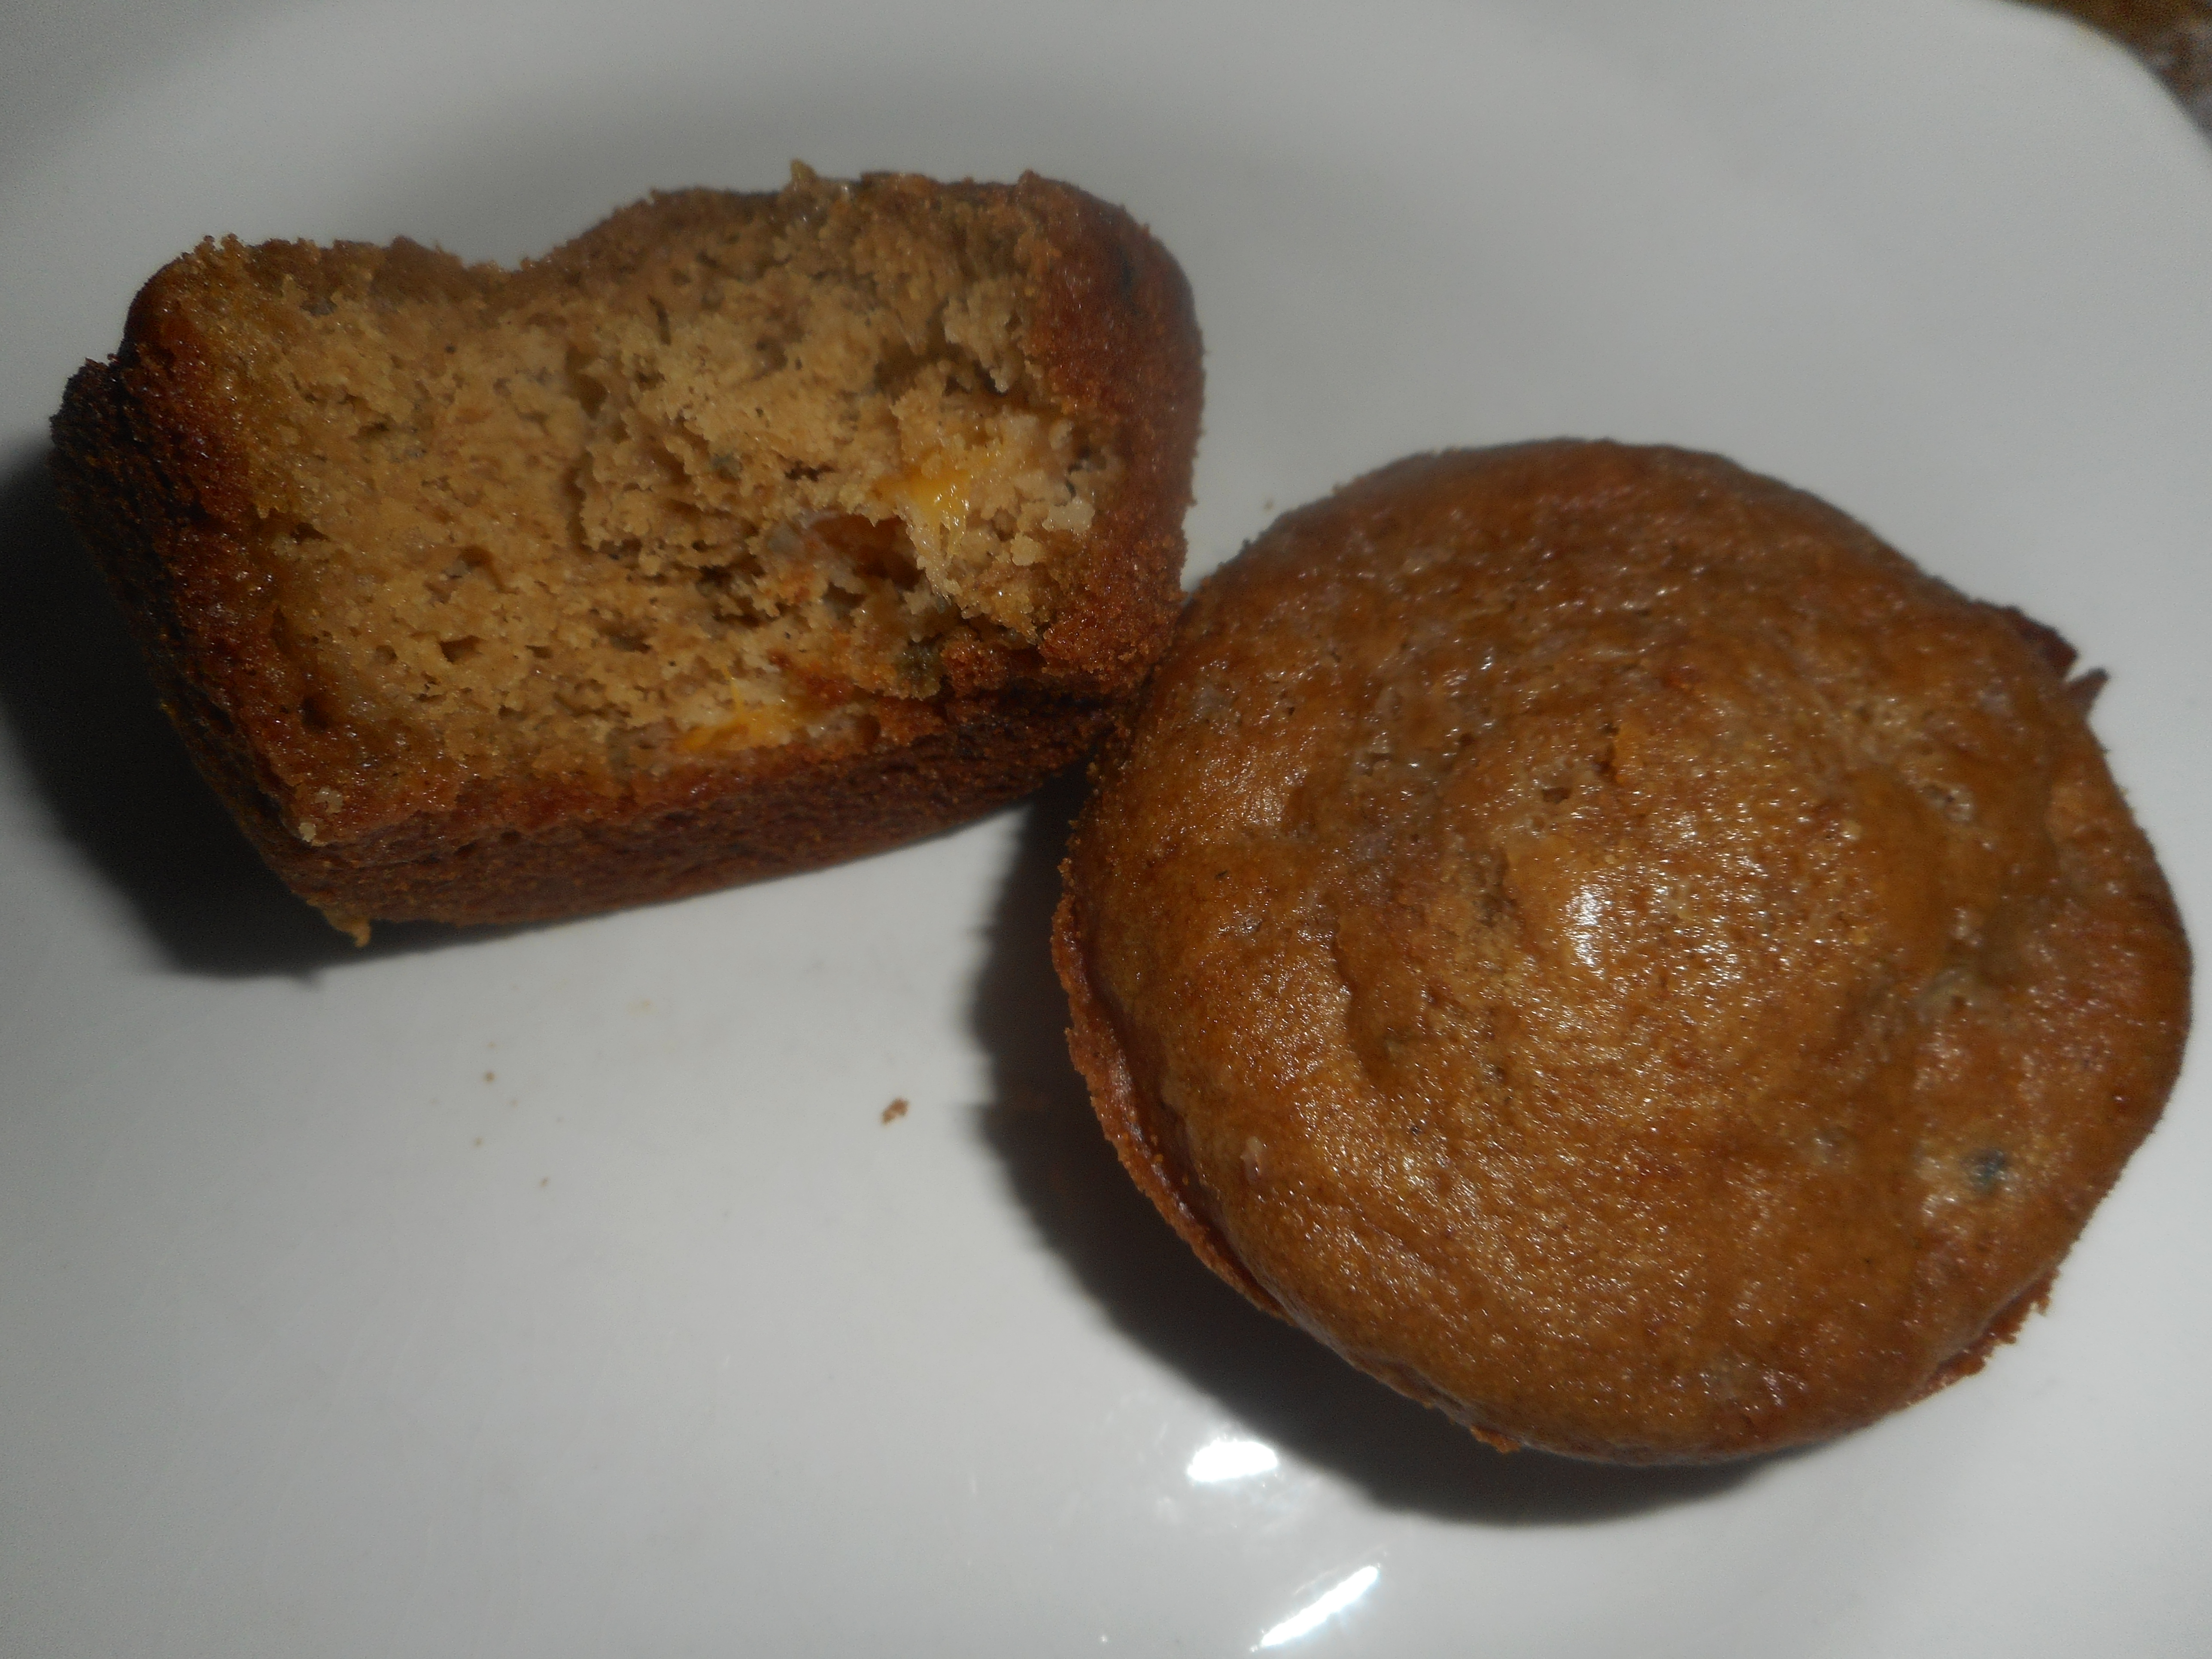
Bake in a preheated 375 degree oven for 40-50 minutes until bubbly and the crust is light brown. Cool at least 15 to 30 minutes before serving.
I served mine with the time honored tradition of vanilla ice cream, my favorite: Turkey Hill’s homemade variety of vanilla. For another meal I served it with plain organic yogurt; a great contrast and organic two percent yogurt is amazingly rich in flavor and no added sugar. It was also delightful all by itself so you can savor the delicate flavors of the apples with the brown butter and brown sugar. The original recipe had some fancy whipped cream flavored with a couple of table spoons of maple syrup; next time! And there sure will be another apple galette this fall. It was tasty – my mom said it was better than apple pie! I loved the extra crunch the crust had from the painting of egg wash and sugar. My pie crust has never been put to better usage nor had better flavor.

Original post: November 2014.
Brown Rice Flour Mix (or use King Arthur GF flour; same recipe)
2 c brown rice flour
2/3 c potato starch
1/3 c tapioca flour