Christmas Stollen, 2.0….Even Better!

Gluten-Free Holiday Stollen Yield: two 10″ loaves

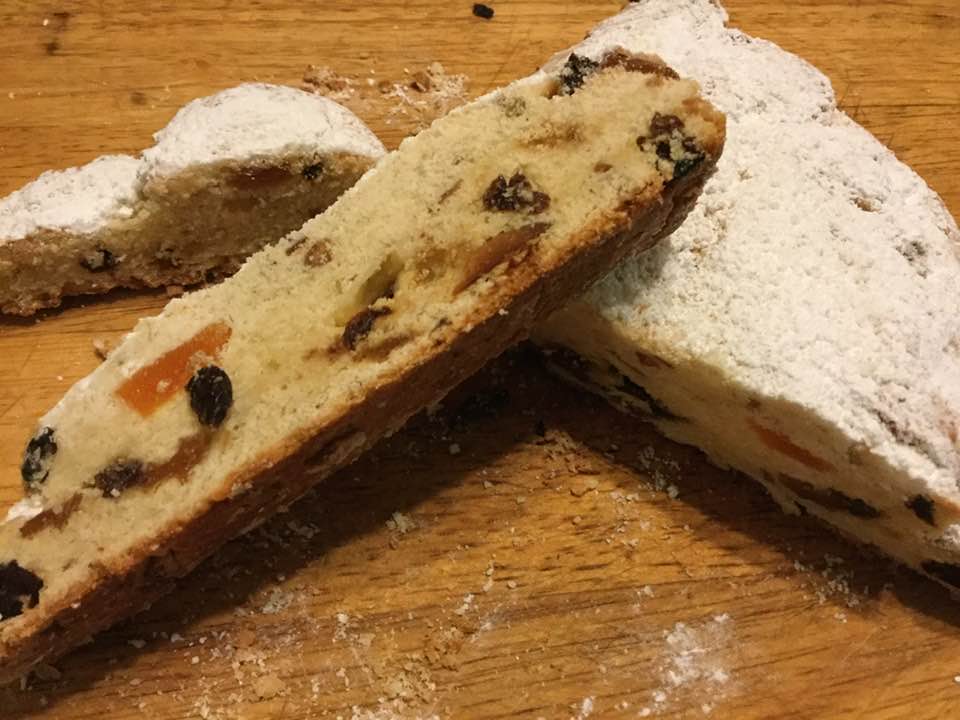
The classic Christmas stollen bread is made with yeast. Shush, don’t tell your gluten eating friends that this quicker, easier gluten-free version, made with baking powder as the rising agent, is even tastier in my humble opinion. Filled with dried fruit and toasted almonds and covered with a layer of melted butter and powdered sugar, this is more like pastry and is delicious with a cup of coffee or tea. Great choice for when company is coming as it isn’t that much work or time needed to create this masterpiece. Everyone will think you slaved all day to bake it. No need to tell them how easy it is! Its origins are Germanic but it isn’t heavy or dry; flaky and tender, pastry perfection. If you are searching for the perfect gluten free holiday treat; look no further. I cannot say enough good things about this treat. It is loved by all, and that second loaf makes a wonderful gift. I am looking forward to enjoying stollen this afternoon; in the oven baking right now!

I first made it 3 years ago, lost the recipe; had to get it again from the King Arthur Flour’s web site customer service center as they had removed it from their recipe rotation. They said it needed some tweaking. I disagree, it is just delectable although shaping it can be rather messy. It is far easier made without yeast which adds steps and can be finicky. I frankly don’t miss the yeast like I once thought I would. This dough is very tender and flavorful, I have been known to eat leftover tidbits raw it is that tasty. My family adores this pastry treat and will do nefarious things to get more stollen at Christmastime.

Notes: You could use orange rind instead of lemon rind and the dried fruit selection is entirely up to your tastes or your pantry. If you dislike the raisins substitute more dried fruit. One more good thing; it doesn’t require aging like a fruit cake. As soon as it cools you can cut a fat piece and enjoy a slice of heaven on earth!

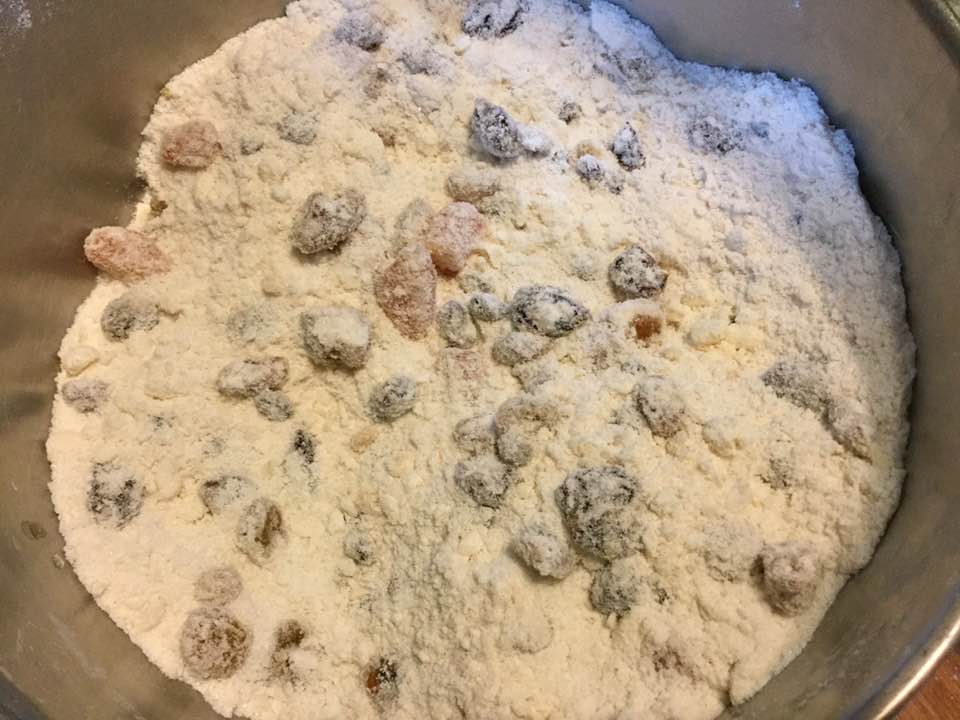
Adding the butter
Butter is now integrated into dough using pastry cutter

Dough

2 1/4 cups King Arthur basic blend Gluten-Free Flour

1/2 cup granulated sugar

1 1/2 teaspoons baking powder

1/2 teaspoon salt*

3/4 teaspoon xanthan gum

1/2 cup (8 tablespoons) cold butter

3/4 cup ricotta cheese, part-skim milk type, let warm a bit to get it close to room temp. Can use whole milk ricotta if that is what you have.

2 large eggs, room temp

1 teaspoon vanilla extract

Grated rind of 1 small lemon; or 1/4 teaspoon lemon oil, or 1/4 teaspoon lemon extract

1/2 cup golden raisins

1/2 cup of your favorite dried fruits, chopped to 1/2″ pieces Yes, dried, not fresh. (I do apricots, cherries, currents, raisins or peaches/pears)

1/3 cup slivered almonds, toasted and cooled

—————

*Reduce the salt to 1/4 teaspoon if you use salted butter.
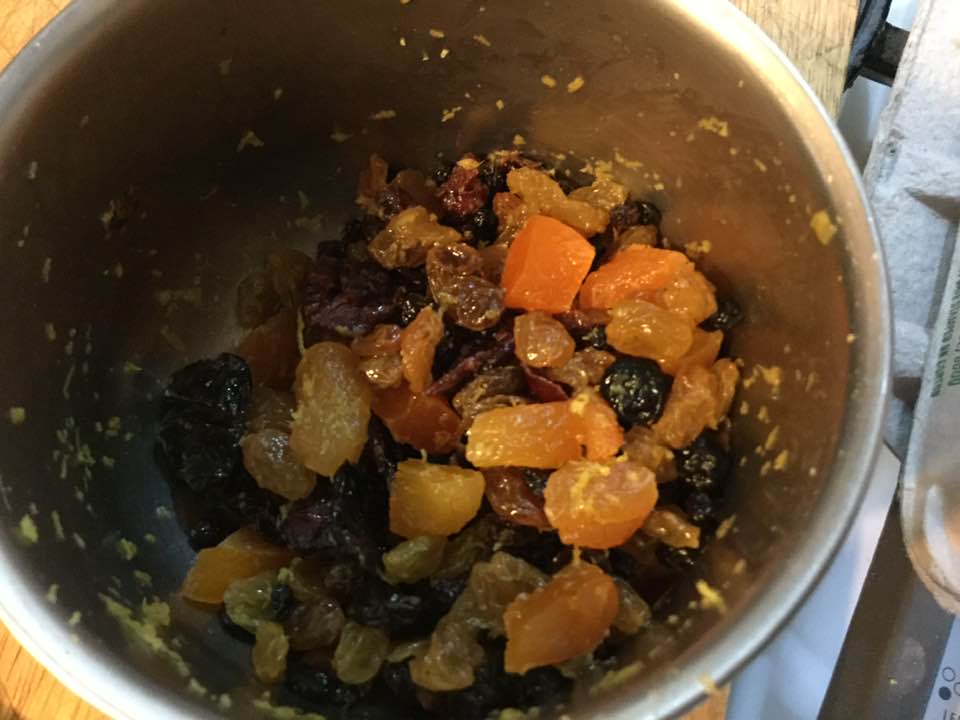
dried fruit and citrus zest

Topping

the dried fruit is mixed in!

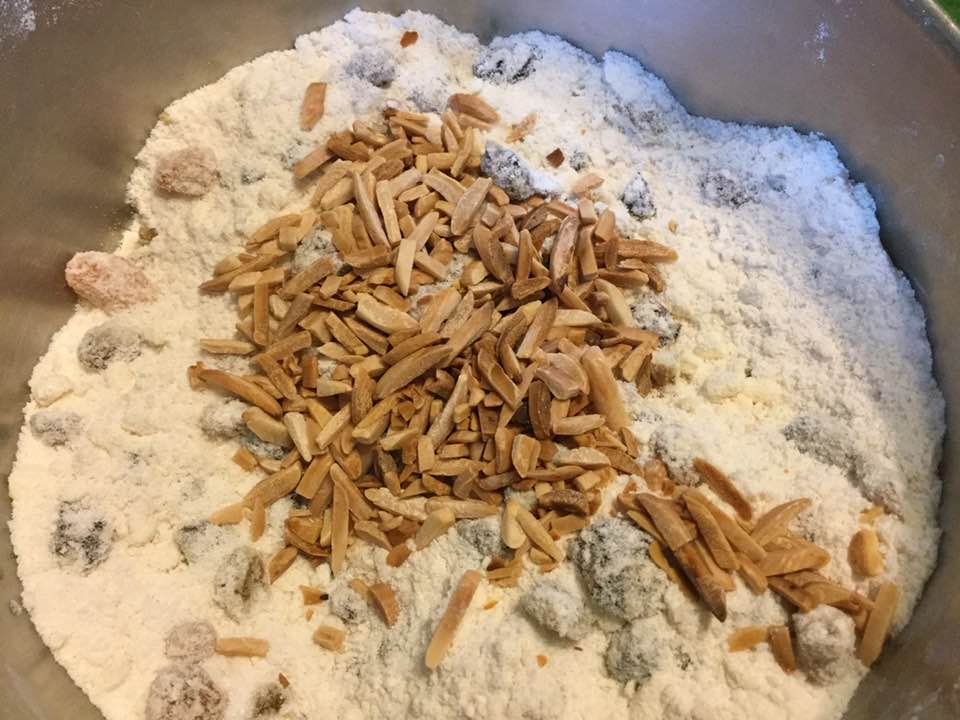
Adding the toasted almonds
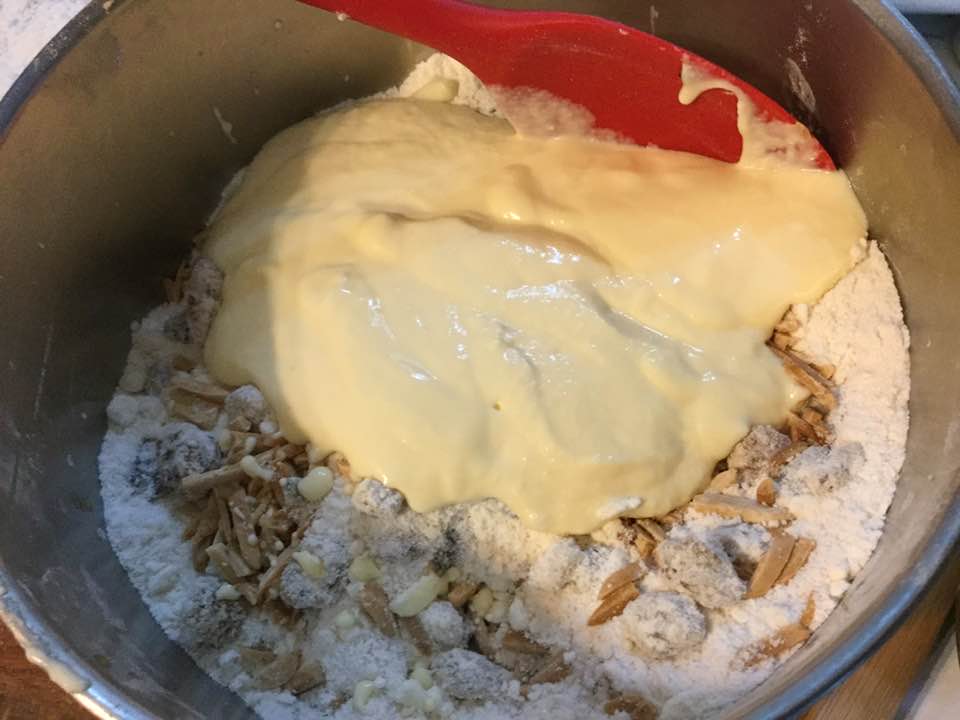
Adding the wet mixture into the dry dough
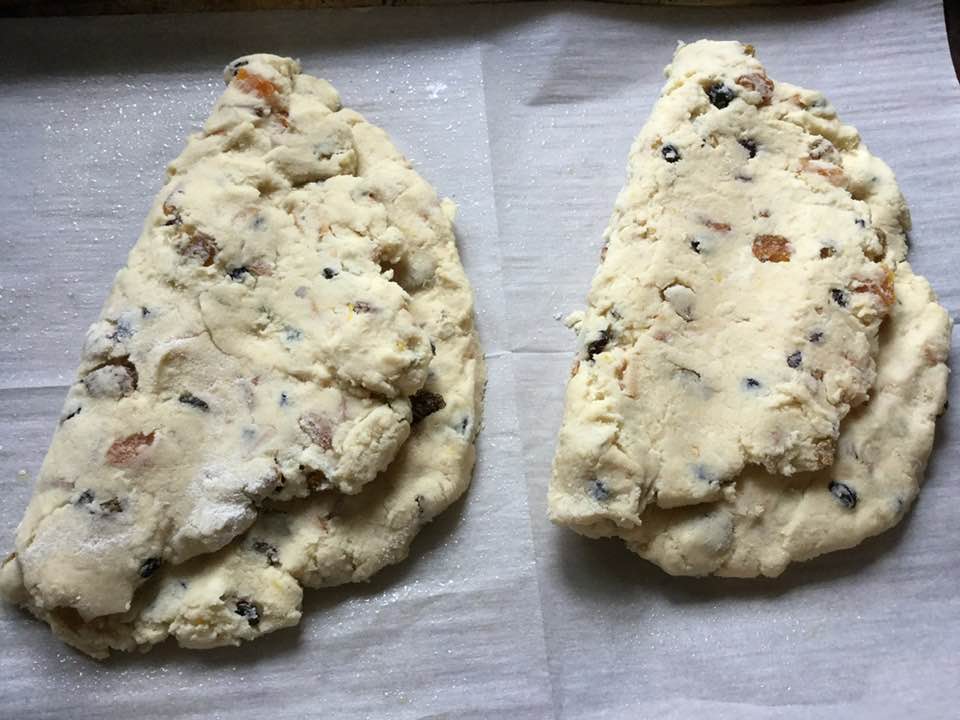
formed stollen ready to bake
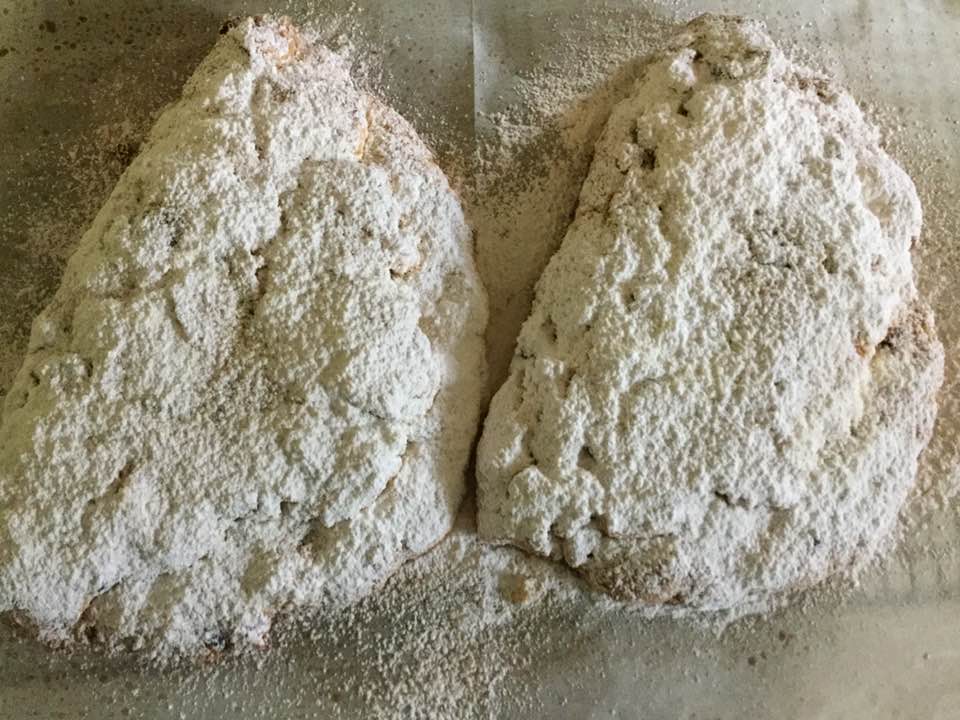
baked and powdered
More powdered sugar sprinkled on using a sieve

4 tablespoons butter, melted

2/3 cup confectioners’ sugar

Directions

1. Preheat your oven to 325°F. Lightly grease a baking sheet, or line it with

parchment.

2. Whisk together the flour, sugar, baking powder, salt, and xanthan gum in a mixing bowl.

3. Cut the cold butter into small chunks, then blend it into the flour mixture to form uneven crumbs.

4. In a separate bowl, mix together the cheese, eggs, vanilla, and flavors.

5. Toss the fruit and almonds with the flour mixture until evenly distributed. Then combine the wet and dry ingredients, mixing until most of the flour is

moistened.

6. Turn the dough out onto a lightly floured work surface, and knead it two or three times, until it holds together. Divide it in half.

7. Pat each piece of dough into an 8″ x 7″ oval about 1/2″ thick.

8. Fold each piece of dough roughly in half, leaving the edge of the top half about 1/2″ short of the edge of the bottom half. Should you fold the long way, or the short way? The long way will give you a longer, narrower stollen, with shorter slices; folding the short way will give you a wider, fatter stollen, with longer slices.  I do the long way, your choice.

9. Use the edge of your hand to press the dough to seal about 1″ in back of the open edge; this will make the traditional stollen shape. It’s also the familiar Parker House roll shape, if you’ve ever made them. The dough will probably crack; that’s OK, just smooth it out as best you can.

10. Carefully place the shaped stollen on the prepared baking sheet.

11. Bake the stollen until they’re very lightly browned around the edges and on top, about 40 minutes. A cake tester inserted into the center should come out clean.

12. Remove the stollen from the oven, and transfer them to a rack. Brush them each with 2 tablespoons melted butter. Sprinkle heavily with confectioners’ sugar.

13. Allow the stollen to cool, then brush with butter again, and sprinkle with sugar again. Wrap in plastic wrap until ready to serve; serve within a week. If desired, sprinkle with additional sugar just before serving.

14. Yield: two 1-pound stollen loaves. I like to freeze one for another occasion if I am not gifting it right away. Enjoy!
Homemade Chili Rellenos and Super Easy Mexican Rice Made in an IP

Chili Rellenos and Mexican Rice

Chilly nights make me long for spicy food and I turn to Mexican dishes as well as Indian curries. They can warm your tummy and brighten up a dull day with vibrant flavors. Curries and Mexican food can be hot as in super spicy; depends on the pepper type and quantity added. I love zingy food but, my idea of spicy is probably on the mild side compared to many folks. Of course, you can always up the spicy ingredients, the jalapeno pepper in this comes to mind. Or cut back if you want it milder.

One of my favorites that I don’t get to eat these days are chiles rellenos. Spicy peppers stuffed with cheese, battered and fried. I bought a few poblano peppers at the farmer’s market for this purpose. I had Mexican cheese in the fridge. The rest of the ingredients were on hand. I do say that next time I will try it with Monterrey Jack cheese; in many of the recipes I previewed in my search for a suitable one that was the cheese of choice. I think it would have a bit more flavor and more melty quality so I do suggest you use that. I made 4 peppers; the recipe I altered was for 6, next time I will do six for sure. I did find the poblanos to be on the hot side for me. Thinking Anaheim for next time. I’m always tweaking recipes to make them more perfect, for me anyway!

The Mexican rice was to be from scratch and I wanted to go a bit more healthy; I used par cooked brown rice; cooked it 7 min in my IP. I think 6 minutes would be enough. If you use regular brown rice you will need to cook it much longer; more like 25 minutes so I suggest the par-boiled rice for quicker cooking.

I started the peppers; charred them in my broiler for about 5-6 minutes on opposite sides and then covered and let stand 10 minutes while I got the rice going. Once it was in the IP and the lid on I went back to the chile rellenos recipe and they both were done around the same time. Success!

Chili Rellenos

Pepper Ingredients:

6 big mildly hot peppers; choose Anaheim or Poblano

3 eggs, separated

6 sticks of Monterey Jack cheese; ½ inch dimeter and the length so they fit inside the pepper.

¼ cup white rice flour mixed with ¼ tsp. sea salt; on a plate

Canola oil to put 1/4-1/2 inch deep in medium fry or sauce pan. 1-2 cups

Sauce ingredients;

1 Tbsp mild olive oil

2-3 Tbsp. minced onion

¼ tsp. cumin

4 ounces tomato sauce (half an 8 ounce can; the rest gets used in the Mexican rice)

Directions: turn on oven to broiler. Place the whole peppers on a piece of aluminum foil on a small sheet. Broil 5-6 minutes until charred; take out and turn over with tongs or fingers. Do other side 5-6 minutes. Do stay near by to yank out before they get over done. Cover with foil and let stand 10 minutes. Then peel off skin of peppers, don’t worry if you can’t get all of it. Then cut a slice in one side and remove all the seeds. Then stuff the pepper with a fat stick of cheese. Fasten with 1-2 toothpicks to keep cheese in. Place on plate until you are ready to finish the dish.

Mexican Rice

Ingredients:

3-4 Tbsp. mild olive oil

1 ¼ cup par boiled brown rice (do not rinse)

¼ cup chopped onion

½-1 jalapeno pepper minced, no seeds unless you want it hotter

1 tsp. minced garlic

1 ½ cup water mixed with one veggie bouillon cube

4 ounces tomato sauce *the other half of the 8 oz can

1 carrot diced

½ cup frozen peas

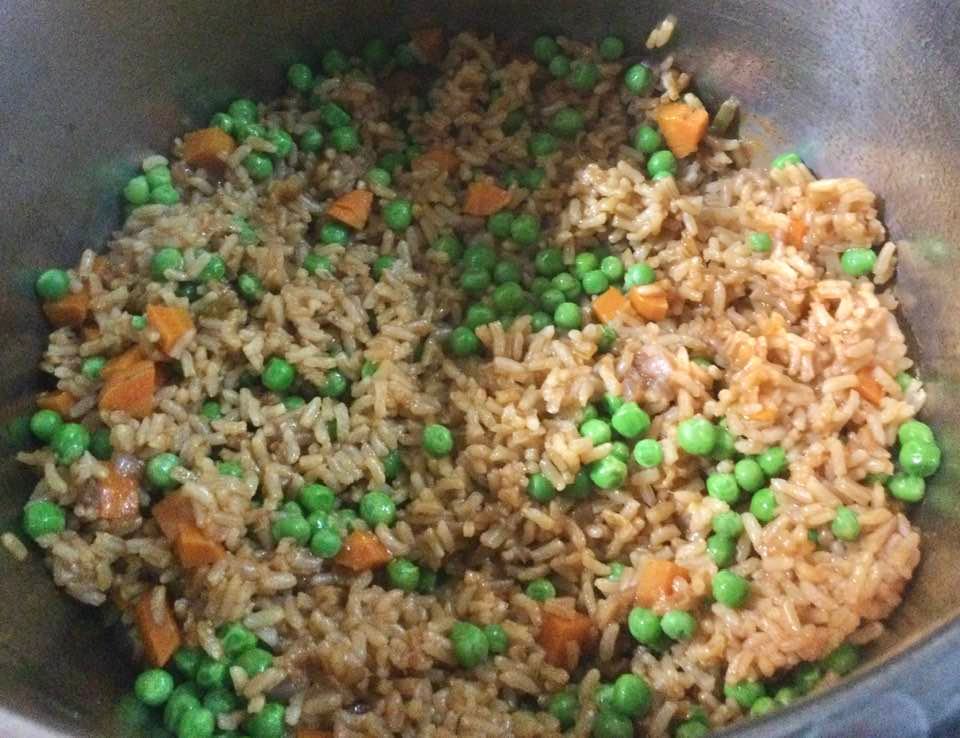
Directions: turn IP onto sauté. Add oil, let warm a moment and add brown rice, stir with oil; let brown for 2 minutes. Add the onion and cook 2-3 minutes. Add minced pepper and garlic. Stir and cook 2-3 minutes. Add broth you created with water and bouillon cube, the tomato sauce and the chopped carrot. Stir up and put the lid on. Cook under pressure 6-7 minutes. Let stand 10 minutes. Release pressure, open, add peas, put lid back on (no need to lock) and let stand 2-3 minutes. Open, fluff gently with fork so peas are getting a bit blended in without breaking the rice grains. Serve and enjoy! This would be perfect with almost anything Mexican like tacos or enchiladas.

Continuation of peppers: while the rice cooks in the IP: fry those pepper babies up!

Use a small electric mixer to whip whites in a medium mixing bowl until they are stiff and then add egg yolks one at a time and blend briefly to make an even mixture. Heat the oil on your stove until hot but not smoking. I used an 8 inch fry pan that would hold 2-3 peppers at a time. Then roll the stuffed peppers one at a time in flour mixture. Next, dip them in the egg fluff coating and gently lay one in the hot oil. I tried to get as thick a coat as possible and cover the entire pepper. Get a second one ready and put it in there too. Turn them over gently once the bottom is a nice medium brown. I used a long big metal spoon with holes in it, tongs might help. As they get done remove them to a oven safe plate lined with paper towels. Add a third once you take the first pepper out. And so on; Put the plate in the oven warmed to 200 degrees while the rest fry. Meanwhile I put the sauce oil and onion in a small pan and let them cook 2-3 minutes. I added the cumin and stirred it. Cooked 30 seconds, added tomato sauce and cooked on low for 4-7 minutes.

Serve by placing some sauce on the plate and top with the fried peppers; 2 per person. Add Mexican rice to the dinner plate. I had a salad too afterwards to settle my fiery tummy, LOL! Those poblanos were a bit hot for me! Still delish…Ole!

Chili Con Carne with a Twist

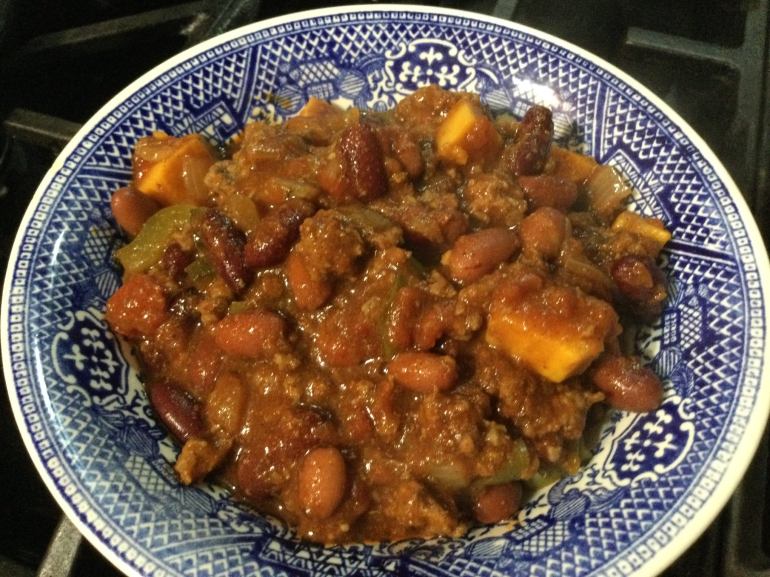
Our PA weather is chilling down. Need something to warm up your tummy and tired of turkey? Try some homemade chili. So easy; one pot, if you like beans in it this is your recipe. And a little something different; cubes of yam. Yeap yam, it picks up all those spicy flavors. Great with cornbread, I had some leftover from Thanksgiving; put it in the freezer and it tastes fresh. I used ground beef, you can use turkey, venison, or use a plant-based ground meat substitute. This is somewhat spicy but not too much, my tummy can no longer handle the really spicy stuff. You can up the spice or tone it down a bit.  Your chili, your choice. Enjoy!

Need something special!

Angie’s Sort of Spicy Chili Con Carne

Ingredients

1 1/3 lb. ground beef, 90 percent is what I used

Cooking spray

1 medium onion; chopped into ½ cup dice

4 garlic cloves, minced

1 medium poblano pepper diced

2/3 cup diced green or red bell pepper

3 tsp. chili powder

½ tsp. cumin

½ tsp. smoked paprika

½ tsp. coriander

½ tsp. cinnamon

¼ tsp. red pepper flakes

1 Tbsp. Worcestershire sauce

1 28 ounce can crushed tomatoes

¼ cup red or white wine (one you would willingly drink!)

1 1/3 cups peeled and cubed yam; roughly that amount

1 cup water

1 tsp. kosher salt

¼ tsp. ground black pepper (more if you want it)

1 14 oz can large kidney beans, rinsed and drained

1 14 oz can small red beans, rinsed and drained

Directions:

Spray la arge wide 4 qt. pot with cooking spray, heat and add ground meat. Let brown as you break it up and spread out the meat. After turning it once add the onions. Cook, stirring a lot, until meat isn’t pink. Add minced garlic; stir in, cook 30 seconds. Add all spices, stir well; cook a minute. Add wine, stir, Add crushed tomatoes. Use cup of water to rinse tomato can and add all to pot. Add diced yams and Worcestershire sauce. Cover and simmer on low at least 30 minutes; I cooked mine for more like an hour. I stirred it a lot, at least every 10 minutes taking care to scrape the bottom so nothing is sticking. I had to go out so I shut it off, put the lid on and restarted it when I returned. It’s flexible that way. Then add kosher salt to taste; I put in 1 tsp. Add the beans. Stir in carefully and cook 15-25 more minutes. Taste and adjust salt, add more ground black pepper if wanted. Honestly it is even better after a good rest in the fridge; the flavors will blend further. Great with corn bread. I didn’t add any toppings; it was just right without any additions but you can go to town with scallions, grated cheese, or what ever you like. Enjoy!

Get a hunk of cornbread and dive in!

Eggplant and Ground Meat Stir-fry

There is this recipe for chowed eggplant with ground pork that I make often when I can find skinny Japanese eggplants. Chowed means stir fried.  It comes out great every time I make it, slight addiction is my position on this recipe. This latest version uses ground chicken thigh meat instead of ground pork. If you get tired of pork or don’t eat it chicken is an excellent choice.  I bought it at Valley Farm Markets; their meats can’t be beat for flavor and value! I suppose you can used ground chicken breast too. Anyway, it worked very well.

I often add veggies; last time it was some sticks of fresh zucchini from my garden  and a bit of sliced cabbage.  THis time I added celery rounds. Both times it was delish for sure. The original recipe is by Jeff Smith, out of his cookbook, The Frugal Gourmet Cooks Three Ancient Cuisines; China, Greece and Rome. It is full of great recipes; where I got my potsticker and other dim sum recipes.  No judging here of Chef Smith; just enjoying great food…

Notes; can change out zucchini and or cabbage, for green beans, celery, carrots, pea pods…but you can’t change out the eggplant.  Ground pork is excellent this way as well. Can use yellow onion rather than green if you prefer; cook a bit longer than scallions if you do.  You could also serve this with rice noodles; the wide kind you let soak in boiling hot water for ten minutes; that’s all the cooking it needs.

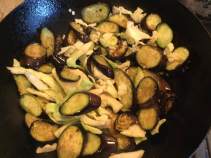
eggplant stir fry
japanese eggplant, stir frying
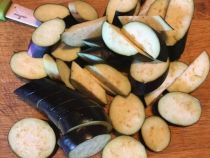
japanese eggplant sliced

Angie’s Eggplant with Ground Chicken

1 lb skinny Japanese eggplant

1 tsp salt

½ tsp. light soy sauce, gf

1 ½ tsp. dry sherry or rice wine

½ tsp. grated fresh ginger

½ lob ground chicken, preferably thigh meat

2 tbsp. mild olive oil or peanut oil

2 cloves of garlic minced

3-4 green onions sliced in 1 to 2 inch lengths and cut in half if white part

1 cup zucchini strips; long rectangle shape

2/3-1 cup sliced green cabbage; not too thin

1 tsp. toasted sesame oil

Pinch sugar

Directions:

Cut unpeeled eggplants into ½ inch thick diagonal slices and cut each in half the long way. Sprinkle with salt, let stand ½ hour draining in a colander.  Pat dry with paper towels.

Mix meat with soy sauce sherry and fresh ginger, let stand 20 to 30 minutes.

Slice or chop veggies.

Heat wok and add 1 tbsp. oil. Add ground meat mixture and flatten a bit; cook until browned lightly; flip over and brown other side; no pink showing; chop up with utensil and set aside.  Add rest of oil and then garlic, cook 30 seconds, add eggplant, cook until it appears more than half done; about 5 minutes; then add zucchini and cabbage, stir for 4-5 minutes, add sesame oil and green onions. Stir a minute, add pinch sugar, wok until cabbage is crisp tender.

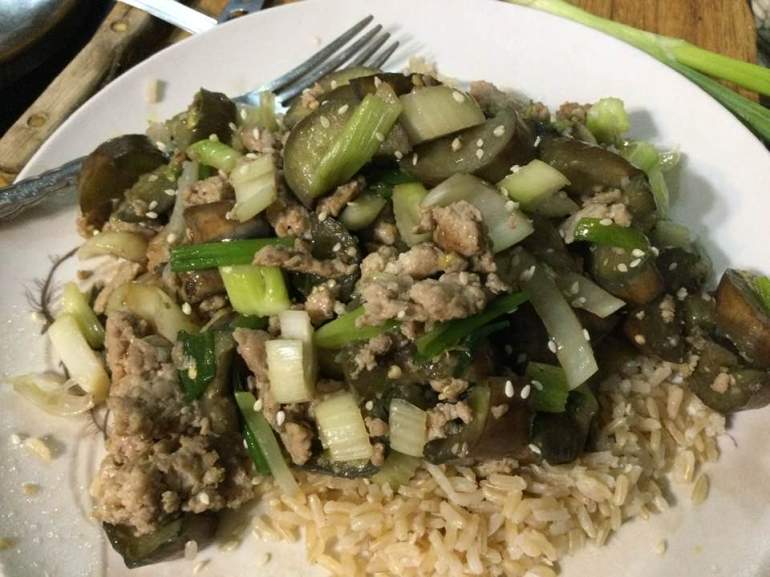
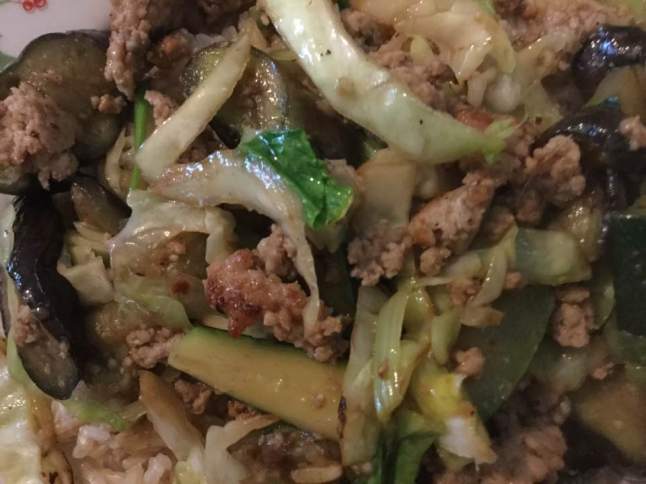
eggplant stir fry on plate

Serve with brown or white rice.  I made my brown rice in my handy instant pot pressure cooker.  I did a cup of long grain brown rice, 1 ¼ cup water, 1 tsp. oil, ½ tsp. sea salt; Manual high pressure for 20 or so minutes, ten minutes natural release.  Easy peasy.

There is this recipe for chowed eggplant with ground pork that I make often when I can find skinny Japanese eggplants. Chowed means stir fried.  It comes out great every time I make it, slight addiction is my position on this recipe. This latest version uses ground chicken thigh meat instead of ground pork. If you get tired of pork or don’t eat it this is an excellent choice.  I bought it at Valley Farm Markets; their meats can’t be beat for flavor and value! I suppose you can used ground chicken breast too. Anyway, it worked very well.

I added some sticks of fresh zucchini from my garden  and a bit of sliced cabbage.  It was delish for sure. The original recipe is by Jeff Smith, out of his cookbook, The Frugal Gourmet Cooks Three Ancient Cuisines; China, Greece and Rome. It is full of great recipes; where I got my potsticker and other dim sum recipes.  No judging here of Chef Smith; just enjoying great food…

Notes; can change out zucchini and or cabbage, for green beans, carrots, pea pods…but you can’t change out the eggplant.  Ground pork is excellent this way as well. Can use yellow onion rather than green if you prefer; cook a bit longer than scallions if you do.  You could also serve this with rice noodles; the wide kind you let soak in boiling hot water for ten minutes; that’s all the cooking it needs.

eggplant stir fry
japanese eggplant, stir frying
japanese eggplant sliced

Angie’s Eggplant with Ground Chicken

1 lb skinny Japanese eggplant

1 tsp salt

½ tsp. light soy sauce, gf

1 ½ tsp. dry sherry or rice wine

½ tsp. grated fresh ginger

½ lob ground chicken, preferably thigh meat

2 tbsp. mild olive oil or peanut oil

2 cloves of garlic minced

3-4 green onions sliced in 1 to 2 inch lengths and cut in half if white part

1 cup zucchini strips; long rectangle shape

2/3-1 cup sliced green cabbage; not too thin

1 tsp. toasted sesame oil

Pinch sugar

Directions:

Cut unpeeled eggplants into ½ inch thick diagonal slices and cut each in half the long way. Sprinkle with salt, let stand ½ hour draining in a colander.  Pat dry with paper towels.

Mix meat with soy sauce sherry and fresh ginger, let stand 20 to 30 minutes.

Slice or chop veggies.

Heat wok and add 1 tbsp. oil. Add ground meat mixture and flatten a bit; cook until browned lightly; flip over and brown other side; no pink showing; chop up with utensil and set aside.  Add rest of oil and then garlic, cook 30 seconds, add eggplant, cook until it appears more than half done; about 5 minutes; then add zucchini and cabbage, stir for 4-5 minutes, add sesame oil and green onions. Stir a minute, add pinch sugar, wok until cabbage is crisp tender.

eggplant stir fry on plate

Serve with brown or white rice.  I made my brown rice in my handy instant pot pressure cooker.  I did a cup of long grain brown rice, 1 ¼ cup water, 1 tsp. oil, ½ tsp. sea salt; Manual high pressure for 20 or so minutes, ten minutes natural release.  Easy peasy.


Peach Blueberry Custard Pie

Peaches and blueberries really do go together so swell. Tasty sliced and uncooked: with milk or cream or baked in a cobbler or a fruity crisp. But this, this is my latest obsession; in a custard pie. Not just any old custard but one made with Greek yogurt and egg yolks. Easy to throw together, creamy, never runny textured and a lusciously fruity flavor that may make you have to eat a second slice! The blueberries do tend to takeover the peach flavor of this pie even though there are more than twice as much peaches by volume, they are just a stronger flavor than peaches. You could play with the proportions of the two fruits; this is the amounts which I used. WARNING: This pie goes soft in 2 humid days so plan to gobble it down within that time frame for face the soggy crust syndrome. Inevitable with gf crust and a custard filling in hot/humid weather.

I don’t recommend frozen or canned fruit for this pie, simply not good enough and you must use plain, unsweetened Greek yogurt in the filling, plain yogurt is too runny. And no, it can’t be made without the egg yolks; it just wouldn’t work as a custard if there are no yolks in there. And one last warning; applicable to 99 percent of my recipes: Please don’t try it with Measure for Measure gf flour; this is calibrated for using King Arthur’s Basic GF Blend.

I hope you give it a try; super easy and super delicious. Best pie of the summer hands down! Making one in the morning…can’t wait for a slice still faintly warm…….

Just baked…hot from my oven. Deceptively plain looking…beneath those golden crumbs likes a intoxicating blend of fresh fruit and custard.

Angie’s Peach and Blueberry Custard Pie

CRUST:

1 c plus 2 tbsp brown rice flour mix (at bottom of recipe)

2 tbsp sweet rice flour

1 Tbps granulated sugar

½ tsp xanthan gum

¼ tsp salt

6 Tbps cold butter cut into 6 chunks

1 large egg

2 tsp fresh orange or lemon juice

Spray 9 inch metal pie pan with cooking spray, dust with white rice flour.

Mix dry ingredients in bowl of stand electric mixer.  Add butter and mix until crumbly and resembling coarse meal.  Add egg and juice.  Mix until it comes together into big chunks.  Shape into a ball with your hands. Put it on a crust sized piece of wax paper (14 x 14 inches more or less), flatten the crust ball some; put on top of it another piece of wax paper and chill it all in your fridge 15-20 minutes while you prepare the filling.

Filling:

2 1/2-3 cups sliced fresh peaches, peeled and cut in half inch slices

1 1/4 cup blueberries; rinsed

Mix in a medium bowl the following ingredients:

1 cup plain Greek yogurt, I prefer whole milk, and let it warm up a bit

2/3 cup sugar, sweeter if you like it that way or if peaches are not fully ripe

3 egg yolks, close to room temp.

1 tsp. pure vanilla extract

1/4 cup brown rice mixture flour (King Arthur Basic GF blend)

Crumb topping

¾ c brown rice flour mix (King Arthur Basic GF Blend)

½ c sugar

½ tsp xanthan gum

1/2 tsp. cinnamon

1/3 c cold butter cut into six chunks

Put all five ingredients in the same mixing bowl you made the bottom crust in and mix well with mixer paddle until crumbs form.

+++++++++++++++++++++++++++++++++++++

Directions: Turn oven on to 400 degrees. Put the oven rack on the closest to the bottom shelf position. Once the crust is chilled some but not hard, Roll it out and fit into the pie shell. Trim off excess crust. I like to chill those crumbs of crust and roll out to make a jam filled hand pie. Anyway, put the sliced peaches and blueberries in the pie shell in a fairly even layer, as the filling and crumbs will hide it there is no need for a pretty design. Then pour the filling over it and bake for 30 minutes. I turned down my oven to 375 after 20 minutes. While it bakes those 30 minutes make the crumbs. Carefully remove the pie from the oven and sprinkle the top of the pie with crumb mix;  I used about half of it but you could use a bit less if you don’t want a thick crumb layer or all of it for a really heavy crumb. Bake an additional 15-20 minutes until crumbs are lightly browned. Let stand at least 1 to 11/2 hours before slicing and serving. Enjoy!