Eating Gluten Free at Family and Friends…Yes it is Do-able!

I am just back from a week in New England visiting friends and my two sisters. Ate lots of gf food, most of it very yummy and only felt mildly ill once.  I ate at both my sister’s houses and at four friends.  One friend just gave me a GF snack bar and herbal ice tea, easily safe.  I was only there for a short visit as I returned to Pennsylvania so she was off the meal hook!

The other three were a contrast in attitudes and meals.  My friend up in New Hampshire made bbq’s pork ribs and potato salad.  He did not listen to my repeated advice to avoid spice mixtures.  He used a famous chef’s blend on the ribs which were slow cooked right on the grill grate.  As they smelled fantastic when I got there, tired from driving all the way up from PA, I bit the bullet and just ate some. I had brought the ingredients for a green salad including a zuke from my garden.  So I know that was safe! He was very relaxed about it and acted unconcerned about whether the food was safe for me although he claimed to understand the gluten free concept.  Luckily I did not suffer any ill effects from that supper.  Another spice blend might have made me sick and the labels are very iffy.  Best method is to make your own spice blend.

Another friend, Debra, in northern Massachusetts made a bbq meal too; this was late in my trip. She was very concerned and confessed to being stressed out before my arrival as to the safety of her food. She used a lot of fresh fruits and vegetables and virtually no spices.  She put aluminum foil on her grill grates to make sure they were not going to contaminate my meal with gluten from old bbqs.  Debra made a table groaning with yummy food with some help from me.  She had several kids and a husband to feed and still there were leftovers, it was quite a feast.  She tried very hard to make a memorable meal and I really appreciate all her efforts.

My dear friend Beth’s house is in Wellesley where I enjoyed some cold lemonade and homemade gf chocolate chip cookies.  A perfect snack.  But I know she was very concerned about contamination and that she went to great lengths to ensure the safety of the cookies as she made them.  She used a gf sugar cookie box mix to which she added chocolate chips.  Some of the best cookies I have eaten in the past year and a half.

My sister Elaine washed all the pots and pans in her dishwasher on the heavy cycle as did Beth. Not sure if anyone else did that.  Beth baked her cookies on parchment paper to ensure they didn’t get any wheat residue on them.

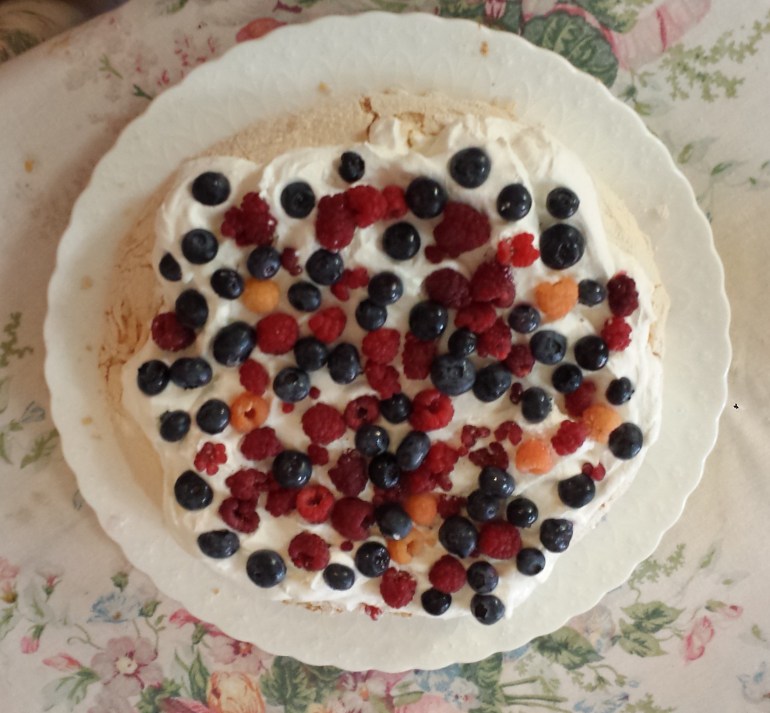
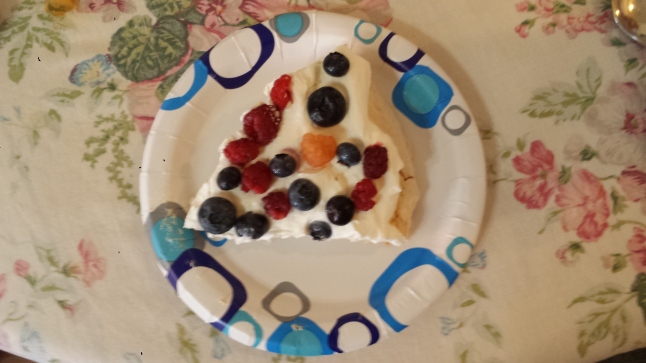
I helped make a big meal for family at Elaine’s. I made some French bread that was very well received; looked like a recipe picture from a cookbook when the loaves came out of the oven.  I also whipped up some deviled eggs and chilly cucumber soup. We had fabulous farmed Canadian salmon with a divine roasted grape tomato sauce.  I got to eat a big slice of her renowned pavlova topped with fresh strawberries.  There was no pavlova left on the plate when we were done!

My other remaining sister, Karen, made a wonderful Spanish stew with chorizo sausage and chicken breast as well as saffron and fresh spinach.  We debated the safety of that sausage after reading the label but I ate it and it was yummy.  Sometimes packaging says “spices” and that can be iffy…. I didn’t feel any ill effects.

I really appreciated all the culinary efforts of my friends and family.  They tried very hard to make my meals safe and they succeeded.  It was interesting how their attitudes differed.  From the very worried to the carefree and several stages in between!  I just wish the labels on foods were less ambiguous; food starch, spices, seasonings, natural flavor are all code words which often mean wheat flour.  Not acceptable or safe for me.  I am sure it is tough to have to read all the labels.  I do it myself every shopping trip. 

You can eat safely at someone’s home while you are on vacation if you pre-educate your friends/family on your dietary needs. My final point is that making a gluten free meal for a friend with celiac is quite doable and there are lots of food options for a tasty meal.  Thank goodness my friends were willing to try and each was successful using a different meal approach.

Pineapple Banana Smoothie….Let Me Count The Ways I Love You

This heat has me craving something cool and wet in the drink department.  Not too tough to figure out when I remember I have some really yummy pineapple juice in the fridge, as well as a container of organic low fat plain yogurt.  And a dead ripe banana is in the fridge, making three critical ingredients. This smoothie is nothing new but it is sure worth revisiting during these dog days of hot humid Pennsylvania summer.

So out comes the blender, in goes the peeled banana, two big spoon scoops of plain organic yogurt and a healthy glug of pineapple juice.  Maybe 2/3 cup of pineapple juice and half a cup of the yogurt. I don’t really measure.  It is a dump process, measuring cramps my style. The best quality yogurt makes the tastiest smoothie so go for the good stuff, not that non-fat crap either!  Then you add either some low fat milk or seltzer water.  Maybe 2/3 to 3/4 cup depending on how thin you want your drink to be.  The milk makes a more substantial drink than seltzer produces.   Thinner tends to be more thirst quenching in this heat and humidity.  Top it off with 4 ice cubes. 

Sometimes I add a tablespoon of flax seed meal to it.  When I want to be extra healthy and virtuous!  Then blend the heck out of it.   At last a minute or two. When it is good and frothy and the ice cubes are fully broken down, pour it into two glasses.  Drink up

Oh so thirst quenching and healthy.  Low calorie and if you have a cough it will help as pineapple juice is a natural cough suppressant.  I make it because it tastes so good on a hot day when I come in from working in the garden. It is naturally gluten free. It fills the void for a snack when there are no gf brownies or cookies around. Plus, it can be modified to fit whatever you have on hand.I wanted to remind you readers that a smoothie doesn’t have to have weird stuff like kale or chia seeds or even flax seed meal.  Or funky fruits like mangoes, kiwi or white nectarines. Go with what ever fruit and juice you have on hand.  The yogurt makes it a bit creamy and is good for you.  The ice is critical for that chill feeling as it slides down your throat.  It is a great way to get rid of ripe bananas or peaches before they can spoil.  Don’t use under ripe fruit as they are less flavorful.

 One last thought; a smoothie can even be a bit decadent if you add some ice cream! 

Strawberry Glace Pie…..Simply Stunning

Okay people, It is at the height of local strawberry season.   This dessert is so lick-your-fingers yummy  that I don’t want you to miss it and have to wait until next May/June to enjoy this strawberry classic.  The local produce store on Main Street here in Hellertown has local berries as does Bechdolt’s Orchard. Or try a farmer’s market for fresh flavorful local berries. If you can make a crust and stir the strawberry goop you can make this.

If you are one of my wheat loving friends; make what ever basic crust you like.  The filling is naturally gluten free.

My mom loves this pie and frankly so does our entire family.  Mom never put the cream cheese on the bottom but I like it as it keeps the crust from getting soggy and adds a delicate counter point to the sweetness of the filling.

strawberry pie and more flowers 005 strawberry pie and more flowers 017

It is not a great summer if you don’t indulge in this dessert at least once!

Angie’s GF Strawberry Glace Pie

Crust:

1 c plus 2 tbsp brown rice flour mix (at bottom of recipe)

2 tbsp sweet rice flour

1 Tbps. granulated sugar

½ tsp xanthan gum

¼ tsp salt

6 Tbps. cold butter cut into 6 chunks

1 lg egg

2 tsp fresh orange or lemon juice

Directions:

Spray 9 inch metal pie pan with cooking spray, dust with white rice flour.

Mix dry ingredients in bowl of stand electric mixer.  Add butter and mix until crumbly and resembling coarse meal.  Add egg and juice.  Mix until it comes together into big chunks.  Shape into a ball with your hands. Put it on a crust sized piece of wax paper (14 x 14 inches more or less), flatten the crust ball some; put on top of it another piece of wax paper and chill it all in your fridge 15-20 minutes.

Roll out pie crust in a pie bag or between the two sheets of wax paper, try to get the thickness even, no thick middle! Peel off one side of paper and place in pie pan, centered.  Remove other slice of wax paper.  Crimp edges all around.  Prick it in a dozen places with a fork to keep it from blowing up bubbles. Bake in a preheated 375 degree oven for 12-15 minutes until the crust is light brown.  Cool at least 30 minutes before filling.

Glaze:

1 cup mashed very ripe strawberries (I sort through the berries and use only the ripest ones for this part.)

2/3-3/4 cup sugar

3 tbsp cornstarch

½ cup water

Mix sugar and cornstarch in 1 qt heavy bottomed sauce pan, stir in water and mashed strawberries.  Cook on medium heat until it boils, stirring constantly.  If it seems too thick, add up to half a cup more water.  It needs to be thin enough to cling to your berries.  Boil and stir one minute.  Let cool at least 20-30 minutes or until close to room temperature.

Filling:

3-4 ounces of light cream cheese, room temperature

4-5 cups fresh strawberries, hulled

Line the bottom of the cooled pie shell with the cream cheese, spread it as evenly as possible. I use ½ an 8 ounce package.  Place berries in a big bowl.  Pour the glaze over top and gently mix.  Pour the goopy berries into the pie shell.  I like to pick the nicest ones for the top of it.

Chill 2-3 hours before serving.  Make some real whipped cream, the fake stuff will not do for this pie; 1 cup heavy cream whipped with an electric mixer or a whisk until soft peaks, I like to chill the bowl and beaters a few minutes as it helps the cream whip faster.  Then add 2-3 tbsp powdered sugar and ½ to 1 tsp. vanilla.  Beat just a bit longer, until nearly stiff peaks.  Slice the pie and top each piece with the whipped cream.  Dive in!  You won’t be disappointed.

Brown Rice Flour Mix– for crust
2 c brown rice flour

2/3 c potato starch

1/3 c tapioca flour

Cheese Filled Fried Zucchini Blossoms….Yes Flowers Fried With Cheese!

Zucchini season is here.  The blossoms, at least, are plentiful and I am expecting many zucchini in a few days.  While no squash are ready to pick I was thinking about the blossoms.  I used to make stuffed blossoms with beer batter.  I hadn’t tried to make them GF yet.  Why not tonight.

I looked up my recipe in the Joy of Cooking; the batter recipe that is.  I was surprised to see it said flour or rice flour.  So I said, why not! No need for a fancy flour blend. I used plain white rice flour in my batter.

I usually use Monterey Jack cheese to fill them but in a pinch some extra sharp cheddar made do.  Or whatever cheese floats your boat; can use almost anything that is not too dry or is runny.

There was some GF Redbridge beer chilling in my fridge. So I cracked a beer and whipped up the batter.  It is supposed to sit for 3 hours, I left it go for about one hour.  I drank the rest of the beer with supper! Why not?

No need to deep fry in a quart of oil, I fried mine in a non stick pan with a good coating of light olive oil.  I like to turn them twice; resulting in a sort of three sided fritter. They are best consumed right away the same day they are made, eaten warm with a sprinkle of salt and a squeeze of lemon juice.  My two and a half year old grandson ate one and seemed to enjoy it!  They have a mild squash taste but I think the beer batter is the predominate flavor. My GF version was pretty much identical to the old wheat version and they tasted fantastic! I ate 4 of them and had to restrain myself from any more….

Squash Fritters with Cheese Filling

Ingredients

1 egg

2/3 cup white rice flour

Sprinkle sea salt, a few grinds of fresh pepper

1 ½ tsp light olive oil plus more for frying

3 ounces GF beer; I measure it midway between ½ and 2/3 cup

Approx 1 inch chunk of cheddar cheese cut into small rectangles

¼ a fresh lemon

Separate the egg and put the yolk in a medium bowl, ditto for the white.  Add the oil, salt, pepper and white rice flour to the yolk.  Then add the beer.  Stir well, cover with plastic wrap and let stand an hour or two.  Beat that reserved egg white until fairly stiff. Add to the batter and stir gently but thoroughly. It will loose some loft but don’t over beat; should be thick and rather puffy in texture.

Slit open the side of each squash blossom and break off the pollen stamen.  Insert a 1 inch by ½ inch chunk of cheddar cheese.

Heat a 10 inch non-stick skillet; add about 2 or 3 tbsp light olive oil.  Take 2-3 blossoms and gently roll in the batter making sure the cheese doesn’t fall out.  Lightly lay them in the hot olive oil and fry until golden, turn twice; about 5 or 6 minutes total. Do not keep turning; maximum of two turns.  Lay on a couple paper towels to absorb any excess oil.  Plate, sprinkle with coarse sea salt and a squeeze of fresh lemon juice.

They are a lovely appetizer. I made 9 of them; that was how many blossoms I had; the batter should do at least 12 to 15 of them.  Even the bit of stem will taste good so don’t worry if you have ½ inch or so of stem.  The blossoms are best if you pick them yourself that day. I did notice that Lehigh Valley Produce had squash blossoms for sale last week so they are the first place I suggest you look for some if you don’t have access to a few squash plants.  I have even used pumpkin or butternut squash blossoms in the past; they taste fine

Do try them; a real conversation starter, not that hard to make and really delicious.

Pavlova, You Will Be Drooling For Some!

My sister Elaine makes this dessert all the time. It is a specialty of hers. I think it is her go to company dessert when nothing else comes to mind. When she first described it I was not impressed. I wasn’t even looking forward to it at our family dinner party she throws every summer when I come up to visit. So I was surprised when I bit into my slice of it. Clearly this is a case of the results being far more than a simple sum of the ingredients. It is light, sweet, airy, fruity and basically melted in my mouth. I have had it at her house one other time and have made it a few times myself. It is easy to construct and it can be varied in the fruit topping.

The old school classic topping is fresh passion fruit. Elaine mostly serves it with sliced fresh strawberries, perfection! It is decent with blueberries too. I once used a mixture of ripe summer fruits; peach, nectarine, blueberries, mango and kiwi. That was really memorable. Ripe local strawberries would be super tasty too. Go with what is ripe and flavorful when you are shopping for fruit. I used blueberries and strawberries for the Fourth of July but you decide what works for you. No canned fruit though, only fresh will do.

My sister got the recipe from Food network – a 1999 recipe. It is naturally GF so no one will ask where the wheat is! Don’t leave out the red wine vinegar; totally necessary.

20180708_133046

Slice today; sorry it is on a paper plate but it  was luscious!

Pavlova

Ingredients:

1/2 cup egg whites at room temp (about 4-5 eggs)

1/8 tsp. cream of tartar

1/8 tsp. salt

1 cup granulated sugar

1 1/2 tsp. cornstarch

1 Tablespoon red wine vinegar

1/2 tsp. vanilla extract

1 1/4 cups heavy cream

2 T light brown sugar packed or white sugar

1 pt. fresh strawberries for top, sliced and 1 cup fresh blueberries

or 3-4 oz fresh raspberries and half a pint of blueberries

or 2 sliced ripe peaches and some raspberries or blueberries

DIRECTIONS:

Preheat oven to 350 degrees

In a mixer fitted with a whisk attachment whip the egg whites, cream of tartar and salt in a clean, dry bowl until foamy. Add the granulated sugar, cornstarch, vinegar and vanilla and continue whipping until stiff, smooth and glossy, about 7-8 minutes more.

On a sheet of parchment paper cut to fit a sheet pan, use a pencil to draw or trace a 9 inch circle in diameter. Line the sheet pan with the parchment, pencil side down (you should be able to see the circle). Spoon the egg whites in the circle, using the back of the spoon to smooth the top and sides of the disk. Make it high rather than wide; it will settle after baking. Bake in the center of the oven for 10 minutes, then reduce the heat to 300 degrees and bake until the meringue has puffed up and slightly cracked on the top and the surface is highly browned to the color of a latte coffee, about 45 minutes more. Turn off the oven, prop open the oven door, and let it cool in the oven at least 30 minutes, to room temperature. This ensures a gradual cooling, which protects the delicate meringue.

Whip the cream and brown sugar (sometimes I use white sugar) until stiff. spoon it in the center of the cooled pavlova and spread out to within 1/2 inch of the edge, arrange the slices of strawberry in the middle. Sprinkle the blueberries around the edge of the strawberries. To serve, slice into wedges with a serrated knife.

Yeah, I know that was a corny title but I couldn’t resist using it….  So make a pavlova and make everyone happy; it is beautiful to look at and even better to eat. Happy Fourth of July peoples!