Figs are delightful in the late summer and early fall. This year my fig trees are full of fruit with several dozen figs ripening over about two week’s time. Lately I pick 2-3 dozen every day or two. I made a super delicious fig and yogurt cake the other weekend. Next I put together a figgy dessert in the tart family. This is my take on the wide variety of fig and custard/honey/cheese tart recipes. FYI: a galette is a free form flat round French tart. Now you know! One of my friends was all “wow you cook stuff I have never heard of and did your mom cook like that?” My response was “nope; Mom never baked a galette. But she was a great cook and I just love trying new things. ” I truly love galettes as they are so easy; just roll out the dough; lay on the filling; crimp up the edges and maybe a bit of egg wash and a sprinkle of sugar and into the oven it goes. Plus I like how they generally aren’t that sweet or tricked out with a ton of ingredients. Simple, tasty, and pretty to look at. Dessert perfection…
I used my favorite gluten free crust recipe plus some cinnamon. This crust never fails to impress; it is flaky and tender. Never tough or too buttery. Sweet juicy figs are the bomb! Finally, the herbed goat cheese added an intriguing slightly savory flavor to the overall taste. A big slice was just delicious with a glass of lemony iced tea. Enjoy!


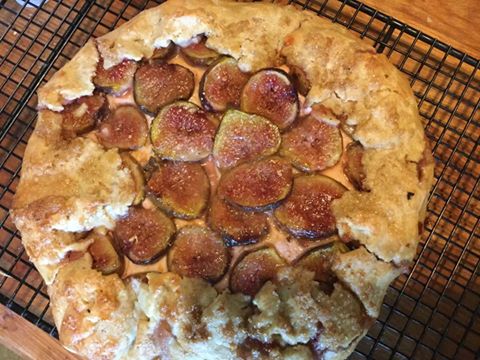
Fig and Goat Cheese Galette
Crust:
1 c plus 2 tbsp brown rice flour mix (at bottom of recipe)
2 tbsp sweet rice flour
1 Tbps. granulated sugar
½ tsp xanthan gum
¼ tsp salt
¼-½ tsp. cinnamon
6 Tbps. cold butter cut into 6 chunks
1 lg egg
2 tsp fresh lemon juice (use juice from zested lemon; below)
Line a 15 inch pizza pan with parchment paper.
Mix dry ingredients in bowl of stand electric mixer. Add butter and mix until crumbly and resembling coarse meal. Add egg and juice. Mix until it comes together into big chunks. Shape into a ball with your hands. Put it on a crust sized piece of wax paper (14 x 14 inches more or less), flatten the crust ball some; put on top of it another piece of wax paper and chill it all in your fridge 15-20 minutes. Then roll out and put on the parchment lined pan; put back in the fridge while you prepare the filling.
Goat Cheese filling:
4 oz package herbed goat cheese, room tem
2 oz light or regular cream cheese, room temp.
2 tbsp. local honey (good stuff)
1 egg beaten well, mix in 1 tsp. water
2 tsp. rough brown crystal sugar for topping
Fruit part:
7-9 ounces of ripe figs: 8-10 large or maybe 14-16 small
Directions: Zest a small lemon. I do this onto wax paper for ease of picking up later. Use some of the juice for the crust. You can leave the zest out if you are not a big fan. You do need the juice in the crust; can use fresh squeezed OJ too.
Get out the tart crust and roll out to a large circle. Place on the parchment paper; I unpeeled one side of the rolling plastic and flopped the whole thing onto the parchment and then peeled off the other side of plastic leaving the crust on the parchment. Blend the goat cheese, cream cheese and honey using a whisk. Add half the beaten egg, beat some more until well blended Spread the mixture out on the crust. Leave 1.5-2 inches of crust around the filling. Top with halved or quartered figs; mine were small; halved them, cut side up. Fold up the edges of your crust and pinch together to create the galette shape. Use a pastry brush to brush the crust with the remaining egg wash. Sprinkle the sugar crystals over the crust and some on the figs. 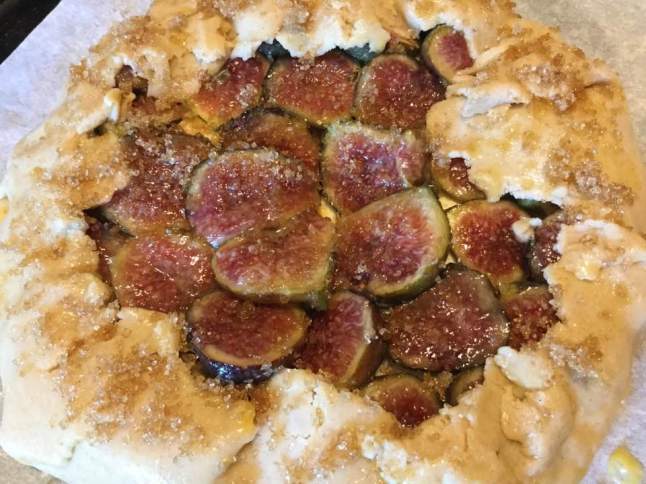 Bake for 30 minutes in a 400 degree oven. Sprinkle the lemon zest on before you bake it or half way through the baking. Let your tart rest a bit on a cooling rack; don’t serve hot but a slightly warm slice will taste amazing. It was still great the next day although the crust wasn’t quite as crisp due to high humidity. Enjoy!
Brown Rice Flour Mix (same as King Arthur basic gf blend)
2 c brown rice flour
2/3 c potato starch – not potato flour!
1/3 c tapioca flour

The crust recipe is from Annalise Roberts great cookbook, GF Baking Classics, Second Edition.