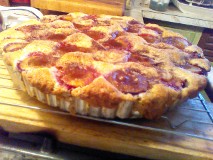
There is a huge abundance of fruit in August and September. Still lots of peaches, plums, grapes and nectarines and the early apples and pears are coming in. What to bake? Tough decision, still I love juicy ripe plums but seldom bake with them. This is one of the only recipes I can make gluten free with blue plums; these are those oval small plums, sometimes called prune or Stanley plums that are only available for a few weeks in the early fall. They are inexpensive, not too sweet and they get soft and purply delish in this simple tart.

It is modeled after some German fruit tarts I had enjoyed in my wheat loving past life. I think it replicates them quite well.
You will use my favorite cobbler mix as the crust base, which makes this recipe really simple. I will put the mix recipe down at the end of this post. I keep it in my freezer and one cup makes great cobbler or this tart base. To this particular batch I added a couple teaspoons of dried lemon peel powder. This ingredient is made of lemon peels rolled in sugar and dried, leftover after make homemade lemoncello liquor. They become powder after a few moments in my spice blender. The fine powder adds a subtle lemon flavor but its okay, you don’t absolutely need it to make this recipe work. It is in the original recipe but I never bothered before to make some even though I had the dried lemon peels. The addition is great and if you can add it you won’t be disappointed. 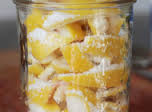
A few instructions to assist you if you make this tart: I cut up the plums first and sprinkle them with sugar, let them stand while I mix the dry stuff up and then stir up the wet items in a small mixing bowl.
Be sure to use a 10 inch tart pan; it can be made in a 9 inch one but it may well spill over and burn on the bottom of your oven which is never a good thing.
We like it with a small scoop of vanilla ice cream on the side. It is fine all on its own. Makes a great breakfast too with a cup of coffee or tea.
GF Fall Plum Tart
1 cup cobbler dry mix; recipe below
mix with 1/4 cup sugar
—-
2 eggs
3 Tbps. buttermilk
2 Tbps. melted butter
1/2 tsp. vanilla
1/2 tsp. almond extract
1 ½ lbs prune plums (enough to cover the entire tart pan) cut in halves or quarters. Mix them with 2 tbsp sugar
Directions:
Heat oven to 350 degrees. Mix dry ingredients in a small bowl.
Spray a 10 inch deep tart pan or 9 in pie pan with cooking spray
Beat eggs in bowl, add rest of wet ingredients, mix well, add to dry ingredients, stir briefly just to mix up. Pour into the prepared pan and spread it out with a spatula. Top with plums, cut side up, push each in slightly into the batter and cover the entire surface of tart base.
Bake 30 min. Top with mixture of 1 ½ tsp sugar and ½ tsp cinnamon
Bake ten more minutes or until top looks done.
Cool somewhat before slicing/serving.
Dry Cobbler Mix
2 ¼ cups white rice flour
½ cup potato starch
½ cup tapioca flour
1 tsp. baking soda
4 tsp. baking powder
1 tsp salt
1 tsp. xanthan gum
1/3 cup sugar