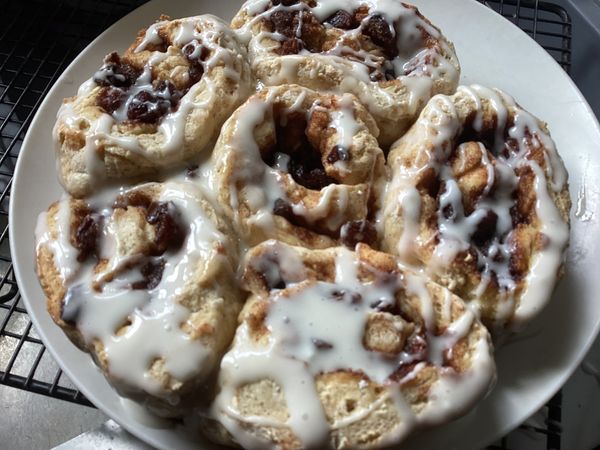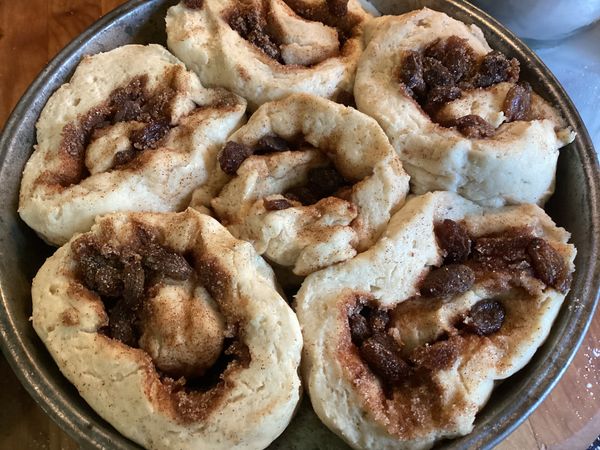
My mom’s cinnamon buns were a delicate balance of tender and sweet with the perfect amount of cinnamon. Making them gf has been so challenging. I have tried several versions. I also happen to make sourdough bread these days, gf of course. And this recipe combines both for a very good result. They are not too sweet, fairly tender and taste so reminiscent of my mom’s that I know this is the recipe for me.
Note: I put raisins in mine as my mom did and I love them in my cinnamon rolls but leave them out if you don’t care for them. I also like a simple icing; yeah I know how folks love those oinky cream cheese icings but honestly I prefer to use a simple powdered sugar and milk version with a touch of vanilla extract to complete the flavor profile. Less calories too!
Ingredients:
1 cup (260 gms) sourdough starter or sourdough discard
15 gms psyllium husk powder
280 gms warm water (90-105 degrees)
1/2 Tsp. ground ginger
1/2 c warm milk
1/2 cup (100 gms) sugar
2 large eggs, room temp
2 tsp xanthan gum
2 tsp. salt
2 tsp. baking powder
Filling: 3.5 Tbsp. melted butter, 1/2 c sugar, 2 1/2 tsp cinnamon and 2/3 c raisins
Frosting: 1 cup powdered sugar, 1/4 tsp. vanilla extract and 1-2 Tbsp. milk
Directions: Put warm water and psyllium powder in a small mixing bowl and whisk to mix. Combine starter, eggs, warm milk, ginger, yeast, and sugar in a medium mixing bowl. In a stand mixer bowl mix the remaining dry ingredients using a whisk. Add the psyllium gel and the mixing bowl of starter and other wet ingredients. Mix up to a minute until it forms a dough. Let it rest 10-15 minutes. Grease a 9×13 baking dish or 2 cake pans; I used a 9 inch and a 7 inch cake pan. Use butter or oil to grease them. Grease a sheet of parchment paper and place on the counter. Melt the butter that is part of the filling. Grease your hands and dump the dough onto the parchment paper; I used a flexible baking scraper to do that. Spread out the dough with your hands. You can spray cooking spray on the top of the dough to help it spread without sticking. Spread it to a rectangle about 12×15 inches. Top with the melted butter. Mix the sugar and cinnamon and sprinkle over it. Spread the raisins evenly on top. Roll up along the long side. Cut into individual rolls with a string or a wet knife. I got 11 rolls. Place in the prepared baking dish(es). Cover with a thin damp kitchen towel and let rise in a warm place for an hour. Put the oven shelf in the middle and preheat oven to 350 degrees. If you want well browned rolls brush them with a beaten egg. Bake 28-30 minutes. Let cool on a rack. Stir up icing as they cool. It should be fairly thick; if thin it will run off rolls. Let them cool 15 minutes before icing and then enjoy warm!
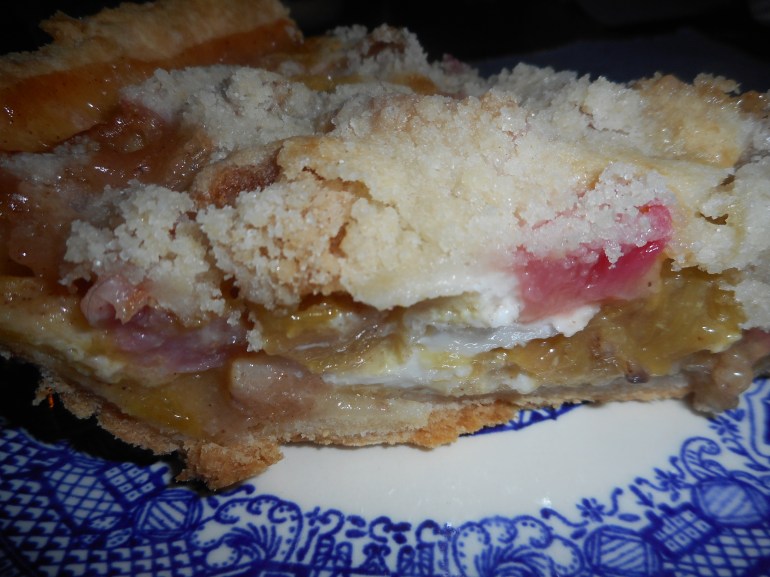
This is my favorite rhubarb pie and my go to recipe for a great spring dessert.
This is an easy pie even though it has several steps. It is different from the usual rhubarb pie because the texture is a bit closer to a crumb cake, no wet, slimy texture and no ultra sour flavor. I think this version tastes even better than it did when I made it with wheat-based flour. This GF crust will work for any pie and the GF crumb topping is perfect for any crumb pie topper. What I am giving you is my mixture of three recipes with some small modifications over time to create one of my favorite GF pie recipes. I know it has several steps, but each one is easy, and you can use these crust and crumb recipes for other pies.
I like it because it has a great texture, and the flavor is complex but subtly rhubarby. It isn’t really soft or all that custardy but more cake-like in texture. It is a game changer of a rhubarb pie. I promise you that!
Angie’s GF Rhubarb Custard Pie
Crust:
1 c plus 1 tbsp brown rice flour mix (recipe for blend at bottom of pie recipe)
2 tbsp sweet rice flour
1 Tbsp. granulated sugar
½ tsp xanthan gum
¼ tsp salt
6 Tbsp. cold butter cut into 6 chunks
1 lg egg
2 tsp fresh orange or lemon juice
——————
Spray a 9-inch metal pie pan with cooking spray, dust with white rice flour. I must confess I forget this step a lot of the time and it doesn’t seem to matter much….
Mix dry ingredients in bowl of stand electric mixer. Add butter and mix until crumbly and resembling coarse meal. Add egg and juice. Do not leave out the juice; it is critical to the crust texture and structure! Mix until it comes together into big chunks. Shape the sticky mess into a ball with your hands. Put it on a crust sized piece of wax paper (14 x 14 inches more or less), flatten the crust ball some; put on top of it another piece of wax paper and chill it all in your fridge 15-20 minutes while you chop the rhubarb into ½ inch chunks.
And make the crumbs while the crust ball chills:
Crumb topping
Put all four ingredients in the same mixing bowl you made the bottom crust in and mix well with mixer paddle until crumbs form.
¾ c brown rice flour mix
½ c sugar
½ tsp xanthan gum
1/3 c cold butter cut into six chunks
Make the fruit Filling:
5 cups cut up fresh rhubarb – place in medium bowl
Mix with dry mix made of
2/3 – 1 c sugar (depends on how sweet you like your pie) I go with 2/3 cup
¼ c brown rice flour mix (see below recipe)
½ tsp nutmeg
Sprinkle cinnamon
Rolling out the bottom crust: My sister bought me one of those pie crust plastic bag thingies; has a zipper around the edge. By OXO: I love it; it works better than wax paper which can get soft and tear as you roll out the crust. King Arthur Flour sells an inexpensive one on line. I highly recommend you get the OXO version for making scratch pie crust. Or maybe improvise with a sheet of heavy duty plastic! Strong enough to work with the rolling pin and better than wax paper.
Roll out pie crust in a pie bag or between the two sheets of wax paper, try to get the thickness even, no thick middle! Peel off one side of paper and place in pie pan, centered. Remove other slice of wax paper. Crimp edges all around. Fill with dry rhubarb mix. Pour the following wet mix evenly over this mixture: Wet mix: 3 eggs (171 grams) beaten lightly with 1/3 c milk (not skim), and ¼ tsp almond extract.
Sprinkle the top of the pie with the crumb mix; use as much as you like. I like about 2/3-3/4 of the mixture. Up to your personal taste… It sinks into the rhubarb and wet mixture to create an almost cake like texture and the crumb crust adds lots of sweetness and eye appeal.
Bake on the bottom shelf in a preheated 375-degree oven for 55-60 minutes until bubbly and the crust is light brown. Cool at least 2 to 4 hours before serving at room temperature.
Brown Rice Flour Mix (same as King Arthur’s Basic GF Blend) [Not Measure for Measure or baking mix] 2 c brown rice flour
2/3 c potato starch
1/3 c tapioca flour
This post was originally published in the late spring of 2013. I revised it somewhat since then. I have made this pie many times in past years to rave reviews. One of my friends had it for dessert at my house and said it was the best pie she had ever eaten, gluten free or not! Spring is rhubarb season. Go forth and make pie!
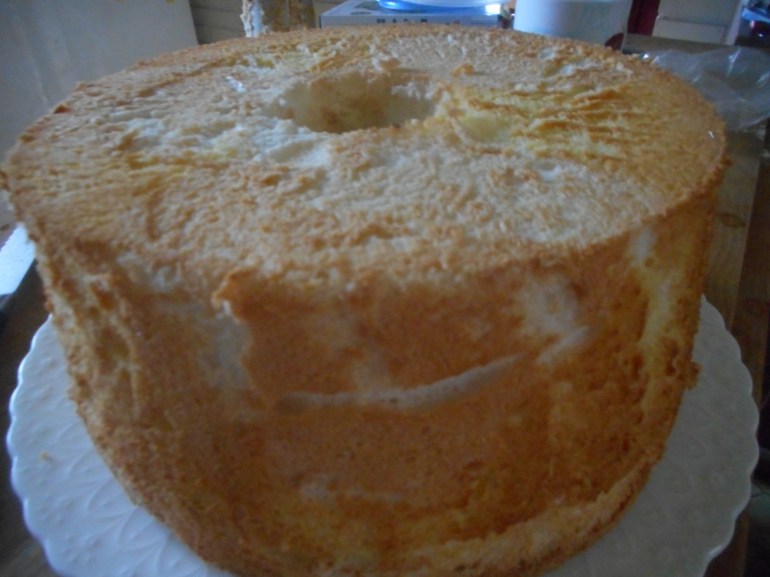
My resolution this year was to eat less sugar and that kinda means less cake and I am doing pretty well at it so far but sometimes it is about using the ingredients you have on hand. I have some egg whites in the freezer and have to use them up. Defrost and I have everything else in the fridge or pantry: go daffodil cake. Looks like an angel food cake on the surface but it is an old-fashioned confection known as a daffodil cake. The insides have some white and some yellow cake. I found the recipe in my 1970s Betty Crocker, a great standard cookbook I would never want to be without. Was making it for many years before my diagnosis with celiac so once I got comfy baking gf I figured I could make it gf and it is perhaps even better than it was with gluten-based flour.
I make them on occasion for my mom who is a big fan of said cake.
She is still not sure I am making it gf but it is totally gf and totally delicious.
So, all you gluten free disbelievers, this cake will change your mind. It is tender, moist and delicately flavored, not to mention very pretty and perfect in spring for Easter. It is after all; a daffodil cake and spring is the only time in the year they bloom. Make some now folks! It makes a wonderful birthday or party cake; you could put a thin vanilla powdered sugar glaze on top to make it fancy for such an occasion.
Notes: I save egg whites; in a Tupperware container in the freezer, until I have a cup of them. Then I am ready to put this beauty together. Or just use enough eggs to make a cup of whites. If you don’t have guar gum you can use xanthan gum.
A few words on separating eggs: this can be tricky, and I have learned from bad experiences not to separate directly into the measuring cup full of whites; do it into a small bowl and dump. You can NOT get ANY egg yolk in the whites, or they won’t beat properly. Best to set any egg that breaks or becomes contaminated with even a speck of yolk aside and make an omelet for supper! I crack each egg on the edge of my counter, split its shell in half and dump it over one cupped hand. The white flows through into the bowl underneath and I drop the yolk into the mixing bowl. Be gentle so the yolk does not break. Don’t use old, tired eggs or the yolks are more likely to break; fresh is best but they need to come to room temperature before cracking, so the whites beat to a high volume. FYI: When baking gf all ingredients should be room temperature unless the recipe tells you otherwise.
Put the yolks in the medium mixing bowl and add those six whites in with the other cup of whites: 1 ½ cup total egg whites. I know, a crazy lot of eggs in this but remember, no fat what-so-ever! Angel food cake is a good choice for your diabetic friends, or so they say. I just think those folks love a good angel food cake. This cake is even better, a masterpiece of delicate melt in your mouth cakey delight.
Angie’s GF Daffodil Cake
1 cup egg whites (room temp)
6 whole large eggs (room temp) separated
1 ¼ cup powdered sugar
1 cup brown rice flour blend (recipe below)
½ tsp guar gum
1 ½ tsp. cream of tarter
¼ tsp salt
1 tsp. pure vanilla extract
½ tsp. almond extract
1 cup granulated sugar
Directions:
Heat oven to 375 degrees. Put baking rack on second slot from the bottom. You need a ten-inch tube pan with removable bottom, do not spray.
Mix and sift the powdered sugar, flour, guar gum in a bowl at least once.
Pour the egg whites (should add up to 1 ½ cups) into a stand mixer bowl, add cream of tarter and salt. Start at medium speed. Beat until foamy, increase speed until high, wait for soft peaks and add cup of granulated sugar a tbsp or two at a time as it beats. No bowl scraping or stopping. Beat at highest speed until you have stiff peaks. Beat briefly after adding the two flavoring extracts. Set aside.
In small bowl beat the 6 egg yolks about 4 minutes until thick and lemon-yellow colored.
Fold the flour mixture into the egg whites, I do about a quarter cup at a time sprinkled all over the top and I fold it with a spatula or spoonula. Be gentle and smooth; don’t worry if it isn’t perfectly smoothly mixed. Put about half of the mixture into a separate large mixing bowl. Add the beaten egg yolks; gently fold until it is pretty well blended.
Put big glops of the plain mixture into the baking tube pan; I like 3 big ones. Put three big glops of the yellow blended mix between them. Top with more glops of the mixes, using it all up. Gently stir through the pan with your spoonula to swirl it a bit and smooth the top with the spoonula.
Put into preheated oven, bake 35 minutes, until when you press gently on the top it springs back.
Remove from oven, turn it over and hang on an empty wine bottle neck or a big funnel. Let cool totally in this upside-down state before cutting it out of the pan. I use a sharp serrated bread knife, cut around the outside edge and the center tube. Lift it out and then slice under the cake all around. Place a cake plate over the top and gently flip it.
I store it in a plastic cake saver or just in the microwave away from breezes and hungry folks. You could wrap it in plastic wrap too. It is best eaten within 3 days. It generally doesn’t last that long around here.
Brown Rice Flour Mix base mix
(This mix is the same as King Arthur’s basic gf blend)
2 c brown rice flour
2/3 c potato starch
1/3 c tapioca flour
This recipe is my variation on the angel food cake you will find in Annalise Roberts’ Gluten-Free Baking Classics cookbook. This post was first published in April 2016.
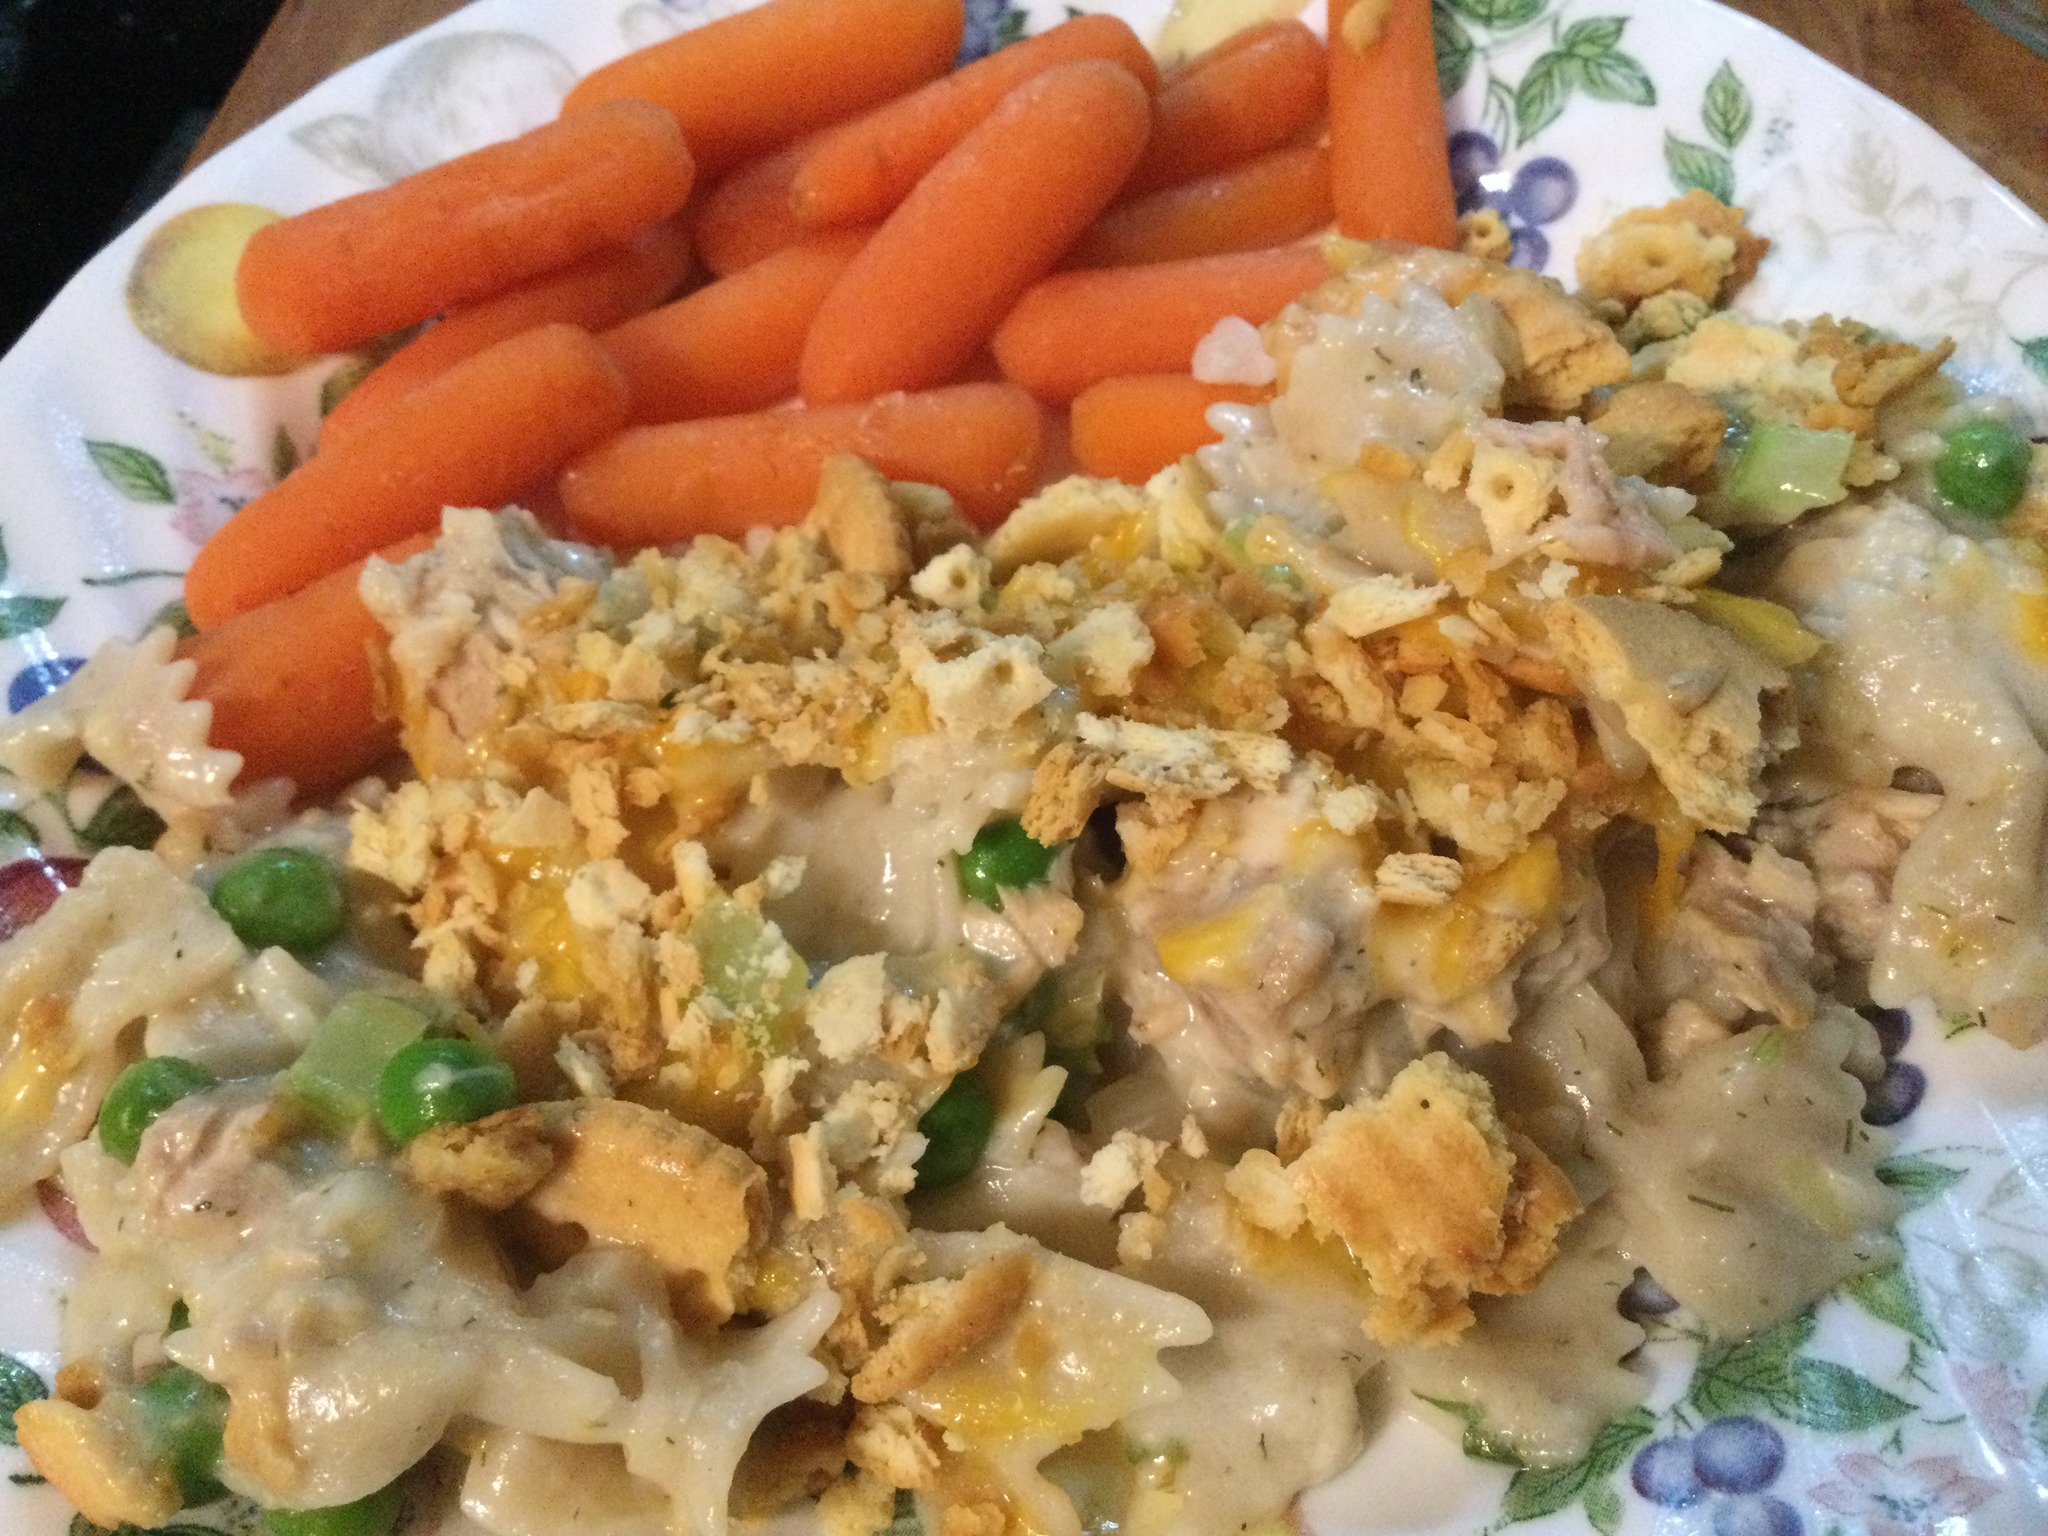
I never make tuna noodle casserole; too blah but I had some new pasta shapes so I attempted it and made a scratch gluten free sauce. What a difference that made! So delicious, a delicate flavor and a huge improvement over bought cans of mushroom soup or cream of chicken soup which are generally not gf anyway. This was as good a tuna casserole if not better than any I have tasted so I plan to make it again for sure. It really isn’t that much work to make a scratch sauce and it makes all the difference in the world in terms of flavor. Just don’t boil the sauce or it may separate.
Notes: you can use any kind of gf pasta or noodles. I used Jovial bowties; just cook them 2-3 minutes less than package says, great look and good flavor. Don’t leave out anything in the sauce; the celery/onions/peas give it such a fresh taste, like early spring! Use the tuna you like; suggest water packed white for this. I find albacore kind of dry so the solid white tastes better to my taste buds; totally your call what tuna you use. Be sure to drain it; your critters will love the juice in their suppers! I served mine with baby carrots cooked with maple syrup. A salad would be nice too!
Angie’s Tuna Noodle Casserole with Crumb Topping
Ingredients:
4 Tbsp. butter, divided
1 rib of celery, diced finely
as1/3-1/2 cup finely diced onion
1 Tsp (1 clove) minced fresh garlic
2/3 cup frozen peas
7 ounces dry pasta; cook it while you cook the sauce; undercook by 2-3 minutes.
4 Tbsp. white rice flour
14 ounces chicken broth; low sodium preferably
7/8-1 cup of milk; I warmed it 1 minute in my microwave
1/4 tsp. sea salt
1/8 tsp. freshly ground black pepper
1/4 tsp. dried dill weed
2 tsp. fresh lemon juice
1-2 Tbsp. finely chopped fresh Italian parsley
1/2 cup fresh grated Parmesan cheese
1/2 cup grated sharp cheddar cheese
2 cans tuna, (5 oz cans) drained
Topping 1/2-3/4 cup crushed gf Schar Company Crackers and 1-2 Tbsp. melted butter; mix in small dish and sprinkle it over before baking the casserole.
Directions: Melt 1 Tbsp. butter in medium frying pan, medium heat. Add onions and celery; cook 4-5 minutes, add garlic and peas, cook one more minute. While they cook, butter a 9×12 glass baking dish and put those hot veggies on a plate while you whip up the nummy good sauce.
Start oven heating to 350 degrees. Melt rest of the butter in the same frying pan, add the flour when it is hot; stir it while the flour blends in, cooking it 30-60 seconds. Add in the broth and then the warm milk, stirring constantly with a whisk. Add the salt, dill, parsley and lemon juice. keep stirring; after a minute or two it should be thick and bubbly. Stir in the parmesan cheese as it bubbles; not at a boil. Taste and adjust sauce as needed. I thought it was perfect with no changes but up to you. Dump back in those veggies; stir; add the tuna and the hot noodles, stir gently and after it looks somewhat blended carefully pour it all into the baking dish. Top with the cheddar cheese and then the buttery crumbs and bake about 25 or 30 minutes until it is bubbling.
It keeps in the fridge for 5-6 days; I added a touch of half and half to my serving before microwaving it; like a couple teaspoons; helps it stay moist when reheated.
Full winter is upon us. Pies are being baked for desserts, cake is often on the menu and cookie season is pretty much always here. I have had emergency texts about gf flour choices and substitutions in creating something gf when the baker is not gf and is more than a little confused. So, I am reposting this flour treatise from last year, in the hopes that folks will read it and use this information to have the best possible results. GF baking is much more technical than wheat flour-based recipes. Substituting is trickier especially flour subbing, partially because of all the new 1 to 1 blends, baking mixes and other innovations. So, before you make those gf cookies for a gf friend, read up on the differences, so you use the right flour. The wrong one will give you a poor result; so important to know what you are doing flour wise.
So, I am writing this post for a friend who bakes gf cookies for someone in her family. I want to go over the flour issue again, particularly for someone new to cooking gf meals. It is slightly tricky, so I am going to try to make it clear for everyone: there are a lot of issues and different scenarios so be sure to read the whole article. So, here are my best thoughts and advice on using gf flours for gravy, and especially for baking.
You could use this rice flour for gravy making.
There are individual gf flours like rice flour, buckwheat flour, oat flour, tapioca flour, sweet rice flour, potato starch, cornstarch, sorghum flour, brown rice flour, etc.! A bewildering array of choices as almost any grain can be ground into a flour. Flour can then be processed to create a starch, which tends to be nearly flavorless but often has a big purpose in gf baking. I rarely use just one flour in a baking recipe. Why? Because a single flour is often missing an important characteristic of what we want in a baking result. A mixture has different kinds of flours to replicate all purpose flour (wheat based) or whole grain flour (also wheat based). Without the gluten there are a number of ways to make it a useful blend for cooking or baking. That said, I use single flour blends in sauces. Just for sauces people!
I usually use blends for baking, 2-6 flours that are blended and work together to mimic wheat-based flour in different applications like bread, cake, cobbler, cookies, pastry or pasta dough. I have a number of them, but my favorite is one you can buy in most stores. King Arthur’s Basic GF Blend; made of a proportional blend of brown rice flour, potato starch and tapioca starch. I use it for over 90% of my baking and cooking needs. There are a number of blends available from companies like Bob’s Red Mill or Jeanes. One of my favorites is Better Batter; never see it in the store but it can be found online. There are many, many blends provided in gf cookbooks. It can cause a traffic jam of jars/cans/zip lock bags of blends labeled and stored in your freezer or fridge. Some of these blends have a gum like xanthan gum included. The gum helps your finished bread/cookie/cake hold together – in wheat based recipes it is the gluten that is the “glue” that holds things together. My blend doesn’t have it so I add it based upon my recipe. Xanthan or guar gum are commonly used. Doesn’t take much xanthan gum; ½-1 tsp is often enough in any recipe. FYI: Better Batter has the gum in it. You should always check on this gum issue; if none in the flour mix you will need to add some; often about 1/2 teaspoon per cup of flour. This amount of gum does vary due to what you are making. Look at a similar gf recipe and add as much gum as that recipe does. There also is psyllium gum but it is mainly used in breads and rolls. Not so much for cookies and cakes.
Next; If your recipe is a recipe not formatted for gluten free baking, you must use a special blend meant for that circumstance. They are called measure for measure, or one-for-one blends. They were not around a decade ago; fairly new. They are carefully calibrated to sub in for all-purpose flour. They may not work as a substitute for whole wheat or rye flour, and yeast baking is not where this flour is meant to be used, it is great for your all purpose flour cookie or cake recipes.
I have used this measure for measure blend and had good results. It is calibrated to be substitutable in any gluten flour-based recipe except I would not recommend it for yeasted breads. Similar restrictions on using Bob’s 1 for 1 GF Blend; not for breads except quick breads. Do not use these blends as a substitute for GF flour blends like King Arthurs Basic GF Blend. They are not interchangeable. They are basically just for when you want to make a cookie or cake that is not meant to be gluten free; these flour 1 for 1 blends sub in and magically make the cookie recipe work using this special blend created exactly for this purpose.Bob’s Red Mill calls it 1 to 1 Baking Flour; same idea as measure for measure. Again, use this in your regular recipe instead of the all-purpose flour in the recipe. This is an excellent flour blend but is Not suggested for yeast breads.
As I wrote above, measure for measure flour is fairly new and very useful. They are for when you want to make a normally gluten-based recipe but use a gf flour. FYI: most gf recipes have been altered from their original recipe or were created just for gf flour. If you want to make those cookies, you can’t enjoy anymore and sub in gf flour these new measure for measure blends is perfect to do that. You generally don’t need to alter your recipe or add gum. The flour blend is made to mimic regular all-purpose flour. It is not interchangeable with things like the Basic GF Blend from King Arthur that I mention above.Don’t use measure for measure in a gf calibrated recipe, use it to make stuff from your old wheat flour-based recipes. [Yes, I am repeating myself but I am finding that people are doing exactly what I caution not to do so repeating myself!] King Arthur or Bob’s Red Mill or a few other companies have a measure for measure blend so get that if you want to take your gluten-based recipe and change it to gf. I must caution you that these flours don’t work well if you are replacing flour in a yeast bread recipe. Works for quick breads, cookies, muffins, and many cakes but I wouldn’t make my old fav Italian bread recipe with these measure for measure as the result is unlikely to be similar to the recipe as made with wheat-based flour. Besides, I have an awesome gf Italian bread recipe my family clamors for!
One more thing, many companies now have gf baking mixes that can be used to make muffins, cookies, cakes, pancakes, etc. They are different from the blends described above. Do not substitute those blends for a basic blend like the one I use. These blends already have gum, baking powder, salt, etc. added to the flour. They are very convenient and there are lots of recipes formulated for using them. There are bread flour mixes that can be used to create shaped pastries; I just bought 1 boxes of Chebe All Purpose Bread Mix. Can’t wait to test it in a pastry recipe I found recently. These gf baking mixes cannot be used in place of the gf flour specified in a recipe or to use like a 1 for 1 Substitution gf flour. they are very specific to recipes that require them or the recipes on the box or the manufacturer’s website.
I used an image for King Arthur baking mix as this is the only premade mix I have tried. It works great!
To repeat; there are single flours, there are blends with or without gum added, there are measure for measure blends for use in the gluten-based recipes you want to recreate as gluten free dishes and there are baking mixes that can be used as a starting place for a quickly constructed baked good like a cake, cookie or muffin. I know, it seems complicated but read your recipe carefully, so you get the right kind of flour to make it successfully. The wrong flour will give you a poor result as gf baking is relatively unforgiving of big errors like that.
Oh, and there are read-made cake or brownie mixes just like you can buy with wheat-based flour; you add eggs, milk/water and oil to them to complete the mixture. The grocery store will likely have a number of choices for gf mixes to make brownies, cakes and other baked goods. Amazon has lots too! It’s where I got the Chebe flour mix.
Here is that Chebe Bread mix I mentioned above.
None of these blends/mixes are interchangeable between other types of blends. Use the blend the gluten free recipe asks for. If it is an old all-purpose flour-based recipe use the measure for measure. Except, do not use that measure for measure for a yeasted bread; quite unlikely to work especially when you use over 1 1/4 cups of it in a recipe; the more the recipe is depending on the flour the less likely it will be successful.
A pie made with King Arthur Basic GF flour blend for the crust.
My recipes generally tell you which flour blend I used. You cannot sub in measure for measure for a basic blend. Nor can you use a baking mix for anything, but a recipe meant specifically for a baking mix. Get the right flour as specified and you will have a great start towards a delicious result. I hope I have educated you on this issue so you can be successful if you need to bake gf this holiday season. Have fun baking!
Sugar cookies made with a Measure for Measure flour blend in my old (pre-celiac) Betty Crocker cookie recipe.