Gluten Free Graham Crackers – Easy Peasy

This post is for all of you who have bought gf graham crackers at the store; you pay double what regular grahams cost, get only half as much and they taste like actual cardboard. Just don’t. These homemade ones are super easy, no tricky or expensive ingredients, not even an egg so if you use vegan butter they will be vegan (other than the honey which I bet you could sub maple syrup in it; might need a bit more to get the right amount of liquid) and best of all, they are absolutely delicious!

You will want to eat them with tea, coffee or a glass of cold milk, not make crust out of them! No sawdust or cardboard flavor here. They are not overwhelmingly cinnaminy. [did I just make up a new word?] If you want that, add another half or whole teaspoon of cinnamon. Cheap, yummy and fun to make; let the kids prick them each 2-3 times with a dinner fork. Mine look like my grands made them; crooked edges and somewhat uneven; who cares; they are going into the blender tomorrow!

I found a couple of similar gf recipes and altered to suit my wishes. They make me happy as they are much cleaner than commercial stuff which can be full of preservatives or other ghastly crap. And I am not supporting a big GF baking company by paying a lot for nasty tasteless crackers.  You can do these! The dough is very forgiving.

Notes: you can use a measure for measure flour; just leave out the xanthan gum. Not sure if they will cook as fast. Check them frequently during the last 2-3 minutes.

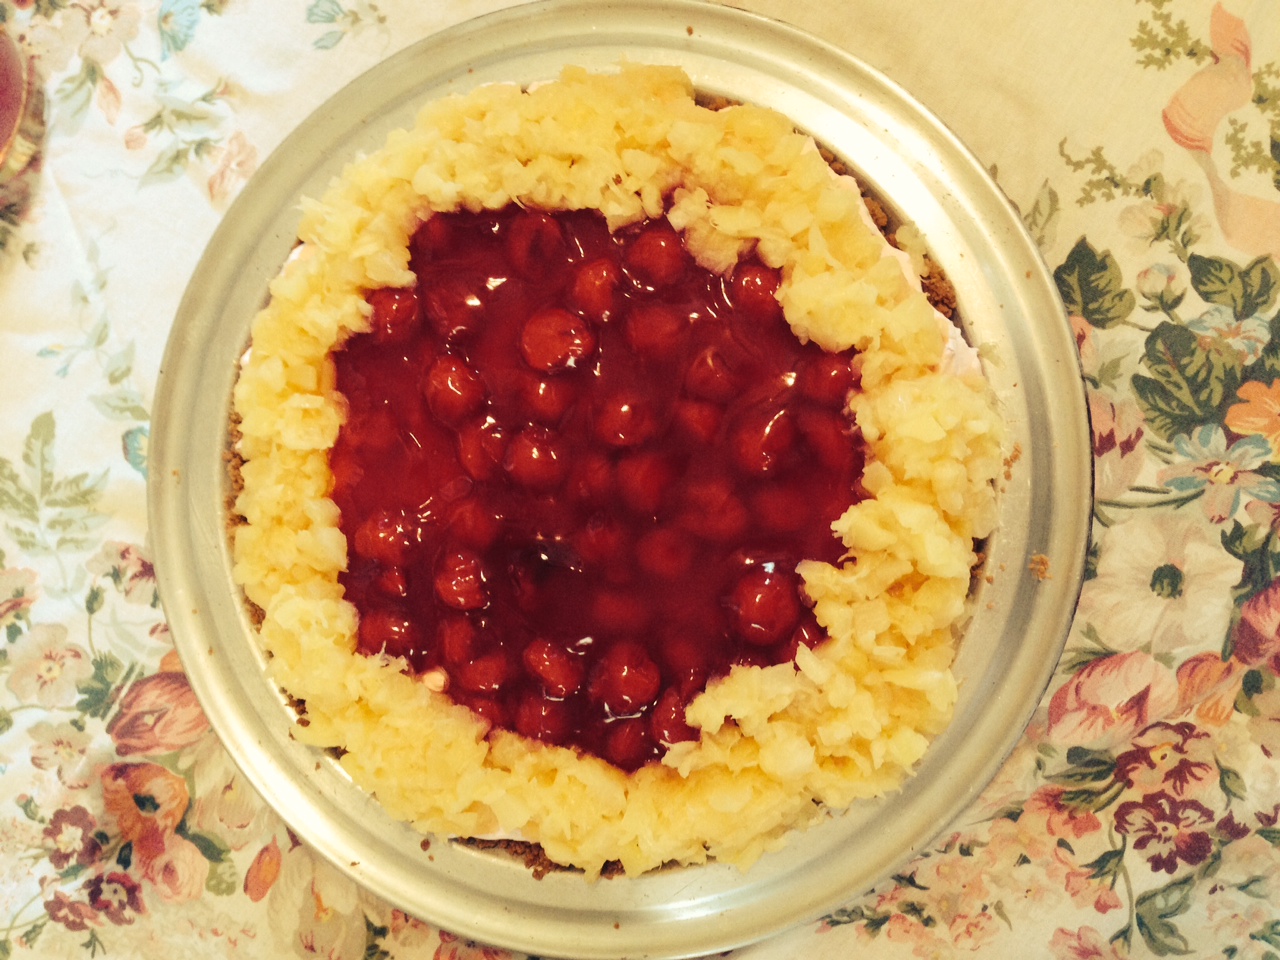
I love these crackers for my Easter Cherry Sunrise Pie. Great for a chocolate pudding pie. Any recipe for a cookie crumbled up crust works great with these beauties. If you are baking them for that purpose bake them an extra minute or two and leave them out at least 24 hours to dry further. If they are fresh the crumbs will fuse together and sag making your crust top lower and once it cools it will be extra firm but it will still taste good. Enjoy!

GF Graham Crackers

Ingredients

1 ½ cups gf flour blend; I used King Arthur’s Basic GF blend – I’m guessing a number of blends will work

½ tsp xanthan gum – if your flour blend doesn’t have any in it

1 tsp cinnamon

1 tsp baking powder

½ tsp baking soda

½ tsp kosher salt (can cut in half if you use salted butter)

½ cup packed brown sugar

1 stick cold butter cut into small chunks

¼ cup honey

1 tsp pure vanilla extract

3-4 Tbsp cold water

Directions: Mix all the dry ingredients in your stand mixer bowl until well blended. Add the butter chunks and blend with the beater attachment until well blended into tiny bits. Add honey, vanilla and 3 Tbsp cold water; stir; you will probably need that fourth Tbsp. of water to bring it into a cohesive dough. Be sure that the butter is fully blended in before stopping. Gather it into a ball and I sometimes put it in a plastic bag or even between the two sheets of parchment paper squashed down flat; it chills faster that way.  Chill a minimum of 30 minutes; an hour would be better. Unless you chill it the dough will be too sticky to work into a sheet of dough.

Tear off two sheets of parchment paper that will cover a large baking sheet or sided bake tray. Put the dough on one on a rolling surface and cover with the other sheet. Heat oven to 350 degrees. Use your rolling pin to roll it out to about 11×15 inches. Peel off the top sheet and use a pizza cutter or knife to cut the rolled-out dough into 3×2.5 inch rectangles; you should get about 24. Pick it up while still on the parchment and lay it on the baking tray. Poke each cookie 2-3 times with a dinner fork. Bake 14 minutes for softer cookies or 15 for more crisp which you want if  you are making crumbs for crust construction. I did 15 and I think 16 might be even crisper. Use the pizza cutter to go over those cuts again.  Leave on tray to cool for 10-12 minutes. Then slide the cookies off with a pancake turner onto a cooling rack and let cool completely. If you are going to grind them up for a graham cracker crust you should leave them sit out on the rack for 24 hours to crisp up. This is probably not going to work so great on a hot humid day… I use about ¾ of the cookies to make one crust; blend in blender and mix with ¼-1/3 cup melted butter, mix well; dump into pie pan and spread out to fill it. Bake at 375 degrees for about 12-15 minutes watching it closely. Let cool completely before filling. Enjoy!

2024 – My Philosophy of Gluten Free Living

As spring of 2024 begins, I feel compelled to reiterate my reasons for blogging and my philosophy as far as food goes.   Some reasons for that compelled feeling?  I haven’t visited this topic in about 8 years, so I think it is time for an update. Plus, maybe because in some small way I influence those who read my posts.  If you read, you deserve to know why I write.

I was diagnosed just over 11 years ago; January 2013.  It was like a death blow at the time…or so I thought.  It took a couple of weeks to even process this idea of walking away from all-purpose flour, from the usual baked treats: whole wheat breads and cereals, rye bread, bagels, rolls, scones, cookies, pies, cakes and pastries. Gosh that was hard to wrap my brain around.  I won’t lie…it was deeply upsetting and rather depressing.  But after a while I dusted off my butt and got to work making my kitchen over into a gluten free kitchen and in fact, my whole life into a gluten-free zone.  Took about two-three months to fully accomplish, I kept finding yet another gluten filled item in my cupboard or freezer. And I switched over to gf pet food.

Let me clear this up; I am not offended by all you wheat eaters out there.  I eat how I do because I must.  I had to change my lifestyle to survive.  It is not some sort of weight loss plan but a way to avoid an early death.  People who mock folks who must eat gluten free deserve to become allergic to whatever they love to eat; so they can experience what we celiacs go through every single day of our lives.  There are some rude types out there but also a lot of caring folks who go out of their way to make safe food for we who can’t eat gluten anymore.

Being gluten free gets easier as time goes on, just like learning any new skill.  You navigate the waters of buying safe choices, of figuring out how to make gf gravy, how to flour meat/fish and how to make that birthday cake or holiday cookie that your family craves.  And to make it all safe for you.  That is my mission; encouraging you, cheering struggling celiacs on and sharing my recipes, found all over the web, in my gf cookbooks or old/new recipes I have translated into a safe, gluten free version. I have even conquered gf kiffles and love making them for friends and family. christmas baking 2015 030

My focus is on eating seasonally, partaking as liberally as possible of fresh fruits and vegetables.  Fruits especially taste the best when eaten in season.  My baking highlights in season fruit and I eat that in season fruit out of hand as well as added to salads.  I eat meats, fish and poultry as well as some vegetarian fare.  I mostly avoid processed foods although I do sometimes eat bacon. I don’t buy a lot of gluten free bread products.  Yet, I crave bread so I occasionally bake in my quest for the best ever gf bread.  So far some success, my french bread with golden raisins and fennel and my gf sourdough bread comes to mind.

I also try more and more to limit my sugar intake: it is a new year’s resolution of mine. In 2015 I discovered coconut palm sugar, pricey but I love how it doesn’t seem to spike my sugar so I use it in muffins that I enjoy as an occasional snack.  apple muffins 002My desserts tend to be fruit based and I often scale back the sugar a bit.  Confession: I still adore the occasional cake but in the interest of healthy eating I am trying to cut back or at least make a lower sugar version; see my sour cream cinnamon cake post recently.  Granulated sugar is being seen more and more as a major villain in our dietary choices. Being pre-diabetic I have long tried to use a bit less of it and choose things like tarts or fruit pie as opposed to a slice of cake with lots of sugary icing.  Humbly I suggest you might try to do as well. alsatian apple tart 002

You can cook gluten free easily enough if you cook meals that are naturally gluten free; rice, potatoes, rice noodles are good examples of starches you can incorporate with your protein item and lots of vegetables.  Be careful of rice mixes that have seasoning packets; often bearers of gluten in them…read the labels carefully.  Sometimes a bit of flour is called for; scalloped potatoes for example. I have subbed in white rice flour or brown rice flour for the white flour.

I hear of many folks successfully using those cup-for-cup mixes that are sold in most stores in old gluten flour recipes.  I do use them especially when I am reformulating an old gluten flour recipe. Still, I tend to use recipes formulated for gf flour as there is a lot of chemistry in baking and gf flour is so pricy.  I hate failing in baking and having to pitch a leaden loaf; not going there if I can help it! I just made a lot of crumbs out of a lousy loaf of sourdough that refused to rise. Two containers of it in my fridge.  My favorite of those gf flour mixes is Better Batter, I do use it on occasion and very successfully so far.

My favorite flour mix is the one Annalise Roberts uses in her recipes; a mixture of brown rice flour, potato starch and tapioca flour; my pie crust is phenomenal tasting using her mix and her recipe.  strawberry rhubarb pie 011I use that flour in my muffins, my chocolate cake, my angel food cake, and a number of yummy cookies I enjoy. You see it often in my blogged recipes.  It is pretty much identical to the all-purpose gf flour mix that King Arthur sells, not their baking mix though; that has added leavening agents. cranberry tartlets 003

Tough items for me are making edible bread, rolls, biscuits and pastries.  It is possible to bake quite decent cakes and cupcakes.  And there are some tasty gf cake mixes in a box out there.  If you love to bake bread, I have written posts about yummy breads I have made from scratch; French bread, yeast zucchini bread and chickpea soup, salad, bread 014the America’s Test Kitchen sandwich bread come to mind.  I have made some decent cinnamon buns. Victory!

In summary, I started writing my blog to cope with the horrors of going gluten-free but I continue because I have found great personal success in cooking and baking safely for myself and my family/friends. I take great joy in serving tasty foods particularly desserts that people clamor for seconds of.  thanksgiving meal 013I want to share that success and help others to be confident enough to bake gf foods for yourself and your family. You can do it, yes you can. I am here to help you; all questions answered gladly, advice given freely, and support is there for you whether your gluten free journey is brand new or has been there for years in your daily life.

Peace and happy eating my friends!

Cherry Sunrise Pie…an Easter Tradition

In a few days it will Easter, the day of baked ham, chocolate candy and dyed or decorated eggs…. For any holiday meal, I want dessert to be special yet not too heavy: an attractive fruit-based pie, but easy to construct and yummy: a tall bill to fill but this cherry sunrise pie checks off all those requirements.  Last time my sisters came for Easter Karen asked me to make it for the big meal and she melted my heart when she said it felt like Easter when we ate that pie! They always fork it down as they are cherry lovers plus my sisters love how light it tastes.  I share it so you can make it anytime you want an easy company dessert.   You should make it the night before, so it is chilled enough to eat by 1 pm.cherry sunrise pie

It has to have a gluten free crust for me but if you are making it for the wheat eating public there are redi-made crusts out there that will make this so simple yet so delightful. Actually, I am making gf scratch graham crackers today, so they set a couple of days before I crush most of them into crumbs for the crust; homemade is very easy and cheap and they taste phenomenal compared to store bought gf graham cracker crumbs.

Cherry Sunrise Pie

One pie crust: I made mine from an 8 oz box of gluten free graham crackers crushed and mixed with 1/3 cup melted butter and pressed gently into a 9-inch pie pan.  Bake at 375 degrees for 9 or 10 minutes.  Let cool completely before filling. I made mine the night before. Or buy one; they sell them at holiday times in the gluten free area in my local supermarket and at the local natural food store. Will save time to buy one…

Ingredients for filling

18 or 19 oz can crushed pineapple in own juice

1 21 oz can of cherry pie filling

1 8 oz pkg light cream cheese, room temp.

½ tsp vanilla

1 cup heavy cream

¼ cup powdered sugar

Directions

Drain the pineapple for 20 min; save the juice!  I used my microwave to gently warm the cream cheese; it has a softening setting for cream cheese which works perfectly. I unwrapped it and placed the cold slab on a small plate and warmed it on a very low heat until supple and smooth.  Dump in a mixing bowl, add 2 tbsp pineapple juice, the vanilla, 1/3 cup crushed pineapple, ½ cup cherry pie filling.  If you are smart you will mostly use the goopy stuff and not too many cherries.  Save them for on top! Next, stir this all together really well.

Then whip the chilled heavy cream in a separate bowl with an electric

mixer until soft peaks form, add powdered sugar and mix well with the mixer; be careful not to over beat it.  If it gets clumpy you went too far.  Fold this into the cream cheese mix until it isn’t streaky with white areas.

Gently spoon the filling into the pie shell, spread it out to fill the entire bottom.  I used a spoonula (blend of spoon and spatula) and smooth the top with a flat cake spatula.  I like to leave a sort of tiny ridge on the outer edge to keep the pineapple from spilling out onto the crust.  Then carefully pour the rest of the cherry pie filling in the center spreading it to cover ¾ of the top from the center out.  Finally, use a spoon to put pineapple around the outer rim of the cherry filling.  Chill at least 2 hours, preferably 4.  Cut and slice. No adornments are needed. It has a light fluffy consistency, and it isn’t that sweet.  Great to top off a big meal; not too filling and the fresh fruity taste is a spring treat.  Try it soon and you will be giving the recipe out afterwards!photo 1

I have no pictures of creating this pie; maybe this Easter I will take the time to snap a few and add them to this post at a later date.

This is about the seventh time I have blogged this recipe; first was in 2014. Been making it for like 20 years!