Refreshing Winter Salad Choices

Winter is not known as the season for great salad but it could be! It has been so cold here in PA I am longing for summer fruits so these winter salads can fill that bill when you are meal planning.

I am giving you two salads for this post plus variations for each. Try your own blends but it is best not to throw everything in the fridge in it.  Try to be selective and highlight one or two ingredients.  Simple salads I like have only three – five ingredients and I use my homemade vinaigrette dressing.   They are pretty healthy and probably fairly low in calories yet high in nutritional value.  These are basic recipes which you can tweak depending on the ingredients in your fridge and pantry.

Here are two versions of my winter salad.  This is a repost from my blog a few years ago. I eat these salads all winter long and think you should too. Recently I bought a few blood oranges and used them in lieu of a navel orange; totally different look but pretty much the same flavor; fun! 

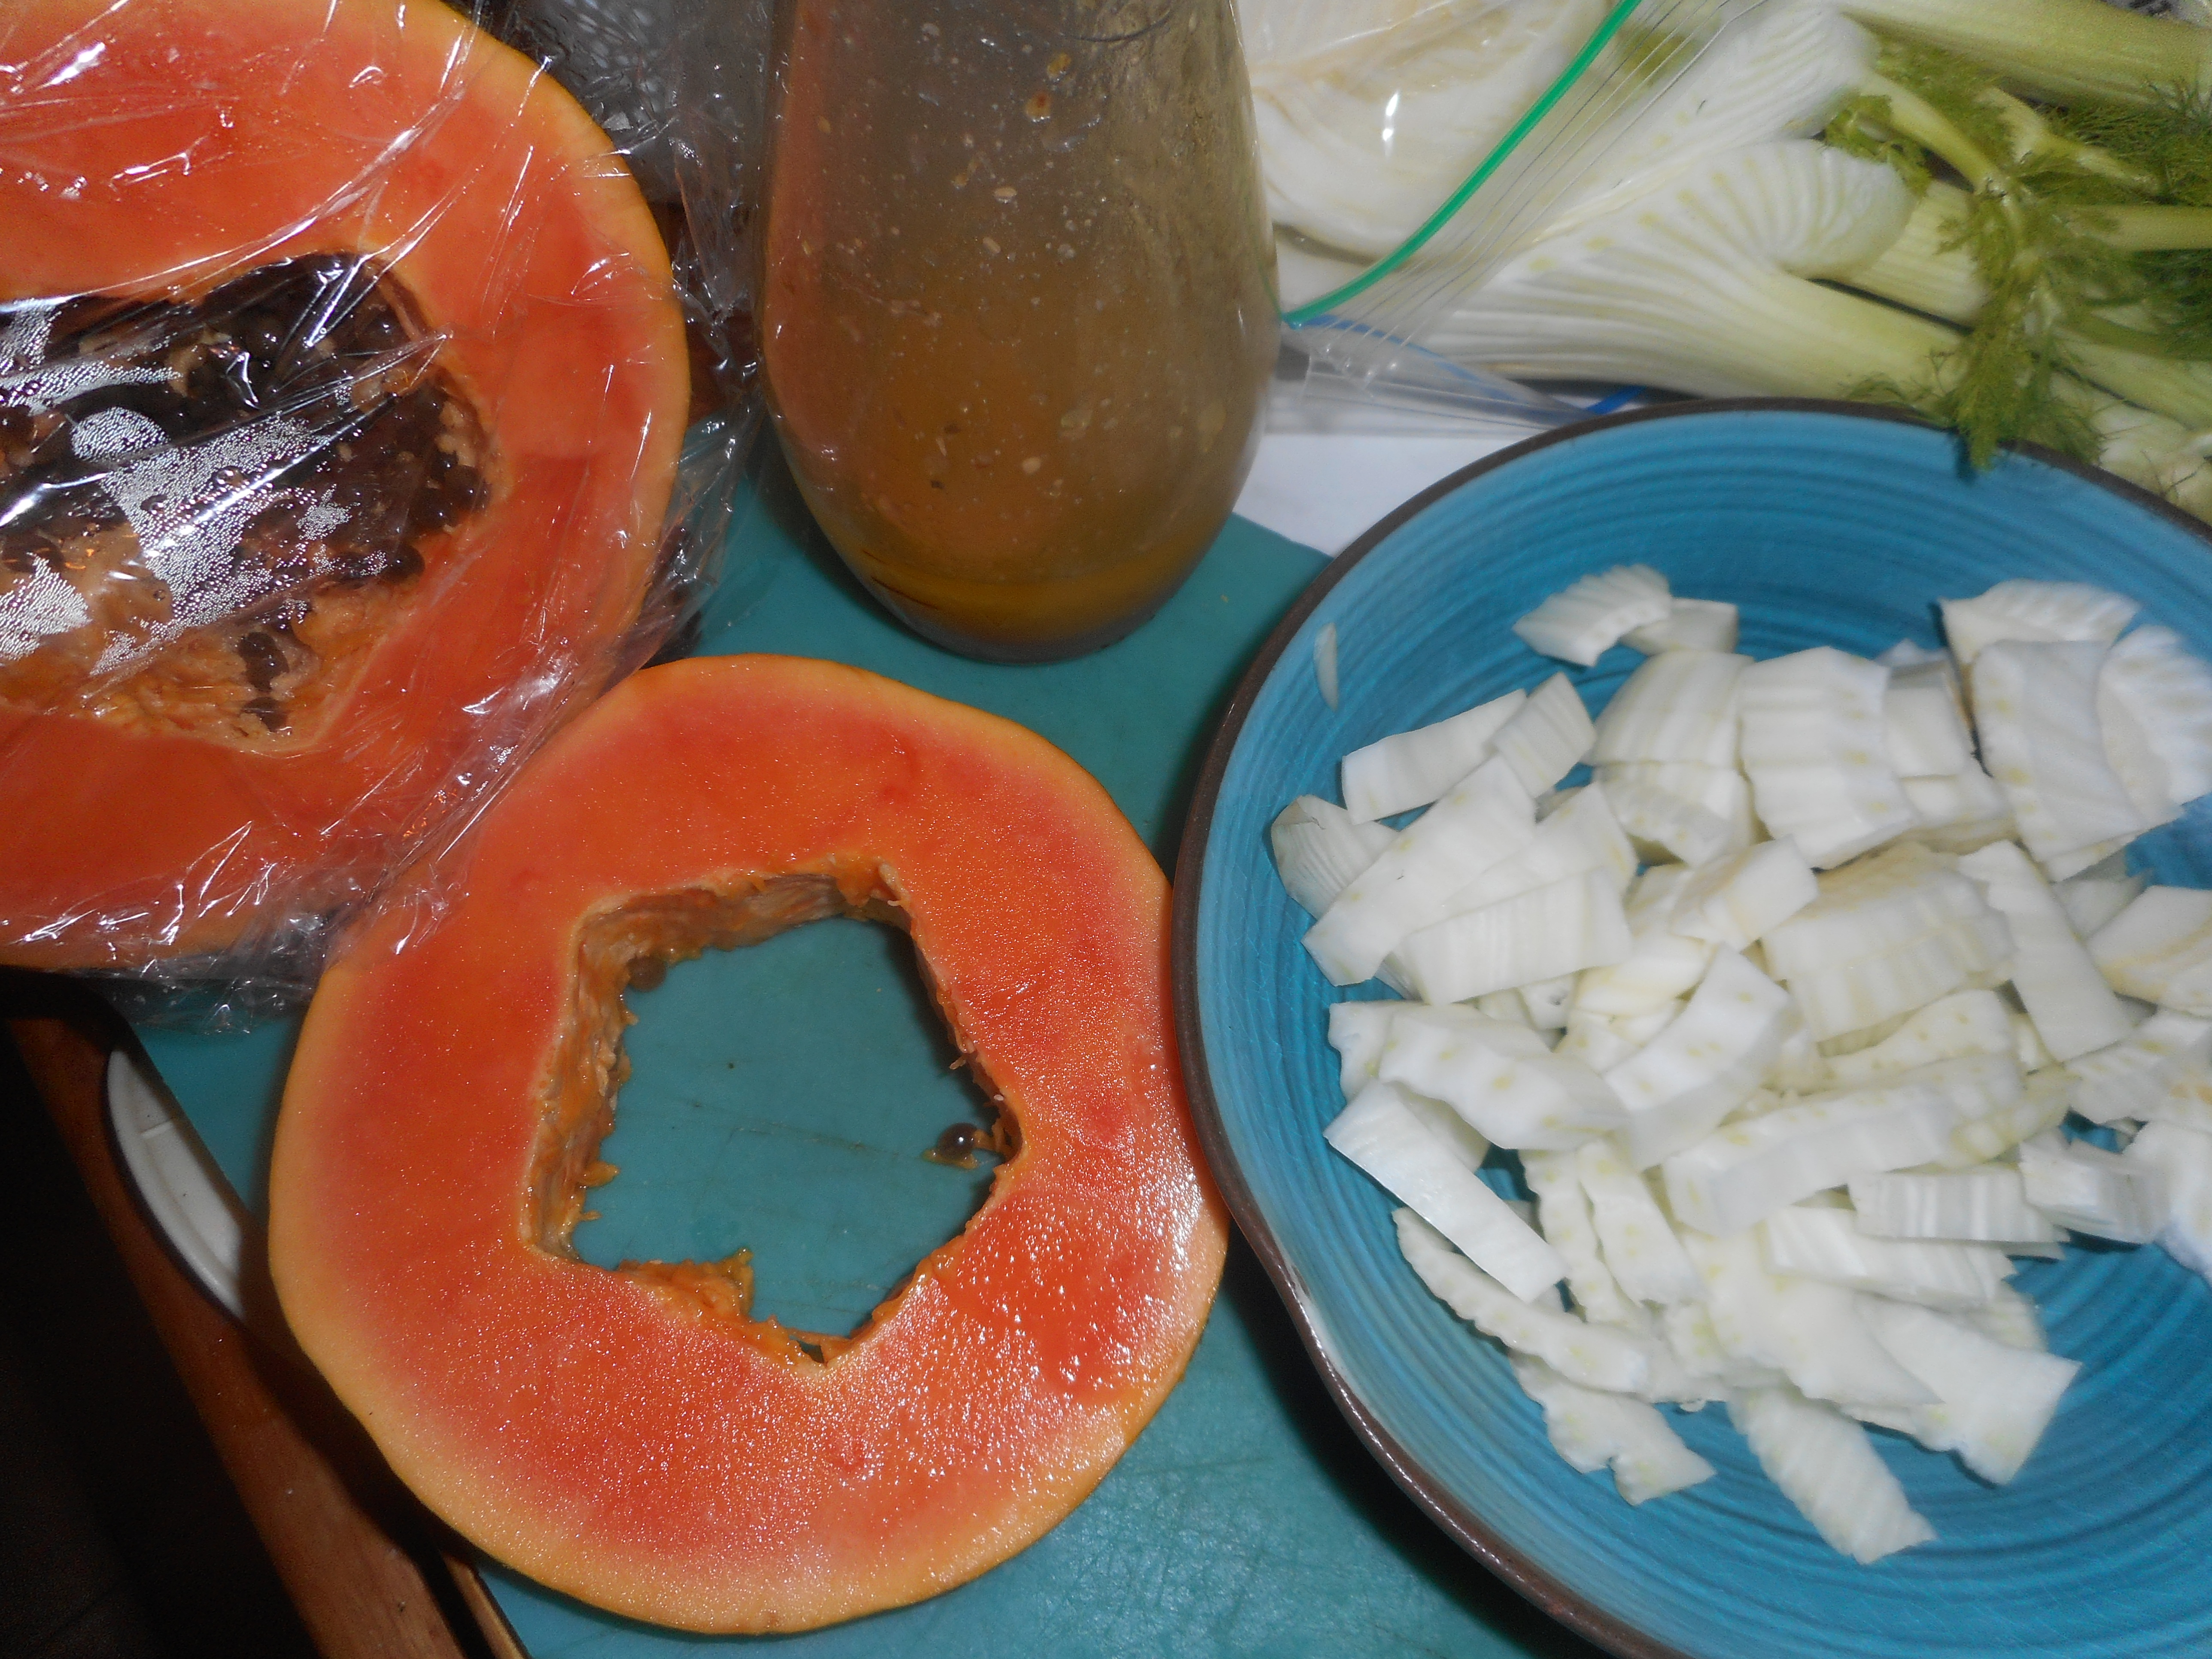
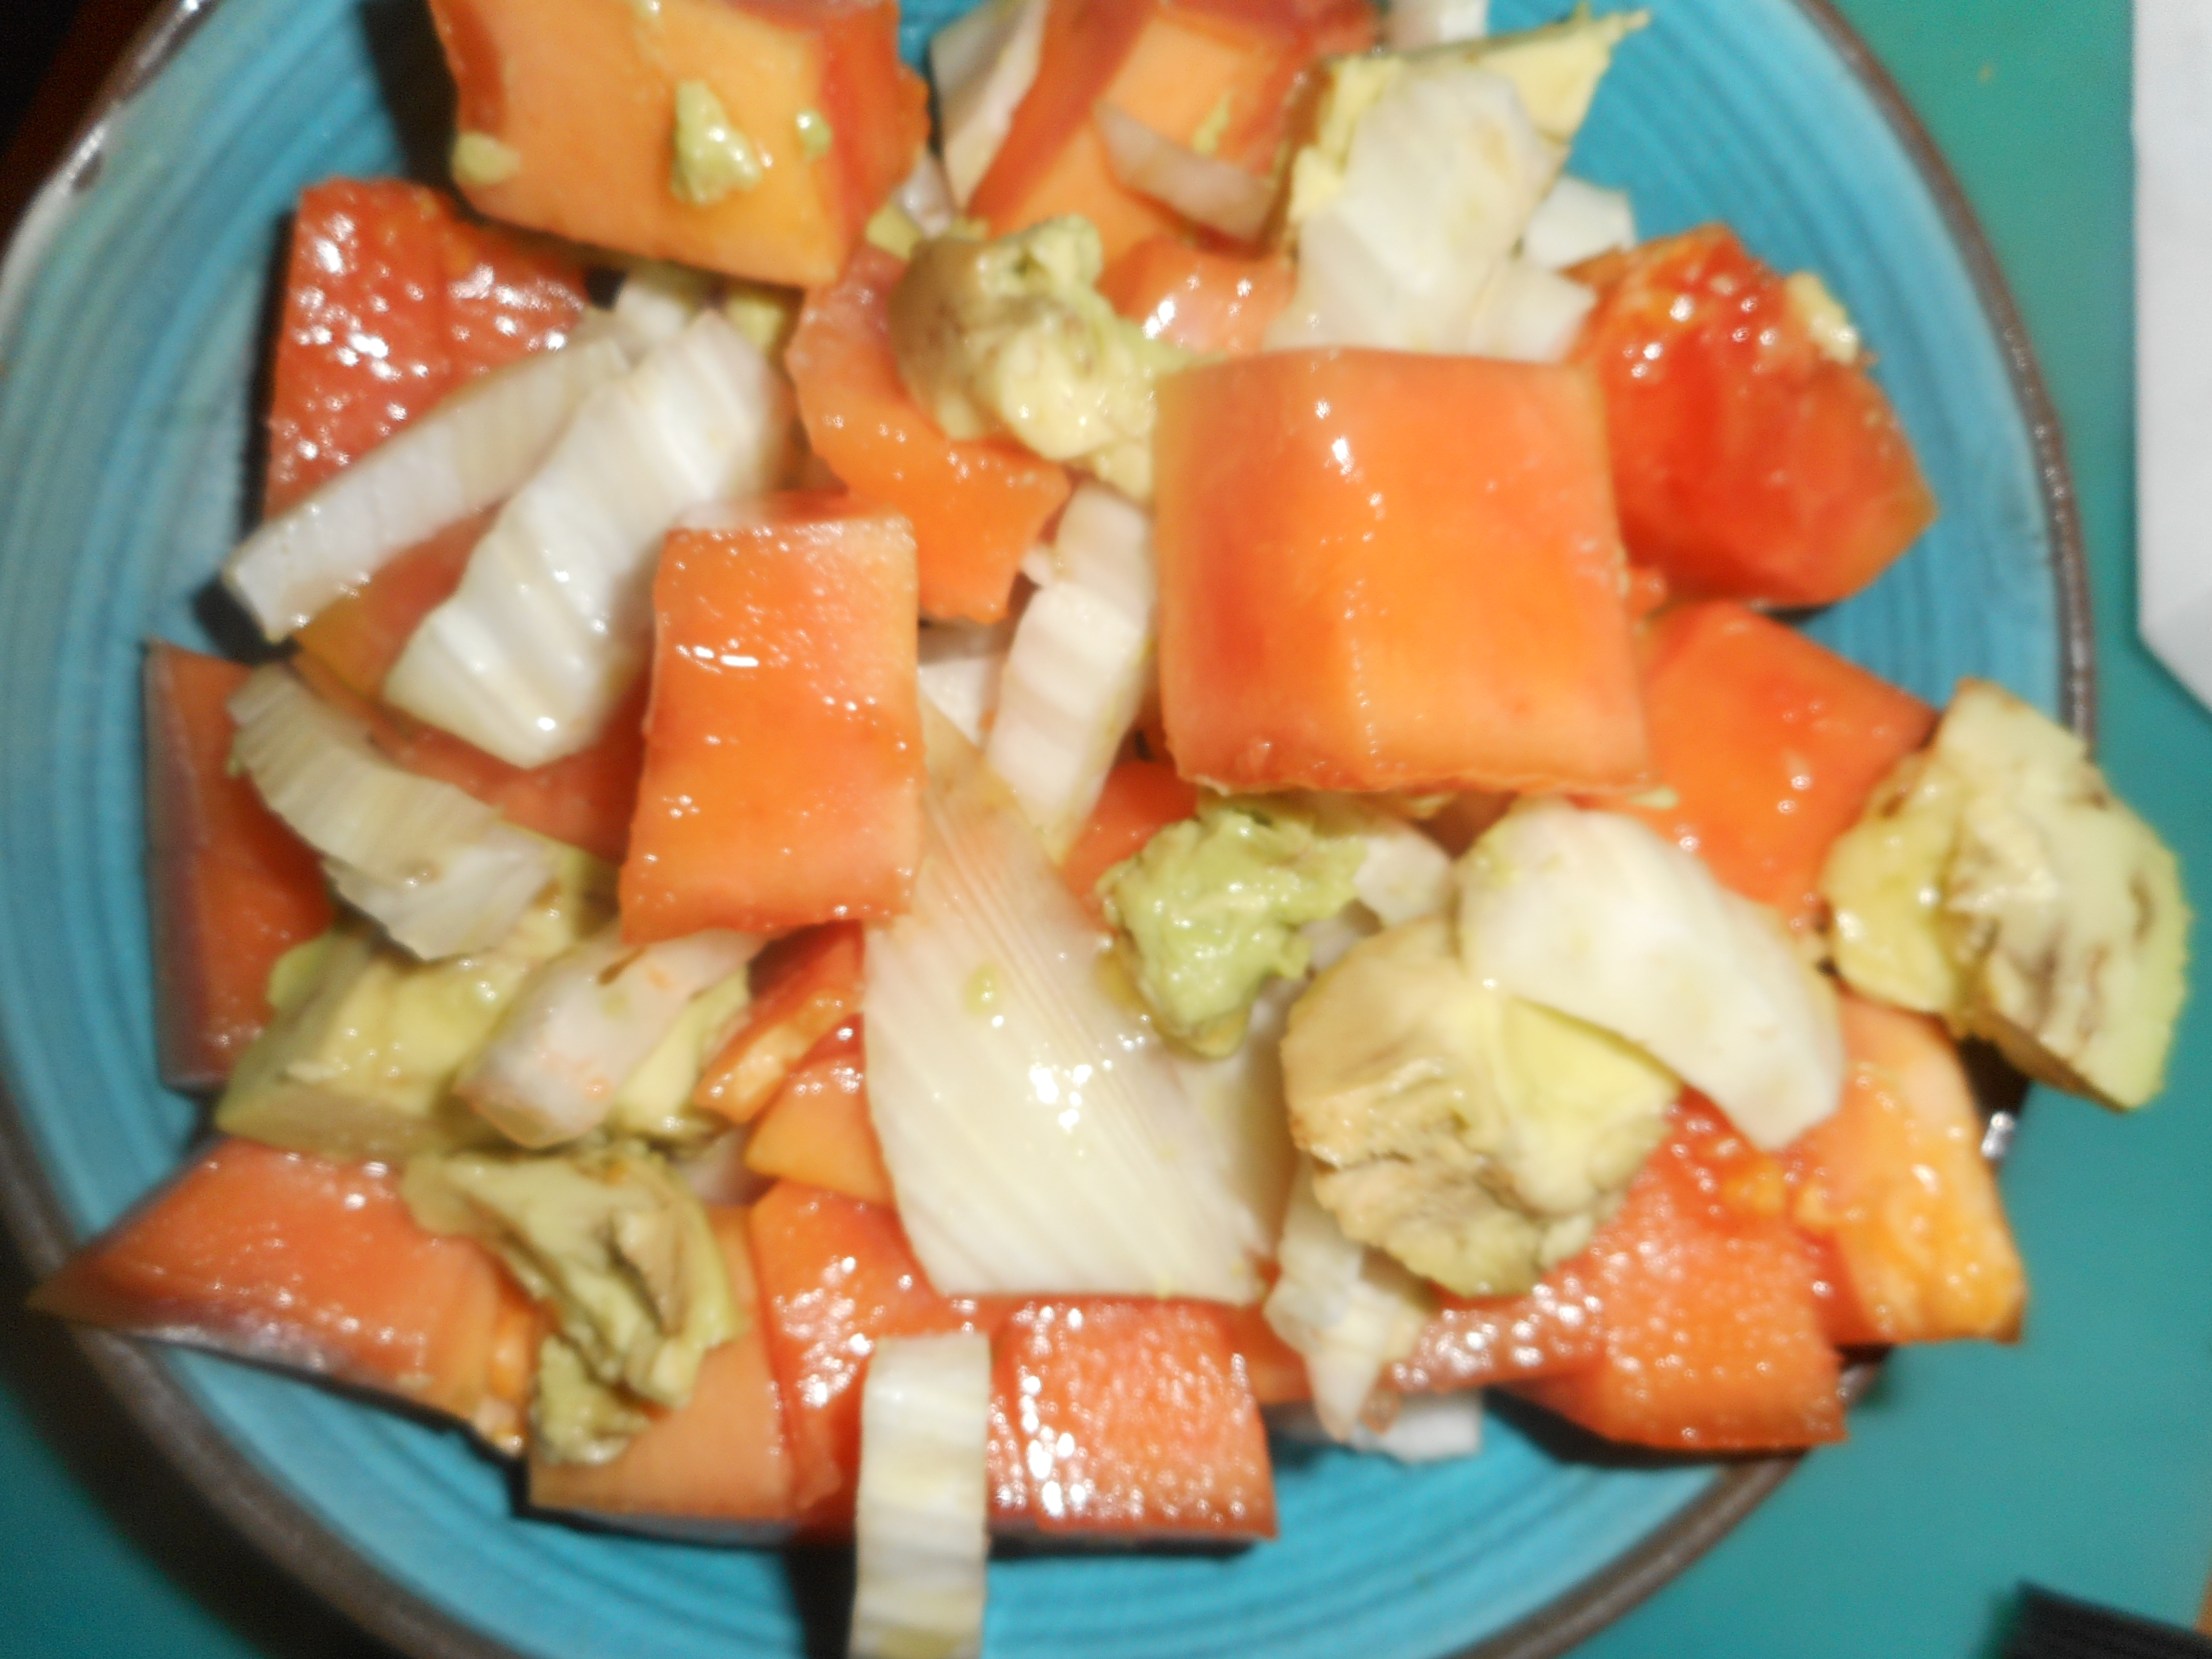
Super Winter Salad (serves 1)

1 cup of chunked papaya

½ an avocado

1 celery stalk

3-4 leaves of green loose leaf lettuce

2-3 tbsp. fresh pomegranate seeds

Or try this yummy winter salad which has lots of fennel which I love and shows off citrus flavor and color:

s

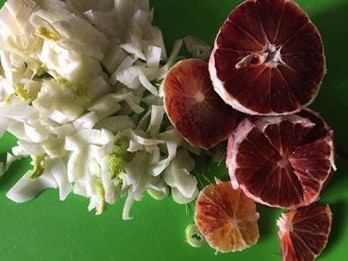
Citrus Fennel Salad (serves 1)

1 inner stalk of celery cut in 1/3 inch rounds

1 navel orange

¼ cup fennel bulb, cut in ¼-1/3 inch slices

Peel the orange, either by hand or using a paring knife.  Cut across into rounds about ¼-1/3 inch across.  Cut again across into halves.

Fennel has a sweet crunch to it, faintly tasting of licorice, kinda sort of and it marries really well with citrus.  I also like to use blood orange or cara cara navel oranges in this recipe.  Even grapefruit slices are great.  Cara cara oranges have an interesting orange-pinkish cast to the fruit and a lovely sweet flavor.  The local Giant grocery store has them on display right now.  You can also mix two citrus in your salad; a navel and a blood orange.  Fantastic!

Finishing directions for both salads:

Place the salad ingredients in your salad dish; I have some very low sided ceramic bowls I got a long time ago that I love for salad. Then sprinkle the salad with vinaigrette which you just shook up one last time! Please don’t add too much salad dressing or you will have soggy salad, really not a good thing.

Margie’s Vinaigrette

So, I used to use one of those Good Seasoning’s jars but add my own ingredients, use a pint jar if you like; my current jar is a plastic lidded shaker jar with a wire mixing ball that shakes the oil and vinegar to perfection. The main thing you must have is a tight-fitting lid. If you use the Good Seasons one, fill it to the vinegar line with red wine vinegar, please don’t use the cheap store brand (skimpy 1/4 cup).  Then some filtered water to the water line (about 1/3 inch more or two tbsp.). Next, I add ½ tsp Dijon mustard, ½ tsp sea salt, ¼ tsp dried oregano, a sprinkle of dried thyme, 1 tsp mayonnaise, ¼ tsp freshly ground black pepper, ½ tsp sugar and [optional] one garlic clove (peeled and mashed down a bit to release flavor). Then add extra virgin olive oil, stop a bit before the oil line and finish it with lighter olive oil (1/2 cup plus one Tbsp. of combined olive oils).  Shake it up really well. Then shake it some more, you need to get the mayo to blend in as completely as possible. It tastes best at room temperature and plan ahead – let it rest for at least an hour before you use it the first time.  Keep it in the refrigerator if there is any left over, lasts like a month in there. The mustard adds snap, and the bit of mayo helps the dressing stay emulsified (fully blended) longer than it would without the mayo.  If your salad is delicate and you don’t want as much olive oil flavor use only mild olive oil and skip the EVOL.  If you chill the dressing, you will need to let it warm up before using it; ten seconds in the microwave can help with that process.

I named this after my older sister who passed away several years ago.  She made fantastic vinaigrette.  Mine is not quite hers but close enough to masquerade as it.  She would approve….

Note: You could up the nutritional value with a few almonds or walnuts if you like nuts in your salad.

More thoughts: I make any number of salad combos.  Two of my favorite ingredient combinations are: shredded carrot, sliced radishes, chickpeas, romaine and half rounds of European cucumber or a mixture of torn kale leaves, shredded raw Brussels sprouts, scallion rounds and julienned raw summer squash.  Both mixtures are great with this vinaigrette.  Just don’t put more than say five things in any one salad or it will have a mixed up taste.

Last thoughts: I generally avoid tomatoes in winter although some grape tomatoes can be relatively tasty; use them if you feel the need for tomatoes.

So, go get your healthy green on and enjoy a fruity salad, even in the winter.

Reposted from February 2015 with minor changes.

Chilly Day Bean Soup

Another cold winter day!  It’s time for a hearty one pot meal.  This one is my multi-bean soup with Italian sausage.  I’m doing a half recipe this time for those who don’t want a giant pot of bean soup! I started with half a 1 lb. 4 oz bag of 15 bean mix   If you have celiac most 16 or 15 bean mixtures for soups contain barley which we  cannot eat.  I found Hurts’s HamBeens 15 Bean Soup mix at Giant grocery store that was marked gf.  I did not use the seasoning packet that came with it.  Same brand I used last time.

My soup has Italian sausage, but you can leave that out if you want a vegetarian version. I personally love sausage in a bean stew. Gives you lots of meaty flavor and a healthy dose of protein. I am guessing you could use other things like smoky ham chunks or maybe a ham hock?

I enjoyed a hot bowl of this healthy pottage with a slice of toasted multigrain sourdough gf bread.  It made a full meal without anything else being necessary.   A fresh crunchy salad would go well if you want to round your dining experience out with some greens!

Multi Bean Soup with Sausage (approx. 4 servings)

Soak half of a 1 pound 4 oz (typical bag size) of dried mixed beans in filtered water to cover.  Soak it for an hour or try the overnight treatment, which is what I did.  Bring to a boil and let stand an hour or just let stand in the cold water overnight.  Be sure to drain them well and rinse with sink sprayer before returning the swollen legumes to the carefully rinsed out pot.  Cover with fresh filtered water and add a bay leaf.  Cook 2 hours, pour in more water as needed and stir so it doesn’t stick or burn, cook another hour until the beans are nearly tender.  It is hard to say when beans get done, depends on a number of factors, taste often to check for tenderness. And stir that pot! As they approach that almost done spot start the rest of the dish, get everything chopped up and ready to toss in when the beans have reached the two-hour mark.

Chop into dice:

2 carrots

1 medium to large onion

Mince: 1 big garlic clove

Add the veggies to the pot, stir and cook 10 minutes. Stir occasionally. Add water if needed.  I like the soup thick, but it can’t be solid so add water.

As that cooks, start the sausage.  Sauté 3 Italian sausage links: brown in a frying pan with a touch of olive oil until top and bottom are browned and sausage is mostly done. Let cool a bit and slice into rounds or chunks, set aside.

Add the following to the soup:

½ a 14 ounce can of diced tomatoes

1/8 or less tsp. red pepper flakes

1/4 tsp. dried oregano

Sprinkle dried basil

1/8 tsp smoked paprika

½ bunch of kale leaves cut into big shreds; I cut off the bigger stems as they can be tough.

1 tsp sea salt

Some fresh ground black pepper

Cook ten minutes, add more water if it gets too thick. Stir occasionally.  Taste and add more spice if you think the soup needs more. Add the sliced sausage and cook five – ten minutes more.  A total cooking time could be from 2.5-3 hours, depending on your beans.  If they have been sitting in the pantry for many months they take longer to cook to a tender texture.

Taste and add more salt/pepper as you see necessary.  Let stand 5-10 minutes before ladling out.  Now that is comfort food that is good for you too!

Revised from a recipe originally posted February 2015

Teriyaki Pork Stir Fry

Tired of rich holiday meals? Want more fresh veggies in your entree? But don’t trust your Chinese restaurant to be gluten free? Or wanna make it cheaper than takeout? Try this easy way to create your own stir fry. I had some boneless pork chops and cut off the excess fat while chunking it for frying. You stir up a sauce and add it near the end all at once to coat the pork and the veggies.

You should definitely use bell peppers, but the other veggie choices are flexible. I like onion and celery in mine. Had mushrooms and a zucchini to use up so they went in too. Snap r snow peas would be excellent instead of the zucchini. I served this over some leftover jasmine rice; perfect but brown rice or rice noodles are great alternative starch options. If you are keto; skip that starch!

Angie’s Teriyaki Pork Stir Fry

Ingredients:

16-20 ounces of pork loin, boneless pork chops or tenderloin

1/2-1 Tsp. meat tenderizer (optional)

2 Tbsp. oil, sunflower oil works well

1 red pepper cut in large dice; I did wide strips top to bottom and then cut into 3 pieces

1 yellow or orange pepper cut the same; large dice

1 med-large onion cut in wide strips and then they get halved

2 celery stalks cut in 3/4 inch chunks; wide bottoms also halved

1 cup chubby zucchini slices cut in quarters to be similar to the peppers

4-6 ounce fresh mushrooms cut into fat slices or chunks.

3-4 scallions cut in 1 inch lengths

3-4 garlic cloves, minced

Sauce: 2.5 Tbsp soy sauce, 1 Tbsp. honey, 1 Tbsp brown sugar, 1 tsp. rice vinegar, 1 tsp. mirin, 3 Tbsp cold water, 1 Tbsp. cornstarch; mix in a small bowl

Directions: Cut meat into 3/4-inch chunks, cutting off any big globs of fat. Sprinkle with some meat tenderizer if you like to do that. I did. Heat oil in a wok or wide fry pan; I used a large non-stick paella dish; it kind of worked well. Add the meat. Cook 2-3 minutes, stir up to get a new side down to browna little, cook 2 more minutes, stir again and cook another 2 minutes. You want it to reach 146-150 degrees; I actually tested the biggest chunk with my instant read thermometer. Remove meat from pan. Add the peppers, onions and celery. Cook 3 minutes, stirring often. Add zucchini and mushrooms. Cook 2 more minutes. Add scallions and cook a minute. Add garlic and the sauce. Cook about 2 minutes until sauce thickened. I added 1-3 more Tbsp. water as it got too thick and I didn’t want it to burn or for the garlic to taste raw. Maybe next time I will cook the garlic a minute with the veggies in the pan before I add the sauce. Up to you just don’t overcook those veggies; they should be slightly crispy. Serve over hot rice. Enjoy!

Tuna French-Fry Casserole, 3.0

I rarely make tuna noodle casserole; but I did make a delicious version a while ago. Today I attempted to make my old French fry version with a scratch gluten free sauce from that noodle version. What a difference that made! So delicious, a delicate flavor and a huge improvement over bought cans of mushroom soup or cream of chicken soup which are generally not gf anyway. This was as good a tuna casserole if not better than any I have tasted before going gluten free so I plan to make it again for sure. It really isn’t that much work to make a scratch sauce, and it makes all the difference in the world in terms of flavor. Just don’t boil the sauce or it may separate.

Notes: I added chunks of red and green sweet pepper; up to you whether you add them. I especially like the red pepper in it. Use whole milk if possible; makes it taste rich. You can use any type of frozen French fries but check to make sure they are gluten free. Don’t leave out anything in the sauce; the celery/onions/peas give it such a fresh taste, like early spring! Use the tuna you like; I suggest water-packed white for this. I find albacore kind of dry, so the solid white tastes better to my taste buds; totally your call what tuna you use. Be sure to drain it; your critters will love the juice in their suppers! I used fresh dill in my sauce this time, but use what you have or even leave it out.

 I served mine with buttered baby carrots. A salad would be a nice option too!

Most of the veggies are in the pan!
Creamy sauce and veggies; thickening
Half constructed; 2 layers of French fries when it gets done.
Ready to bake: cracker topping is on!
A healthy serving of tuna french fry casserole

Angie’s Tuna French Fry Casserole

Ingredients:

4 Tbsp. butter, divided

1 rib of celery, diced finely

1/3-1/2 cup finely diced onion

1/2 cup sweet red pepper, diced

1 tsp (1 clove) minced fresh garlic

2/3 cup frozen peas

4 Tbsp. white rice flour

14 ounces chicken broth; low sodium preferably

7/8-1 cup of whole milk; I warmed it 1 minute in my microwave

1/4 tsp. sea salt

1/8 tsp. freshly ground black pepper

1/4 tsp. dried dill weed or 1 Tbsp. fresh chopped dill

2 tsp. fresh lemon juice

1-2 Tbsp. finely chopped fresh Italian parsley (optional)

1/2 cup fresh grated Parmesan cheese

1/2 cup grated sharp cheddar cheese

2 cans tuna, (5 oz cans) drained – I like solid white packed in water for this

half a bag of frozen french fries baked for 10-12 minutes at 375 degrees; bake while you make the sauce.

Topping: 3/4 cup crushed gf Schar Company Crackers and 1-2 Tbsp. melted butter; mix in small dish and sprinkle it over before baking the casserole.

Directions: Melt 1 Tbsp. butter in medium frying pan, medium heat. Add onions and celery; cook 4-5 minutes, add garlic and peas, cook one more minute. While they cook, butter a 9×12 glass baking dish (2.75 quart) and put those hot veggies on a plate while you whip up the nummy cream sauce.

Start oven heating to 350 degrees. Melt rest of the butter in the same frying pan, add the flour when it is hot; stir it while the flour blends in, cooking it 30-60 seconds. Add in the broth and then the warm milk, stirring constantly with a whisk. Add the salt, dill, parsley and lemon juice. keep stirring; after a minute or two it should be thick and bubbly. Stir in the parmesan cheese as it bubbles; not at a boil. Taste and adjust sauce as needed. I thought it was perfect with no changes but up to you. Dump back in those veggies; stir. Add half the hot French fries and then carefully pour half the sauce and veggies into the baking dish. Top with the cheddar cheese and then the buttery crumbs and bake about 25 or 30 minutes until it is bubbling. I did 30 minutes

It keeps in the fridge for 2-3 days; I like to add a touch of half and half to my serving before microwaving it; like a couple teaspoons; helps it stay moist when reheated.

Black Bottom Pie A Southern Treat!

This is a humdinger of a pie, from the South but definitely a pie we love here in Pennsylvania. A gingersnap crust topped with a thin layer of dark chocolate custard and then a high layer of rum flavored custard which I like to top with lightly sweetened freshly whipped cream. Heaven on a plate.

This pie is slightly tricky but honestly I have never had a fail and I have made it like 2 dozen times over the years. My mom used to make it and I often make it during the Christmas season. We had some on New year’s Eve to celebrate. My guy claims to not like gingersnaps but once he eats a freshly baked one made from scatch he suddenly becomes a fan! So, you could use a graham cracker crust but I urge you to try this with the gingersnap version. The rest of it is hard to sub in anything. I generally like dark rum but in a pinch I have used white rum more than once. I use bittersweet chocolate but you could try it with semi-sweet or even 50/50 bittersweet and unsweetened chocolate.

Black Bottom Pie

Make a gingersnap crust; 1 1/2 cup crushed gingersnaps; I do it in the blender

1/3 cup melted butter; mix in a bowl and pour into a 9 inch pie pan; spread evenly on bottom and sides. I like to use a sheet of wax paper to easily spread it. Bake at 350 degrees for 8 minutes. Let cool completely.

Filling

Ingredients

1/2 cup sugar mixed with 1 Tbsp and 2 tsp. cornstarch

2 cups whole milk heated to quite hot in the microwave; I do 2 minutes

4 eggs separated; put yolks in a small bowl and lightly beat with a whisk

1.5 ounces of bittersweet chocolate melted

1 tsp. vanilla extract

1 Tbsp plain gelatine mixed with 2 Tbsp. cold water in a small dish; let stand a minute before using

1/4 tsp. cream of tarter

2 Tbsp rum, preferably dark rum

a cup of cold heavy cream

Directions: Mix the sugar and cornstarch and add to the milk in 1.5 quart saucepan, heavy if you have such. Stir as it heats on medium. I use a heat diffuser between the heat and the pan. Cook slowly, do not let boil. Stir a lot so it heats evenly. It needs to coat the spoon; won’t get that thick and this generally takes 8-10 minutes at least. Then use a measuring cup to dip out 1/3 or so cup of it and stir into the egg yolks. Then pour the egg yolk mixture into the hot milk and stir well. Then cook on medium heat for a minute. Meanwhile… Melt that chocolate; I do it in my microwave. Dip out or pour a cup to 1.25 cups custard into a small bowl; pour in melted chocolate, stir good and add the vanilla, stir and let cool a couple of minutes before pouring into the crust. evenly coating the bottom. Put in fridge to chill.

Whip the egg whites and cream of tartar until forming soft peaks. Add 1/3 cup sugar very slowly as it beats to firm peaks. Pour the melted gelatin into the remaining hot custard, stir in until it is melted. Add rum and fold together with the beaten egg whites until no white shows, pull the crust out of the fridge and gently pile the rum custard on top of the chocolate custard. Chill at least 3 hours. Serve topped with whipped cream sweetened with a little powdered sugar; 1 cup heavy cream plus 2 Tbsp. powdered sugar.