Navigating a Gluten-Free Thanksgiving: Tips & Recipes

Holidays are a joyous time, but they are also a stressful one for those of us with celiac or gluten allergies. We have a difficult road dealing with holiday work parties, festive outings, dinners with family and or friends. Some people make it easy for us to participate and some try but unfortunately, they make errors that cause upset digestive systems. I myself am rather leery of all those situations except my family gatherings. My sisters and brothers understand my dietary restrictions really well and never cook stuff on the table that I cannot eat.  They try had to find safe places to eat out, which isn’t easy in my geographic area. They don’t want to go far and close by my home there are limited choices. All that said, if you need to cook for someone who is gluten free there are a number of great choices of what to serve and there are some simple protocols to follow. cherry sunrise pie

Cherry Sunrise Pie; you can use a premade gf crust. No baking then!

apple pie done

Gluten is in all wheat-based ingredients; from all-purpose flour, to rye flour, whole wheat, spelt, farro and barley grains/flours. So, I have to avoid them completely. Even a quarter teaspoon in your dessert or sauce is enough to cause major digestive pain.

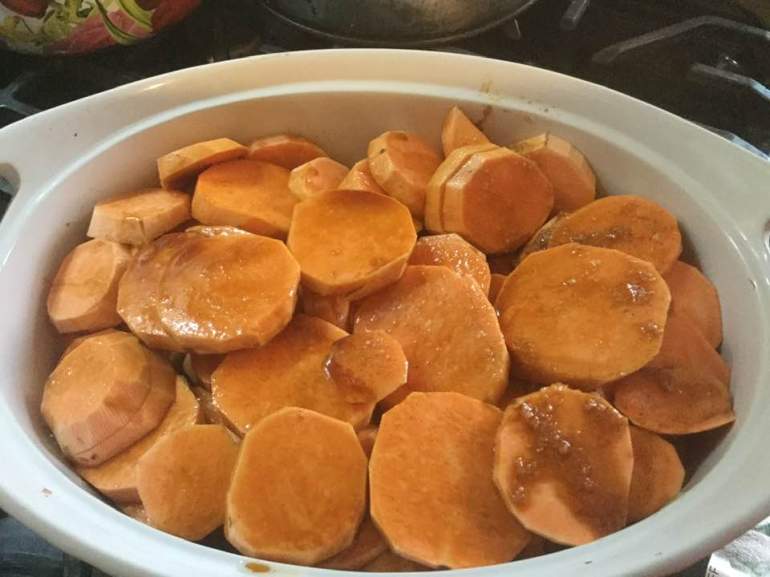
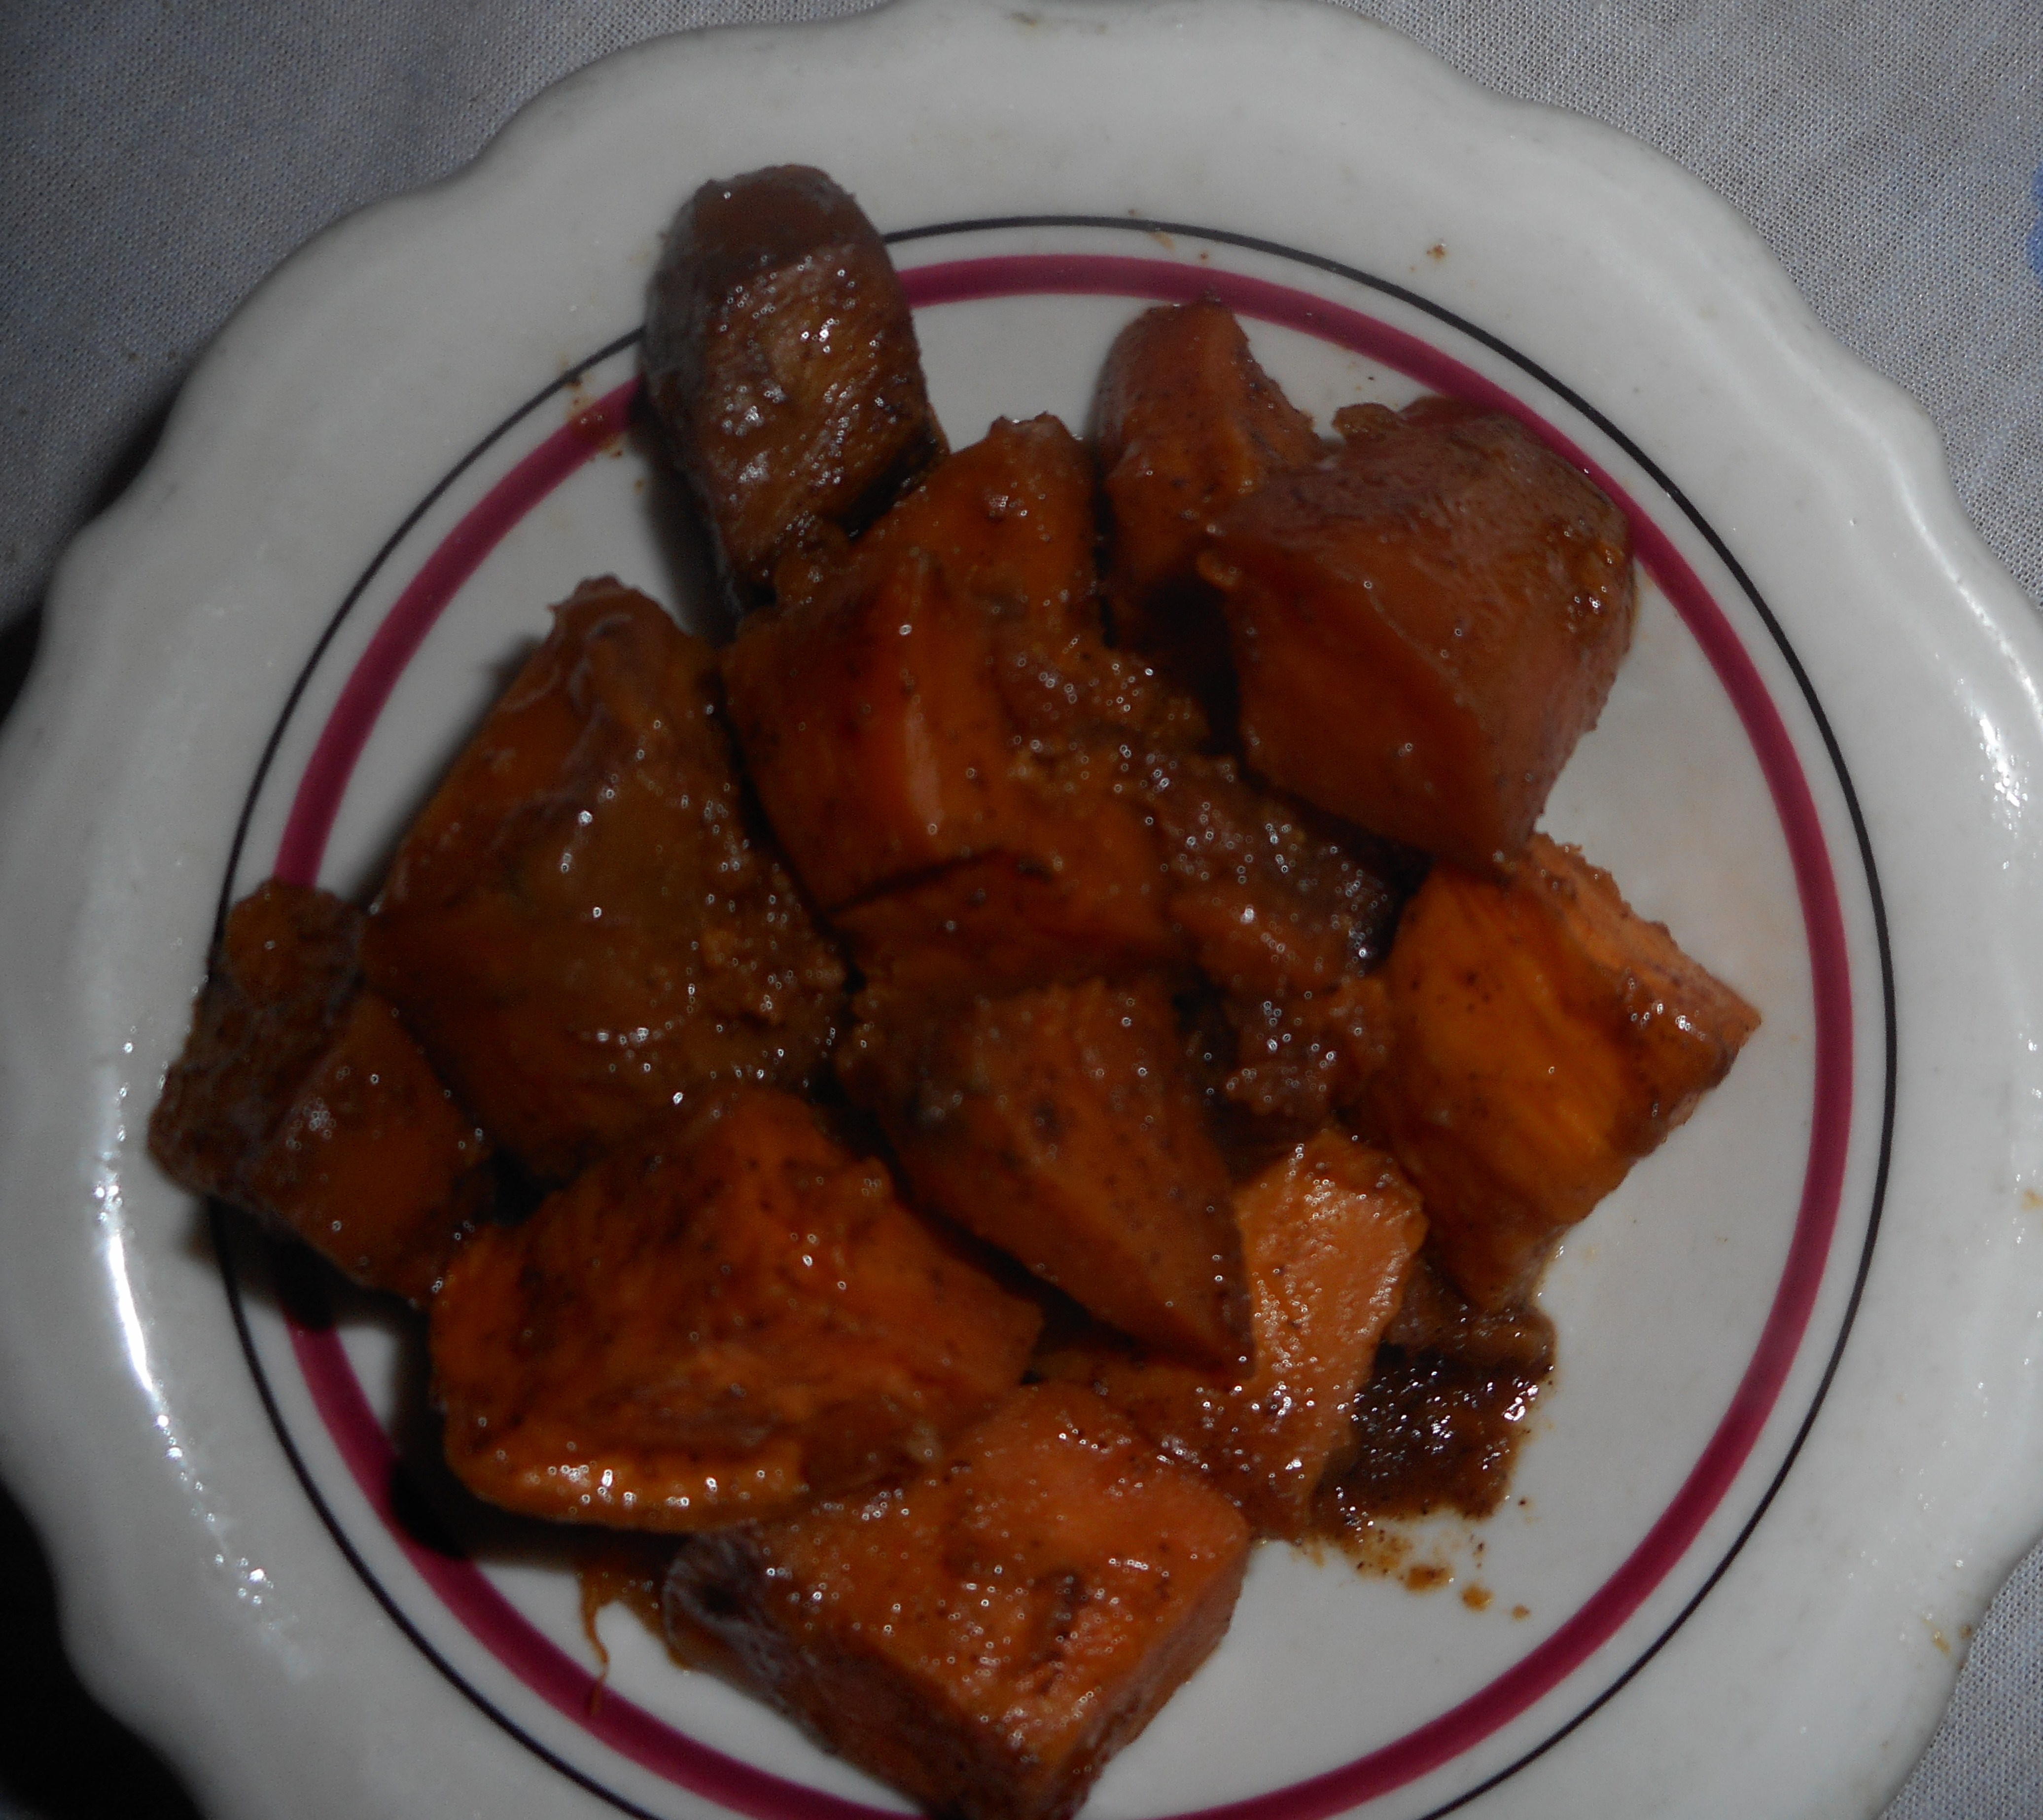
One easy way to go is to make a meal that is all naturally gluten free; baked potatoes, steak, roasted or grilled chicken, fish without breading, pork chops, fried or mashed potatoes, rice: all safe. Beware of breading on proteins unless you are creating it with gf flour or gf breadcrumbs.  If you are making stuffing you can buy gf stuffing at many stores including Aldi’s. Or dry a loaf of gf bread in your oven and cube it. Veggies are safe unless they come with a crumb topping or other fancy stuff; read the label! Be careful with spice mixes; sometimes they have flour in to facilitate flow; stick to McCormick; their single spice containers are generally very safe. I have found gf onion rings for the green bean casserole; most recently in Aldi’s. They were even organic and quite tasty.

You might want to focus on a gluten free dessert like a cake or pie for your company. I have some advice below for you for these categories and there are many options for gf desserts on my blog; just type in what you want like cake or pie and see what comes up!

chicken with broc

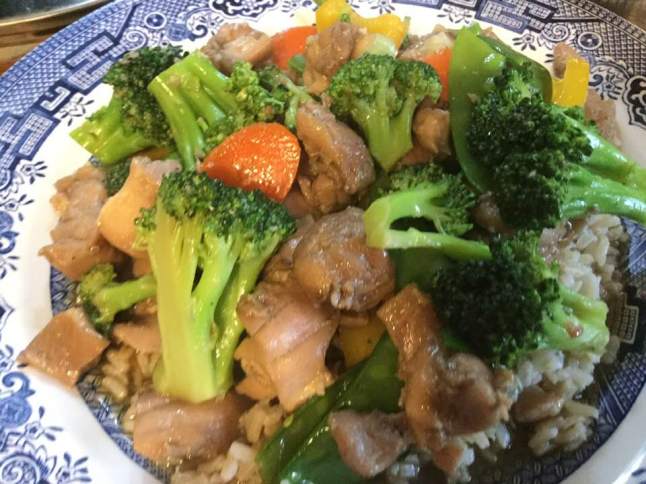
Stir fry; I used cornstarch in a slurry to thicken the sauce. Great way to use up leftover turkey; cube it and put it in a stir fry!

First some entree and sauce advice: no regular flour can be in that gravy or sauce.  An easy substitution is either white or brown rice flour in the same proportions as regular flour stirred into the gravy or sauce. I have gone with each of them several times. I slightly prefer the brown rice in gravy. Other good gravy thickener choices are cornstarch, sweet rice flour, potato flour or arrowroot.  They function pretty much identically to the all-purpose flour in your recipe for these items of gravy or sauce.

Most proteins are naturally gluten free but be careful of injected broth or marinades; often have some small amounts of flour which renders them uneatable for folks with celiac or a wheat allergy. This happens in turkeys; pork roasts and often hams. Read the labels! I look for a GF stamp/sign.  FYI: Fake crab is the one seafood I cannot eat; it is wheat based. Eat the real deal!

Be careful making gravy, soups or stews; many canned broths have a small amount of gluten/wheat in them. Read that label. Aldi’s has some great gf broths at excellent prices. I often get gf turkey broth there to start my bird roasting, so nothing burns on the bottom of the roaster.

choco tart in pan

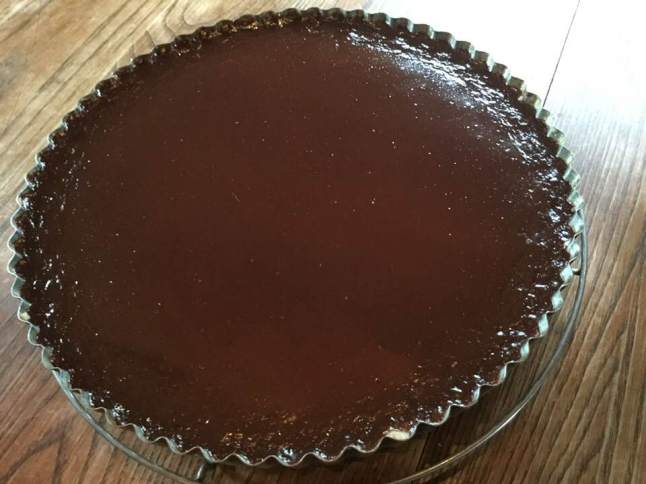
Chocolate silk tart ready for embellishment and devouring!

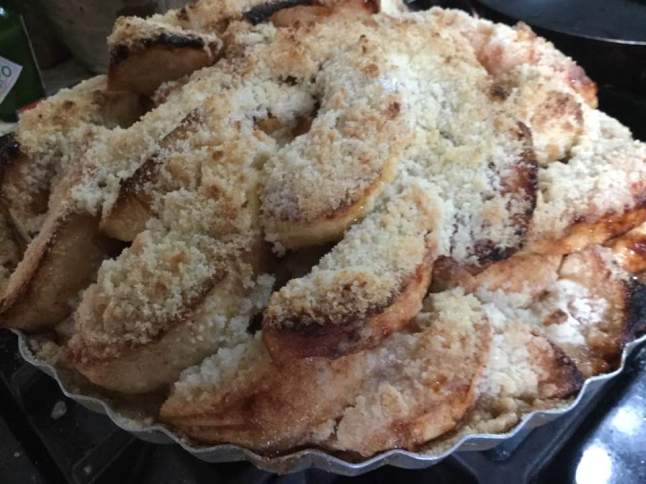
Now desserts: If you are making a dessert, it is a different ball game going gf. A mix that you add eggs, butter and milk to is a great starting place. If you buy a gf mix for a cake, I suggest you also buy some throw away aluminum pans to use; your pans may have tiny amounts of food particles from past baking. Better safe than sorry as even that tiny amount would be problematic. If the dessert requires a graham cracker crust just buy a readymade one in the gf section; the ones I make with gf crackers cost just about as much as a readymade one and it is a real time and labor saver. My gf apple or pumpkin pies are easy enough to make; see recent posts on each of them. The gf crust is the key; you can make it easily in a stand mixer or buy a mix crust; there are several varieties out there to pick from. Just be sure that the pie pan is extremely clean and that your counter for rolling out crust is likewise extremely clean and free of all flour particles.

choc pavlova minus choco

Chocolate pavlova: if you can make meringue in your mixer you can make this awesome company dessert.

In summary, read labels, try to cook naturally gf and don’t try to make too many gf items your first time or two; think one, maybe two new recipes at a time!  You will be rewarded with gratitude from the person who has to be gluten free, and you will feel great for your efforts. I will be posting and reposting holiday baking recipes in the next 2-3 weeks so you may find some awesome gf holiday treats. There are even more in my large catalog of blog posts so use the search feature to see what I have available to shine for your holiday gathering.  Best of luck to you in your holiday gluten free adventure!

Butternut Squash, Pancetta and Chard Pasta

This colorful pasta dish is pretty healthy and very tasty. Not too tricky either. I have enjoyed it many times in the years. It makes 4 satisfying servings.

It showcases roasted cubes of butternut squash and tender melt-in-your-mouth Swiss chard. My amounts are somewhat approximate.  I used gf fettuccine noodles. Don’t overcook them! You could buy pre-peeled and cubed squash to save time. I used some I grew this fall and honestly it didn’t take long to peel and cube it. I suggest you roast the cubes from a whole squash and use as much as you think works for you. Valley Farms has great fresh Swiss chard; that’s where I get mine if I don’t grow it myself.  I have made this recipe with thick cut bacon, if that is what you have; go for it.  I got a package of chopped pancetta at Giant for a decent price. It will keep a few days in the fridge.

Butternut, Pancetta and Chard Pasta

Ingredients:

1 bunch Swiss chard, I like the red or white stemmed variety, rinsed off

3-4 tbsp. EVOL

1 cup or so of diced red onion; one decent sized one

1 lg garlic clove minced

1 medium butternut squash; peeled, seeded and cubed; at least a pound in weight

4 oz pancetta, diced

10-12 oz dried gf fettucine noodles.

Good quality Parmesan cheese to grate on plated entree

Directions:

Roast the squash; heat the oven to 400 degrees, spray a rimmed baking sheet with olive oil cooking spray; spread the cubed squash, drizzle with 1-2 Tbsp of EVOL and ½ tsp. kosher or sea salt, bake at 400 degrees for 45 to 60 minutes; turn cubes every 20 minutes with a metal spatula to help them cook evenly, a bit of crunch is nice! Start the rest of the recipe as they approach doneness or bake the squash a day before if that works for you. Have done it both ways. Crunchier if made right before serving

Heat a large pot of salted water for the pasta while you make the chard.  Chop it into 1 inch lengths; set the chopped leaves aside separately from the lower stem bits. Heat the EVOL in a large frying pan or smallish wok. Add the stems and cook 2-3 minutes, add garlic, stir, add the onion; cook 3-5 minutes until softening. Add rest of chard in 2-3 handfuls letting it cook down for a minute before stirring and adding the next third. Then push the veggies up the sides or to the edges and add the pancetta. Push the veggies gently back around and over the pancetta. Cook 2-3 minutes until the pancetta is hot and the chard is soft.  Meanwhile you have cooked the pasta to al dente. Add it to the pan with the chard, stir, add the roasted squash cubes. Stir. Serve with freshly grated Parmesan cheese on top; none of that pre-grated crappy cheese please! Enjoy!

swiss chard pasta plated

Not sure where I found this recipe, but it is a keeper; we generally enjoy it in the fall as chard and squash are fall harvest vegetables.

Pecan Pie: Thanksgiving Classic!

Thanksgiving pie – you gotta have it. Posted my go-to pumpkin pie recipe the other day.  Here is another classic pie. This is my favorite pecan pie recipe; been making it for a long while and I have shared the recipe before but not on this blog; right out of Betty Crocker, just now with a gluten free crust.  I add an extra quarter cup pecans to make the pie a bit fatter and I always use dark Karo syrup; it is really the only one you should use if you want a great result. The next time I bake it I want to test it with coconut palm sugar instead of granulated sugar in the filling. I love the lower spot for it on the hypoglycemic index so lately I use it whenever possible.

karopecans

I often don’t need a whole pecan pie so I make a half batch of filling to fill four flat bottom tartlets filled with pecan yumminess. Just a thought if you don’t want a whole big pie.  My tartlets were baked in 30-35 minutes.  They were scrumptious.

Pecan pie is awesome on its own but is also great with some whipped cream or vanilla ice cream.  A classic never goes out of style.  It looks just like pecan pie should; rich, dark and chock full of pecan halves. The crust is tender and flaky: it tastes exactly like the best pecan pie ever: no one will ever know it is gf!

pecan-pie

I keep forgetting to take a pic of my pie; this is from McCormick Spices but looks a lot like mine.

Angie’s GF Pecan Pie 

Crust:

1 c plus 2 tbsp brown rice flour mix aka King Arthur basic gf blend (diy recipe is at the bottom of this recipe)

2 Tbsp sweet rice flour

1 Tbsp. granulated sugar

½ tsp xanthan gum

¼ tsp salt

6 Tbsp. cold butter cut into 6 chunks

1 lg egg

2 tsp fresh orange or lemon juice

Directions: Spray a 9-inch metal pie pan with cooking spray, dust with white rice flour.  I don’t usually bother with this but feel free to take this extra caution. A glass pie tin works too.

Mix dry ingredients in bowl of stand electric mixer.  Add butter and mix until crumbly and resembling coarse meal.  Add egg and juice.  Mix until it comes together into big chunks.  Shape into a ball with your hands. Put it on a crust sized piece of wax paper (14 x 14 inches more or less), flatten the crust ball some; put on top of it another piece of wax paper and chill it all in your fridge 15-20 minutes while you get the rest ready. I use an OXO pie bag that is great for rolling out gf crust…better than wax paper by far.

Filling:

3 large eggs

2/3 c sugar (try coconut palm sugar!)

½ tsp salt

1/3 cup very soft or melted butter

1 cup dark corn syrup

1 1/4 cups pecan halves

Sprinkle of cinnamon

Directions: Beat eggs, sugar, salt, butter and corn syrup until well mixed, can use a hand held mixer.  Stir in pecans and a sprinkle of cinnamon.

Roll out pie crust between the two sheets of wax paper or in a pie bag; try to get the thickness even, no thick middle is allowed! Peel off one side of paper and place in pie pan, centered.  Remove other slice of wax paper.  Crimp edges all around.  Fill with pecan mix.  Bake in a preheated 375-degree oven for 40-50 minutes until the filling is set.  Cool at least 1 hour before serving at room temperature or slightly chilled.


Brown Rice Flour Mix (same as King Arthur’s gf flour blend)
2 c brown rice flour

2/3 c potato starch

1/3 c tapioca flour

Healthy Honey Spiced Yam Casserole

I started making this side dish over 10 years ago, have made it for a number of holidays.  We had it one Easter Saturday along with a big roasted chicken and mashed potatoes, the whole chicken dinner complete with challah bread which was a first for me gluten free and an almond honey cake with candied lemon peel slices and fresh raspberries.  But with all the yummy food, this humble side dish was sort of the star.  There was very little left and most of us had seconds.  So, I figured it was time to share it; now you have it for the next time you make a big meal and want a simple yet yummy and healthy side dish.

I love it because it is healthier than most yam/sweet potato casseroles.  It is free of gluten, grains, eggs and refined (read white) sugar.   If you use something other than butter it can be dairy free too.  No tons of butter, marshmallows or cup of brown sugar.  Less than a quarter cup of sweeteners make this a good choice for pre-diabetes.  I do use the coconut oil; adds a subtle flavor I love.

And it is so easy to throw together. Just peel and dice up the yams, mix up the other ingredients in a small saucepan and pour over, bake and enjoy.  So easy but the flavor is subtle yet very pleasing.  I use 4 large yams but I often use 5 or 6 smaller ones. You can double it easily; actually have a post doing just that.  Simple, tasty and healthy; side dish home run!

Honey Spiced Sweet Potatoes

4 large sweet potatoes or yams
1/4 c. butter (or coconut oil, for dairy-free)
2 T. coconut oil
2 T. honey
2 t. molasses
1/2 t. cinnamon
1/4 t. ginger
1/2 – 1 t. kosher salt

Preheat oven to 400 degrees. Wash sweet potatoes, peel if you like (it’s not all that necessary), chop into uniform 1/2 inch cubes, and place them in a 9×13 inch baking dish. Over low heat, melt the butter and coconut oil. Stir in the honey, molasses, and spices. Drizzle over sweet potatoes, than sprinkle with salt. Stir to evenly coat, then bake for about 1/2 hour, or until potatoes are fork tender. Suggest that you stir it up once or twice while it bakes so that yummy sauce can sink into every bite of yam. Enjoy!

It shrank a bit in the pan but still a nice amount of delish to share. Looked fantastic before I took it to the luncheon; darn but I forgot to take a picture….

Apple Crumb Pie

Apples are a favorite American fruit, and they are the main ingredient in America’s favorite pie.   This crumb topped pie is easier to construct than a two-crust pie. I gave you the amounts for a 9-inch pie; I myself generally make it 10 inches; use 9-10 cups sliced apples and higher end of amounts of sugar, tapioca and spices.  Bake this bigger pie for 55-60 minutes.

I like to use 2-3 kinds of apples in my pie; my favorites include golden delicious, Cortland, Pink Lady, Empire, Rome or Ida apples but if you want to use one variety my favorite is golden delicious, and they generally are apple perfection, great flavor and hold their shape without any crunchiness. They also play well in pies made with other baking apples like Empire, Ida Red, Rome to name a few. Just skip Red Delicious; only for eating raw and their texture doesn’t hold up in a pie.

I generally make my own crust but you can use a Bob’s Redmill GF crust mix; pretty decent if a bit trickier to roll out than my usual homemade crust. Definitely a good choice when you don’t have the time for a scratch pie crust. I always use my homemade crumbs. They are easy to make and taste the best!

I put this pie together in a few steps; make the crust dough; put it in fridge to chill while I peel, slice and cut up the apples. I also throw together the crumbs before rolling out the pie; you don’t need to rinse the mixer bowl from the crust then.  If you plan to prebake your crust those ten minutes of baking the empty pie crust are also a good time for making the crumbs and preparing the apples too! I generally move an oven shelf to the very bottom of my oven and that helps the bottom pie crust bake fully.

Note that I love using coconut palm sugar in place of brown sugar as it is lower on the hypoglycemic index which is better for your pancreas if you are avoiding sugar. I am pre-diabetic, so I have switched to coconut palm sugar whenever possible for that reason and it is working great for me! It has a lovely caramel flavor too!

Each step is fairly easy, but the results are spectacular.  Of course, you could buy a readymade unbaked crust but this roll out crust I prefer to use is really tasty: my mom never believed it was gluten free!  This disbelief of hers was proof of the great flavor and texture of this particular basic gf pie crust.unbaked-apple-crumb-pie

It goes without saying that this pie is great with a slice of vanilla ice cream.  Fall is the best season for apple pie as they are fresh and full of juicy flavor.   Be seasonal whenever possible when it comes to fruits, and you will get the best taste in your fruit-based desserts.

Apple Crumb Pie

Crust:

1 c plus 2 Tbsp. King Arthur Basic GF blend or the brown rice flour mix at bottom of my recipe

2 Tbsp. sweet rice flour

1 Tbsp. granulated sugar

½ tsp xanthan gum

¼ tsp salt

6 Tbsp. cold butter cut into 6 chunks

1 lg egg

2 tsp fresh orange or lemon juice

Directions: Spray a nine-inch pie pan with cooking spray, dust with white rice flour. Set aside.

Mix dry ingredients in bowl of stand electric mixer.  Add butter and mix until crumbly and resembling coarse meal.  Add egg and juice.  Mix until it comes together into big chunks.  Shape into a ball with your hands. Put it on a crust sized piece of wax paper (14 x 14 inches more or less), flatten the crust ball some; put on top of it another piece of wax paper and chill it all in your fridge 15-20 minutes.

Roll out the flattened ball into a pie crust in a pie bag or between the two sheets of wax paper, try to get the thickness even, no thick middle! Peel off one side of paper and place in the pie pan, be sure to center it.  Remove other slice of wax paper.  Crimp edges all around.

Filling:

8 cups thin apple slices from 8-9 medium-large sized apples, I like a mixture of yellow delicious and at least one other cooking variety; red Rome, Jonathan, empire, Courtland, or any tart apple you like to bake with. Note: I have made it just with Cortland or with Golden Delicious apples; excellent pies! Peel apples, quarter, cut out core, slice into 1/3-inch-thick slices. Place apple slices in a large bowl and sprinkle top with 1 Tbsp lemon juice. Mix the following dry ingredients in a small bowl and then pour over the apples and mix up with a big spoon.

¼ cup brown sugar or coconut palm sugar (my new fav sub for brown sugar)

3-8 Tbsp. granulated sugar (3= pretty tart, 8 if you like it sweet)

2 Tbsp. minute tapioca or tapioca flour

1 tsp. cinnamon

A good sprinkle of ground nutmeg

A small sprinkle of ground ginger (optional)

Directions: After you mix up the apples and topping then heap the apples in your uncooked pie crust.

Crumb topping

Directions: Put all four ingredients in the same mixing bowl you made the bottom crust in and mix well with mixer paddle until crumbs form.

¾ c brown rice flour mix

½ c sugar

½ tsp xanthan gum

1/3 c cold butter cut into six chunks

Finishing directions: Sprinkle the top of the pie with crumb mix; use as much as you like.  I like about 2/3-3/4 of the mixture.  Up to your personal taste…  Bake in a preheated 375-degree oven for 50-60 minutes until bubbly and the crust is light brown.  You can cover the pie loosely with aluminum foil for the first 30 minutes.  I bake my pies at the lowest possible level shelf, so my crust gets crisp but if you have issues with soggy bottom crusts; prebake your crust for 10 minutes; then fill and bake immediately.

Cool the pie at least 3 to 4 hours before serving at room temperature.

Brown Rice Flour Mix
2 c brown rice flour

2/3 c potato starch

1/3 c tapioca flour

The crust and crumbs are from Annalise Roberts’ great cookbook: Gluten-Free Baking Classics. My filling is slightly different.

Originally posted February 2015. Revised slightly and updated for this 11/1/24 post.