

The soup I love to serve on a cold snowy winter day is pasta fagioli meaning pasta and bean soup, Neapolitan style. It is full of veggies and a ton of fresh flavor. Not to mention beans and pasta. Yes, I make it now with gluten free pasta, use the same recipe as always. I often use elbow pasta by Barilla; great flavor and holds its shape well. Try not to overcook it though as gf pasta goes from done to mush easily if you are not paying attention! This rib sticking soup will be a big meal if you add a salad and a slice of gf bread. I will serve it tonight with a slice of homemade bread; the bread recipe is from a new cookbook of mine. Warm, flavorful, satisfying and sure fills the tummy. I made it with dried navy beans I cooked in my Instant Pot unsoaked; set it for 18 minutes but you can soak them overnight and then cook until pretty soft. Any kind of white beans or even kidney beans work. You can even use a couple of cans of beans; I once made it with a can of cannelloni beans and a can of fava beans; very Italian…
My version has lots of veggies; if you don’t want them all; leave some out! I often use small cubes of turnip as they hold their shape well and add a subtle tasty flavor to the soup. No one ever guesses they are in there; looks like cubes of potato. Or add more veggies, what is in your fridge? I have used green beans, summer squash cubes or peas. Today’s version has yellow zucchini squash cubes, kale and fresh green beans. No turnips or celery. Just plain forgot the celery. Oh well, next time…
Secret weapon: I always add a cheese rind or two saved from a chunk of Parmesan cheese. It really ups the flavor of the soup. And if you get a bit of it in your soup bowl the oozy cheesy goodness will be your prize!
NOTES from 2024: I only used a bit of pancetta. Summer squash, no turnips.
Notes from 3/7/18. I did a quick heat and soak of the navy beans in a sauce pot and then I cooked them for 11 minutes in my Instant Pot. Great way to get it going quickly. I used broken up fettuccine pasta for that version. I used cut up pancetta I got at Aldi’s instead of prosciutto.


My version of Pasta Fagioli Soup
2 cups of dried cranberry, navy or kidney beans, soaked overnight in lots of filtered water. Be sure to pick over them for foreign objects.
1 bay leaf
1 quarter inch thick slice of prosciutto (leave out for vegetarian version)
¼ cup EVOL (extra virgin olive oil)
1 cup chopped yellow onion
1 cup chopped carrot
½ cup chopped celery
½ cup chopped turnip or summer squash
3 minced garlic cloves
2 Tbsp. chopped fresh parsley
1 can plum tomatoes chopped (or 1 lb fresh ones chopped in the summer when they have decent tomatoes available)
¼ tsp red pepper flakes
1 to 1 ½ tsp sea salt
1 cup elbow macaroni, gf
Directions: Drain the soaked beans, rinse well, return to cleaned pot and cover with fresh filtered water, add bay leaf and cook 1-2 hours until soft. Add water if it gets low. Turn off and let rest while you make soup. Skip step if you use canned beans; do drain them and rinse. Just add them where you would add the beans you soaked and cooked yourself.
Heat EVOL in big sturdy soup pan, I like a thick bottom to keep the soup from burning easily. Add onion and cook 5-6 minutes, add garlic, stir and cook a minute, add prosciutto which you have diced up into small squares and the parsley. Cook for a couple minutes, add the tomatoes, carrots, celery, turnip, hot pepper and stir well. Add a tsp. of salt. Cook uncovered about 12-14 minutes. Add any bean water in the pan. I often end up adding 1-4 cups of water during this point if there is no bean liquid. Mush up half the beans in a food processor or with a potato masher. Add to soup. Reheat and cook 5 minutes, add rest of beans, reheat and then add the pasta. Cook just the length of time the box says, stirring it every 2-3 minutes. Taste and add more salt if needed and some fresh black pepper. Turn off and let stand at least 10 minutes before serving. True Italians often let it stand for hours and they serve it room temp. I sometimes drizzle some best quality EVOL on the top of each bowl before digging in. A big bowl of that will warm you up for sure! 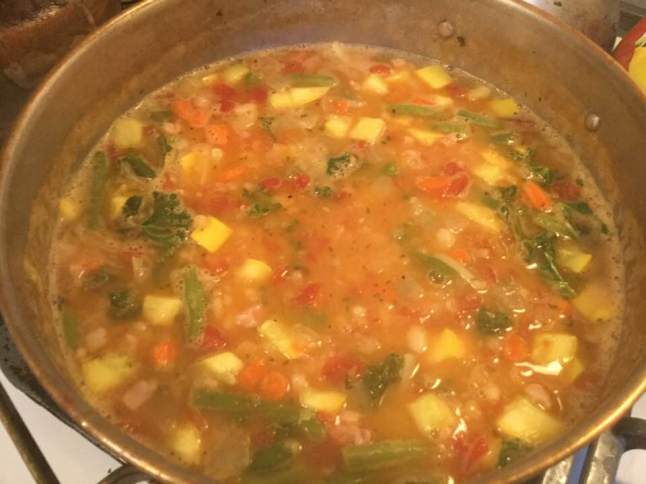
Originally posted by me in January 2015.


