Chicken with Zucchini and Red Onions

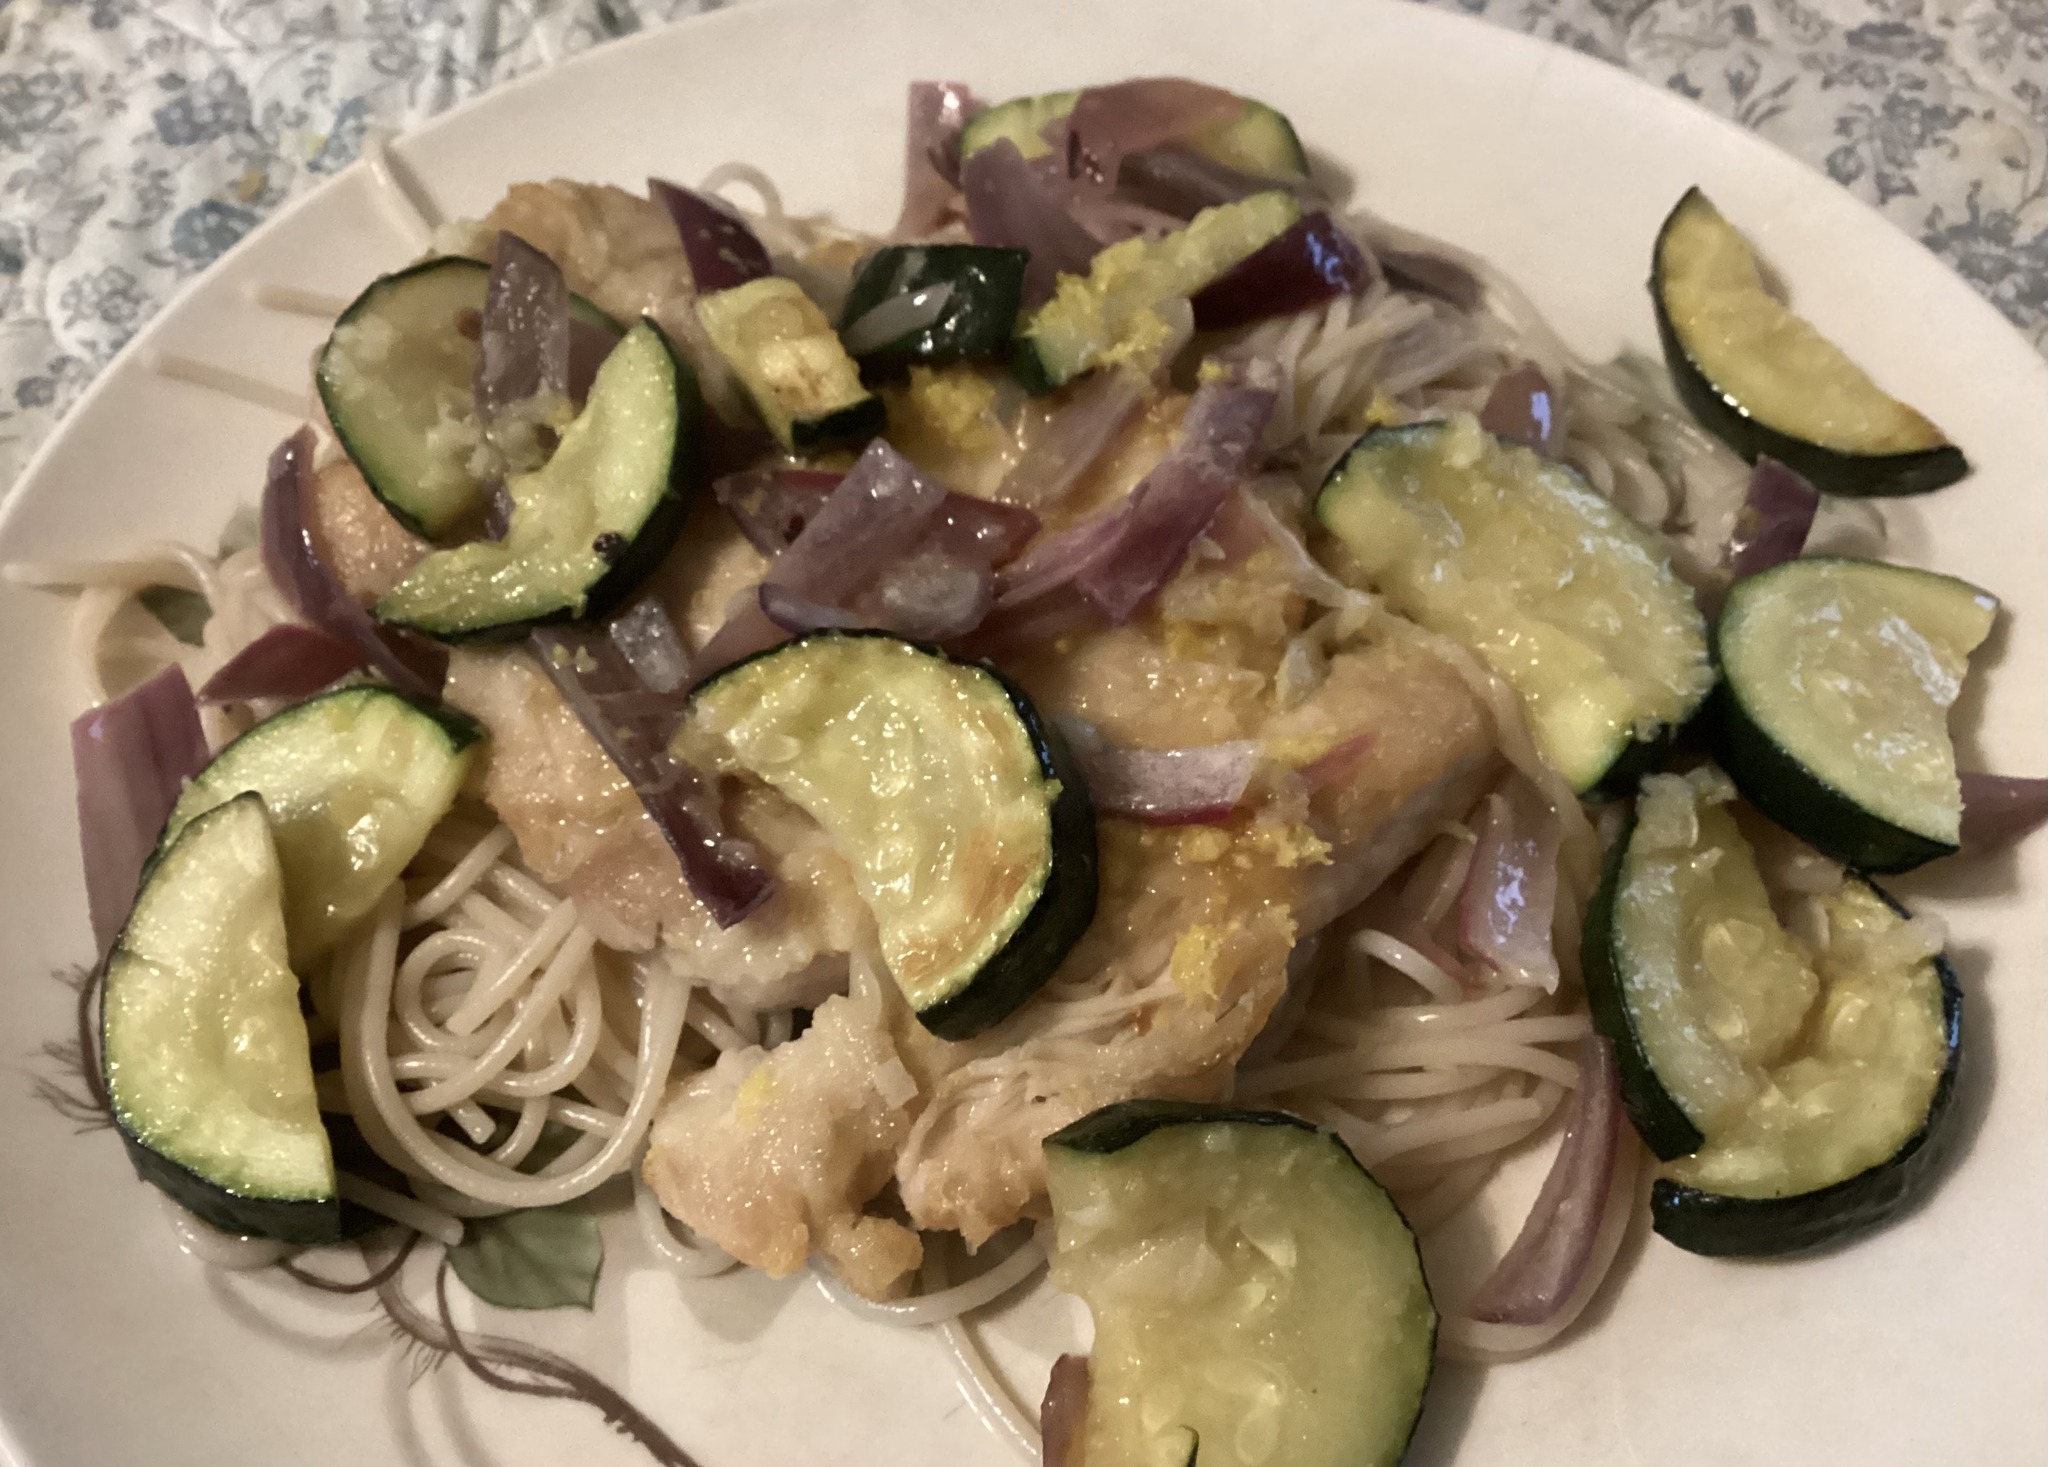
This is a new combination of loved ingredients. I love the versatility of boneless chicken thighs. I like red onion for its mild but tasty results when lightly cooked. Zucchini is another versatile ingredient. I added lemon zest and juice, lots of crushed garlic and served it with capellini pasta. It is light but flavorful. Great for a midweek supper. I add a vegetable side or more likely a green salad to complete the meal.

NOTES: don’t make it too soupy: add enough broth to steam the veggies a bit. You could use pasta water for this purpose. Use 4 garlic cloves if you enjoy garlic a lot. If the oil is mostly gone after frying the chicken; add an equal amount more of oil and butter; maybe 2 tsp. more for sautéing the veggies. You can use more zucchini and onions if you want. Chose whatever pasta you enjoy although I like a long skinny pasta for this dish.

Chicken with Zucchini and Red Onions

Ingredients:

3 boneless chicken thighs

1/3 cup white rice flour mixed with 1/2 tsp. fine sea salt

2 Tbsp butter and a Tbsp of mild olive oil

one medium zucchini

a medium red onion or half a big one

3 or 4 garlic cloves

1/2 cup chicken broth

the zest of one lemon and after zesting, juice it

freshly cooked pasta

Veggies cooking

Directions:

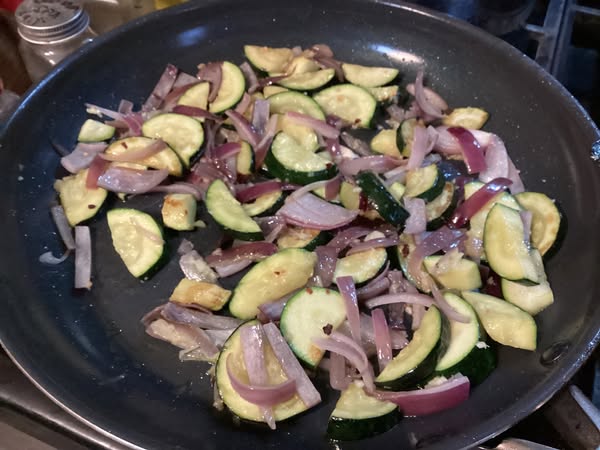
I always pound out chicken before sautéing it; tenderizes it and makes it thin so it fries faster. I use 2 pieces of wax paper and a pounding hammer. Do this first; make sure it is no thicker than half an inch. After that do some more prep. I cut the zucchini in half the long way and then across into 1/3-inch-thick half-moons. Peel and slice the onion in half and then cut into thin slices top to bottom and then cut across in half. Try to not get them too thin. Zest the lemon and then juice it. I have an old-fashioned glass lemon/orange juicer.

Heat the butter and oil in a large nonstick frying pan. I have a new ceramic one that is 16 inches in diameter. I still could only fit 2 of them at a time as they get kinda big when you pound them out. Dredge the chicken in flour; add salt too before dredging. Lay two thighs in the hot oil/butter and cook about 3 inches on a side. When you take out the first one add the third thigh. I put the fried chicken into a low oval ceramic baking dish and put it in a 300-degree oven to cook slowly, make sure it reaches 165 degrees. By the time you add the third thigh you can probably turn your oven off. It will still cook on residual heat for a few minutes as you cook the veggies. Add the zucchini to the pan and cook a minute or 2. Add the sliced onion and cook another minute. Add most of the broth. Add the garlic and cook one more minute. The zucchini should be tender but not soggy. Add the zest and the lemon juice. Add the rest of the broth as needed. Add the chicken back to the pan and let cook one more minute. Adjust with salt and pepper as needed. Serve on pasta of choice. Enjoy!

Fig, Goat Cheese, Pancetta and Carmelized Onion Pizza

I have been picking dozens of figs most days in recent weeks. Getting creative in my cooking in order to use up this bounty and so I’m enjoying them in lots of new dishes. Pinterest is my closest bud these joyous weeks of fig festival in my tiny kitchen. Last Friday I whipped up my favorite gf pizza dough baked it for ten minutes and flipped it. Then came the toppings. Never had figs on a pizza, but won’t be the last time! My fridge held some pancetta which is uncured Italian bacon that was purchased at Aldi’s for a rediculously low price, as was a container of tiny fresh mozzarella and a log of herbed goat cheese. Some onions which I carmelized and Bam! My oven produced an amazing treat for supper. I felt like I was in Italy at a small restaurant enjoying the local fare!

Note to all, my computer croaked the end of last week so I am typing one finger on my tablet, no access to Word either. So my apologies for any and all  mistakes in my last post or in this one. Normally I am constantly double checking names, products and prior posts as I create a new post. Not so much of that here in this laborious tablet production.

I promise this pizza is going to change your taste buds into fig pizza lovers. One more great fig recipe discovery. I took elements out of several recipes to create this delightful dish. It went together really quickly. Enjoy!

PS, it was still great warmed up the next day but with two or three hungry folks, there won’t be any leftovers.


Angie’s Fig and Goat Cheese Pizza

one large gf pizza crust. See my previous pizza post or use your own recipe.

8-12 ripe fresh brown figs

4 oz. herbed goat cheese, Aldi’s has a great goat cheese at a super price

most of a pint container of fresh tiny mozzarella cheese balls

2 good sized onions

1 Tbsp. EVOL

2-3 ounces pancetta, Aldi’s has a small container, already chopped

a big handful of kale shredded finely

Directions

Slice the onions into rounds. Heat EVOL in a cast iron frying pan, add onion slices. Cook over medium low heat stirring often so it doesn’t burn. Cook 8 -15 minutes until carmelized. Set aside on a plate. Add pancetta to same frying pan and cook a few minutes to render out the fat. Do not overcook. Remove from pan to a small bowl. Add the kale to the frying pan and cook on low a few minutes until it wilts, stir often. Let cool.

Heat oven to 425 degrees. Slice the goat cheese into thin rounds, cut the mozzarella balls in half. Slice the figs in half or quarter them if large.

Assemble: spread the carmelized onions evenly over the partially baked crust. I like to flip the crust before topping. Spread the goat cheese slices evenly over the surface,  Scatter the mozzarella cheese between the goat cheese and top with the cooked pancetta. Then scatter the fig pieces evenly over it.  Evenly is so every slice has a decent amount of both cheeses and the other components.

65E9A88F-5495-46E1-9F79-38851BC15477

Bake pizza 8-10 minutes. Scatter kale over the top. Let stand 3-5 minutes before slicing and serving. If you can stand that long of a wait to enjoy your masterpiece of a pizza!CFF4F2B8-6D22-4AE6-94C7-A13B6222B266


Spicy Chicken Tenders

There are a lot of commercial food items that I don’t get to eat anymore, specifically most fast food being a major no no.  I miss crispy chicken like I used to enjoy at Wendy’s.  When I saw this recipe referenced on facebook I immediately went to the site, read the recipe and decided I had to try it.  I had some chicken breast tenders and all the ingredients except the gf Bisquick.  I looked on Glutenfreeonashoestring and lucky me; she has a recipe for making your own gf Bisquick; it is attached to a recipe for mini breakfast pancake bite muffins. I had the flours needed; white rice, potato starch and tapioca flour plus the add ins of baking powder, baking soda, salt, and sugar.  Easy peasy to put a double batch together; I will keep it in my freezer in a Ziplock freezer bag; sure have been wanting some of that Bisquick!

I lowered the hot sauce to half, ditto for the cayenne powder as I was pretty sure I didn’t want it so spicy; do as you wish. It was simple to do; mix the spices with the Bisquick, mix the hot sauce with the water, dip the chicken in the spices, then the hot water and back in the spiced flour and fry. The second time I made this I used a non stick stainless steel pan and 1/4 inch canola oil.  It was almost like deep frying but not quite.

I didn’t eat it as a sandwich the first time; had two juicy tenders with a baked potato and some summer squash.  It was very tasty and not too spicy for me.  I had it in a gf bun for a meal, complete with lettuce, tomato and mayo, and it was wonderful. You can also cut the chicken up into chunks, pound them briefly and you have lovely fingers that are somewhat smaller, great for kids. Fried chicken tenders are not something I would eat every week but it sure was yummy! I think this recipe is well worth trying even if you just buy some gf Bisquick.

Gluten-Free Spicy Chicken Sandwich (like Wendy’s)


2-3 Tbsp. Frank’s Red Hot Sauce  (the second time I made this I used another red hot sauce so it doesn’t have to be Franks to turn out great)

1/2 c Water

1/2 c Gluten-Free Bisquick

1 Tsp. Sea Salt

1-2 Tsp. Cayenne Pepper (use 1/2 tsp. if you want it close to mild)

1/8 Tsp. Fine Ground Pepper

1/4 Tsp. Paprika

1/4 Tsp. Garlic Powder

1 lb. Chicken Breast tenders – pound them a bit if they are very fat; you want it ½ inch or thinner.

Mix together the Gluten-Free Bisquick, Salt, Cayenne Pepper, Pepper, Paprika and Garlic Powder in a low bowl.  I used a wide soup bowl.

In a separate cereal bowl mix together Frank’s Red Hot Sauce and water. In a  high-sided sauté pan heat 1 cup of canola oil – it should come up about 1/2 inch the side of the pan depending on the size of your pan. I started it on medium heat and put in a candy thermometer to regulate the temperature; I got it pretty hot; 350 degrees before putting in the chicken.  Or use my frying pan method I described above; less oil for that and no thermometer needed. Take one chicken breast tender at a time and dredge it in the GF Bisquick mixture, then roll it in the hot sauce/water mixture and then put it back in the Bisquick mixture and roll it to coat.  This can get messy; try to keep one hand dry and one for the water/hot sauce part. I slid one into the hot oil and then a second one. Cook chicken for about 5 minutes, until they are golden brown and no longer pink in the center (I used a meat thermometer just to make sure).

Remove from the oil and drain on paper towels to blot any excess oil. If you have the oil hot enough they shouldn’t be greasy. If you want a sandwich, serve on a gf bun and top with mayonnaise, tomato and an additional piece of lettuce.

Go ahead, indulge in this delicious chicken and I promise you it will be a hit with your family!

Adapted from creativecookinggf.wordpress.com, February 2011.

Reblogged from a post in August 2015. Minor changes.