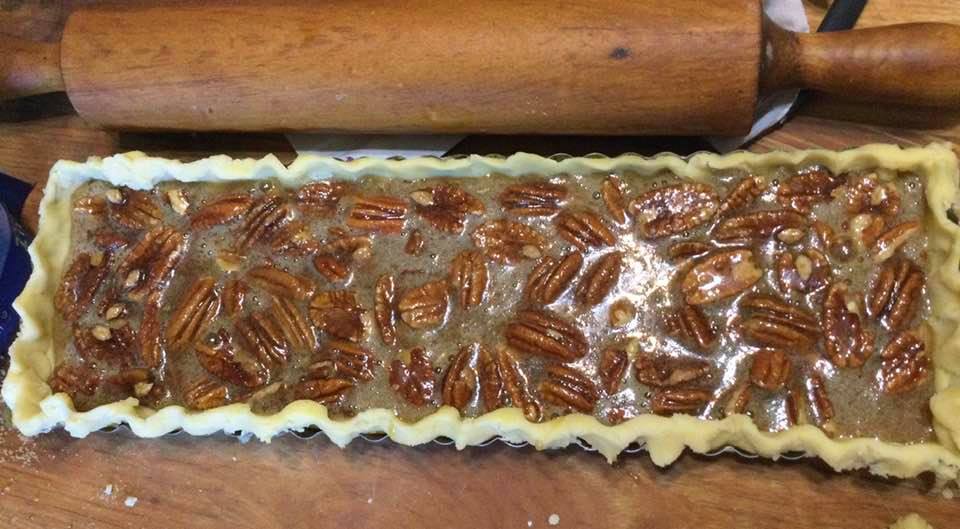
Something sort of sweet for a spring weekend, no fresh fruit available in the house. But I have a bag of pecan halves. Perfect. I wanted a whole tart not some small individual tarts like I’ve made in the past so I just used my long rectangular tart; it worked great, correct amount of filling. You can also use a 9 inch round tart pan . A rectangular one is kinda fun to cut in narrow slices across the width. And a tart is not quite as thick as a pie; I like the crust and filling proportions.
Notes: You have to use dark corn syrup. Yes, I know corn syrup is an unhealthy item but sometimes you just have to go wicked! It’s worth it, I promise. Cross my heart. Oh and NO margarine. Butter! Or Earth Balance if you don’t eat real butter.
This tart was awesome as is but are also great with some freshly whipped cream or vanilla ice cream which is quite popular at my house.
Ready for the oven….
Angie’s GF Pecan Tart
Crust:
1 c plus 2 tbsp brown rice flour mix (at bottom of recipe)
2 Tbsp sweet rice flour
1 Tbsp granulated sugar
½ tsp xanthan gum
¼ tsp salt
6 Tbsp cold butter cut into 6 chunks
1 large egg
2 tsp fresh orange or lemon juice
Crust directions: Mix dry ingredients in bowl of stand electric mixer. Add butter and mix until crumbly and resembles coarse meal. Add egg and juice. Mix until it comes together into big chunks. Shape into a ball with your hands. Put it on a crust sized piece of wax paper (14 x 14 inches more or less), flatten the crust ball some; put on top of it another piece of wax paper and chill it all in your fridge 15-20 minutes while you get the rest ready.
Filling:
2 large eggs
1/3 c sugar
1/4 tsp sea salt
2 and a half tbsp. melted butter
1/2 cup dark corn syrup
1 cup pecan halves
Sprinkle cinnamon
Filling: Beat eggs, sugar, salt, butter and corn syrup in a bowl until well mixed, can use a hand held mixer. Stir in pecans and a good sprinkle of cinnamon.
Assembly: Roll out pie crust between the two long sheets of wax paper; try to get the thickness even, no thick middle! Peel off one side of paper and lay in long rectangluar tart shell or a round one if that’s what you got. Crimp edges all around. Fill your shell with pecan mix. Bake in a preheated 375 degree oven on a low shelf for 25 or so minutes until set and crust edges lightly browned. Cool at least 1/2 hour before serving warm or at room temperature or even slightly chilled.
I found this recipe on line somewhere for an almond cake but it was in British measurement and oven temp. I did some math and measuring; a lot of number changing and a bit of guessing. I gave it a whirl; made some minor changes to amounts, simplified a bit and added some almond extract for more flavor. And it turned out so delicious. More of a torte in my mind so that’s what I am calling it. Next time I think I will use a slightly smaller spring-form pan; an 8 inch rather than the 9 inch I made it in. That will make it thicker; might have to bake it longer. Otherwise; perfect dessert treat: tender with a delicate almond flavor. The coconut is a back note but I liked it in there. Just sweet enough for us. You can add another quarter cup of sugar if you are mad for sweet…
I wasn’t planning to blog this so I took no pictures. This is the last slice left 24 hours after it was baked. Went fast…definitely a keeper recipe! Next time I will snap a shot of the whole torte and some pictures of the process of making it.
Almond Torte – serves 6-8
Ingredients:
11 Tbsp. butter; melt it and let it cool to room temp. Plus a tsp. to butter the pan.
1 ½ cups almond meal plus a Tbsp. to coat the buttered pan
2/3 cup sweetened coconut, flaked
¼ tsp. sea salt
1 cup sugar
4 eggs, room temperature
1 tsp. vanilla
½ tsp. almond extract
3 Tbsp. sliced almonds
DIRECTIONS:
Place shelf in center of oven. Heat oven to 350 degrees.
Melt the 11 Tbsp. of butter and let it cool. I did that in my microwave. Butter (1 tsp butter) a 9 inch spring-form (8 will work too) on bottom and first inch and a half up the sides and then dust with almond meal; about a Tbsp of almond meal should do it.
Mix almond meal, coconut, sea salt in a large bowl. In a smaller bowl beat the eggs until frothy; add almond extract and vanilla extract. Add the cooled butter. Mix. Add to dry ingredients. Mix well with whisk. Pour into prepared pan. Sprinkle the sliced almonds over the top evenly. Bake 35-40 minutes.
Top should spring back lightly when touched, lightly browned. You can dust with powered sugar but I liked the look of it plain. Guessing it could be yummy with a scoop of vanilla ice cream. Cover to store leftovers; doubt they will last long. Enjoy!
My love for snacking muffins unfolds further…what new flavor shall I make? Turning to my trusty basic muffin recipe I went for a sweet treat; chocolate chip muffins. They are a riff on my blueberry muffin recipe. If you are wondering why I am posting yet another muffin recipe: homemade muffins are lots cheaper than commercially made GF muffins plus they taste so fresh and oh so tasty. I walk right by all those pricey gf snack bars and cookies; knowing that in my freezer is a zip-lock bag full of luscious muffins that defrost to taste as though I made them that morning.
This batch of muffins was delightful: delicate texture yet with a great crunch and the lightly chocolate flavor from the mini chips. I cut back on the chips a bit so they are not too heavy or too chocolaty. The walnuts also contribute to the crunch and add a subtle nutty taste. I added a bit of cinnamon which pulls it all together.
The streusel topping gives a great look and adds texture and flavor. I messed up my topping this batch; had to sprinkle melted butter over them after topping. Still yummy but they are slightly bald on top as a lot of the oats didn’t stick properly due to my error. Next time they will be perfect. And there Must be a next time as these sweet treats are awesome!
I love how healthy these muffins are compared to commercial gf muffins, no preservatives, chemicals or weird ingredients I would never bake with. Try them and see how eating gluten free can be so easy when you bake your own snacks. As always I freeze those I won’t eat in two days time; a zip lock freezer bag works great.
Chocolate Chip Muffins
2 cups brown rice flour mix (see below) or King Arthur Basic GF Flour blend
2/3 cup granulated sugar or granulated coconut palm sugar
1 tbsp. baking powder
1 tsp. baking soda
¾ tsp. xanthan gum
¼ tsp. salt
1/2 tsp cinnamon
3/4 cup mini chocolate chips
1/3 cup chopped walnuts
2 large eggs
½ cup milk, 1 or 2 percent plus 2 tbsp more if you use the palm sugar
½ cup canola oil
—————-
Topping: Mix the following in a bowl, add the butter last after you stir it up a bit: use a spoon to blend. Set aside while you make the muffin batter.
1/2 cup rolled oats
1/3 cup brown sugar
2 tbsp. almond meal
¼ tsp. cinnamon
3 tbsp. butter, melted
——-
Muffin directions: Heat your oven to 350 degrees, placing the rack in middle of oven. Spray muffin pans with cooking spray. One batch makes 14-16 muffins. I got 16 when I made them.
Mix all dry ingredients in bowl of stand mixer or big bowl Add chips and walnuts; stir to coat them with dry mix. Combine milk and oil. Beat in eggs, add vanilla. Add liquids to big bowl; stir just until blended. It is a very thick batter.
Fill muffin pans 2/3 full. I use a big serving spoon and fill it about half way to dump in each muffin space. Sprinkle the top with the topping. Press it in a bit so it won’t all flake off after baking. Bake 21-23 min until golden brown. Do not over bake or they will taste dry. Remove within 2 minutes from the pans and cool on a rack. They freeze well for a few weeks: if they last that long. Keeps in an airtight cookie jar for 2-3 days.
Originally published in March 2019, no recipe changes made.
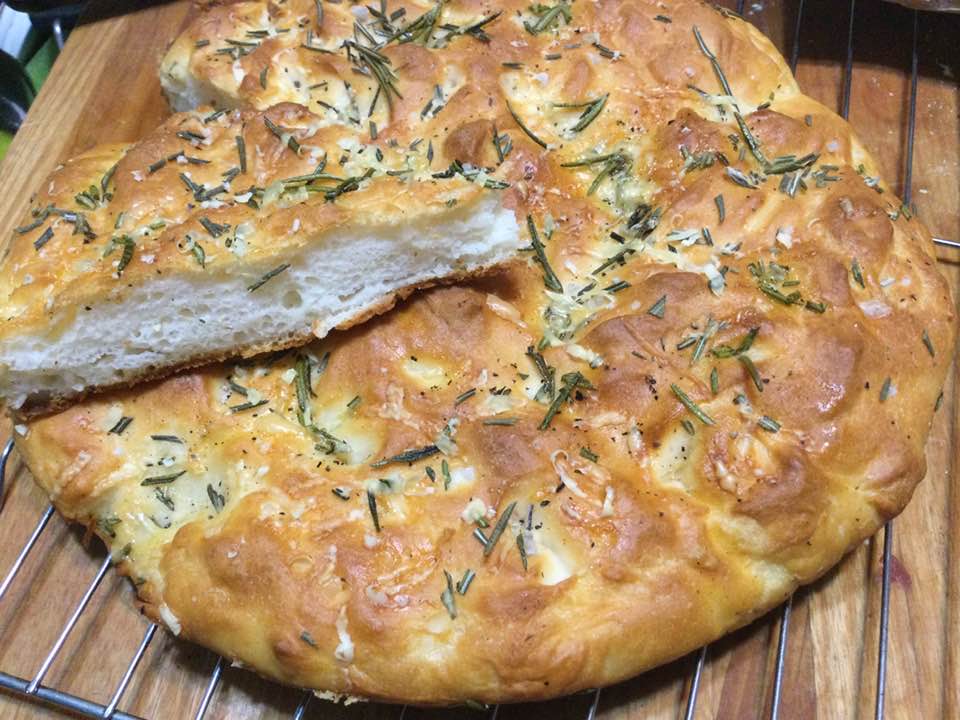
I have made a few attempts at focaccia; some are too bready, some are heavy and it has been rather disappointing. Until now! I just made a great focaccia last week; so fluffy yet crisp on outside and with delicate crumb, really light and a delightful flavor. It is topped with fresh rosemary, grated parmesan cheese, kosher salt and fresh black pepper. I am crazy for it! Best the first day; maybe freeze the leftovers? It does reheat nicely. It makes 2 so you can do 2 12 inch breads or make pizza out of the second half. I have my half in the fridge; making pizza shortly.
Here are the ingredients if you want to make sure you have them on hand. I had this flour in my freezer but since last week I made a new batch; easy enough if you have a good scale. I love mine; can do grams or ounces and it will zero off the container you put the flour in which is super helpful. This is definitely a white bread flour. I think you could sub in a bit of brown rice flour; it wouldn’t be quite so fluffy but that would add more flavor to the breads you make with it.
This week I discovered an old college friend has suddenly developed an allergy to wheat and to gluten. When his wife tried to bake gluten free using xanthan gum, he hated the after taste he noticed (I personally have never noticed that phenom but it sure could be so!) and guar gum made him break out in a nasty rash. She loves to bake and just was dismayed with a number of recipes she tried. Terrible texture and heavy especially without the gum. Generally disheartening. I decided immediately that I had to help them out. So after some research here are a few of my ideas, resources and general thoughts to help them.
Of course I wanted to help them out; I love a good challenge and to help friends is a true joy. So, I looked in my cookbook collection last night and discovered that my book by Nancy Cain titled “against the grain” is chock full of gluten free recipes that have no xanthan or guar gum in them. I haven’t made many of her recipes but I think they could work well for my friend. Bonus points as she takes a rather natural approach to baking gf and I am all for natural foods.
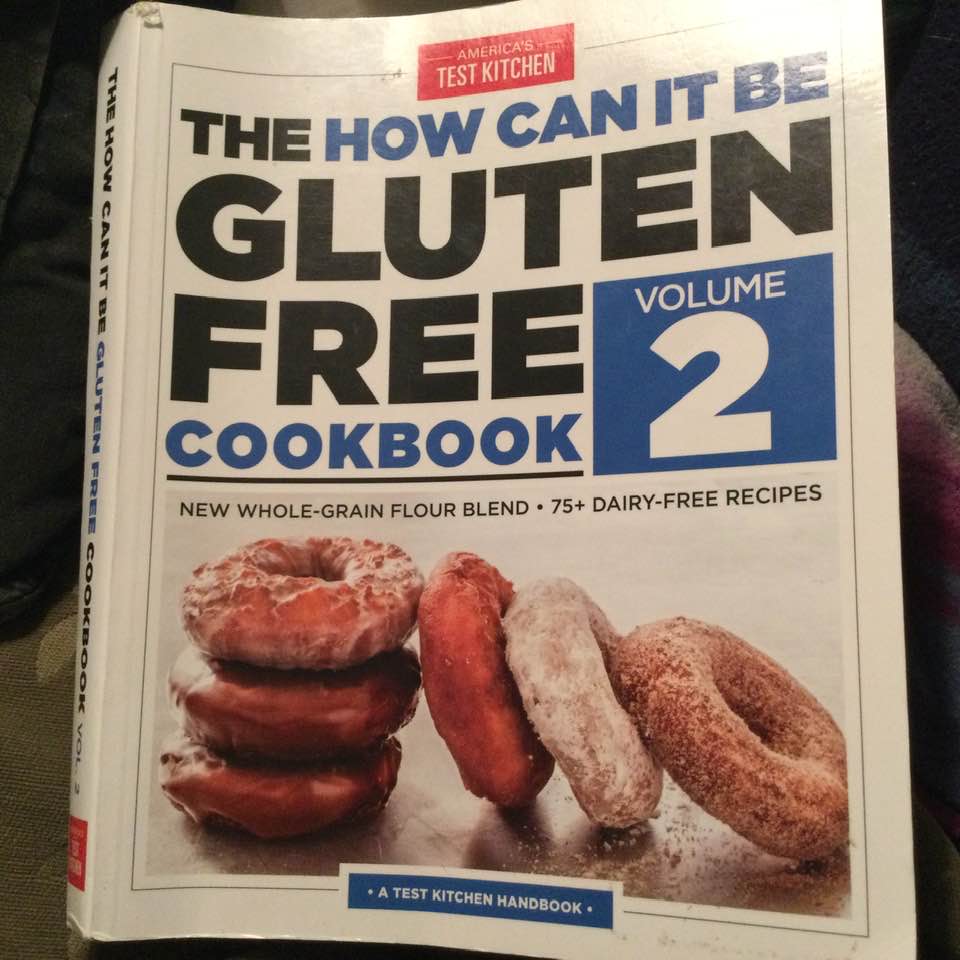
My second cookbook choice is “The How Can It Be Gluten Free Cookbook, Volume 2” by America’s Test Kitchen. This book contains two gf flour blends neither of which has a gum in them. I have made several recipes from it and can say they are tasty and worth making again. Not all the recipes avoid gums but they mostly use a tiny amount; ¼ of a teaspoon. I feel this could be replaced by several choices.
For that I did a search and found this: bakingkneads.com/substitutes-for-xanthan-gum-in-baking/ by Sarah. This is a wonderful post and I highly recommend you visit it. Here is a brief summary: you can use chia seeds softened in water, egg whites, cornstarch, konjac powder, agar -agar and flax seeds mixed with water (the flax seed “egg”). For cornstarch you use the same amount as a gum. For the flax seed or chia “egg” I believe it is a tablespoon of chia and 2 tablespoons of hot water. Let it stand about 5 minutes. You can grind the seeds up if you want a smooth mixture as whole seeds can definitely add texture or pop to your bread. I can’t wait to try a few of these ideas out. I have used the flax seed egg in the past and it works okay in a cake. I think it would work better in a whole grain bread which would more disguise the seedy texture and flavor.
Another cookbook I like is “Gloriously gluten-free cookbook) by Vanessa Maltin. It focuses on three cuisines: Italian, Asian and Mexican. The red velvet mochi cupcakes with ginger buttercream icing recipe looks amazing and no gum. There are dozens of gorgeous sounding ethnic recipes. I am wondering why I haven’t cooked from it lately!
I constantly use Annalise Robert’s book: “Gluten-Free Baking Classics” I feel you could use one of those six substitutes I mention and alter her recipes to make them gum free. She uses a simple flour blend of 3 flours but you can buy it too; it is King Arthur’s Basic Gluten Free Flour. There is no xanthan gum in it. I is comprised of brown rice flour, potato starch and tapioca starch. Has a nice “wheaty” taste to the pie crusts she shares. I won’t make any other pie crust. I get a lot of complements on it. A suggestion from fb; add cinnamon to your baked goods to hide the taste of xanthan gum. I actually do that for a number of my recipes; will do it even more now that I am thinking on it.
Two more choices are “Artisanal Gluten Free Cooking” by Kelli and Peter Bronski and “‘The Gluten-Free Table” by Jilly and Jessie Lagasse. Most of the Lagasse sister’s recipes are naturally gf recipes, there is some use of xanthan but now armed with my knowledge of several gum replacements I feel I could make them gum free successfully. Ditto with enthusiasm for the Bronski book. It is chock full of interesting and mouthwatering ideas. Definitely work the look and maybe the buy!
Another suggestion, which I found in my gf support group, but haven’t tried yet is: https://shop.betterbatter.org/products/artisanbakersblend?fbclid=IwAR1iOKMW4jM0C9jUKLk33Tb7RHchdrC4rxXNO-xjmyYL_asnvddUDJUgDMc. The site sells a gf and gum free bread flour. Pretty pricy but definitely an option. This blend’s ingredients are: sorghum flour, tapioca starch, potato starch, psyllium husk, and potato flour. I personally make up a Better Batter knock off flour mix and use it a lot; it does have xanthan gum in it. I am betting you could replace that gum with one of the above six replacements for your baking pleasure!
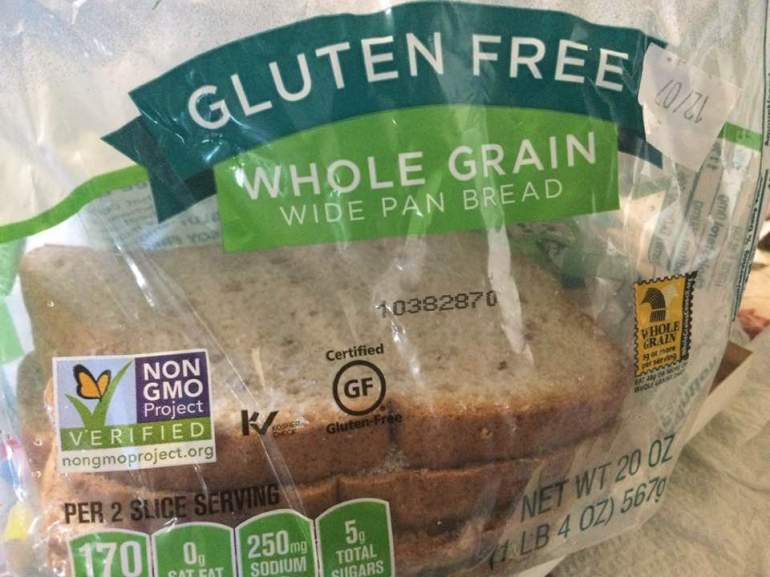
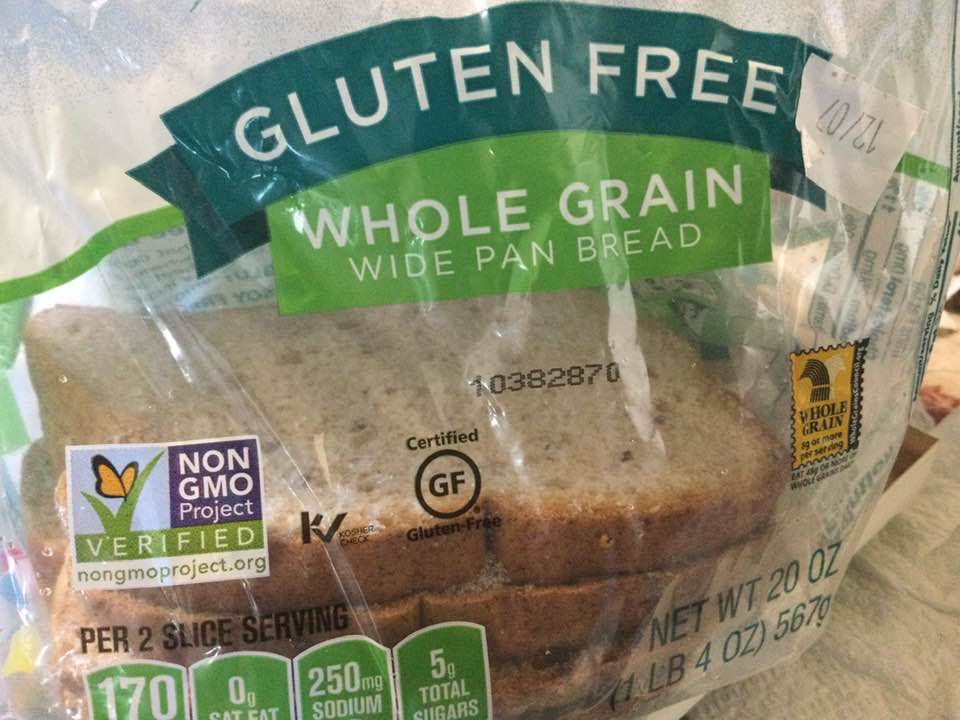
I buy a lot of gf items at Aldi’s and sometimes Trader Joe’s or Wegmans. Aldi’s has a bread that is fairly new; it is a multi grain wide pan loaf. I find it life changing. Makes amazing grilled cheese and ham sandwiches. About to try french toast with it. So tasty and the bigger slices are the best!
Yeah; this is 3/4 gone but look at it’s slilce size and at that lovely grain; no big holes here!
Other advice to newbies; read my original early posts on switching to being gf. Look at my 2014 posts: for most of 2013 I posted on Patch. I do not thing those posts are still available but I reposted most of them in my first few months on my new blog location. Critical to success: new bread pans at 8.5x 4.5 with taller sides, new cake and pie pans unless you scrub the heck out of them. You need to read up on cross contamination as it is a really serious problem. You should invest in a new toaster for only gf breads and bagels. Your cutting boards and rolling pins must be incredibly free of all old flour; maybe if you are going to still have gluten in your house buy a new bread board and rolling pin for gf use only. You will absolutely need a new colander for gf pasta. Mark it so or get one very different in color so you can easily distinguish it. Ditto for wooden spoons. In fact, you need to run everything you plan to use for gf cooking through the dishwasher several times or hand scrub a LOT. I found it too difficult to keep both gluten-based flour and my new gf flours around. I have a few burger buns and a loaf of white bread in my basement freezer for Joe or Aiden. No more do I keep gluten-based pasta or mixes.
In short, eat clean, eat organic when you can, don’t buy packaged gf foods if you can make it yourself and avoid the processed gf treats full of fats, sugar and preservatives. DIY is always healthier if it avoids excesses of those demons especially hydronated fats and all sugars other than coconut palm sugar which is low on the hypoglycemic index and possibly use honey, maple syrup and agave syrup but in moderation. Being gluten free is a journey, an adventure in experimentation and can be surprisingly delicious. GF foods have gotten a bad rap and often folks eating my cookies, brownies, pies, tarts and cakes are shocked at how delicious they actually are. I am generally very happy to be gf. Rarely, on visiting people I find them being insensitive; like baking gluten filled muffins right in front of me and offering me no substitute or alternative. I think that behavior is obnoxious; you knew I was coming. Couldn’t you put off your wheaty muffins a few days and buy a gf mix treat to make while I was there? My pet peeve…. oh well. I survived it and I love to bake gf and we eat darn well around here!