Fig and Ricotta Cake, GF and Fabulous!

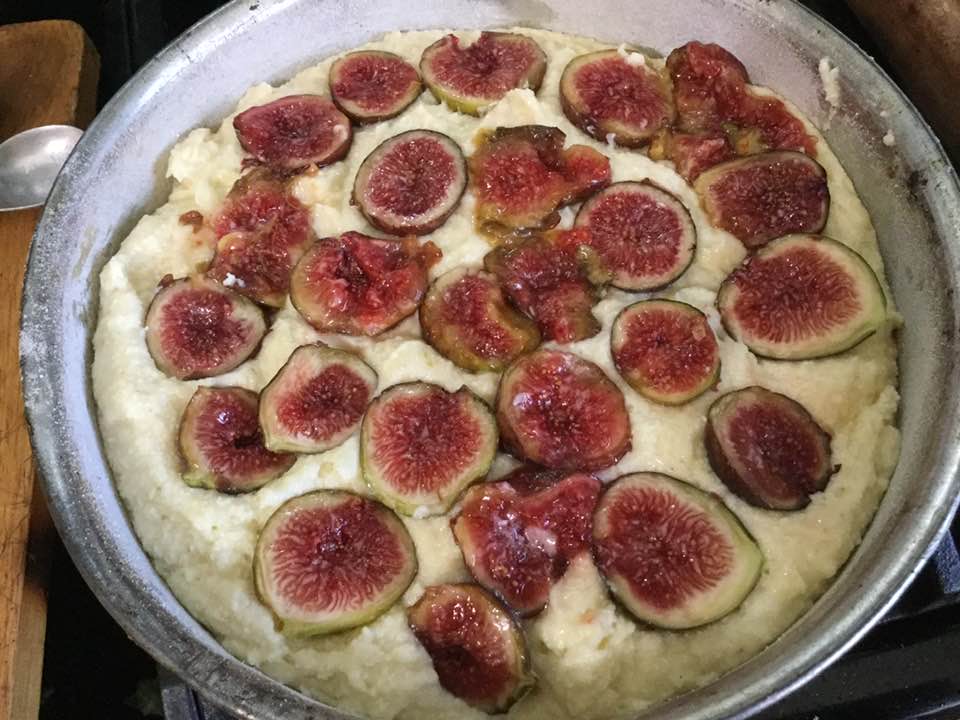
Figs, figs, figs! Enough to enjoy, not enough for making big batches of fig jam. I did make some sweet pickled figs in October and last week we enjoyed a lovely fig and sweet cheese galette. This time I went back to the best bake I ever have made with figs; the fig and ricotta cake. It is just so delish, I now call it THE Fig Cake. When I told my sister Karen I was making a fig cake she knew exactly which one; she and her hubby who is of Italian heritage loved it when I made it in September 2020 while visiting them and our mom for her big 100th birthday celebration. I made it about 3 weeks ago but last night I felt another ricotta cake was just the right way to use some of my last ripe figs from this season.

This recipe is a big favorite of Ina Garten; you can find it on her barefoot contessa website. I reworked it a tiny bit to make it gluten free. It has a lovely crumb and a delicate flavor that is delightful. I think this cake is definitely one I would like to try and make with other fresh fruit, cherries? Apricots? Plums? All seem like great possibilities.

You can use small figs like I did or get larger yellow ones. Which tastes better is definitely a personal decision! Dried ones will not work. I think orange zest might be a delicious substitution for lemon zest. I think you can use any cup for cup gf flour as long as it is meant for direct substitution in recipes.

Don’t forget to let the eggs and all dairy items come to close to room temp; cold from the fridge is not good for gf baking. DO not underbake the cake; the center needs to look firm not squishy. Better to bake 5 more minutes than have a soggy center.

I think this cake tastes great warm but once it is cool it is still delish; you can warm slices briefly in the microwave before serving; I did this once and loved it.

brown turkey figs just picked

Fig and Ricotta Cake

Mixing up a storm of yumminess!
ready for figs!

Ingredients:

10 Tbsp. butter, at room temperature

1 cup sugar

3 extra large eggs; I just picked the three largest in my dozen large eggs

1 cup whole milk ricotta; also at room temp.

2 Tbsp. sour cream; room temp.

1 Tsp. vanilla extract

½-1 Tsp. fresh grated lemon zest

1 ¼ cups Bob’s Red Mill One for One Gluten Free flour

1 Tbsp. baking powder

1 Tsp. kosher salt

8 large or 12 medium figs, stems removed! Quarter if large, halve if smaller

1 Tbsp. coarse sugar or finishing sugar

Directions:

Heat oven to 375 degrees. Butter and flour a 8 inch removable bottom round cake pan. Tap out excess flour.

Beat butter and sugar in stand mixer at medium speed for 3 minutes, scrape down as needed. Until it is fluffy. Then add eggs one at a time, beating well between eggs.  Add ricotta, sour cream, vanilla, zest and mix until smooth. Mix dry ingredients in small bowl and add in thirds, mixing well between additions. Pour into prepared cake pan. Place figs, cut side up in pan; I started with a ring around the outside and worked my way inside pressing them in a bit. Sprinkle with sugar. Bake 40-48 minutes until a cake tester in center comes out clean. I did 46 minutes. The top should be browned but not really dark.  Cool on a rack for 15-20 minutes before removing side panel. Serve warm with whipped cream, crème fraiche or ice cream. I actually like it best plain so I can focus on the amazing flavors and texture. Enjoy!

This is a re-blogging of the recipe first published by my blog in Sept, 2020. Minor text changes and some new photos. Recipe unchanged.

Peach Blueberry Custard Pie

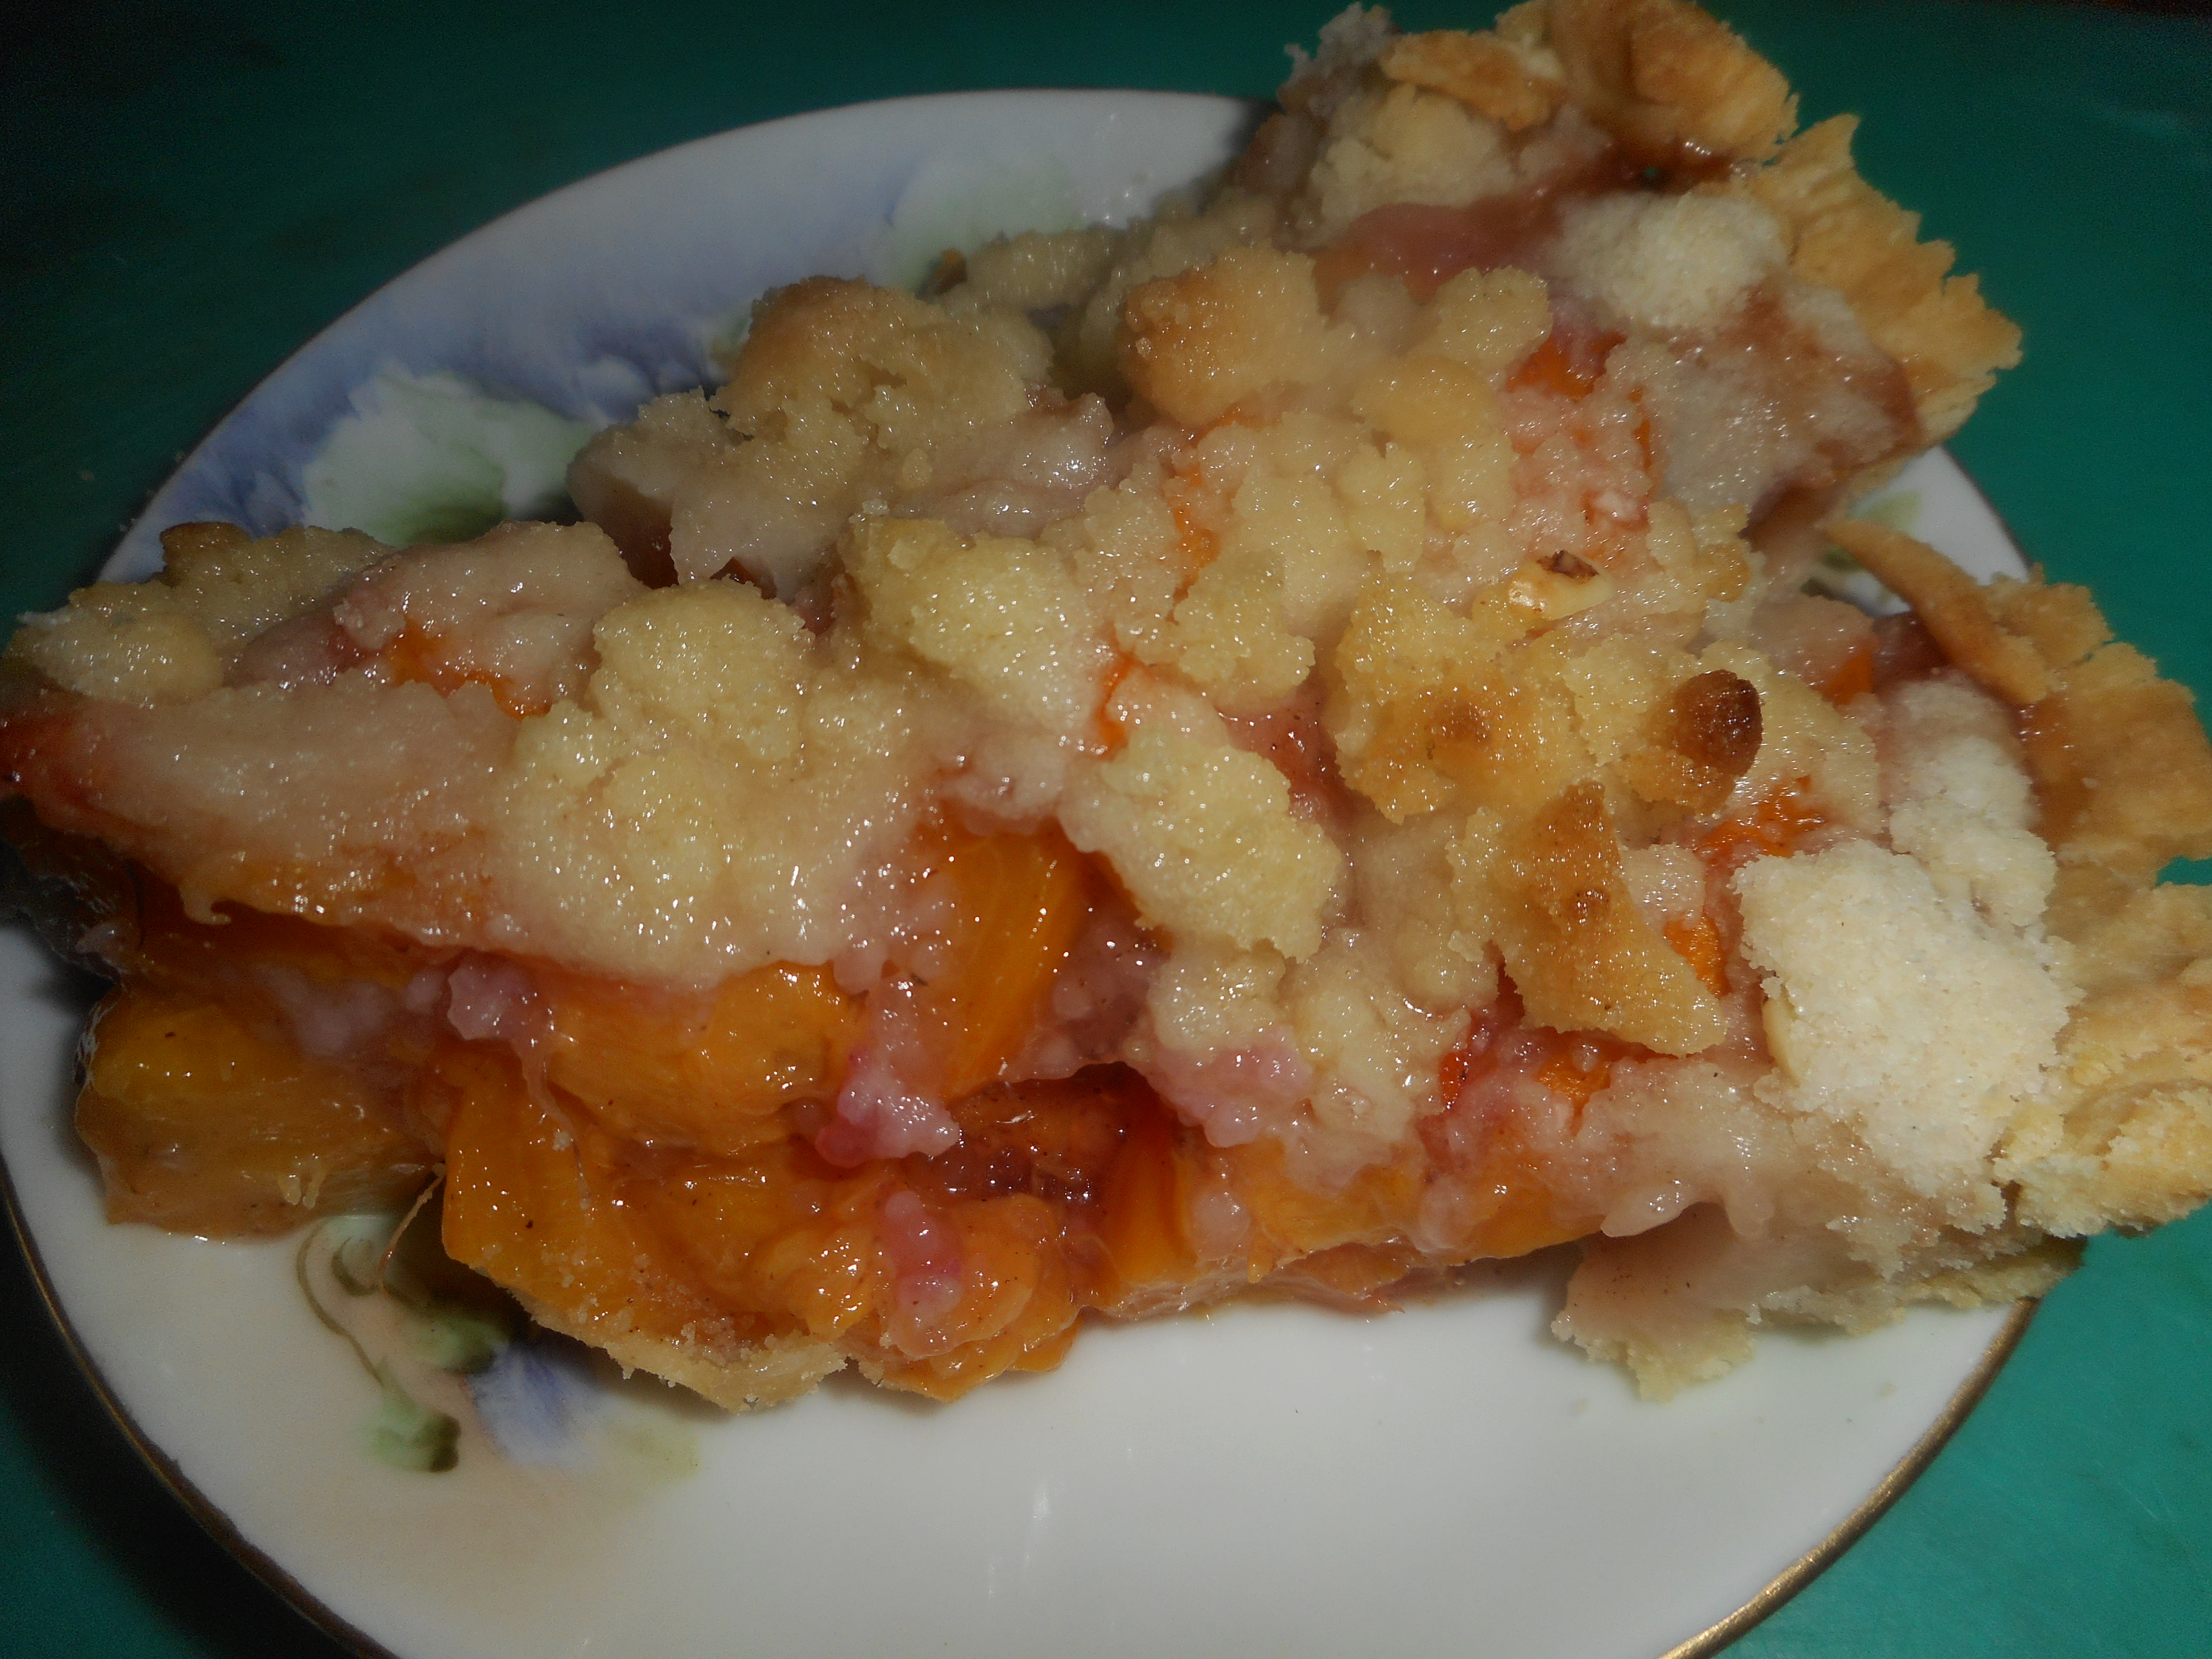
Peaches and blueberries really do go together so swell. Tasty sliced and uncooked: with milk or cream or baked in a cobbler or a fruity crisp. But this, this is my latest obsession; in a custard pie. Not just any old custard but one made with Greek yogurt and egg yolks. Easy to throw together, creamy, never runny textured and a lusciously fruity flavor that may make you have to eat a second slice! The blueberries do tend to takeover the peach flavor of this pie even though there are more than twice as much peaches by volume, they are just a stronger flavor than peaches. You could play with the proportions of the two fruits; this is the amounts which I used. WARNING: This pie goes soft in 2 humid days so plan to gobble it down within that time frame for face the soggy crust syndrome. Inevitable with gf crust and a custard filling in hot/humid weather.

I don’t recommend frozen or canned fruit for this pie, simply not good enough and you must use plain, unsweetened Greek yogurt in the filling, plain yogurt is too runny. And no, it can’t be made without the egg yolks; it just wouldn’t work as a custard if there are no yolks in there. And one last warning; applicable to 99 percent of my recipes: Please don’t try it with Measure for Measure gf flour; this is calibrated for using King Arthur’s Basic GF Blend.

I hope you give it a try; super easy and super delicious. Best pie of the summer hands down! Making one in the morning…can’t wait for a slice still faintly warm…….

Just baked…hot from my oven. Deceptively plain looking…beneath those golden crumbs likes a intoxicating blend of fresh fruit and custard.

Angie’s Peach and Blueberry Custard Pie

CRUST:

1 c plus 2 tbsp brown rice flour mix (at bottom of recipe)

2 tbsp sweet rice flour

1 Tbps granulated sugar

½ tsp xanthan gum

¼ tsp salt

6 Tbps cold butter cut into 6 chunks

1 large egg

2 tsp fresh orange or lemon juice

Spray 9 inch metal pie pan with cooking spray, dust with white rice flour.

Mix dry ingredients in bowl of stand electric mixer.  Add butter and mix until crumbly and resembling coarse meal.  Add egg and juice.  Mix until it comes together into big chunks.  Shape into a ball with your hands. Put it on a crust sized piece of wax paper (14 x 14 inches more or less), flatten the crust ball some; put on top of it another piece of wax paper and chill it all in your fridge 15-20 minutes while you prepare the filling.

Filling:

2 1/2-3 cups sliced fresh peaches, peeled and cut in half inch slices

1 1/4 cup blueberries; rinsed

Mix in a medium bowl the following ingredients:

1 cup plain Greek yogurt, I prefer whole milk, and let it warm up a bit

2/3 cup sugar, sweeter if you like it that way or if peaches are not fully ripe

3 egg yolks, close to room temp.

1 tsp. pure vanilla extract

1/4 cup brown rice mixture flour (King Arthur Basic GF blend)

Crumb topping

¾ c brown rice flour mix (King Arthur Basic GF Blend)

½ c sugar

½ tsp xanthan gum

1/2 tsp. cinnamon

1/3 c cold butter cut into six chunks

Put all five ingredients in the same mixing bowl you made the bottom crust in and mix well with mixer paddle until crumbs form.

+++++++++++++++++++++++++++++++++++++

Directions: Turn oven on to 400 degrees. Put the oven rack on the closest to the bottom shelf position. Once the crust is chilled some but not hard, Roll it out and fit into the pie shell. Trim off excess crust. I like to chill those crumbs of crust and roll out to make a jam filled hand pie. Anyway, put the sliced peaches and blueberries in the pie shell in a fairly even layer, as the filling and crumbs will hide it there is no need for a pretty design. Then pour the filling over it and bake for 30 minutes. I turned down my oven to 375 after 20 minutes. While it bakes those 30 minutes make the crumbs. Carefully remove the pie from the oven and sprinkle the top of the pie with crumb mix;  I used about half of it but you could use a bit less if you don’t want a thick crumb layer or all of it for a really heavy crumb. Bake an additional 15-20 minutes until crumbs are lightly browned. Let stand at least 1 to 11/2 hours before slicing and serving. Enjoy!

Peach Crumb Pie

It is near the peak of peach season so get some peaches and whip up a delicious gluten free peach pie.   This is an easy pie to create.  Slice and dump together the filling, crumb topping made in unwashed mixer bowl you used for bottom crust. You can store any leftover crumb mixture in a sealed container in the fridge; it keeps a few weeks.  I let my mix spin a few more moments in the stand mixer for extra big crumbs for this pie; love that look. If you prefer a solid crust just double the crust part and top your pie with it.  Be sure to cut some slits for steam escape! And if you don’t have time, buy a ready-made crust but homemade is always best.

Please make every effort to use local fruit; can get peaches at orchards like Bechdolt’s near Springtown, at most farm stands and at farmer’s markets; one on Saturdays in Easton or Sunday’s in Hellertown.  This pie really showcases great tasting peaches. If you use lousy peaches your pie will taste crummy. But, here’s the thing: store peaches can be poor in flavor and texture due to improper chilling so I strongly suggest you buy only locally grown, sweet, ripe peaches to make your pie.  I love when they have a pink blush; it makes the pie so pretty and perhaps even tastier!

peaches      raspberry-jam-014

To peel easily; heat 3 inches of plain water, drop the peaches gently in 4-5 at a time and cook them 2-3 minutes.  Use the lesser time for more ripe peaches. Allow to cool somewhat before peeling.  I like to do that over a bowl to catch the juices as I slice each peach.

Bake and enjoy late summer in a pie in just a few minutes of work.  Don’t eat it hot; it should be cooled to just warm if you like it so or room temperature or even a bit chilled.  You could certainly serve this with vanilla ice cream.  And this pie works perfectly with fresh nectarines, bonus: no peeling required!


Angie’s GF Peach Crumb Pie

Crust:

1 c plus 2 tbsp brown rice flour mix (at bottom of recipe)

2 tbsp sweet rice flour

1 Tbps granulated sugar

½ tsp xanthan gum

¼ tsp salt

6 Tbps cold butter cut into 6 chunks

1 large egg

2 tsp fresh orange or lemon juice

Spray 9 inch metal pie pan with cooking spray, dust with white rice flour.

Mix dry ingredients in bowl of stand electric mixer.  Add butter and mix until crumbly and resembling coarse meal.  Add egg and juice.  Mix until it comes together into big chunks.  Shape into a ball with your hands. Put it on a crust sized piece of wax paper (14 x 14 inches more or less), flatten the crust ball some; put on top of it another piece of wax paper and chill it all in your fridge 15-20 minutes while you prepare the filling.

Filling:

6 cups sliced fresh peaches, peeled and cut in thick slices, place in medium bowl

Mix with:

½ cup sugar

1/4 tsp. cinnamon (optional)

3-4 Tbsp. quick tapioca

Stir in 1 tbsp. fresh lemon juice and ¼ tsp. almond extract

Let stand while you prepare the crust.

Roll out pie crust in a pie bag or between two sheets of wax paper, try to get the thickness even, no thick middle! Peel off one side of paper and place in pie pan, centered.  Remove other slice of wax paper.  Crimp edges all around.  Fill with fruit mixture.

Crumb topping

Put all four ingredients in the same mixing bowl you made the bottom crust in and mix well with mixer paddle until crumbs form. If you let them go extra long you get big fat crumbs if you want that look and I did!

¾ c brown rice flour mix

½ c sugar

½ tsp xanthan gum

1/3 c cold butter cut into six chunks

Sprinkle the top of the pie with crumb mix; use as much as you like.  I like about a heaping cup of the mixture.  Up to your personal taste… It sinks partially into the fruit mixture and adds lots of sweetness and eye appeal.

Bake in a preheated 400 degree oven for 45-50 minutes until bubbly and the crumb crust is light brown.  Cool at least 1 to 4 hours before serving at room temperature.  I think it is best served the same day you make it, or no more then 12 hours after baking for optimal flavor.  The crumbs will get soggy if too much time passes. Mine was still very good the next day; just not as great as when really fresh.

mom's new watch 013

Note: if you find your bottom crust is not browning enough bake it empty at 375 degrees for ten minutes before filling it with the fruit.  I have a bottom heat pizza style oven which gives me perfect pie crust so I don’t ever have pale pie crust.

Brown Rice Flour Mix (Same as King Arthur GF All purpose blend)
2 c brown rice flour (finely ground)

2/3 c potato starch – Not potato flour!

1/3 c tapioca flour

Note: This post was originally blogged by me the late summer of 2015. Minor changes made.

Pizza that Wows! And the English Muffins will Amaze You…

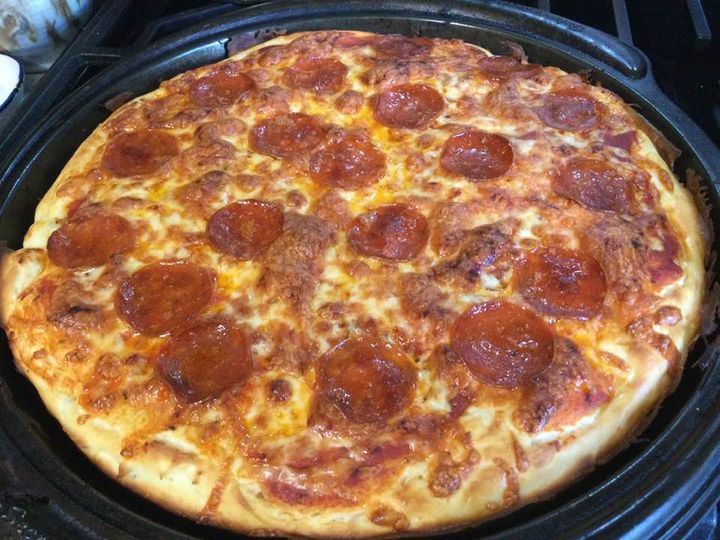
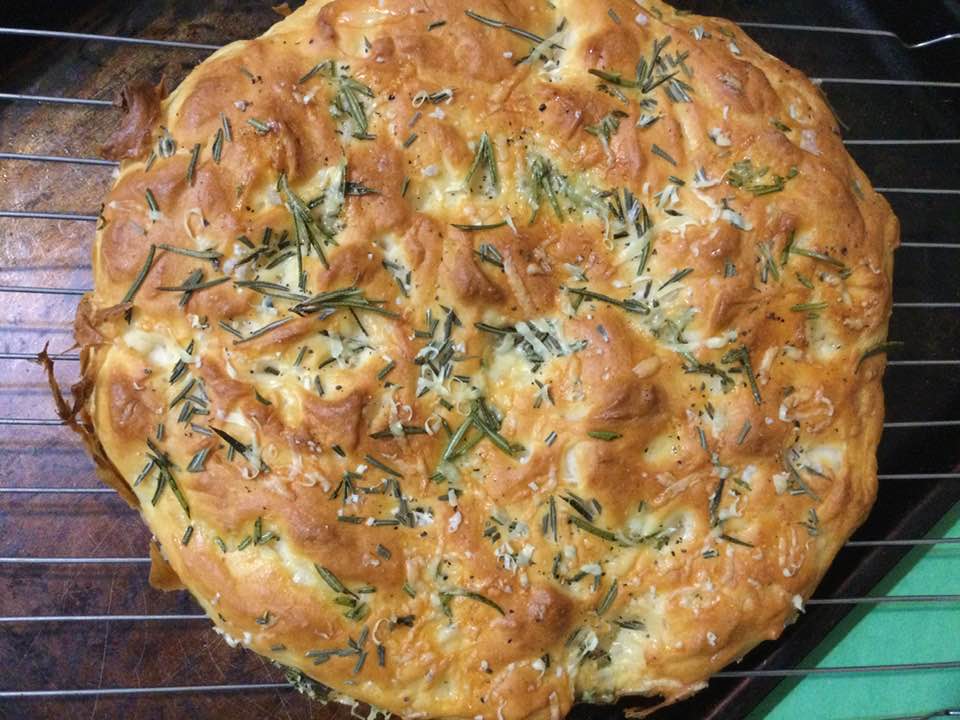
Pizza is a tough food to replicate gluten free. For a year I didn’t really try. I finally attempted one by Annalise Roberts. It has that thin crust which is  almost cracker like. Not bad in flavor and definitely better than ones I get in restaurants or buy premade. I have made that crust many times. Then, a revolution – this winter I found this awesome pizza dough that makes the best focaccia bread that I have every made crust ever; crispy bottom and soft top. Perfectly delicious bread to go with an italian meal. And then I discovered that it makes a wonderful pizza too. Have made both several times.

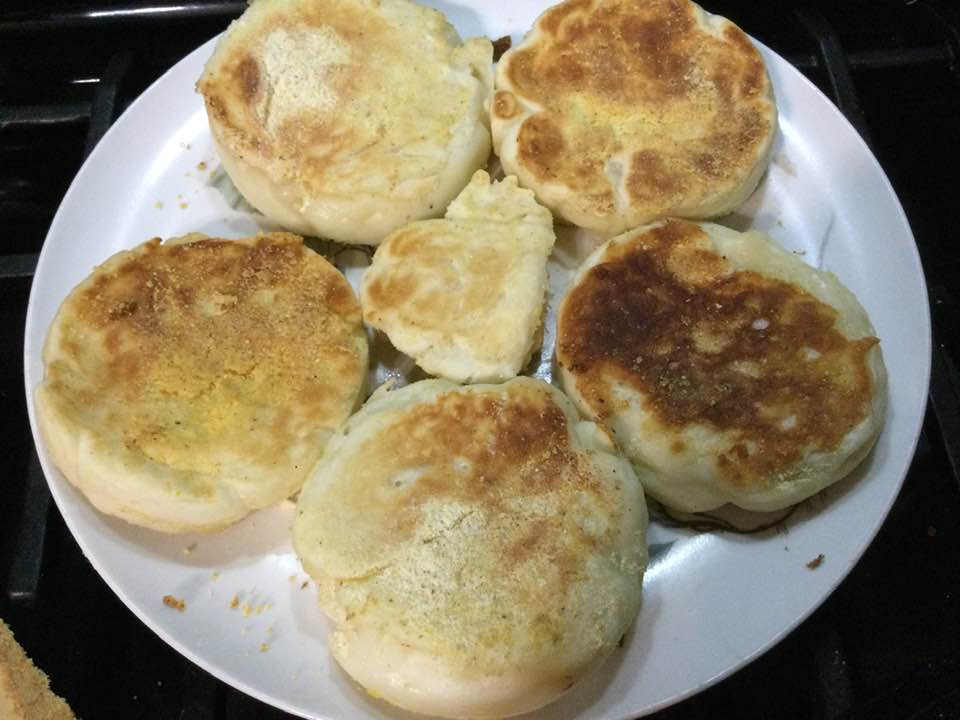
This week I used some of the dough to make English Muffins; the first half became a pizza of epic beauty and lovely flavor.  The muffin recipe is actually the base recipe for the other two foods. Oh, my goodness; they are definitely the best English muffins I have made since going gluten free. Thank goodness I bought English muffin rings years ago; that recipe back then didn’t work but this one does. It’s a keeper; the texture, flavor, looks, taste; all is much better than any others I have made. I love that it is “baked” under a lid on your griddle or electric fry pan. I used my cast iron griddle on a low setting.

Best process is if you let the dough rise 2 hours in your kitchen warmth and then refrigerate it for 4-10 hours or overnight. It can be used as soon as you take the bowl out of your fridge.

Here is a link to the base recipe: https://www.letthemeatgfcake.com/gluten-free-english-muffins/

These are the ingredients. I do weigh my flour these days; much more accurate so there are both ways in the list for flour and sugar:

  • 3¼ cups (455 g) Kim’s gluten free bread flour blend
  • 1 tbsp plus 1 tsp (16 g) granulated sugar
  • 2 tsp kosher salt
  • 2 tsp rapid rise/instant yeast
  • 2½ cups whole milk
  • 4 tbsp butter, melted
  • about 1/3-½ cup gf cornmeal for sprinkling
  • 2 tbsp butter
  •  

Here is a link to her bread flour mix. I am thinking of making it in bigger quantities as I have had such success with her recipes. 

https://www.letthemeatgfcake.com/resources/gluten-free-flour-blends/

It contains white rice flour, cornstarch, potato starch, tapioca starch, and xanthan gum. Super easy to do with a good scale. And these are fairly standard ingredients; nothing too weird. Far cheaper too than buying those 1 to 1 mixtures or any gf blended flour. Totally worth it! You make enough flour blend for like 4 pizzas. The recipe makes enough for two 12-14 inch pizzas or 2 focaccias. I like to do a pizza and on a second day something different from the remaining dough. It will keep for several days in the fridge. That’s timesaving; one dough; two recipes.

I did the focaccia first, then tried pizza…was blown away by it and this week the English muffins flipped my lid with their texture, looks and flavor. They all are just fabulous in texture and flavor. Really head turning for me for how close they came to all purpose flour baking of my past…may not be as healthy as a multigrain dough but it sure brings back good memories and is so enjoyable. If you bake gf; this dough is super easy to make in a stand mixer and let rise, chill it and make a great pizza. Just plan for it as the dough is better if it has that refrigeration period. Ditto for the English muffins although the round tin molds make them look just perfect. I used a thick pizza pan to make my new favorite pizza and a cast iron frying pan for the focaccia; no kneading, no super liquid messy stuff; it is sticky but it doesn’t need much forming. I promise you won’t be disappointed. Enjoy!!

Buttermilk Caramel Pie

This pie was revolutionary for me. Been debating buttermilk pie for a long time; felt chess pie (a southern standard) was too sweet and buttermilk pie sounded bland. Finally found a great recipe that wasn’t too sweet and had a perfect texture.  It is from a great new cookbook; “Pie Academy” by Ken Haedrich. This was the first thing I baked from it. Won’t be the last. This guy knows pies!

FYI: It doesn’t have a strong buttermilk presence, more of an undertone. The main thrust is a delightful light caramel flavor and that creamy texture I was hoping for. It is otherwise neutral and perfect all by itself.

Of course, I made my pie gluten free; used my trusty favorite pie crust and put 3 tbsp. of King Arthur basic gf blend in it in place of all purpose flour.

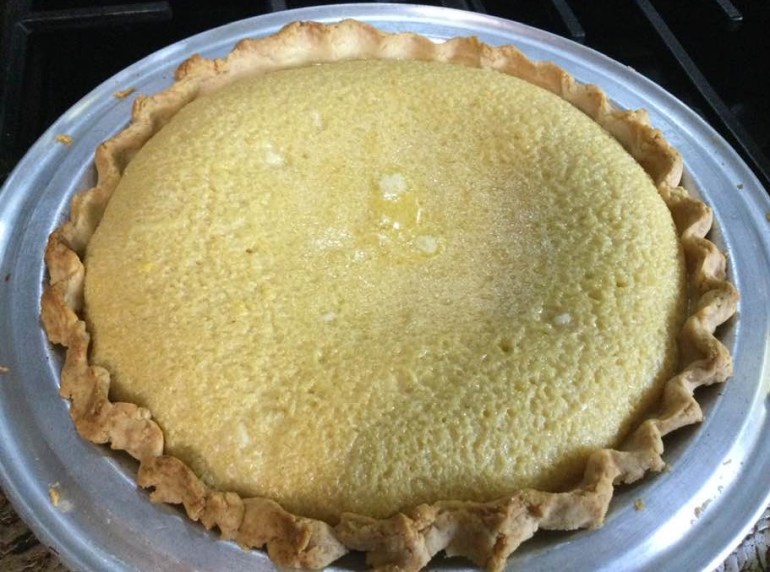
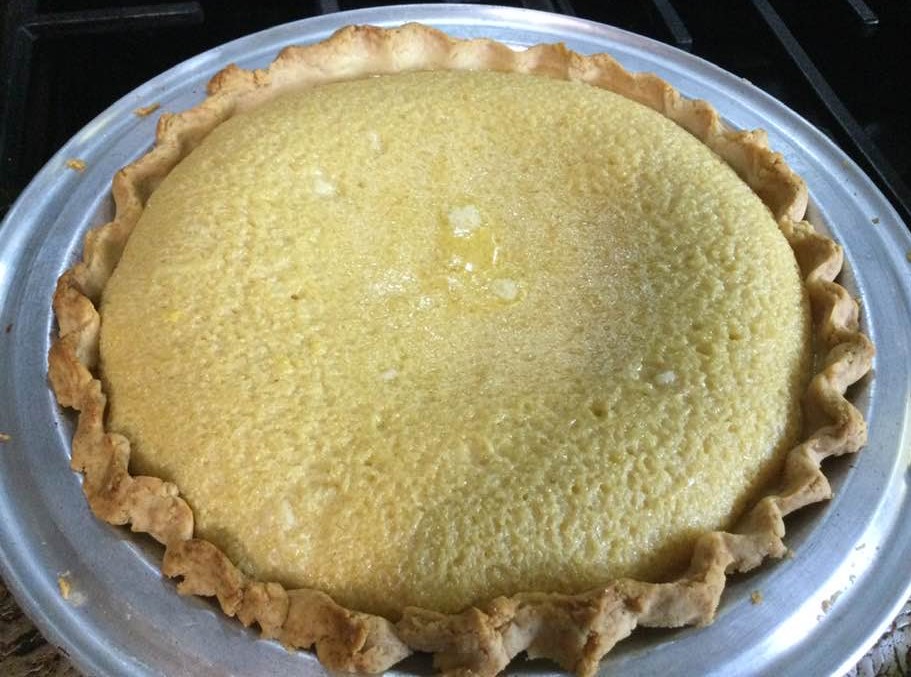
Just baked; kinda puffed up. It will settle back as it cools. Please do not eat this warm much less hot. Room temp is best! Don’t let it’s simple appearance fool you. It is a subtle blending of sugars, buttermilk, vanilla, eggs and butter. Mmmm…….

Indiana Buttermilk Pie

One pie crust; prebake it for 10 min at 375. I let mine cool about 10-15 min before filling it. Here’s my recipe:

1 c plus 2 tbsp King Arthur basic gf flour mix

2 tbsp sweet rice flour

1 Tbsp. granulated sugar

½ tsp xanthan gum

¼ tsp salt

6 Tbsp. cold butter cut into 6 chunks

1 lg egg

2 tsp fresh orange or lemon juice

Directions: Spray a nine inch pie pan with cooking spray, dust with white rice flour. Set aside. Half the time, no 90 percent of the time I don’t bother…

Mix dry ingredients in bowl of stand electric mixer.  Add butter and mix until crumbly and resembling coarse meal.  Add egg and juice.  Mix until it comes together into big chunks.  Shape into a ball with your hands. Put it on a crust sized piece of wax paper (14 x 14 inches more or less), flatten the crust ball some; put on top of it another piece of wax paper and chill it all in your fridge 15-20 minutes. Roll out and fit into pie pan, don’t leave the center too thick! Bake at 375 for 10 minutes. Let cool at least 10 min before filling.

Filling Ingredients:

½ c packed light brown sugar

½ c sugar

3 Tbsp flour (I used King Arthur basic gf blend)

1/8 tsp salt

3 lg eggs plus one yolk

1 tsp vanilla

1 ½ c. buttermilk

3 tbsp. unsalted butter; melted

Directions: I used my stand mixer (you can use a food processor too or even a portable mixer). I put the dry ingredients in the bowl and mixed them briefly. Add the eggs and yolk and mix well. Add rest of ingredients; blend until all smooth; check to make sure the very bottom got blended too. Oven should be 350 degrees. Put pie shell on a baking sheet or pie drip pan and carefully pour in the creamy mixture. Bake on lowest shelf for about 40 min. Do not let it come out jiggly; should be fairly firm. Let cool on rack until room temperature before slicing. It is also nice chilled. Enjoy!