Josh’s Giant Muffin

In the interest of friendship and my natural curiosity I finally baked a very special muffin for my friend Josh, lover of the giant muffin!  I know some of you folks are fans of huge muffins. It was a gigantic banana nut chocolate chip muffin and it took enough batter for two regular muffins to fill each giant muffin portion: that’s a lot of batter! They were baked them in this oversized muffin tin someone gave me years ago, never used, so no worries on gluten filled crumbs in crevices.

I used my regular recipe with no alterations and baked them a few minutes longer.  Success!  Moist flavorful muffins with perfect texture.  And they were gorgeous, bakery worthy looks. Still, I was only able to eat half at a time.

Not sure I will be always making giant muffins, I tend to like small snacks but for you big muffin lovers; just know that you will get half as many muffins and I suggest you bake it 5 extra minutes, test it with a skinny cake tester and let it cool about 10 minutes in the pan before removing them to finish cooling on a cake rack.

giant muffin and buckwheat gnocchi 015

The giant muffin is on the left; two small ones on the right.  All tasty!

I ate a giant one the day after baking, it was still so fresh and tasty.  I froze Josh’s muffin so it would be fresh for him.  I did tell him that it was frozen a few days and that he should plan to eat it that day.  He misunderstood and waited a day more. It was getting crumbly but he said the flavors were fantastic, especially the chocolate chips.  Gluten free baked goods has a shorter shelf life plus mine have no preservatives.  That’s why I freeze them and defrost the day I am consuming.
giant muffin and buckwheat gnocchi 016

In conclusion, giant muffins are no big deal; no more work, just need that honking big muffin pan and you are set to go.  Bake them 5 to 7 minutes extra; I put in my cake tester and eye balled them just to be sure; they looked done, tester said done. Done.

Tasty.  But, that big muffin was too much food for my normal snack size.  Still, for company; they might be just the ticket for breakfast.  If you love giant muffins; feel free to use any of my multitude of muffin recipes for those big boys.  Test for doneness and let them cool longer in the metal pan as they are so big they will take longer to be ready to safely lift out of the pan. Enjoy!

Easy Cherry Berry Muffins

People may wonder why I post muffin recipes fairly often.  Well, it’s simple: those cute things are so easy to make and so delicious… They are my go to gf snack.  They never turn out heavy or gummy: always tender and delightful not to mention healthy.  Best of all they taste much better and are cheaper than most readi-made store gf snack bars.

Turning to my trusty muffin recipe I decided to try a new variant; cherry and berry because I got a bag of frozen dark cherries, blackberries, blueberries and raspberries. I was thinking I would get a similar texture to previous berry muffins especially using my basic, easy to dump together, recipe. It’s so easy; I think I can almost do it in my sleep! Plus the frozen berries might actually be of better quality than fresh ones in the produce section at the grocery store right now; it is not berry season yet, hardly seems like spring at the present folks!

I’m emphasizing how simple they are to bake so that you can feel comfortable making your own muffins even if you have never done it before.  Why buy them when you can make your own: tasty and far cheaper than GF muffins you can buy? Seriously simple and a big reward; 14-16 tasty treats for less money.

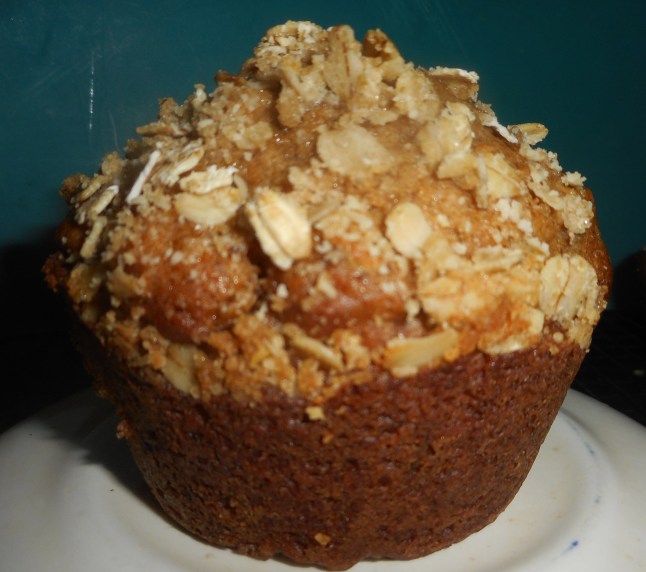
This batch of muffins did not disappoint: delicate texture yet slightly crunchy outside with zingy cherry, blackberry, raspberry and blueberry flavors and just enough sugar for me.  I used the bag of mixed fruit I got from Giant grocery store straight out of the freezer -don’t defrost them before adding.  I suggest you use a paring knife and chopped up the larger fruits for this recipe. You can buy a bag of what ever berries float your boat or fit your budget. That’s the beauty of this recipe, flexibility.

The streusel topping insures that they look gorgeous and adds an extra layer of flavor.  There are walnuts in them to so you get some really great nutrients from the fruit and nuts.  Not much guilt in eating one of these treats! You can swap the white sugar for coconut palm sugar as I do: it barely raises blood sugar levels, unlike white sugar.  Loving the envious looks people give me whenever I chow down on a berry muffin as they eat some noxious bag of salty/sugary snack full of preservatives and who knows what. People are envying ME and my GF treat…Loving it! Much better than the pity party I can face when there is nothing safe for me to eat at school or at gatherings.

As always I taste tested a muffin from the batch while they were still warm out of the oven: at the moment of perfection.  This version is up there with all the other flavors of muffins I am addicted to.

It is smart to freeze any you won’t eat in two days time; a zip lock freezer bag works great.

lemon blooms and beef with broccoli 006

Cherry Berry Muffins

2 cups brown rice flour mix (see below)

2/3 cup granulated sugar or coconut palm sugar

1 tbsp. baking powder

1 tsp. baking soda

¾ tsp. xanthan gum

¼ tsp. salt

1 tsp cinnamon

½ tsp. dried ginger

1 1/2 cup fresh or frozen berries

1/2 cup chopped walnuts

2 large eggs

½ cup milk, 1 or 2 percent

½ cup canola oil

Topping: Mix the following in a bowl, make sure the butter is in tiny pebbles; use your fingertips to blend.

½ cup rolled oats

¼ cup brown sugar

2 tbsp. almond meal

1½ tbsp. butter

¼ tsp. cinnamon

——-

Directions: Heat oven to 375 degrees, placing the rack in middle of oven.  Spray muffin pans with cooking spray.  One batch makes 14-16 muffins.  I got 16 when I made them but if you make them really full I am guessing it will make a dozen.

Mix all dry ingredients in bowl of stand mixer or big bowl Add fruits and walnuts; stir to coat them with dry mix.  Combine milk and oil in a a small bowl.  Beat in eggs, add vanilla.  Add liquids to big bowl; stir just until blended.  It is a very thick batter. If you used the coconut palm sugar be sure to add ¼ cup extra milk.

Fill muffin pans 2/3 full.  I use a big serving spoon and fill it about half way to dump in each muffin space. Sprinkle the top with the topping. Press it in a bit so it won’t all flake off after baking. Bake 21-23 min until golden brown. Do not over bake or they will taste dry.  Remove immediately from the pans and cool on a rack.  They freeze well for a few weeks, if they last that long.  Keeps in fridge (well wrapped) or an airtight cookie jar for two days.

Brown Rice Flour Mix base mix 

(This mix is the same as King Arthur’s basic gf blend)
2 c brown rice flour

2/3 c potato starch

1/3 c tapioca flour

This recipe is a variant of the muffins you will find in Annalise Roberts’ Gluten-Free Baking Classics cookbook.

Oopsie, I Just Made Some Cloud Bread!

Finding or baking decent gf bread can be problematic.  Poor texture, weird flavors, big holes the middle of the loaf, leaden brick like baked products, high prices and lots of ingredients which must be compiled exactly according to the recipe.  It adds up to a fair amount of stress as to just having a sandwich.

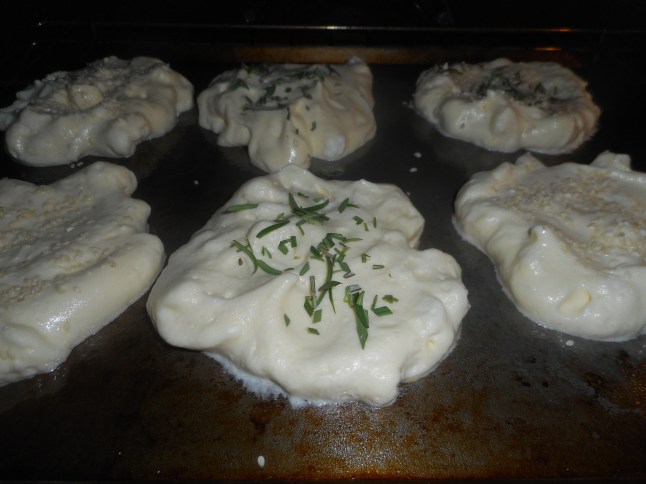
The other week I made some really interesting bread/rolls.  The name is “cloud bread” (also called oopsie bread) and it has no flour, no oats nor any grains.  I was intrigued when I kept seeing this cloud bread popping up in my support group messages and just had to try it. My recipe has five ingredients but three should be in your pantry already.  It was very easy, quick and yes; tasty.  So it made a super bread for a ham and cheese sandwich and a ham/turkey and cheese sandwich.  I ate one warm out of the oven, also enjoyable. Great with a little jam or jelly on top.

I added a couple toppings which add a lot to the flavor and look of it.  I recommend them but it sure can be made plain.   You have to use full fat cream cheese to make it work, only a few tablespoons so don’t get all freaked out over that issue!

shoe fly pie, hash 010shoe fly pie, hash 011

Cloud Bread/Rolls (makes six large ones)

3 eggs, room temperature and separated; in two separate mixing bowls

3 ounces cream cheese at room temperature

1 tsp. baking powder

1 tsp. honey

Pinch salt

Toppings; sesame seeds and a tbsp. of chopped fresh rosemary.

Directions

Beat the egg yolks with the cream cheese until it is very smooth, lemon yellow. Add the baking powder and honey, beat in.

Beat the egg whites until foamy, add a sprinkle of salt. Beat until stiff peaks form.  Fold together gently with the yolk mixture until mostly blended together.

While the egg whites were beating I lined a big baking sheet with parchment paper and sprayed it lightly with Pam.  Heat oven to 300 degrees. Some people heat the pan in the oven before spreading the dough; I didn’t bother but feel free to preheat your pan.

Using a big spoon spread the bread mixture on in six big circles spaced 1-2 inches apart.  Sprinkle with sesame seeds and or finely chopped fresh rosemary. Bake until golden brown between 20 and 30 minutes.  I did just about 30 minutes for mine. Using a spatula separate them from the parchment paper right away. Let cool.  Store in a ziplock bag overnight; they will get soft and be ready for sandwiches.  Keep them in the fridge. I put slices of wax paper between them to avoid sticking. shoe fly pie, hash 012 They keep about 3 days there and a week in the freezer.  Wonderful flavor and texture for sandwiches: I used one for the top and a second one as the bottom of the sandwich. It did not fall apart and looked fantastic. shoe fly pie, hash 013 Did I mention they are no carbs in this bread? Yeap; this delightful bread is great for my low carbing friends!

Cinnamon Raisin Bread Mix Review

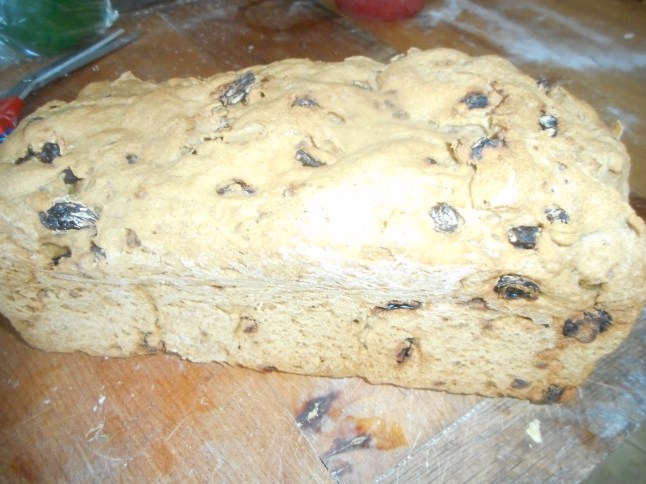
A good friend gave me a gluten free bread mix for Christmas, Bob’s Red Mill Cinnamon Raisin Yeast Bread.  I haven’t done many mixes for bread so it was a new experience. I made it the other week, it turned out great.  Very simple to create, not that much to add, water, two eggs and oil and beat it well, let it rise and bake the loaf.  Mine went together in a few minutes and I poured it into my tall sided 8 ½ x 4 inch bread pan and smoothed the top with a wet spatula. I let it rise the maximum; one hour.  Baked it and it rose nicely.  Cooled and sliced…very tasty.  This is not a sweet bread; rather low in sugar which can’t hurt and not overly cinnamoned, just enough.  I froze most of it sliced so it won’t spoil. I like to toast it after defrosting (my toaster has a defrost setting) and butter the hot bread.  It makes a very satisfying snack and goes well with breakfast choices like scrambled eggs or an omelet.

lemon velvet pie 004

lemon velvet pie 010lemon velvet pie 011Warning, this is not a traditionally sweet cinnamon raisin bread: seriously lowered sugar so I was put off a bit at first bite but once I adjusted my expectations I was pretty darn happy with it.  I think it would be awesome for a peanut butter and jelly sandwich.  Maybe I will try that for lunch tomorrow.
If you can’t find it in your store (try Wegmans) you can shop for it on line: http://www.bobsredmill.com/shop/mixes.html

Happy baking!

French Apple Tart…ooh la la

This French apple tart is an old favorite of mine, been making it for years.  I have no idea where I got the original recipe from so I can’t give credit for it, I lost my copy and had to replicate it. Plus, I had to change it a bit to make it gluten free but it tastes just as good as before.  The cinnamon and lemon topping are what makes it so tasty.

It should be made with an apple that keeps its shape; Granny Smith is the best choice in that regard or Golden Delicious.  Don’t use one that goes all squishy like Empire or Macintosh.  You only need 3 large apples.  It should give you about 6-8 slices of tart. Lesser amount of slices if your family is piggy, the full eight slices if they are not big dessert eaters.french apple tart

I use my GF tart shell crust which is from Annalise Roberts’ book; Gluten-Free Baking Classics.  It is very easy; hand pressed into your tart pan.  I would say that this is a cookie crust; sweet and short, very yummy.

I rarely have any of this tart left over for more than 24 hours.  It is very popular with everyone.  I like it for how easy it is to make, how handsome it looks and that I can throw it together quickly with only 3 apples and a lemon. Sorry for the lack of photos.  Wasn’t thinking about pictures when I was making it…

French Apple Tart

Crust

1 cup brown rice flour mix

¼ cup sugar

1 tsp. xanthan gum

5 tbsp. cold unsalted butter, in 5 chunks

1 tsp. vanilla extract

Mix the dry ingredients in a stand mixer, cut in the butter by mixing it at a med low speed until crumbly.  Add vanilla and mix well.  If it is really dry looking add a tbsp. of water.  Press into the bottom and up the sides of your tart shell as evenly as you can make it.

For this recipe I always use an extra large 10 inch tart pan.  Mine is ceramic so it doesn’t have a removable bottom.   Bake it at 350 degrees for 10 minutes. Let it cool while you peel and slice the apples.

Filling

3 large Granny Smith apples; peeled and sliced – not thick or too thin

2 tbsp. sugar

1 tbsp. GF flour

Lay the apple slices in concentric circles in the tart pan over the crust. Mix the sugar and flour and sprinkle over the apples.  Cover loosely with foil and bake 25-30 minutes until the apples are soft if pricked with a fork.  Do not bake until they collapse; should still hold their shape.

While the tart is just finishing its baking make the topping.

Topping

In a small heavy sauce pan place

2 tbsp. sugar and 1 tbsp. cornstarch and mix them.

Add ¼ cup fresh lemon juice

1 tsp. lemon zest (grate the zest and then juice the lemon)

½ cup water

½ tsp. cinnamon

Cook over medium heat, stirring it constantly with a small whisk or a spoon, until it boils and seems thickened and is no longer opaque.  This should take less then five minutes.  Remove from heat and pour the hot gloppy topping carefully over the hot apple tart taking your time so you cover the entire surface of the apples.

Let cool before serving.

This tart is perfect with a scoop of vanilla ice cream on the side.  Don’t put it on top or it will not look so nice because of the French cinnamon topping. Or some plain organic yogurt goes well and is far healthier…just saying.

Brown Rice Flour Mix (this is the same as King Arthur’s gf all purpose blend)
2 c brown rice flour (finely ground)

2/3 c potato starch – Not potato flour!

1/3 c tapioca flour

Originally posted in September 2014.  I bake this tart quite often; it is definitely a go to tart at my house.