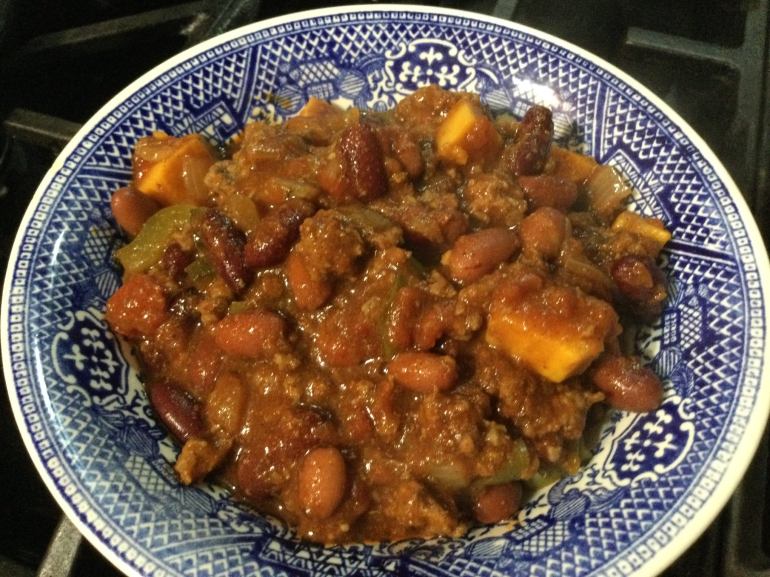
Our PA weather is chilling down. Need something to warm up your tummy and tired of turkey? Try some homemade chili. So easy; one pot, if you like beans in it this is your recipe. And a little something different; cubes of yam. Yeap yam, it picks up all those spicy flavors. Great with cornbread, I had some leftover from Thanksgiving; put it in the freezer and it tastes fresh. I used ground beef, you can use turkey, venison, or use a plant-based ground meat substitute. This is somewhat spicy but not too much, my tummy can no longer handle the really spicy stuff. You can up the spice or tone it down a bit. Your chili, your choice. Enjoy!
Need something special!
Angie’s Sort of Spicy Chili Con Carne
Ingredients
1 1/3 lb. ground beef, 90 percent is what I used
Cooking spray
1 medium onion; chopped into ½ cup dice
4 garlic cloves, minced
1 medium poblano pepper diced
2/3 cup diced green or red bell pepper
3 tsp. chili powder
½ tsp. cumin
½ tsp. smoked paprika
½ tsp. coriander
½ tsp. cinnamon
¼ tsp. red pepper flakes
1 Tbsp. Worcestershire sauce
1 28 ounce can crushed tomatoes
¼ cup red or white wine (one you would willingly drink!)
1 1/3 cups peeled and cubed yam; roughly that amount
1 cup water
1 tsp. kosher salt
¼ tsp. ground black pepper (more if you want it)
1 14 oz can large kidney beans, rinsed and drained
1 14 oz can small red beans, rinsed and drained
Directions:
Spray la arge wide 4 qt. pot with cooking spray, heat and add ground meat. Let brown as you break it up and spread out the meat. After turning it once add the onions. Cook, stirring a lot, until meat isn’t pink. Add minced garlic; stir in, cook 30 seconds. Add all spices, stir well; cook a minute. Add wine, stir, Add crushed tomatoes. Use cup of water to rinse tomato can and add all to pot. Add diced yams and Worcestershire sauce. Cover and simmer on low at least 30 minutes; I cooked mine for more like an hour. I stirred it a lot, at least every 10 minutes taking care to scrape the bottom so nothing is sticking. I had to go out so I shut it off, put the lid on and restarted it when I returned. It’s flexible that way. Then add kosher salt to taste; I put in 1 tsp. Add the beans. Stir in carefully and cook 15-25 more minutes. Taste and adjust salt, add more ground black pepper if wanted. Honestly it is even better after a good rest in the fridge; the flavors will blend further. Great with corn bread. I didn’t add any toppings; it was just right without any additions but you can go to town with scallions, grated cheese, or what ever you like. Enjoy!
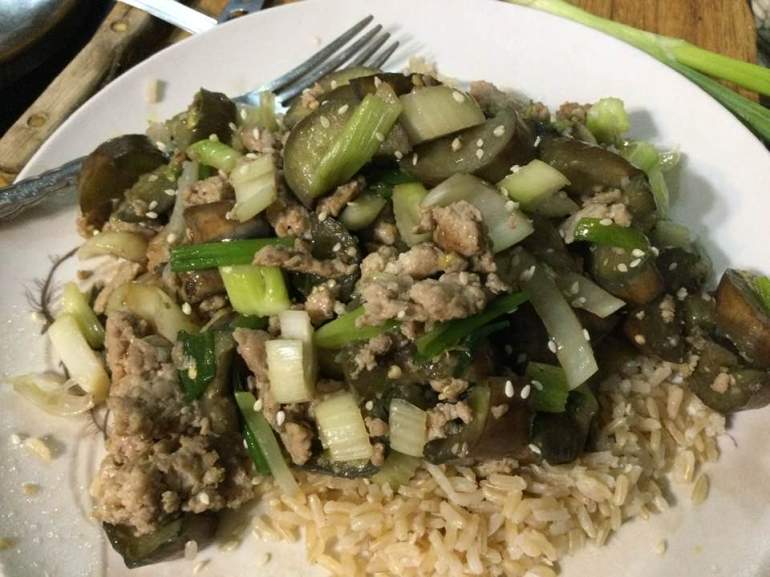
There is this recipe for chowed eggplant with ground pork that I make often when I can find skinny Japanese eggplants. Chowed means stir fried. It comes out great every time I make it, slight addiction is my position on this recipe. This latest version uses ground chicken thigh meat instead of ground pork. If you get tired of pork or don’t eat it chicken is an excellent choice. I bought it at Valley Farm Markets; their meats can’t be beat for flavor and value! I suppose you can used ground chicken breast too. Anyway, it worked very well.
I often add veggies; last time it was some sticks of fresh zucchini from my garden and a bit of sliced cabbage. THis time I added celery rounds. Both times it was delish for sure. The original recipe is by Jeff Smith, out of his cookbook, The Frugal Gourmet Cooks Three Ancient Cuisines; China, Greece and Rome. It is full of great recipes; where I got my potsticker and other dim sum recipes. No judging here of Chef Smith; just enjoying great food…
Notes; can change out zucchini and or cabbage, for green beans, celery, carrots, pea pods…but you can’t change out the eggplant. Ground pork is excellent this way as well. Can use yellow onion rather than green if you prefer; cook a bit longer than scallions if you do. You could also serve this with rice noodles; the wide kind you let soak in boiling hot water for ten minutes; that’s all the cooking it needs.
Angie’s Eggplant with Ground Chicken
1 lb skinny Japanese eggplant
1 tsp salt
½ tsp. light soy sauce, gf
1 ½ tsp. dry sherry or rice wine
½ tsp. grated fresh ginger
½ lob ground chicken, preferably thigh meat
2 tbsp. mild olive oil or peanut oil
2 cloves of garlic minced
3-4 green onions sliced in 1 to 2 inch lengths and cut in half if white part
1 cup zucchini strips; long rectangle shape
2/3-1 cup sliced green cabbage; not too thin
1 tsp. toasted sesame oil
Pinch sugar
Directions:
Cut unpeeled eggplants into ½ inch thick diagonal slices and cut each in half the long way. Sprinkle with salt, let stand ½ hour draining in a colander. Pat dry with paper towels.
Mix meat with soy sauce sherry and fresh ginger, let stand 20 to 30 minutes.
Slice or chop veggies.
Heat wok and add 1 tbsp. oil. Add ground meat mixture and flatten a bit; cook until browned lightly; flip over and brown other side; no pink showing; chop up with utensil and set aside. Add rest of oil and then garlic, cook 30 seconds, add eggplant, cook until it appears more than half done; about 5 minutes; then add zucchini and cabbage, stir for 4-5 minutes, add sesame oil and green onions. Stir a minute, add pinch sugar, wok until cabbage is crisp tender.
Serve with brown or white rice. I made my brown rice in my handy instant pot pressure cooker. I did a cup of long grain brown rice, 1 ¼ cup water, 1 tsp. oil, ½ tsp. sea salt; Manual high pressure for 20 or so minutes, ten minutes natural release. Easy peasy.
There is this recipe for chowed eggplant with ground pork that I make often when I can find skinny Japanese eggplants. Chowed means stir fried. It comes out great every time I make it, slight addiction is my position on this recipe. This latest version uses ground chicken thigh meat instead of ground pork. If you get tired of pork or don’t eat it this is an excellent choice. I bought it at Valley Farm Markets; their meats can’t be beat for flavor and value! I suppose you can used ground chicken breast too. Anyway, it worked very well.
I added some sticks of fresh zucchini from my garden and a bit of sliced cabbage. It was delish for sure. The original recipe is by Jeff Smith, out of his cookbook, The Frugal Gourmet Cooks Three Ancient Cuisines; China, Greece and Rome. It is full of great recipes; where I got my potsticker and other dim sum recipes. No judging here of Chef Smith; just enjoying great food…
Notes; can change out zucchini and or cabbage, for green beans, carrots, pea pods…but you can’t change out the eggplant. Ground pork is excellent this way as well. Can use yellow onion rather than green if you prefer; cook a bit longer than scallions if you do. You could also serve this with rice noodles; the wide kind you let soak in boiling hot water for ten minutes; that’s all the cooking it needs.
Angie’s Eggplant with Ground Chicken
1 lb skinny Japanese eggplant
1 tsp salt
½ tsp. light soy sauce, gf
1 ½ tsp. dry sherry or rice wine
½ tsp. grated fresh ginger
½ lob ground chicken, preferably thigh meat
2 tbsp. mild olive oil or peanut oil
2 cloves of garlic minced
3-4 green onions sliced in 1 to 2 inch lengths and cut in half if white part
1 cup zucchini strips; long rectangle shape
2/3-1 cup sliced green cabbage; not too thin
1 tsp. toasted sesame oil
Pinch sugar
Directions:
Cut unpeeled eggplants into ½ inch thick diagonal slices and cut each in half the long way. Sprinkle with salt, let stand ½ hour draining in a colander. Pat dry with paper towels.
Mix meat with soy sauce sherry and fresh ginger, let stand 20 to 30 minutes.
Slice or chop veggies.
Heat wok and add 1 tbsp. oil. Add ground meat mixture and flatten a bit; cook until browned lightly; flip over and brown other side; no pink showing; chop up with utensil and set aside. Add rest of oil and then garlic, cook 30 seconds, add eggplant, cook until it appears more than half done; about 5 minutes; then add zucchini and cabbage, stir for 4-5 minutes, add sesame oil and green onions. Stir a minute, add pinch sugar, wok until cabbage is crisp tender.
Serve with brown or white rice. I made my brown rice in my handy instant pot pressure cooker. I did a cup of long grain brown rice, 1 ¼ cup water, 1 tsp. oil, ½ tsp. sea salt; Manual high pressure for 20 or so minutes, ten minutes natural release. Easy peasy.
Peaches and blueberries really do go together so swell. Tasty sliced and uncooked: with milk or cream or baked in a cobbler or a fruity crisp. But this, this is my latest obsession; in a custard pie. Not just any old custard but one made with Greek yogurt and egg yolks. Easy to throw together, creamy, never runny textured and a lusciously fruity flavor that may make you have to eat a second slice! The blueberries do tend to takeover the peach flavor of this pie even though there are more than twice as much peaches by volume, they are just a stronger flavor than peaches. You could play with the proportions of the two fruits; this is the amounts which I used. WARNING: This pie goes soft in 2 humid days so plan to gobble it down within that time frame for face the soggy crust syndrome. Inevitable with gf crust and a custard filling in hot/humid weather.
I don’t recommend frozen or canned fruit for this pie, simply not good enough and you must use plain, unsweetened Greek yogurt in the filling, plain yogurt is too runny. And no, it can’t be made without the egg yolks; it just wouldn’t work as a custard if there are no yolks in there. And one last warning; applicable to 99 percent of my recipes: Please don’t try it with Measure for Measure gf flour; this is calibrated for using King Arthur’s Basic GF Blend.
I hope you give it a try; super easy and super delicious. Best pie of the summer hands down! Making one in the morning…can’t wait for a slice still faintly warm…….
Just baked…hot from my oven. Deceptively plain looking…beneath those golden crumbs likes a intoxicating blend of fresh fruit and custard.
Angie’s Peach and Blueberry Custard Pie
CRUST:
1 c plus 2 tbsp brown rice flour mix (at bottom of recipe)
2 tbsp sweet rice flour
1 Tbps granulated sugar
½ tsp xanthan gum
¼ tsp salt
6 Tbps cold butter cut into 6 chunks
1 large egg
2 tsp fresh orange or lemon juice
Spray 9 inch metal pie pan with cooking spray, dust with white rice flour.
Mix dry ingredients in bowl of stand electric mixer. Add butter and mix until crumbly and resembling coarse meal. Add egg and juice. Mix until it comes together into big chunks. Shape into a ball with your hands. Put it on a crust sized piece of wax paper (14 x 14 inches more or less), flatten the crust ball some; put on top of it another piece of wax paper and chill it all in your fridge 15-20 minutes while you prepare the filling.
Filling:
2 1/2-3 cups sliced fresh peaches, peeled and cut in half inch slices
1 1/4 cup blueberries; rinsed
Mix in a medium bowl the following ingredients:
1 cup plain Greek yogurt, I prefer whole milk, and let it warm up a bit
2/3 cup sugar, sweeter if you like it that way or if peaches are not fully ripe
3 egg yolks, close to room temp.
1 tsp. pure vanilla extract
1/4 cup brown rice mixture flour (King Arthur Basic GF blend)
Crumb topping
¾ c brown rice flour mix (King Arthur Basic GF Blend)
½ c sugar
½ tsp xanthan gum
1/2 tsp. cinnamon
1/3 c cold butter cut into six chunks
Put all five ingredients in the same mixing bowl you made the bottom crust in and mix well with mixer paddle until crumbs form.
+++++++++++++++++++++++++++++++++++++
Directions: Turn oven on to 400 degrees. Put the oven rack on the closest to the bottom shelf position. Once the crust is chilled some but not hard, Roll it out and fit into the pie shell. Trim off excess crust. I like to chill those crumbs of crust and roll out to make a jam filled hand pie. Anyway, put the sliced peaches and blueberries in the pie shell in a fairly even layer, as the filling and crumbs will hide it there is no need for a pretty design. Then pour the filling over it and bake for 30 minutes. I turned down my oven to 375 after 20 minutes. While it bakes those 30 minutes make the crumbs. Carefully remove the pie from the oven and sprinkle the top of the pie with crumb mix; I used about half of it but you could use a bit less if you don’t want a thick crumb layer or all of it for a really heavy crumb. Bake an additional 15-20 minutes until crumbs are lightly browned. Let stand at least 1 to 11/2 hours before slicing and serving. Enjoy!
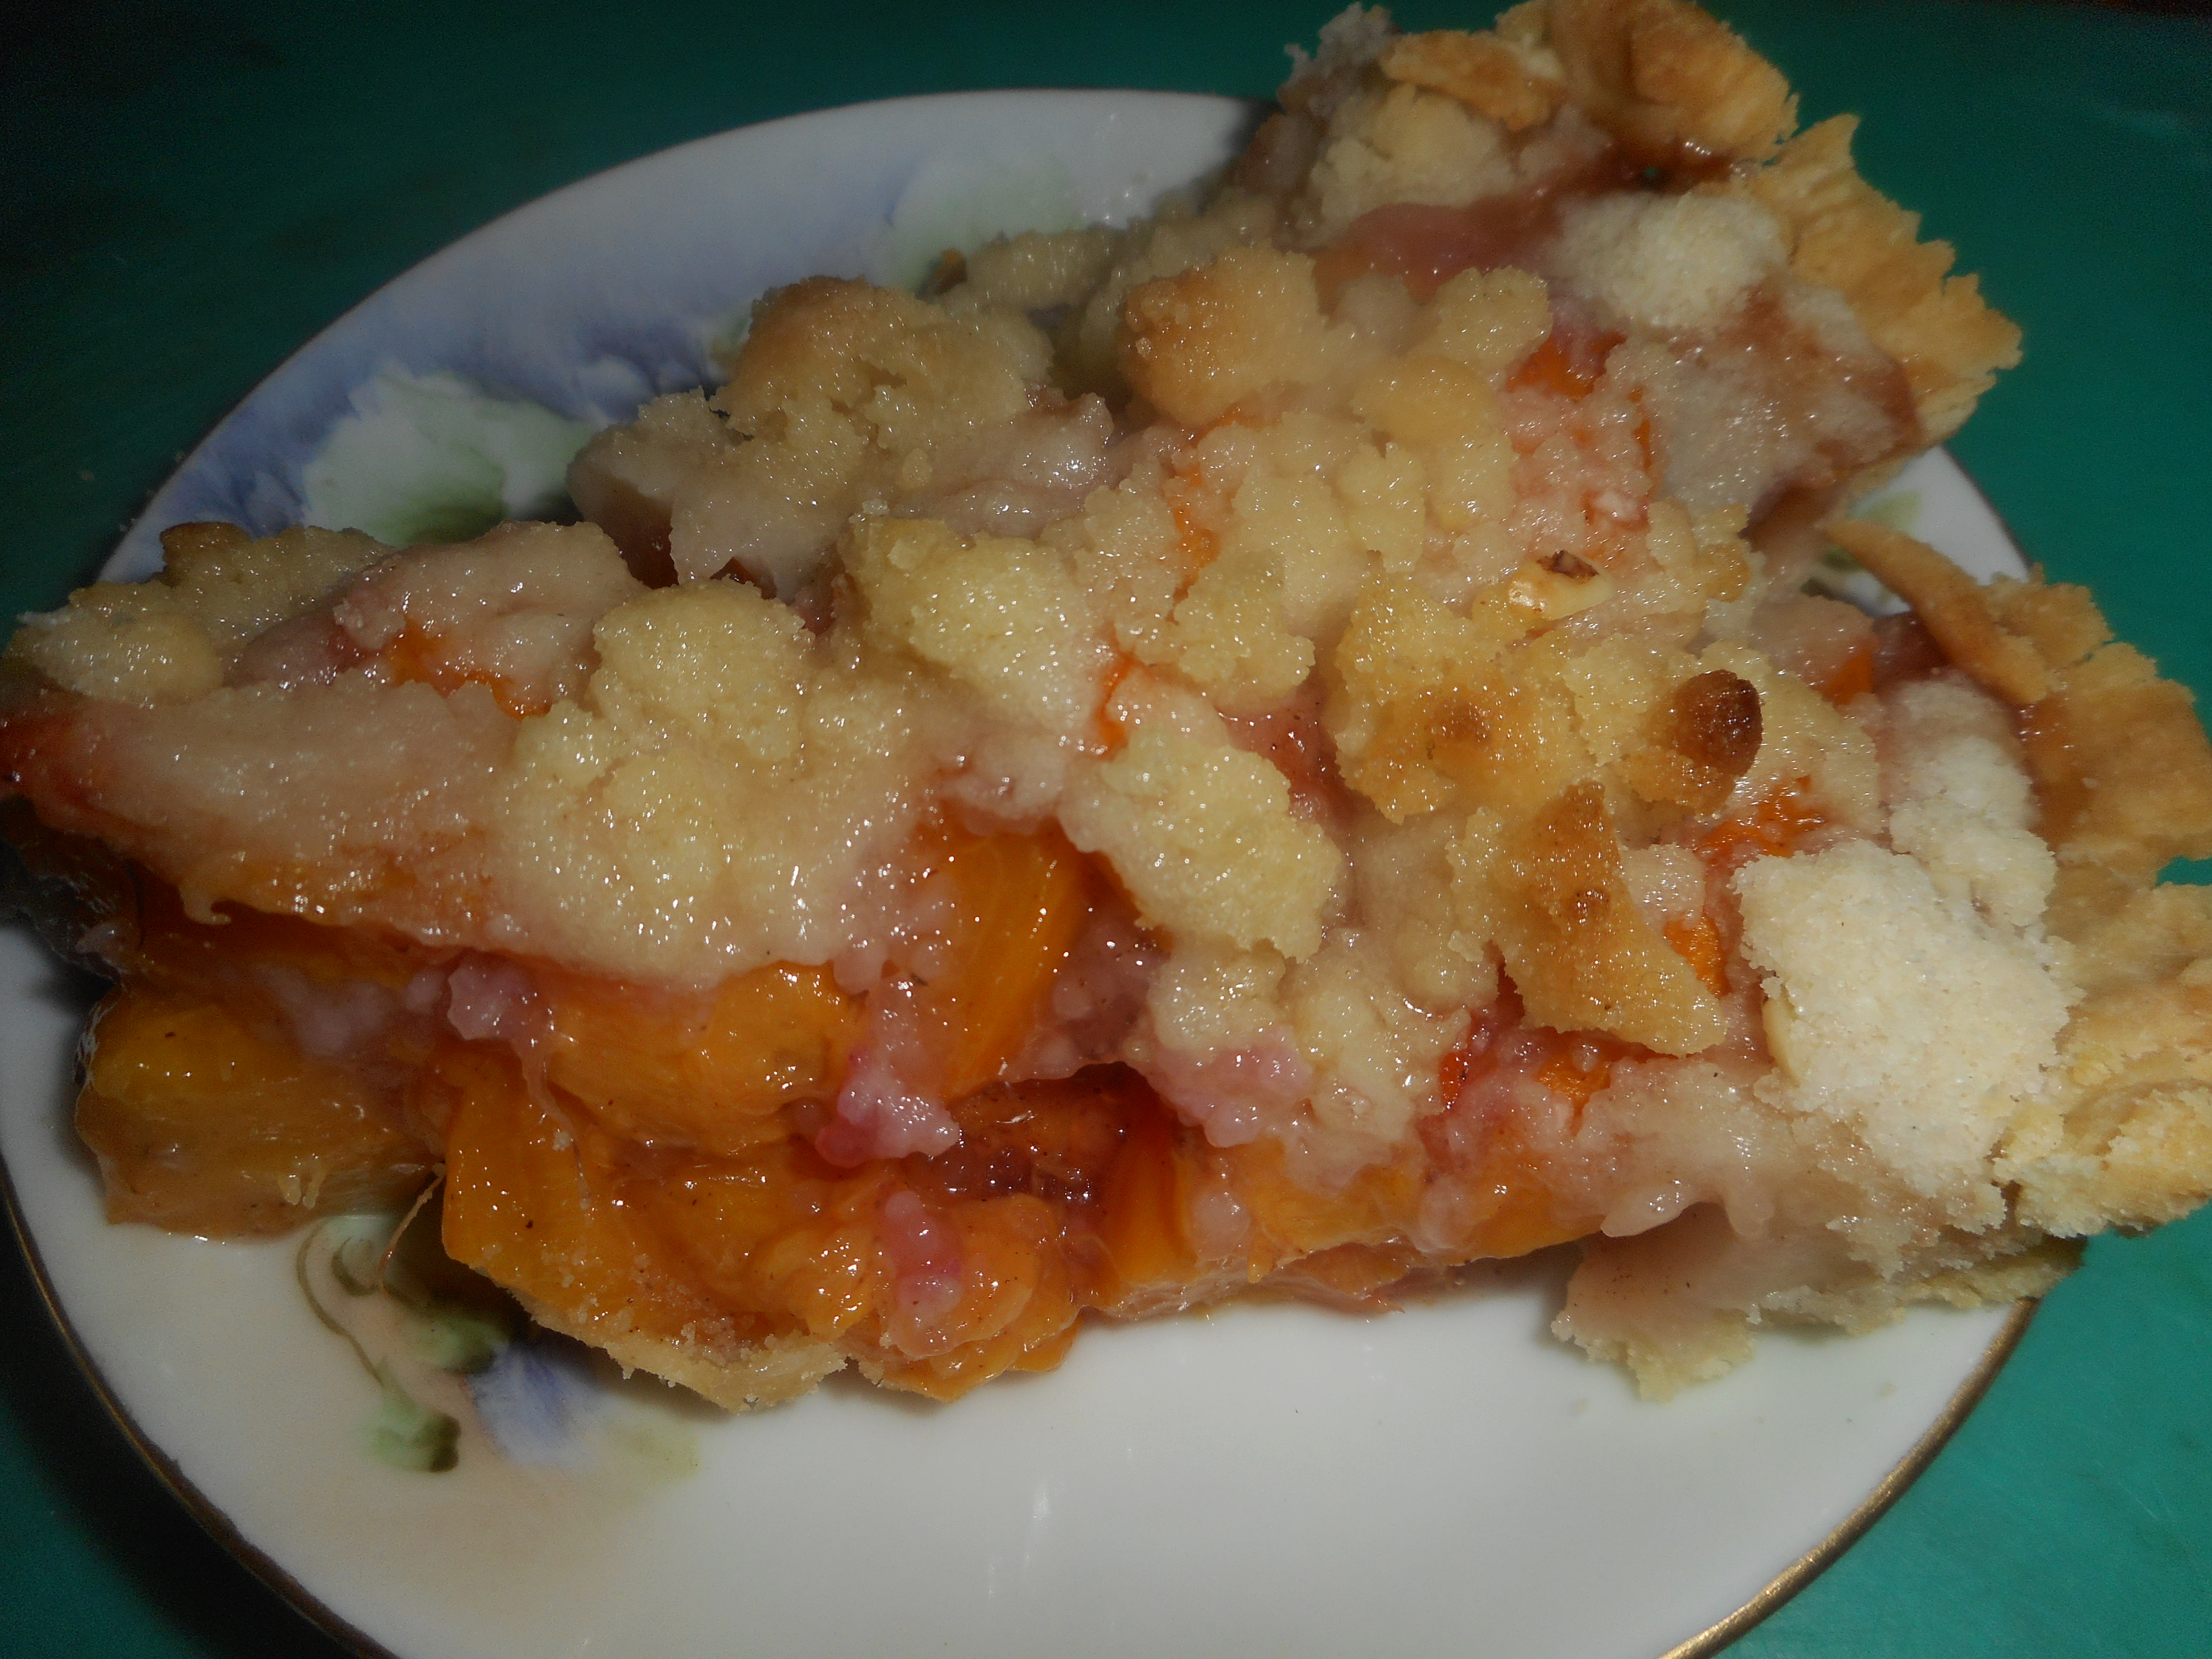
It is near the peak of peach season so get some peaches and whip up a delicious gluten free peach pie. This is an easy pie to create. Slice and dump together the filling, crumb topping made in unwashed mixer bowl you used for bottom crust. You can store any leftover crumb mixture in a sealed container in the fridge; it keeps a few weeks. I let my mix spin a few more moments in the stand mixer for extra big crumbs for this pie; love that look. If you prefer a solid crust just double the crust part and top your pie with it. Be sure to cut some slits for steam escape! And if you don’t have time, buy a ready-made crust but homemade is always best.
Please make every effort to use local fruit; can get peaches at orchards like Bechdolt’s near Springtown, at most farm stands and at farmer’s markets; one on Saturdays in Easton or Sunday’s in Hellertown. This pie really showcases great tasting peaches. If you use lousy peaches your pie will taste crummy. But, here’s the thing: store peaches can be poor in flavor and texture due to improper chilling so I strongly suggest you buy only locally grown, sweet, ripe peaches to make your pie. I love when they have a pink blush; it makes the pie so pretty and perhaps even tastier!
To peel easily; heat 3 inches of plain water, drop the peaches gently in 4-5 at a time and cook them 2-3 minutes. Use the lesser time for more ripe peaches. Allow to cool somewhat before peeling. I like to do that over a bowl to catch the juices as I slice each peach.
Bake and enjoy late summer in a pie in just a few minutes of work. Don’t eat it hot; it should be cooled to just warm if you like it so or room temperature or even a bit chilled. You could certainly serve this with vanilla ice cream. And this pie works perfectly with fresh nectarines, bonus: no peeling required!
Angie’s GF Peach Crumb Pie
Crust:
1 c plus 2 tbsp brown rice flour mix (at bottom of recipe)
2 tbsp sweet rice flour
1 Tbps granulated sugar
½ tsp xanthan gum
¼ tsp salt
6 Tbps cold butter cut into 6 chunks
1 large egg
2 tsp fresh orange or lemon juice
Spray 9 inch metal pie pan with cooking spray, dust with white rice flour.
Mix dry ingredients in bowl of stand electric mixer. Add butter and mix until crumbly and resembling coarse meal. Add egg and juice. Mix until it comes together into big chunks. Shape into a ball with your hands. Put it on a crust sized piece of wax paper (14 x 14 inches more or less), flatten the crust ball some; put on top of it another piece of wax paper and chill it all in your fridge 15-20 minutes while you prepare the filling.
Filling:
6 cups sliced fresh peaches, peeled and cut in thick slices, place in medium bowl
Mix with:
½ cup sugar
1/4 tsp. cinnamon (optional)
3-4 Tbsp. quick tapioca
Stir in 1 tbsp. fresh lemon juice and ¼ tsp. almond extract
Let stand while you prepare the crust.
Roll out pie crust in a pie bag or between two sheets of wax paper, try to get the thickness even, no thick middle! Peel off one side of paper and place in pie pan, centered. Remove other slice of wax paper. Crimp edges all around. Fill with fruit mixture.
Crumb topping
Put all four ingredients in the same mixing bowl you made the bottom crust in and mix well with mixer paddle until crumbs form. If you let them go extra long you get big fat crumbs if you want that look and I did!
¾ c brown rice flour mix
½ c sugar
½ tsp xanthan gum
1/3 c cold butter cut into six chunks
Sprinkle the top of the pie with crumb mix; use as much as you like. I like about a heaping cup of the mixture. Up to your personal taste… It sinks partially into the fruit mixture and adds lots of sweetness and eye appeal.
Bake in a preheated 400 degree oven for 45-50 minutes until bubbly and the crumb crust is light brown. Cool at least 1 to 4 hours before serving at room temperature. I think it is best served the same day you make it, or no more then 12 hours after baking for optimal flavor. The crumbs will get soggy if too much time passes. Mine was still very good the next day; just not as great as when really fresh.
Note: if you find your bottom crust is not browning enough bake it empty at 375 degrees for ten minutes before filling it with the fruit. I have a bottom heat pizza style oven which gives me perfect pie crust so I don’t ever have pale pie crust.
Brown Rice Flour Mix (Same as King Arthur GF All purpose blend)
2 c brown rice flour (finely ground)
2/3 c potato starch – Not potato flour!
1/3 c tapioca flour
Note: This post was originally blogged by me the late summer of 2015. Minor changes made.
So, if you are just going gluten free let me give you some advice. Things to do, things you should get and things not to bother with. I wish I had read a column like that when I was first plunged into gluten free eating.
If you plan to make baked goods, I suggest a stand mixer in the KitchenAid family; nothing big; just a standard/classic model. So many gf breads need a long beating before you put them in a pan. The stand mixer is a workhorse in my gluten free kitchen, used for breads, cookies, muffins and other baked goods requiring a long beating. I also have attachments for shredding large amounts of cabbage, for grinding cranberries for relish and I just got some for rolling out sheets of pasta. There are attachments for making sausage, for grinding grain and for straining out seeds from veggies and fruits. It’s a big investment but mine is 25 years old and still working despite my frequent usage.
I have a 8.5 x 4.5 heavy duty aluminum bread pan for gf quick and yeast breads. The taller sides and slightly narrowed width is particularly helpful for yeast bread rising. Definitely helpful to me as a baker. My pizza pan is heavy duty too. I have various baking sheets and pie pans sized to what I bake frequently. Sturdy muffin pans and English muffin rings are useful.
Yeap; this is my fav bread pan, full of quick bread. The ridge sides are taller than 9×5 pans; just makes a great loaf of bread.
A well-functioning oven is critical to gf baking; you need those even temperatures for sure. I used to have a second oven with bottom heat; great for pizza and gf pie crusts. My current range is more traditional. I put my rack just above the oven bottom and my pie crusts come out perfectly browned. Just as good as the pizza oven I sadly gave up when it died.
You should get an instant read thermometer, use my constantly and it is great for temping proteins to know when they are ready. A set or two of solid measuring cups are vital as are 2 sets of measuring spoons and a liquids measuring cup; I have a one cup and a two cup size of those. A large, medium and small whisk set is needed as are spatulas for scraping bowls. I have a OXO pie crust rolling bag; very sturdy and well made; is a huge help in pie crust rolling; much better than the cheaper ones; the translucent silicon sides are excellent for the crust rolling process. My cheap one lasted a year; this OXO one is about 3 years old and in perfect condition.
Best pie roller bag ever!
I store some flours in my freezer; whole grain ones especially. Others are just in large storage jars in my kitchen and pantry. I have tried many mixes and brands and find a few are my favorites; King Arthur basic gf flour is my workhorse blend. I also really like Better Batter for a host of recipes especially quick breads. Kim’s GF Flour blend is wonderful for making pizza and focaccia. I made an old school muffin mix to use for cobblers Bette Hagman’s book, More from the Gluten-Free Gourmet – You can find the mix recipe in my post: https://myworldwithoutwheat.com/2020/05/20/rhubarb-cobbler-spring-treat/
When starting out start slowly. Look at recipe comments and try new things. I do want to give a shout out to King Arthur’s website and their large amount of wonderful gf recipes. They are well tested; work every time and have great flavor and texture. Their chocolate chip cookies are the bomb! I also love their cake mixes they sell; makes a bigger double layer cake than other brands of available store gf mixes.
Things I don’t care for: quinoa flour and almost all bean flours. Chickpea flour has some specific recipes it works well in. I avoid using all white flours except in a few cases as it is pretty devoid of nutrients and of flavor. I make a great French bread and I subbed in brown rice for white rice flour; much better flavor. Look at my most recent pizza dough recommendation; this one is a game changer; must try it; easy to do and it makes enough for two crusts.
Rediculously good crust…and easy to make.
There are many cookbooks available. My hands down favorite is Annalise Roberts, Basic Gluten Free Baking. Her pie crust is perfection. I love her muffins, the waffles are the best and the chocolate cake is excellent. She has another one full of heritage recipes which has proved to be a super source of party desserts. Maybe you should read some of my blog posts for ideas of what to make/bake. I had some excellent blueberry muffins my neighbor made with Bob’s Red Mill 1 to 1 blend; so tender and delicious. I had shied away from that blend for a long while but those muffins totally changed my mind.
Don’t let anyone tell you that gf baked goods always taste bad; not the least true. My mom swore for years that my gf angel food cake had to be made with all purpose(gluten) flour. I had to swear that I never ever bake anything with gluten-based flour to convince her.
great crust helps make a great tartThe Daffodil Cake!
So get out there and bake some good stuff. I never post a recipe unless I make it for myself and most of them, I made over and over again. They are all delicious things you can feel confident in making. Enjoy baked good again. Really.