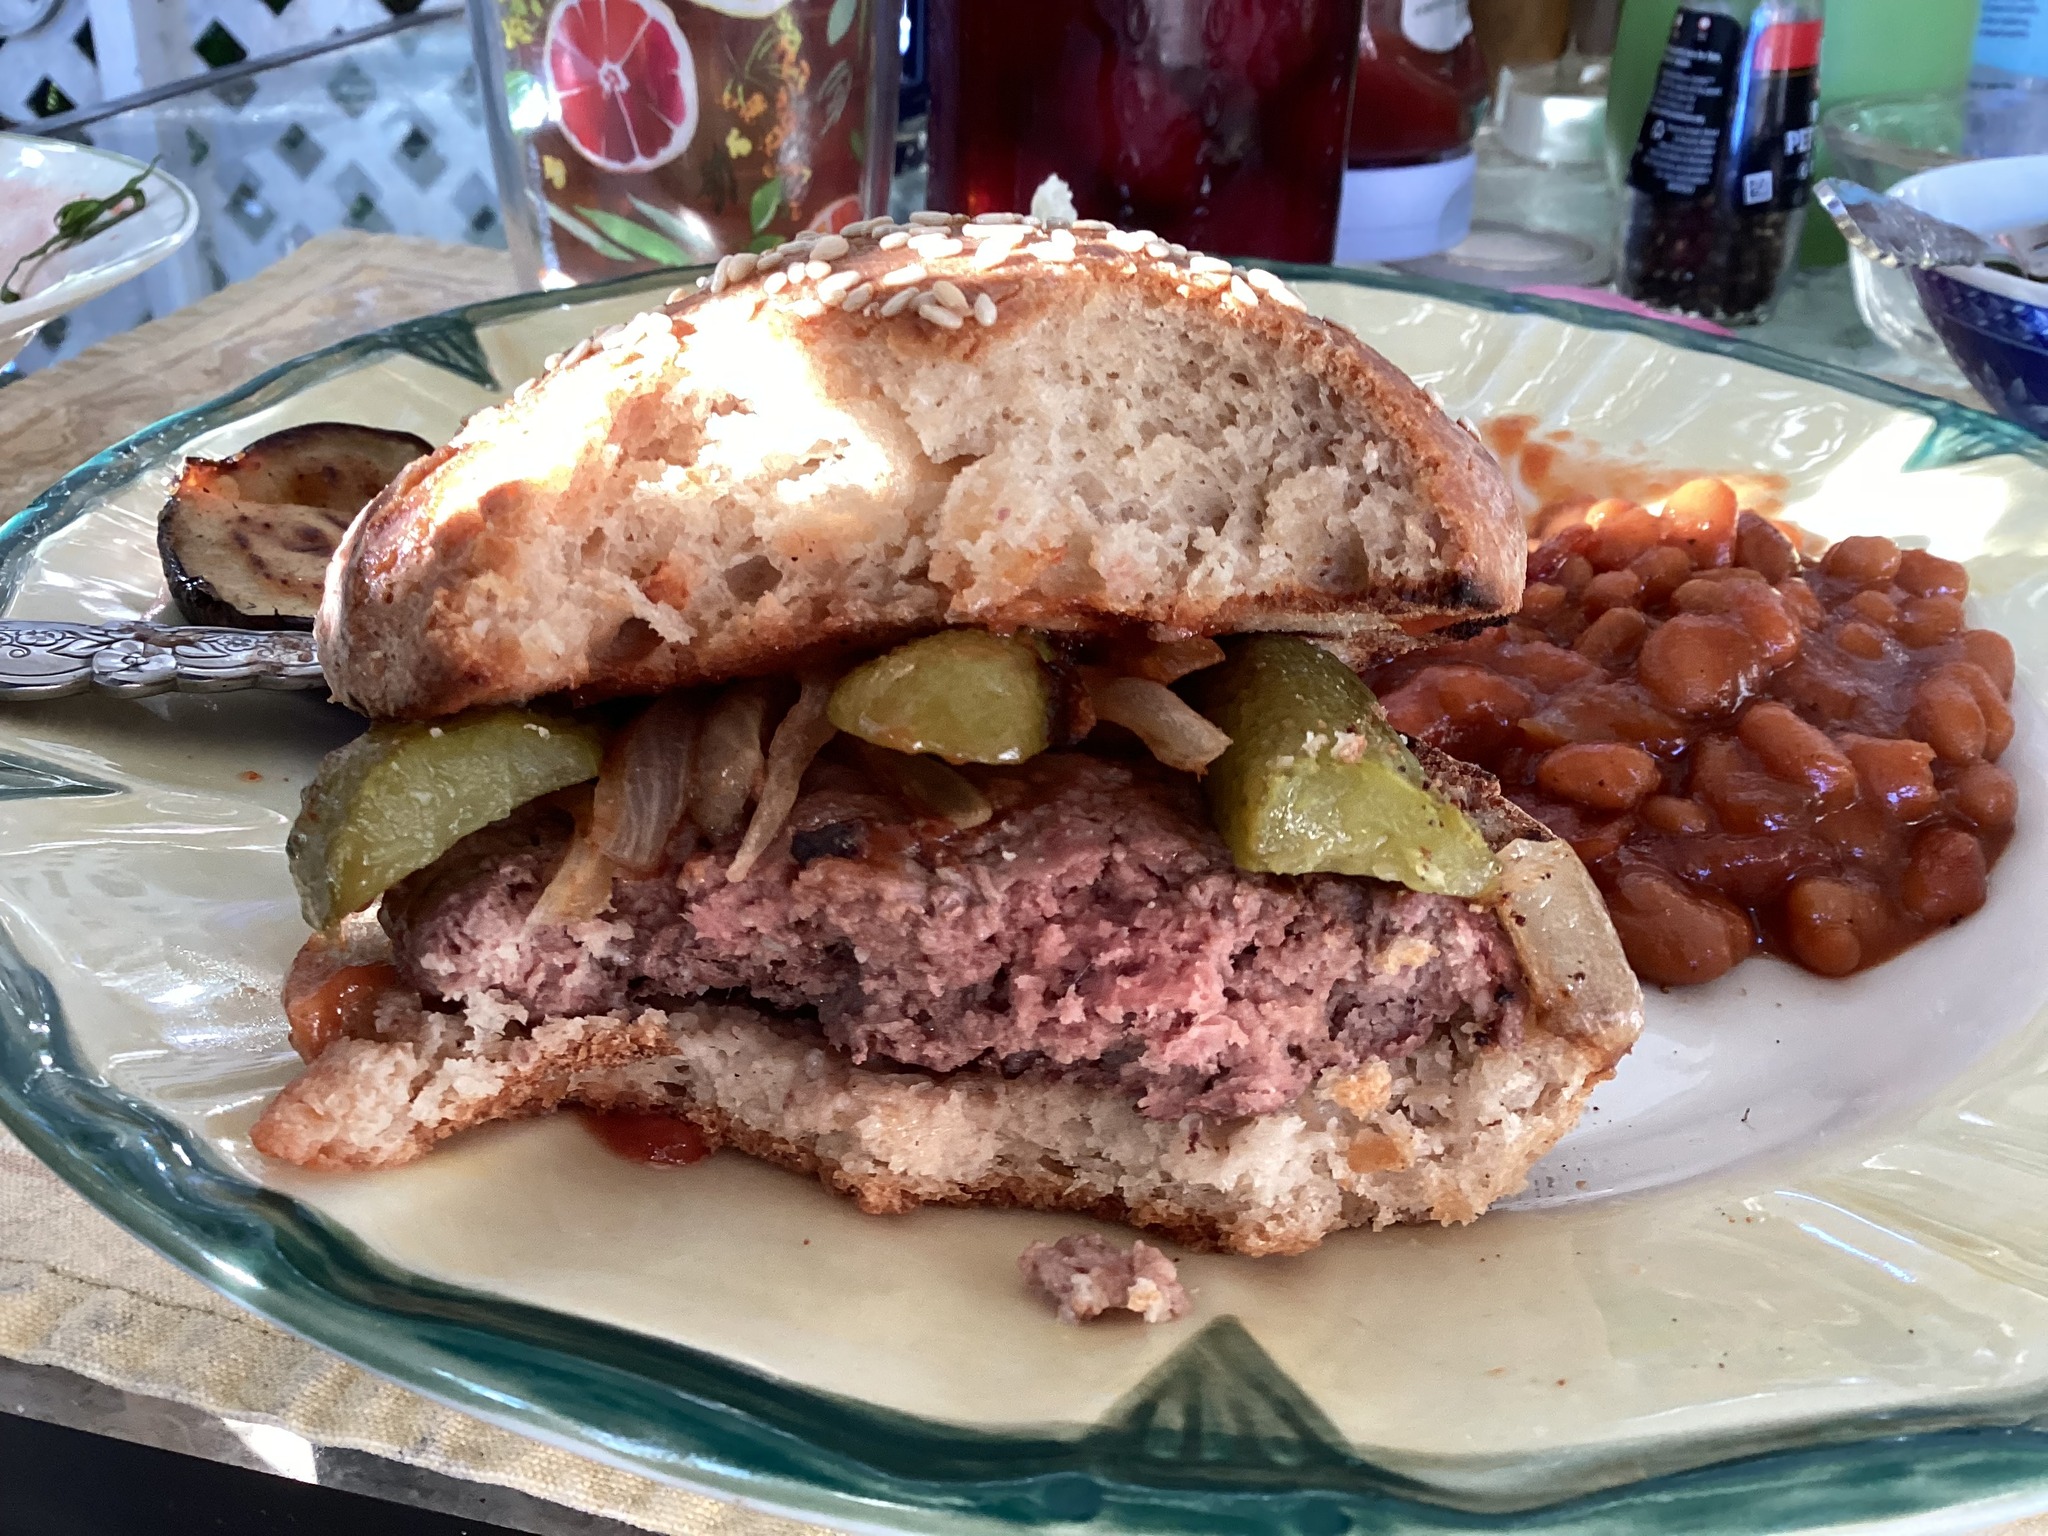
This is my version of a recipe that was a sourdough bun recipe. I made many changes; added yeast which makes it a discard bread, changed flours, made less buns so they would be bigger and added a brief bulk rise. The sourdough starter adds a certain something even though I am not relying on it for much rise. Plus, without the yeast it would take up to 10 hours to get them to rise. I am no purist, and I don’t have the desire to spend my entire day fussing over rolls! These have great flavor and texture. Frankly they are the best burger buns I have eaten since going gf.
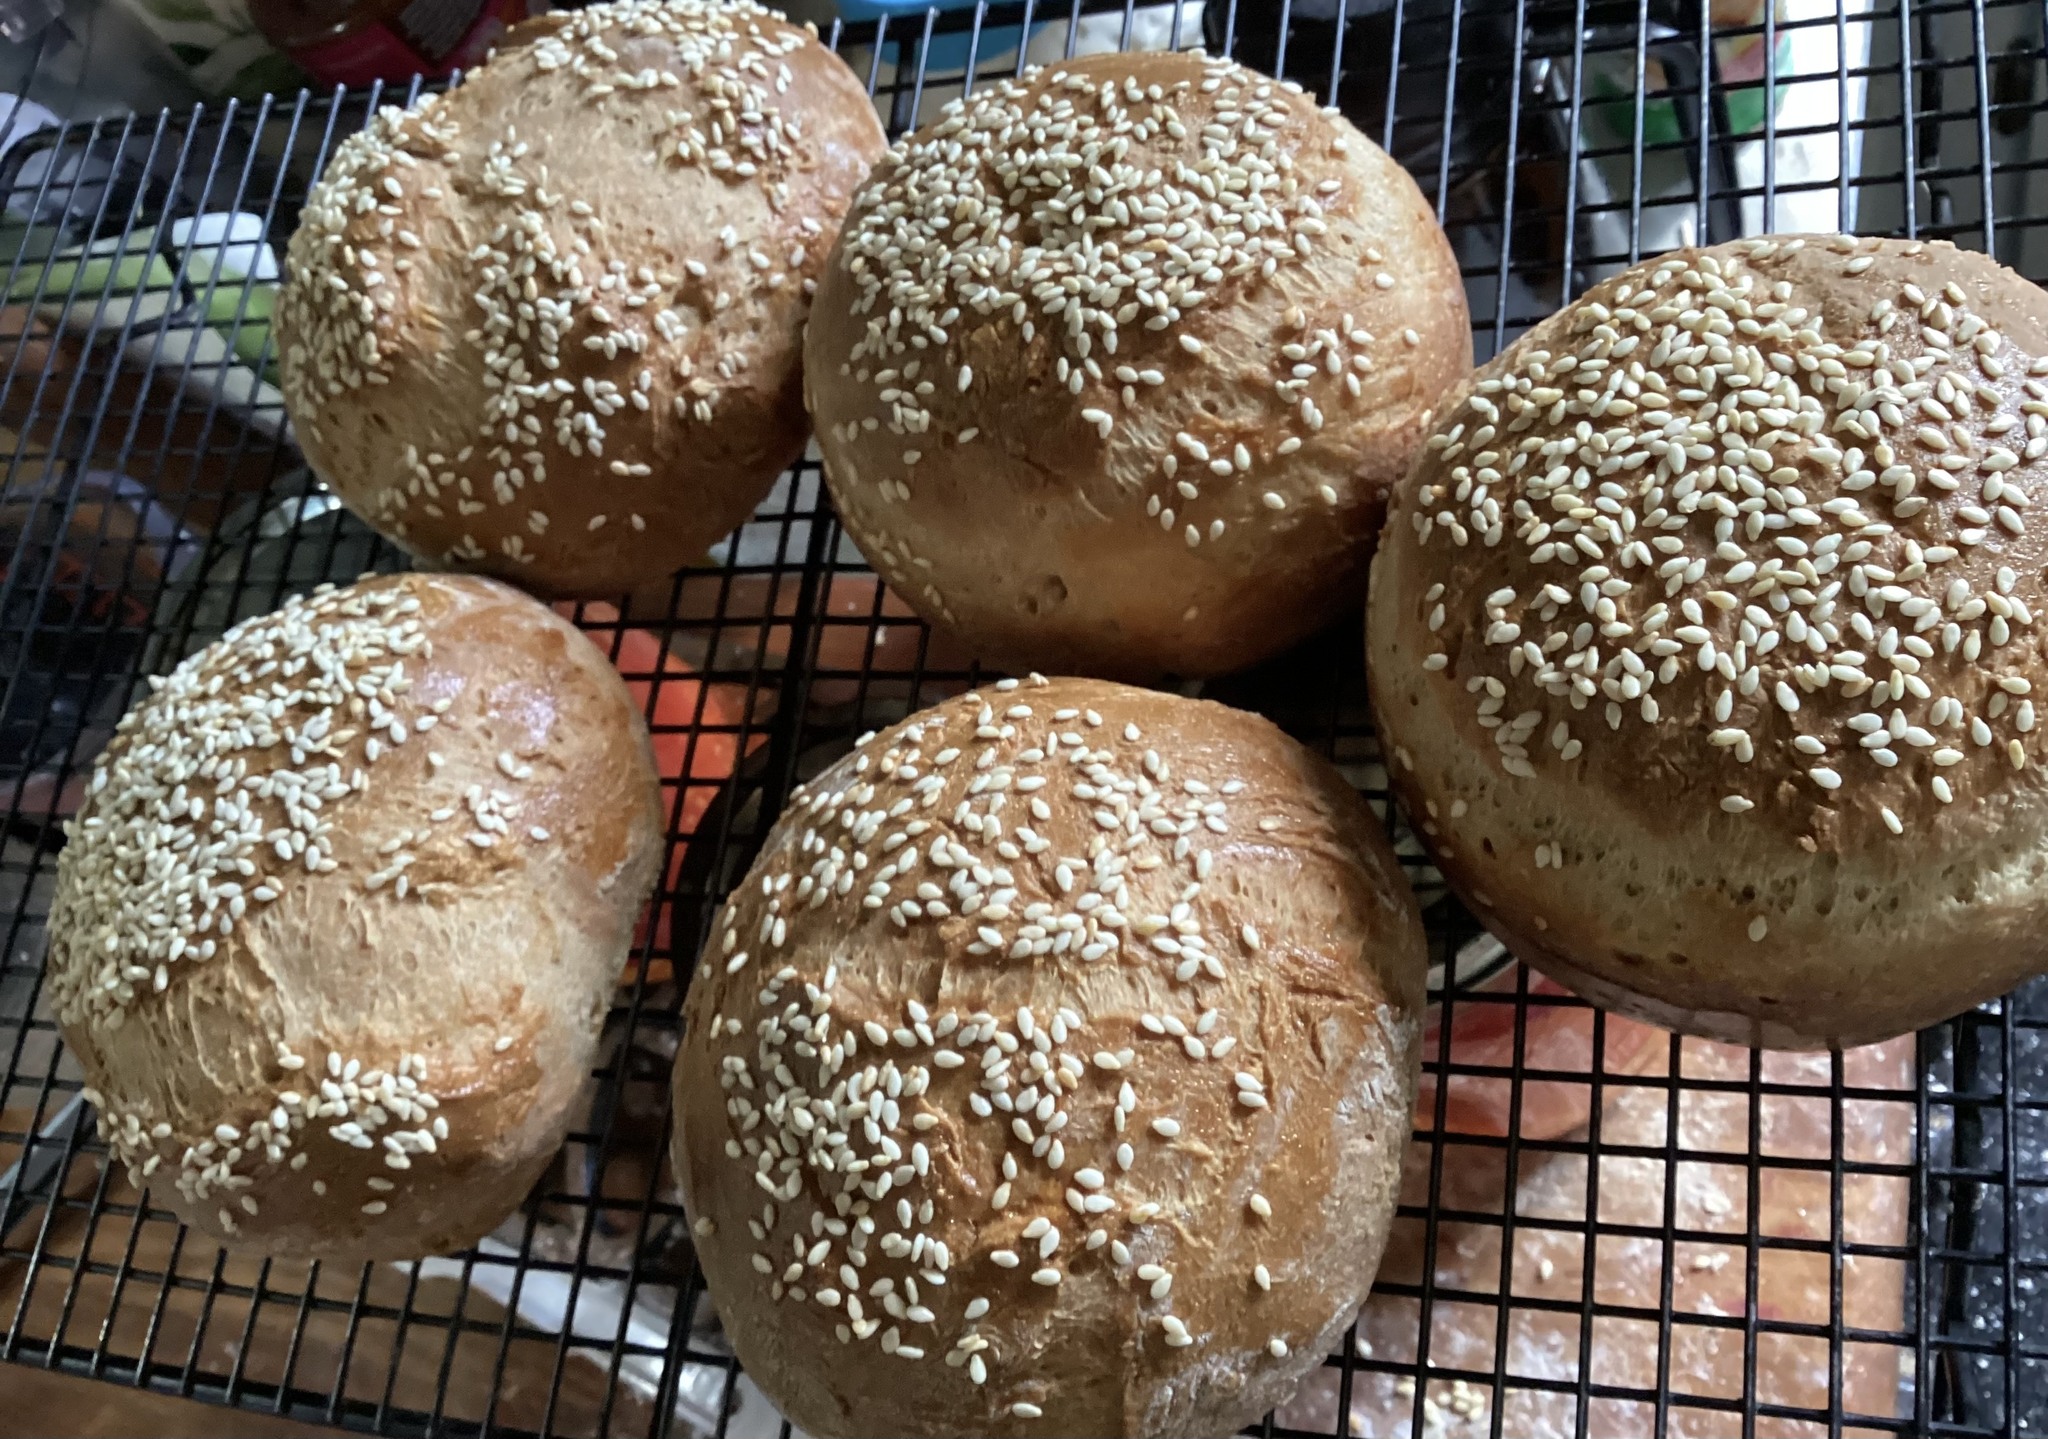
Notes: I made 5 but next time I will do 6 or 7 as they are quite big. I never thought my gf bun would be bigger than the burger, lol. And the flavor! They are tender and delicious. My guy tasted my bun, and it clearly was better than his store bought (not gf) hamburger bun. I love the sesame seeds on top; don’t skip that; adds flavor and they look so authentic and so beautiful.

GF Hamburger Buns
280 gms room temperature filtered water
18 gms. psyllium husk powder
130 gms tapioca starch
70 gms sorghum flour
100 gms oat flour (if you can’t do oats make that 170 gms sorghum flour)
1 rounded tsp. yeast
7gms xanthan gum
8 gms baking powder
25 gms sugar
12 gms sea salt
120 gms milk; warm 30 seconds in your microwave
60 gms room temperature sourdough starter, preferably fed within 8 hours
2 large eggs, room temperature
50 gms canola or sunflower oil
Topping ingredients: 1 small egg beaten, 1 tbsp. sesame seeds
DIRECTIONS
Add water and psyllium husk powder to a medium bowl and let stand to gel
In stand mixer bowl combine all dry ingredients; whisk briefly to combine. I don’t like to use the mixer to stir; flings flour out even at low speed; use a whisk
Add all the other bread ingredients and mix slowly for first minute than 4 minutes on medium. Cover with plastic wrap and put in a warm place for 15 minutes. Then form into 5 or 6 equal balls on a floured board; I used tapiocas starch for the flouring. You can spray your hands with spray oil or just pour a tsp on your hands to help the dough not stick. Round the balls as best as you can; it sure is sticky. Place each in a small pan; I had some tall-sided pans and some tart pans; the walls help keep the bun from spreading too wide. Put the buns on a baking sheet and put in your oven that has been warmed for a minute or 2 so it is about 95-110 degrees. Let rise an hour; they won’t double but they should look bigger and puffy. Remove from the oven and set it to heat to 375 degrees. Put rack in middle of oven.
Topping: take 1 medium egg; beat it well to break up the white and blend it nicely. Brush on the roll tops and sprinkle each one as soon as you egg it with sesame seeds.
Bake for 55 minutes. Let cool for 5 minutes; remove from pans. Let cool about 30-60 minutes; can use while slightly warm or at room temperature. Store in bread bag for a day or two or freeze in a freezer bag; use within 1 month. Enjoy!