Swiss Chard Tacos

Meatless meals don’t thrill me like those made with serious proteins, favorites like salmon, poultry, lamb or pork.  That said, I have a few delightful vegetarian items I make on occasion.  Time to add another to my roster; these swiss chard tacos. My sister made these while I was up visiting her.  I was skeptical but found them to be really delicious and a great way to use up a lot of the swiss chard growing profusely in my August gardens!  No meat but you won’t miss it in these flavorful and filling tacos.

I used Mexican cheese but you can also use Monterey Jack as that is what the original recipe called for.  The recipe is out of a recent Home and Garden magazine. I made a few changes….added some ground cumin for extra spice. Don’t forget the red wine vinegar, really a great finishing touch.

The white corn tortillas (La Bandarita brand) came from Wegmans; they have one up near Boston.  There are three here near me. Enjoy!

chard taco

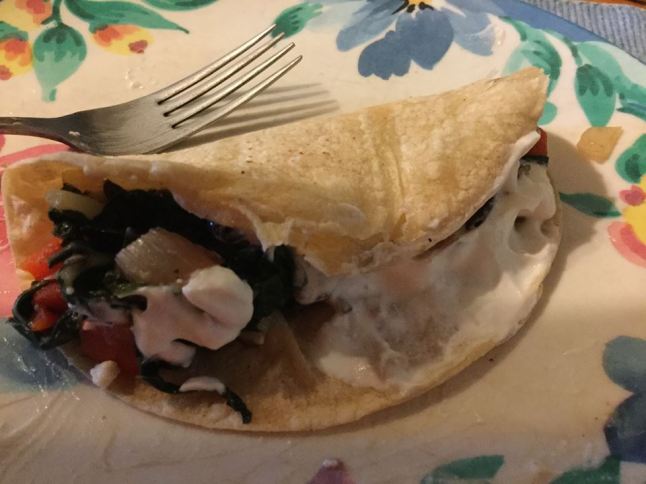
Sorry for the messy picture. I guess I should make a prettier taco!

Karen’s Swiss Chard Tacos

1 lb Swiss chard

½ tsp. cumin seeds

¼ tsp. ground cumin

½ a red onion, chopped

1 red pepper, chopped

1 tbsp. olive oil

1 clove garlic minced

1 Tbsp. red wine vinegar

1 can of black beans, rinsed and well drained

8 tortillas; corn flour

1 cup of Monterey jack cheese or Queso Fresca cheese; grated

1/3 cup sour cream, reduced fat is my preference

cilantro for garnish if desired

Directions:

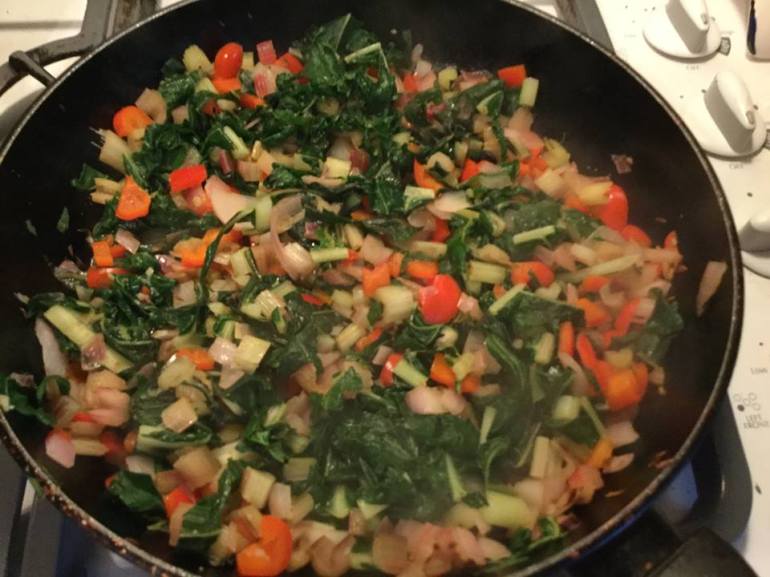
Chop up the chard stems into half inch dice.  Rough chop the rest of the chard and set aside. Heat a large frying pan and add the cumin seeds; cook 1-2 minutes until fragrant.  Add olive oil then chard stems.  Cook 3 minutes until softening.  Add the chard leaves that you have rough chopped, ground cumin, onion, garlic and red pepper.  Cook 3 min, stirring.  Add the red wine vinegar and the black beans.  Stir well, cook 3-4 minutes longer. The greens should be wilted but they don’t need to be fully cooked down.

Meanwhile while the filling cooks; heat oven to 350 degrees.  Lay tortillas out on baking sheets.  Sprinkle grated cheese in the center of each.  Bake 4-5 minutes until cheese starts melting and tortilla is somewhat crisp. Remove from oven.  Place a generous amount of chard mixture on each tortilla.  Top with a spoonful of sour cream.  Sprinkle cilantro over top if desired.  I am not a fan but you might be…

Blueberry Crumb Pie – Delish!

Somehow I haven’t ever shared my recipe for blueberry pie. I went to repost it and found no post!  And as it is blueberry season and I just made a gorgeous blueberry pie this weekend I was feeling the need to share. Plus 2016 is my year of pie and I feel that compulsion to give you another fantastic pie recipe.

This is really easy to create.  Slice and dump together the filling, crumb topping gets quickly made by dumping ingredients in the mixer bowl you used for the bottom crust. You can store any leftover crumb mixture in a sealed container in the fridge; it keeps a few weeks.  This GF crumb topping is perfect for most any fruit pie.

Bake and enjoy summer in a pie in just a few minutes of work.  Don’t eat it piping hot; it should be cooled to room temperature.  You could certainly serve this with vanilla ice cream or any other vanilla topping.

Angie’s GF Blueberry Crumb Pie

Crust:

1 c plus 2 tbsp brown rice flour mix (at bottom of recipe)

2 tbsp sweet rice flour

1 Tbps. granulated sugar

½ tsp xanthan gum

¼ tsp salt

6 Tbps. cold butter cut into 6 chunks

1 lg egg

2 tsp fresh orange or lemon juice

Spray 9 inch metal pie pan with cooking spray, dust with white rice flour.

Mix dry ingredients in bowl of stand electric mixer.  Add butter and mix until crumbly and resembling coarse meal.  Add egg and juice.  Mix until it comes together into big chunks.  Shape into a ball with your hands. Put it on a crust sized piece of wax paper (14 x 14 inches more or less), flatten the crust ball some; put on top of it another piece of wax paper and chill it all in your fridge 15-20 minutes while you prepare the filling.

Filling:

5 cups fresh blueberries – place in medium bowl

Mix with: ½ cup sugar

1/4 tsp. cinnamon

3 tbsp. quick tapioca

Add and stir in

2 tsp. fresh lemon juice

Let stand while you prepare the crust.

Roll out pie crust in a pie bag or between the two sheets of wax paper, try to get the thickness even, no thick middle! Peel off one side of paper and place in pie pan, centered.  Remove other slice of wax paper.  Crimp edges all around.  Fill with fruit mixture.

Crumb topping

Put all four ingredients in the same mixing bowl you made the bottom crust in and mix well with mixer paddle until crumbs form.

¾ c brown rice flour mix

½ c sugar

½ tsp xanthan gum

1/3 c cold butter cut into six chunks

Sprinkle the top of the pie with crumb mix; use as much as you like.  I like about three quarters of the mixture.  Up to your personal taste… It sinks partially into the fruit mixture and adds lots of sweetness and eye appeal.

Bake in a preheated 375 degree oven for 50 or so minutes until the blueberries are bubbly and the crumb crust is light brown.  I put a piece of aluminum foil on top for the last ten minutes if the crumbs are getting too browned.  Cool at least 2 to 4 hours before serving at room temperature.  I think it is best served the same day you make it, or no more then 12 hours after baking for optimal flavor.  The crumbs will get soggy if too much time passes.

Note: if you find your bottom crust is not browning enough bake it empty at 375 degrees for ten minutes before filling it with the fruit.  I am lucky to have a bottom heat pizza style oven which gives me perfect pie crust so I don’t ever have pale pie crust.

Brown Rice Flour Mix (same as King Arthur basic gf blend)

2 c brown rice flour

2/3 c potato starch – not potato flour!

1/3 c tapioca flour

***************************************

The crust and crumb recipes are from Annalise Roberts great cookbook, GF Baking Classics, Second Edition.

Little Cherry Cake

Cherry pie…yes, I’m still obsessing on cherries.  The other week I did make something with the few sour cherries I still had in the freezer.  A small six inch cherry cake. It was so easy; a basic cake batter made with my portable mixer and you sink some sour cherries into the batter, sprinkle with cinnamon sugar and bake.  The batter swallows up the cherries and they bake in the cake creating a wonderful, sweet, little treat.  I know… trying to eat less sugar but I really wanted a smaller cake to share with my mom and it was wildly successful.  Subtle cherry flavor in a tender golden blanket of cake.  Totally yummy and really not that much sugar.

The recipe is by Annalise Roberts and the original can be found on her blog.  I changed it a bit for my small cake version. She uses sweet cherries and I prefer sour.  This little cake serves four.  It goes together quickly and makes a great dessert for a small group.  Guessing vanilla ice cream would be fantastic on it but never got to that!

Little Cherry Cake

Heaping 1/3 cup c. sugar

¼ c. butter, room temperature

½ brown rice flour mix

¾ tsp. baking powder

¼ tsp. xanthan gum

Pinch of salt

1 large egg, room temperature

½ tsp. almond extract

¼ tsp. vanilla extract

¾ to 1 cup pitted sour cherries (if frozen do not fully defrost)

1-2 tsp. cinnamon sugar

Directions: Heat oven to 350 degrees.  Put rack in center to lower center of oven.  Spray a six inch cake pan with cooking spray.

Cream the butter and sugar in a bowl using an electric hand held mixer, not a standing mixer as that is too powerful.  Blend until smooth. Add the eggs, dry ingredients and extracts, beat 2 min at medium speed.  Pour batter into pan.  Place cherries evenly around the top; push them in a bit so they are not just laying on the surface. Sprinkle with the cinnamon sugar. Bake for about 35 minutes; test to see if the batter is set.  Cool on rack before cutting. Store leftover cake tightly wrapped (if there is any!)

cherry torte 001

Not the prettiest cake slice; a quarter of it.  It tasted better than it looks here!

Brown Rice Flour Mix  (Same as King Arthur GF blend)
2 c brown rice flour

2/3 c potato starch

1/3 c tapioca flour

Pickles Without the Heat

Some of us adore pickles and some dislike them.  If you are a pickle fan read on.  If not, read anyway as these are far better than the tired flabby canned pickles found at the grocery store.  A good gardening friend gave me this recipe.  It is really easy and rather fun to construct.  Even better is that you can pickle most any veggies. I have tried zucchini, carrots, cauliflower, green peppers, cabbage and red peppers.  Of course, cucumbers are in there too!  Debating beets….hummm. Plus there is no heating up the kitchen with canning equipment which has real appeal in this endless heat wave. sausage and beans, beets 006.JPG

You do need a couple grape leaves.  You might be able to find a neighbor with a grape vine.  I am sure you could use wild grape leaves from a state park or along a country road.   They really add to the authenticity of it so snag a few from somewhere.

Also needed are 3 dill heads (the flowers of a dill plant).  This might be more problematic but if you know a real gardener, aka someone like me, you can beg the dill heads as frankly they are not used much for cooking and I was happy to give some to the friend who gave me this recipe.  Grow your own dill for next summer; it is so easy to do and it does reseed and come back year after year.  Dill is lovely in potato salad and in other salads like my stuffed tomatoes, see that blog post… pickle jar

Refrigerator Pickles

2 cups white vinegar

¼ cup salt, I used kosher salt in mine

4 cups water (I used 3)

¾ cup sugar

3 garlic cloves cut up

3 dill heads

2 grape leaves

Bring the first four ingredients to a boil in a sauce pan and let cool fully.  Put the other three ingredients in the bottom of a gallon jar.  Cut up your veggies and pile in the jar.  Top with the vinegar mixture. Put on the lid. Put in the fridge and let marinate for 3 days before trying it.

I have pickled cucumbers, short zucchini spears, broken up cauliflower heads, thin slices of white turnip, peppers, broccoli spears, and celery chunks.

My grandson Aiden who is almost five clamors for the pickle jar to come out when he eats meals here.  I say, eat your food and you can have some pickles! He gobbles up his food and waits expectantly for me to fish out a pickle or two.

I like how fresh they are and how crunchy the pieces still are. Plus they have no additives or preservatives.  You can keep adding veggies as you use them up.  I think the tough part is fishing them out of the jar.  The other day I lost a fork in there but luckily it didn’t go to the bottom of the jar; a cuke round stopped its descent! Now, go pickle fresh veggies and have some fun with it….

Originally posted by me late last summer 2014.

Cherry Berry Pie in July

Just cause it is hot doesn’t mean I can’t bake a pie.  Ran my exhaust fan to carry off some of the excess heat.  Worth it for the yummy pie to share with friends and family. I was out of town and missed sour cherry season in late June. Bummer.  So…cherry pie; want it but didn’t want canned pie filling.  No sour cherries in the farm stand, no frozen ones in my grocery store.  What to do.  I decided to make a cherry berry pie with a four berry blend from the grocery store’s frozen case. I have used this blend before to make muffins and it did pretty well.  One other options is jarred sour cherries, maybe next cherry pie attempt will be with them.

If you prefer a lattice it can be made by doubling this pie crust and some careful construction work.  I tend to go the easy route of the crumb as everyone loves it. You could make a smaller 8 inch pie; use a cup less fruit and cut the sugar some, ditto for the tapioca. This pie is fantastic with a scoop of vanilla ice cream on the side. cherry berry pie 005

This recipe is a blending of my own pie filling and the pie crust and crumb recipes from Annalise Robert’s cookbook, Gluten-Free Baking Classics.  I used a touch less sugar a a bit more fruit, and the frozen fruit blend to create my own special pie.  That cookbook is a fabulous resource and I can’t recommend it enough to anyone trying to bake gluten free for a family member.  There is nothing like the classic dessert of a pie to comfort a celiac who can’t eat what they used to.

cherry berry pie 004
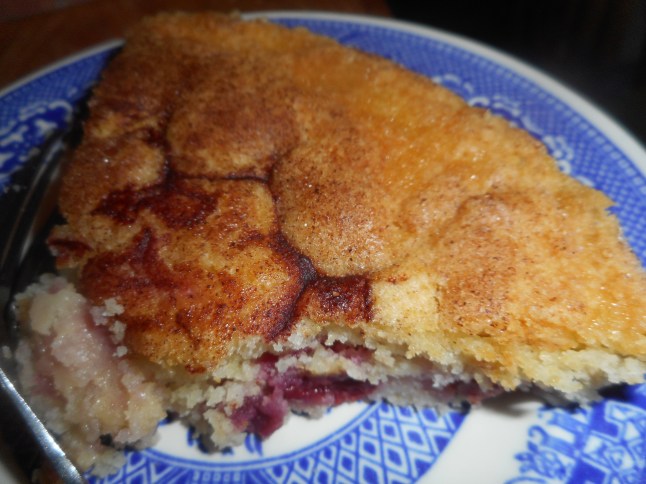
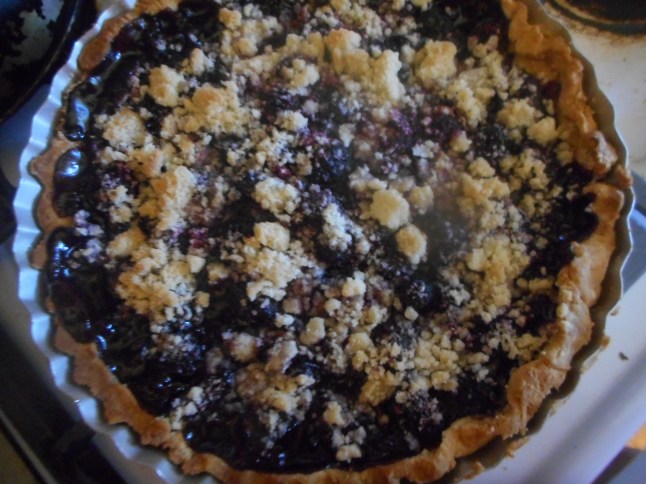
Angie’s GF Cherry Berry Crumb Pie

Crust:

1 c plus 2 tbsp brown rice flour mix (at bottom of recipe)

2 tbsp sweet rice flour

1 Tbps. granulated sugar

½ tsp xanthan gum

¼ tsp salt

6 Tbsp. cold butter cut into 6 chunks

1 lg egg

2 tsp fresh orange or lemon juice

———————–

Spray 9 inch metal pie pan with cooking spray, dust with white rice flour.

Mix dry ingredients in bowl of stand electric mixer.  Add butter and mix until crumbly and resembling coarse meal.  Add egg and juice.  Mix until it comes together into big chunks.  Shape into a ball with your hands. Put it on a crust sized piece of wax paper (14 x 14 inches more or less), flatten the crust ball some; put on top of it another piece of wax paper and chill it all in your fridge 15-20 minutes while you ready the crumb crust and the fruit.

Filling:

6 cups fresh or frozen sweet cherry, blackberry, blueberry and raspberry mix   (two plastic 12 oz packages)

Mix the following in a small bowl and pour over the cherries:

1/3 to ½ cup granulated sugar

3 tbsp. tapioca granules

1/4 tsp. cinnamon

Roll out pie crust between two sheets of wax paper or in a pie bag; try to get the thickness even, no thick middle! Peel off one side of paper and place in pie pan, centered.  Remove other slice of wax paper.  Crimp edges all around.  Fill with sweetened fruit mix.  Sprinkle the crumb topping (1 to 1½ cup) evenly over this mixture.  The more crumbs the thicker the crust they will form; for a really thick crust use all the crumbs from the recipe below.

Bake in a preheated 400 degree oven for 30 minutes with a piece of aluminum foil on top of the pie, then 25-30 more minutes at 375 degrees uncovered until bubbly and the crust is light brown.  If you use frozen berries like I did, don’t defrost them more than half way; make sure it is bubbling and light brown before taking it out of the oven. Cool at least 2 hours before serving at room temperature.

Note: I bake pies in my bottom heat pizza oven and it gives me a great browned crust.  If your oven isn’t bottom heat you might want to pre-bake the crust 10 minutes before filling and topping the fruit.

Crumb topping

Put all four ingredients in the same mixing bowl you made the bottom crust in and mix well with mixer paddle until crumbs form. Don’t over mix or you will get a soft dough instead of crumbs; not a good thing…done it and not happy with myself…

¾ c brown rice flour mix

½ c granulated sugar

½ tsp xanthan gum

1/3 c cold butter cut into six chunks

Brown Rice Flour Mix  (Same as King Arthur GF blend)
2 c brown rice flour

2/3 c potato starch

1/3 c tapioca flour