Blueberry Muffins: Delicious!

spagetti and raspberry muffins 001

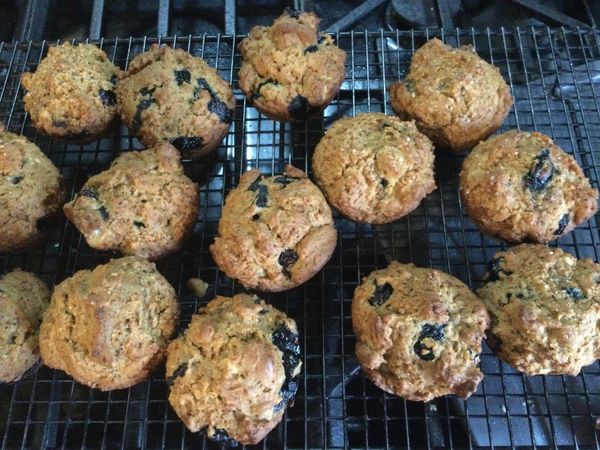
Oh….the muffin saga continues. What shall I make for summer snack time?  Turning to my trusty muffin recipe I try a new version that somehow, I never seem to make: blueberry. Knowing I will get a similar texture to the cranberry blueberry I have made before, if I use the same easy to dump together recipe. So easy: I think I can almost do it in my sleep! That’s why these fruity muffins are often my go-to baked snack; they can be quickly thrown together, a dependably yummy and it is simple to vary the flavor depending on what fruit is available. I mention all this that so you can feel comfortable making your own version of them.  They are always tasty and far cheaper and healthier than GF muffins you can buy.

I used fresh blueberries but frozen from the freezer works great.

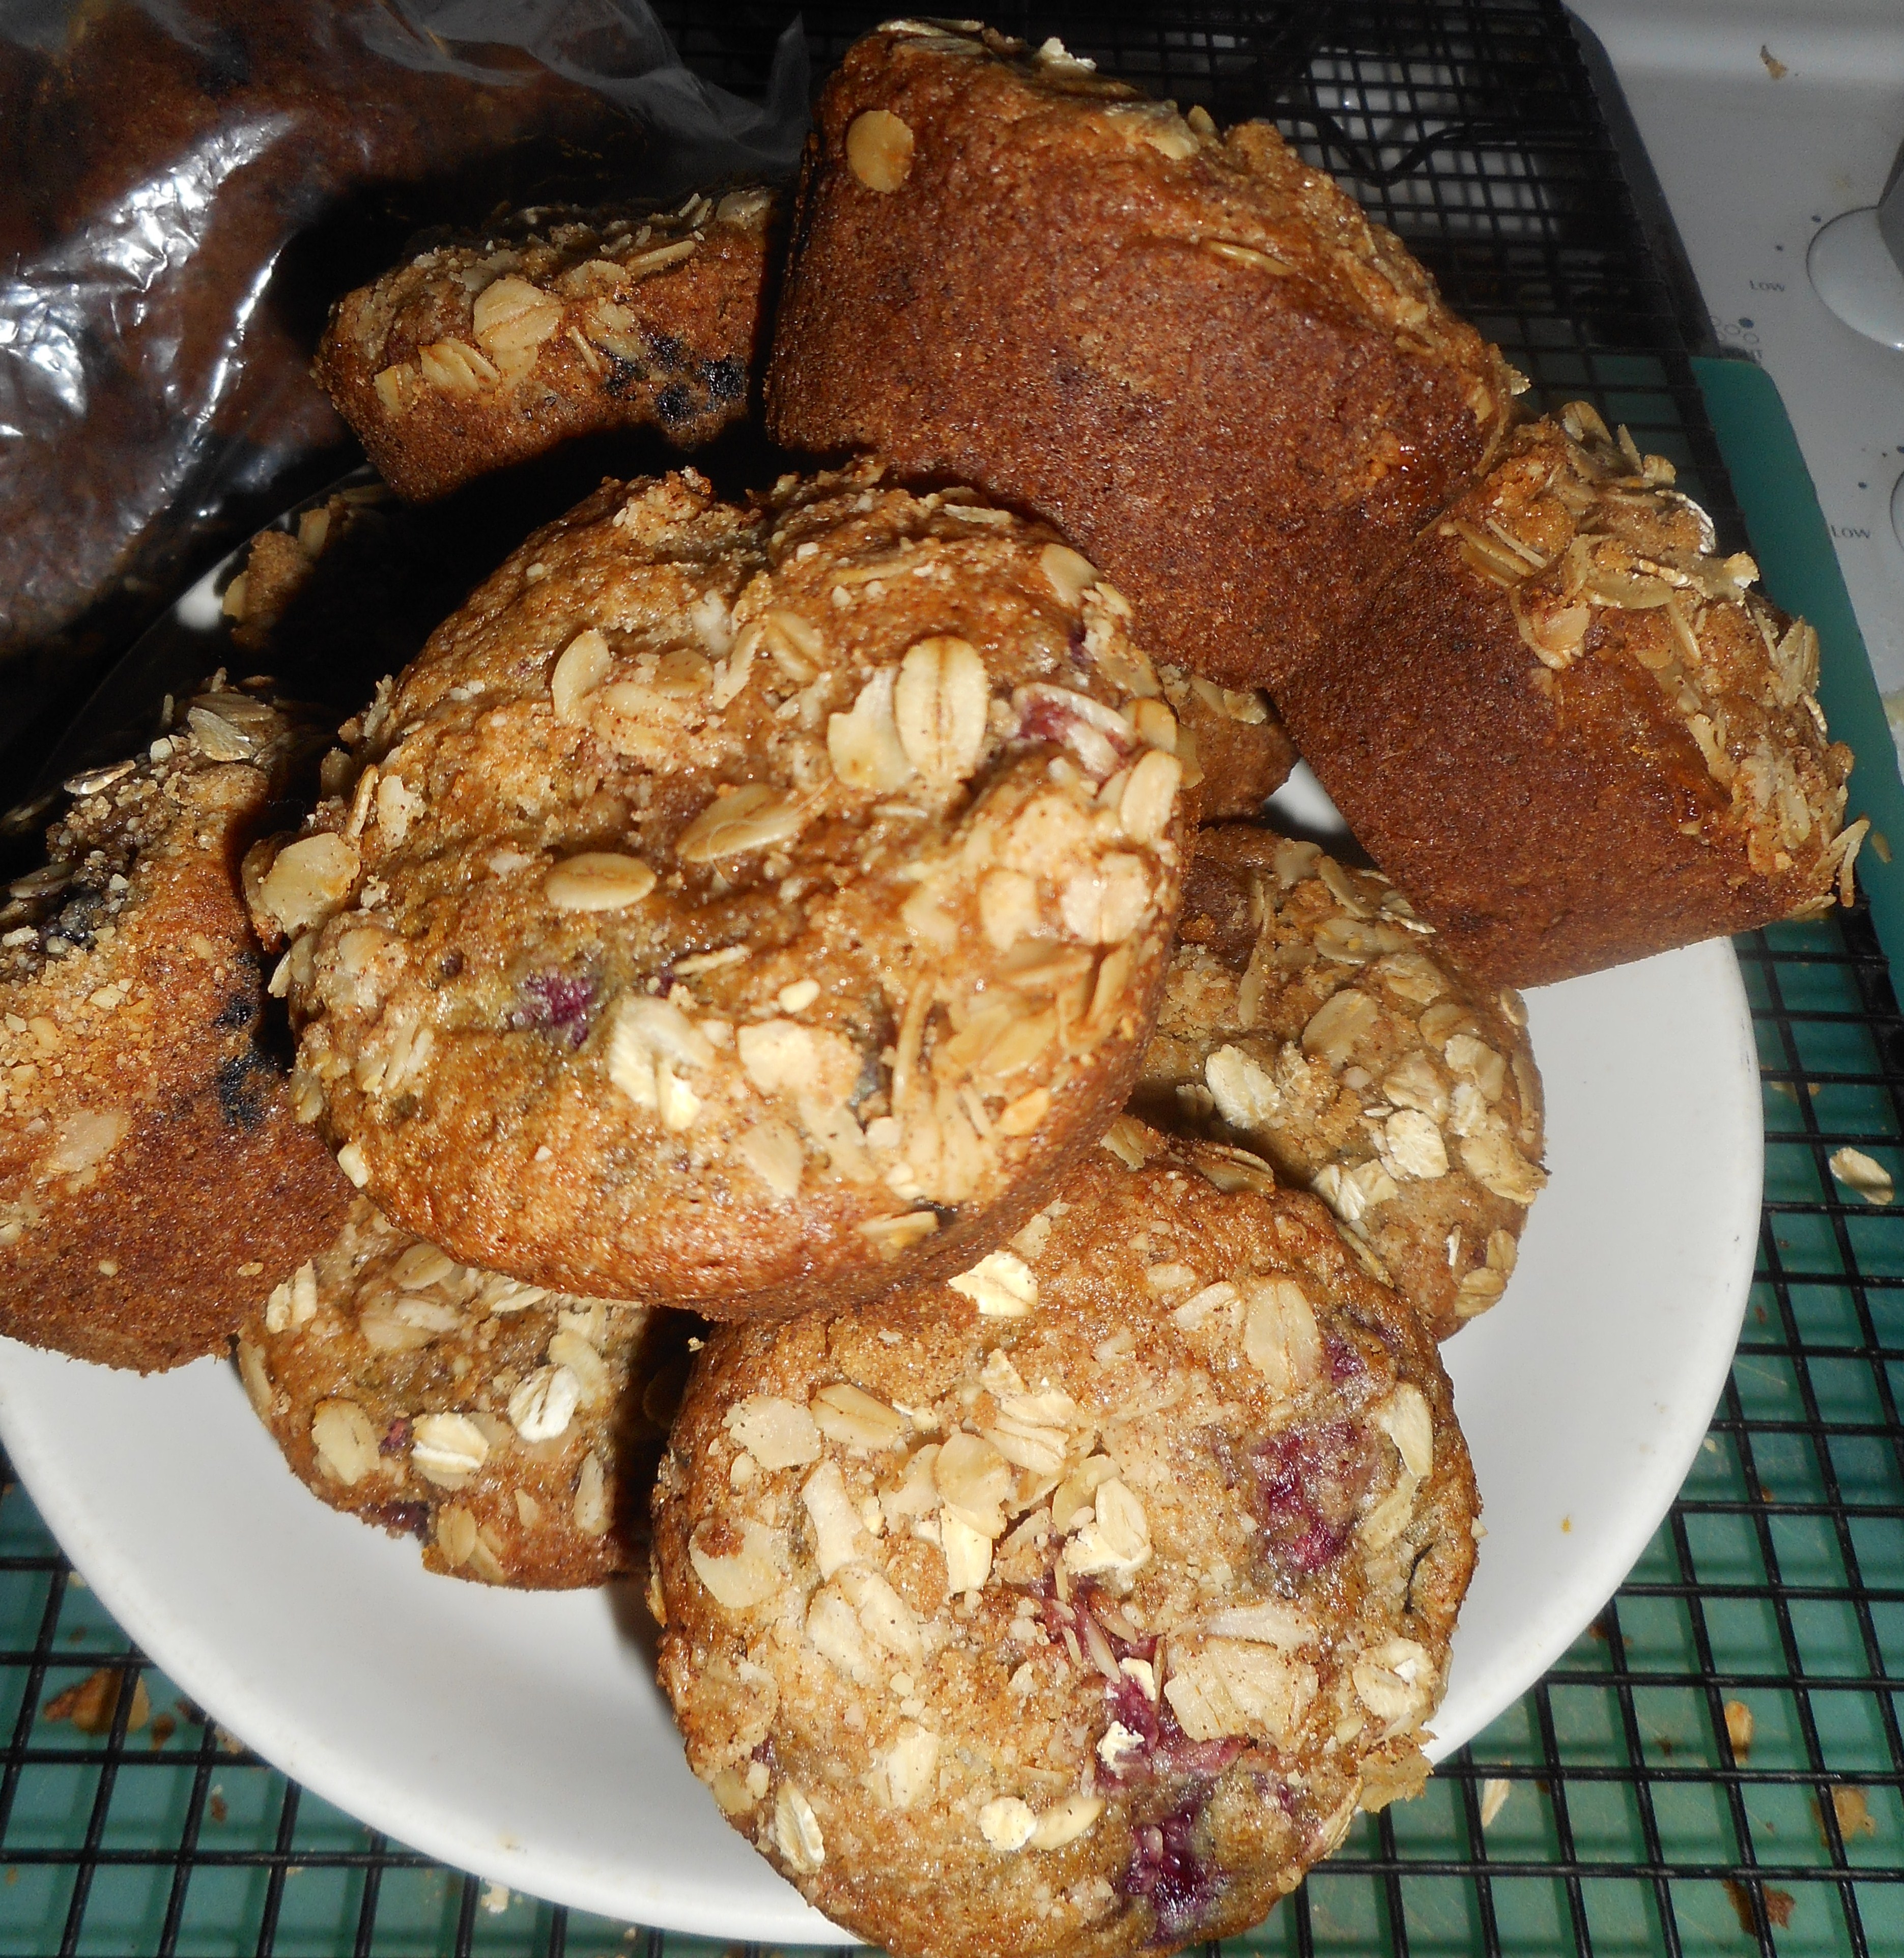
The streusel topping is optional; it ensures that they look gorgeous and adds an extra layer of flavor. I didn’t use it this time but include it as it is a great option.  There are walnuts in them to, so you get some really great nutrients from the fruit, oats and nuts.  Not much guilt in eating one of these treats! You can swap the white sugar for coconut palm sugar like I did; it barely raises my blood sugar.  I love how healthy these muffins are and the envious looks people give me when I chow down on one as they eat some noxious bag of salty/sugary snack full of preservatives and who knows what. People are envying ME and my GF treat…Love It! Much better than the pity party I sometimes face when people hear what I can’t eat anymore.

As always, I taste tested a muffin from the batch while they were still warm out of the oven: at the moment of perfection.  This version is up there with the cranberry blueberry muffins I am addicted to.

It is smart to freeze any you won’t eat in two day’s time; a zip lock freezer bag works great. They last 3-4 weeks in the freezer.

Blueberry Muffins

2 cups brown rice flour mix (see below)

2/3 cup granulated sugar or coconut palm sugar

1 tbsp. baking powder

1 tsp. baking soda

¾ tsp. xanthan gum

¼ tsp. salt

1/2 tsp cinnamon

1 1/3 cup fresh or frozen blueberries

1/3 cup chopped walnuts.

2 large eggs

½ cup milk, 1 or 2 percent

½ cup canola oil

Optional Topping: Mix the following in a bowl, make sure the butter is in tiny pebbles; use your fingertips to blend.

½ cup rolled oats

¼ cup brown sugar

2 tbsp. almond meal

1½ tbsp. butter

¼ tsp. cinnamon

——-

Directions: Heat your oven to 375 degrees, placing the rack in middle of oven.  Spray muffin pans with cooking spray.  One batch makes 14-16 muffins.  I got 15 when I made them.

Mix all dry ingredients in bowl of stand mixer or big bowl Add fruit and walnuts; stir to coat them with dry mix.  Combine milk and oil.  Beat in eggs, add vanilla.  Add liquids to big bowl; stir just until blended.  It is a very thick batter. You could add another tablespoon or two of milk if it seems too thick to your mind.

Fill muffin pans 2/3 full.  I use a big serving spoon and fill the spoon about half way to dump in each muffin space. Sprinkle the top with the topping. Press it in a bit so it won’t all flake off after baking. Bake 21-23 min until golden brown. Do not over bake or they will taste dry.  Remove immediately from the pans and cool on a rack.  They freeze well for a few weeks, if they last that long.  Keeps in fridge (well wrapped) or an airtight cookie jar for 2-3 days.

Brown Rice Flour Mix base mix 

(This mix is the same as King Arthur’s basic gf blend) [Not their measure for measure blend!!]
2 c brown rice flour

2/3 c potato starch

1/3 c tapioca flour

Swiss Chard Tacos

Tomorrow is Tuesday; taco Tuesday to be exact! Meatless meals don’t thrill me like those made with serious proteins, favorites like salmon, poultry, lamb or pork.  That said, I have a few delightful vegetarian items I make on occasion.  Time to add another to my roster; these Swiss chard tacos. My sister made these while I was up visiting her.  I was skeptical but found them to be really delicious and a great way to use up a lot of the Swiss chard growing profusely in my gardens!  No meat but you won’t miss it in these flavorful and filling tacos.

I sometimes use Mexican cheese but you can also use Monterey Jack as that is what the original recipe called for and what I currently prefer.  The recipe is out of an old Home and Garden magazine. I made a few changes….added some ground cumin for extra spice. Don’t forget the red wine vinegar, really a great finishing touch.

The white corn tortillas in these pictures (La Bandarita brand) came from Wegmans; they have one up near Boston.  There are three Wegman’s here near me. I got some light corn tortillas today at my local Giant; they work well. Enjoy!

chard taco

Sorry for the messy picture. I guess I should make a prettier taco!

Karen’s Swiss Chard Tacos

1 lb Swiss chard

½ tsp. cumin seeds

¼ tsp. ground cumin

½ a red onion, chopped

1 red pepper, chopped

1 tbsp. olive oil

1 clove garlic minced

1 Tbsp. red wine vinegar

1 can of black beans, rinsed and well drained

8 tortillas; corn flour

1 cup of Monterey jack cheese or Queso Fresca cheese; grated

1/3 cup sour cream, reduced fat is my preference

cilantro for garnish if desired

Directions:

Chop up the chard stems into half inch dice.  Rough chop the rest of the chard and set aside. Heat a large frying pan and add the cumin seeds; cook 1-2 minutes until fragrant.  Add olive oil then chard stems.  Cook 3 minutes until softening.  Add the chard leaves that you have rough chopped, ground cumin, onion, garlic and red pepper.  Cook 3 min, stirring.  Add the red wine vinegar and the black beans.  Stir well, cook 3-4 minutes longer. The greens should be wilted but they don’t need to be fully cooked down.

Meanwhile while the filling cooks; heat oven to 350 degrees.  Lay tortillas out on baking sheets.  Sprinkle grated cheese in the center of each.  Bake 4-5 minutes until cheese starts melting and tortilla is somewhat crisp. Remove from oven.  Place a generous amount of chard mixture on each tortilla.  Top with a spoonful of sour cream.  Sprinkle cilantro over top if desired.  I am not a fan but you might be…

Summer Risotto: Light and Delicious

I love risotto and am always looking for new recipes. I saw this one on epicurious but I don’t have a subscription, so I lost access to the recipe and had to create my own version. The garlic clove (minced) is optional as is the cheese. It has a lighter texture than my usual risotto made with chicken broth and white wine and a delicate flavor that if you didn’t know it was pineapple you might be stumped as to what was used in place of white wine. I am crazy about it’s subtle flavor and lightened texture. I left off the cheese and garlic but feel free to add them. It is vegetarian, made with pseudo butter it can be vegan. It is my new fav summer dish!

I served it topped with sautéed scallops and shrimp, 3 of each. You can actually cook the shrimp in the rice; toss the peeled raw shrimp in for the last 4-6 minutes or so of cooking. I pan fried the scallops, in mild olive oil for 2 minutes on a side until browned. This is a lovely light summer dish for delightful dining. Other seafood might be lovely too, try oven baked pork tenderloin slices or some sautéed boneless chicken.

The tiny grains of short rice swell up as they absorb the liquid you add to the pan, stirring frequently.
Pan fried scallops and shrimp poached in the rice. Waiting to be added on top of the plated risotto.
Sorry about the old and sad melamine plate; it was a delicious meal for sure!

Ingredients:

3 Tbsp. butter divided

1 Tbsp. mild olive oil

1 cup arborio rice (I used Italian Vialone Nano rice imported from Itally which is especially authentic for risotto.)

1/2 cup chopped onion

1 minced garlic clove

1 small can pineapple juice; about 2/3 cup. Add veggie broth to make the total 3 1/4 cups.

1/2 tsp. sea salt

1/4 tsp. fresh ground black pepper

1/4-1/3 cup freshly grated parmesan cheese (optional)

1-2 Tbsp. finely chopped fresh basil or whole tiny basil leaves

Directions: Heat large saucepan (I use my mini wok) and add 2 tbsp. butter and the oil, melt butter and add chopped onion, cook 2 minutes; add the rice. Stir and cook 2 minutes while you heat the veggie broth and pineapple juice in a saucepan until hot but not boiling.

To the pan add garlic if you want (optional) and then add broth/juice mixture, one ladle full at a time.  Stir after adding each ladle and stir a couple times as it cooks.  When the broth is mostly absorbed add another ladle. When I add the first ladle, I set my timer for 18 minutes. When the 18 minutes have elapsed add a tablespoon of butter and 1/4 the chopped basil, also salt and pepper. Stir well and cook 1-2 minutes. Add another few tablespoons of veggie broth if it looks dry. I did a quarter cup more liquid when I made it. Stir frequently and taste; can cook another minute if necessary (total of 20 minutes for the dish once rice added.) Turn it off and stir in optional grated cheese, then add the basil leaves, stir and serve.

I served it in a mound with some sauted whole shrimp and scallops fried top and bottom about 4 minutes total. Delicious!

Sweet Corn Cooking Hack

Sweet corn season is here.  In many places really good sweet corn can be had, like farms markets, road side stands and even Wegmans!  I don’t know about you but when I only am making one or two ears it seems silly to fire up a tall pot of water.  I do steam the corn which only takes an inch or so of hot water but still…too much to do.

A few summers ago on a hot day, I realized there was a quick and easy way to make an ear…or two without that big hot pan of water and steam. I just take a large frying pan, put a quarter inch of water in it, sprinkle of salt and let it heat until bubbling.  I then lay in my ear or two which I have husked and removed all the silk.  Then the pan is topped with a lid or an empty pizza pan if your frying pan is too big for your lids.  Cook it the usual time; depends on how fresh the corn is.  The fresher your corn ears, the less cooking time you need.  The steam in the pan will cook it really fast.  Maybe 6 to 8 minutes. I have been doing this since 2016 and it is such a better way to steam corn. Just give it a try; I know you will find this a great way to cook sweet corn.

And the bonus is that if it runs out of water your ear will get a bit of carmelization going which only adds to the flavor.  In fact, I hope it gets browned a bit; sometimes I rotate the ear to brown it on another side.  Remove with tongs when your corn reaches the done stage you like.  Sometimes I take a quick bite to test for eating readiness!

Serve your ear(s) with salt and butter and enjoy fresh corn without heating the kitchen up much.  Oh, and I have some lovely prong thingies my sister gave me for pushing into the corn, so my fingers stay cool as I munch corn.  Great idea. Get them! Mine are plain like these; they do make corny looking versions, but I prefer these simple looking ones. 

Originally posted in 2016. A few minor grammar changes were made.  corn prongs

Coconut Chicken and Rice

This yummy recipe is great for hot summer days as it is made in an Instant Pot. It doesn’t warm up the kitchen and allows me to do other things while my IP works hard to make a great dish that is quick, delicious and healthy. It is from my favorite Instant Pot cookbook The Instant Pot Electric Pressure Cookbook by Laurel Randolph. There are many excellent recipes in this book and most of them can be gluten free; either naturally or with a little tweeting of the ingredients. I highly recommend it for great recipes and it is well designed for easy use.

My notes: I do not like cilantro so I just sprinkled some parsley in the pot and it was fine. It has a lot of curry powder but I found it to be well balanced and not too spicy; if you really want to, cut it back by a third. I used frozen ginger as it keeps so well and chops/grates easily. Don’t forget the lime to squeeze over the plate; really adds a fresh note.

Yummy Coconut Chicken and Rice

Ingredients

1 Tbsp. EVOL

1 large onion sliced vertically into 1/4 inch strips

a 1 inch length of ginger, peeled and sliced into fine sticks

2-3 garlic cloves minced

1 Tbsp curry powder

1 tsp. ground tumeric

kosher salt

ground black pepper

1 14 oz can light coconut milk

4 chicken thighs; bone in, skin on

1/2 cup water

1 1/3 cup jasmine rice

1-2 Tsp. parsley or cilantro leaves, chopped fine.

1- 1 1/2 tsp. sugar

1 lime cut in wedges

Directions: set IP on sauté, add EVOL. When hot add the sliced onions, stir for a minute, add the ginger, cook 2 minutes, add garlic, cook 30 seconds and add the two spices, stir well. Add the chicken thighs, turn over to coat with spices. Add salt and pepper to taste; I did 1/2 tsp. salt and just a few turns of pepper. Add the water and coconut milk, stir around, put the lid on and set for 13 minutes. When timer goes off, set to quick vent. Remove chicken to a plate and add the rice, parsley and sugar, stir. Close lid and set to 4 minutes. When done hit cancel and let stand 10 minutes, then vent and open. I served mine in a wide shallow bowl; removed the skin and squeezed lime juice over it all. Enjoy!