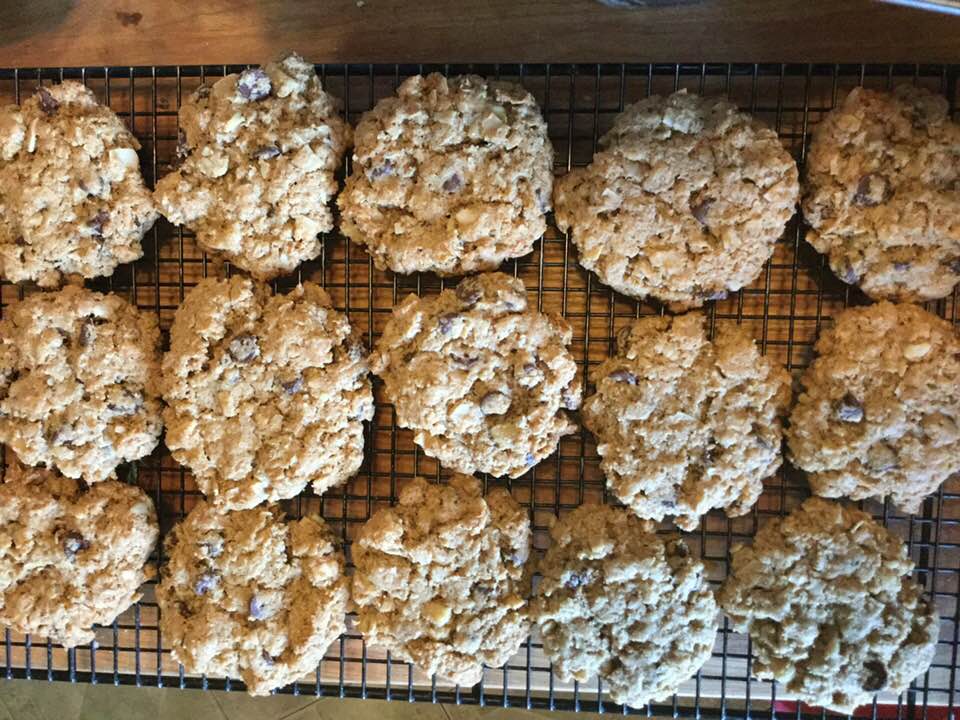
I heard about recipes for three ingredient peanut butter cookies. I wanted something a bit more actual cookie texture (think less greasy) and with less sugar than the versions I have come across. So I decided to play with the proportions plus I wanted to add some gf flour. I cut the sugar by one fourth and dumped in a small amount of flour. To make sure my results weren’t like a brick I added some baking powder and to keep them from being incredibly crumbly messes I tossed in a touch of xanthan gum. The resulting dough was still a tad crumbly but when you scrunch up about a tablespoon with your fingers it forms a ball that can be flattened with a fork dipped in granulated sugar in the traditional cross hatch of all great peanut butter cookies.
The results: simple but tasty = peanut butter heaven. I must advise that I used chunky peanut butter. I don’t much care for creamy peanut butter so I try not to have to buy it for recipes. So I chunked it and my somewhat picky eater who doesn’t like chunky peanut butter was in love with these beauties. I am guessing it would work with creamy. Let me know how they turn out if you make them with a creamy peanut butter.
To review, significantly lower in sugar than most three ingredient recipes, great flavor and texture and simple to make. Bonus: they still remind me of the peanut butter cookies of my childhood…which were full of all purpose flour! I used my typical flour blend; King Arthur gf blend but I am sure Better Batter or Cup for Cup will work. If your blend has gum in it no additional gum is needed so leave that quarter teaspoon out.
Note: if you love the salty cookie concept, sprinkle with coarse sea salt before baking. Either sweet or salty they are somewhat addictive, especially fantastic with a glass of cold milk.
Chunky Peanut Butter cookies
1 cup chunky peanut butter ¾ cup sugar 1 large egg (room temp) ½ cup gf flour blend (I used King Arthur basic gf blend) ½ tsp. baking powder ¼ tsp. xanthan gum
¼ cup sugar for fork action Coarse sea salt (optional)
Directions: Mix first six ingredients well in stand mixer. Form into balls by squeezing in hand. Place on ungreased cookie sheet, press with fork dipped into sugar. Sprinkle with coarse sea salt if desired.
Bake at 375 for 9 to 11 minutes. Watch carefully – they burn easily. Let stand one minute before lifting off with pancake turner to a cooling rack. Eat and enjoy these gems of cookies…you will be taken back to your childhood.
December is upon us. Pies are being baked for dessert, pumpkin roll is on the menu and cookie season is pretty much here. I have already had emergency calls about gf flour choices and substitutions in creating something gf when the baker is not gf and is more than a little confused. So, I am reposting this flour treatise from last year, in the hopes that folks will read it and use this information to have the best possible results. GF baking is more technical than wheat flour-based recipes. Substituting is trickier especially flour subbing. So, before you make those gf cookies for a family member, read up on the differences, so you use the right flour.
So, I am writing this post for a friend who wants to cook gf cookies for someone in her family for the holidays. I want to go over the flour issue particularly for someone new to cooking gf meals. It is slightly tricky, so I am going to try to make it clear for everyone: here goes.
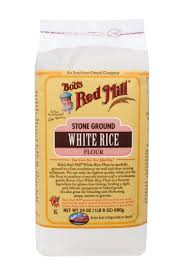
you could use this rice flour for gravy making
There are individual gf flours like rice flour, buckwheat flour, oat flour, tapioca flour, sweet rice flour, potato starch, cornstarch, sorghum flour, brown rice flour, etc.! A bewildering array of choices as almost any grain can be ground into a flour. Flour can then be processed to create a starch, which tends to be nearly flavorless but often has a big purpose in gf baking. I rarely use just one flour in a baking recipe. Why? Because a single flour is often missing an important characteristic of what we want in a baking result. A mixture has different kinds of flours to replicate all purpose flour (wheat based) or whole grain flour (also wheat based). Without the gluten there are a number of ways to make it a useful blend for cooking or baking. That said, I use just single flour blends in sauces. Just for sauces people!
I usually use blends for baking, 2-6 flours that work together to mimic wheat-based flour in different applications like bread, cake, cobbler, cookies, pastry or pasta dough. I have a number of them but my favorite is one you can buy in most stores. King Arthur’s Basic GF Blend; made of a proportional blend of brown rice flour, potato starch and tapioca starch. I use it for over 90% of my baking and cooking needs. There are a number of blends available from companies like Bob’s Red Mill or Jeanes. One of my favorites is Better Batter; never see it in the store but it can be found on line. There are many, many blends provided in gf cookbooks. It can cause a traffic jam of jars/cans/zip lock bags of blends labeled and stored in your freezer or fridge. Some of these blends have a gum like xanthan gum included. The gum helps your finished bread/cookie/cake hold together – in wheat based recipes it is the gluten that is the “glue” that holds things together. My blend doesn’t have it so I add it based upon my recipe. Xanthan or guar gum are commonly used. Doesn’t take much xanthan gum; ½-1 tsp is often enough. You should always check on this gum issue; if none in the flour mix you will need to add some; often about 1/2 teaspoon per cup of flour. This amount of gum does vary due to what you are making. Look at a similar gf recipe and add as much gum as that recipe does.
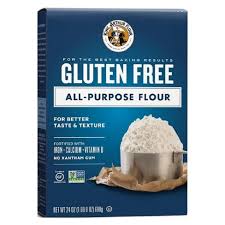
If your recipe is a recipe not formatted for gluten free baking, you must use a special blend meant for that circumstance. They are called measure for measure or one-for-one blends. They were not around a decade ago; fairly new. They are carefully calibrated to sub in for all purpose flour. They may not work as a substitute for whole wheat or rye flour. Let me know if you successfully do that!
I have used this measure for measure blend and had good results. It is calibrated to be substitutable in any gluten flour-based recipe except I would not recommend it for yeasted breads. Bob’s Red Mill calls it 1 to 1 Baking Flour; same idea as measure for measure. Again, use this in your regular recipe instead of the all-purpose flour in the recipe. Not suggested for yeast breads.
As I wrote above, measure for measure flowers are fairly new and very useful. They are for when you want to make a normally gluten-based recipe but use a gf flour. FYI: most gf recipes have been altered from their original recipe or are created just for gf flour. If you want to take those cookies, you can’t enjoy anymore and sub in gf flour these new measure for measure blends are perfect to do that. You don’t need to alter your recipe or add gum. The flour blend is made to mimic regular all-purpose flour. It is not interchangeable with things like the Basic GF Blend from King Arthur that I mention above. Don’t use measure for measure in a gf calibrated recipe, use it to make stuff from your old wheat flour-based recipes. King Arthur or Bob’s Red Mill or a few other companies have a measure for measure blend so get that if you want to take your gluten-based recipe and change it to gf. I must caution you that these flours don’t work as well if you are replacing flour in a yeast bread recipe. Works for quick breads, cookies, muffins, and many cakes but I wouldn’t make my old fav Italian bread recipe with these measure for measure as the result is unlikely to be similar to the recipe as made with wheat-based flour. Besides, I have an awesome gf Italian bread recipe my family clamors for!
One more thing, many companies now have gf baking mixes that can be used to make muffins, cookies, cakes, pancakes, etc. They are different from the blends described above. Do not substitute those blends for a basic blend like the one I use. These blends already have gum, baking powder, salt, etc. added to the flour. They are very convenient and there are lots of recipes formulated for using them.
I used an image for King Arthur baking mix as this is the only premade mix I have tried. It works great!
To repeat; there are single flours, there are blends with or without gum added, there are measure for measure blends for use in gluten based recipes you want to recreate as a gf dish and there are baking mixes that can be used as a starting place for a quickly constructed baked good like a cake, cookie or muffin. I know, it seems complicated but read your recipe carefully so you get the right kind of flour to make it successfully. The wrong flour will give you a poor result as gf baking is relatively unforgiving of big errors like that.
Oh, and there are read-made cake or brownie mixes just like you can buy with wheat based flour; you add eggs, milk/water and oil to them to complete the mixture.
None of these blends/mixes are interchangeable between other types of blends. Use the blend the gluten free recipe asks for. If it is an old all purpose flour based recipe use the measure for measure. Except; do not use that measure for measure for a yeasted bread; unlikely to work especially when you use over 2 cups of it in a recipe; the more it is depending on flour the less likely it will be successful.
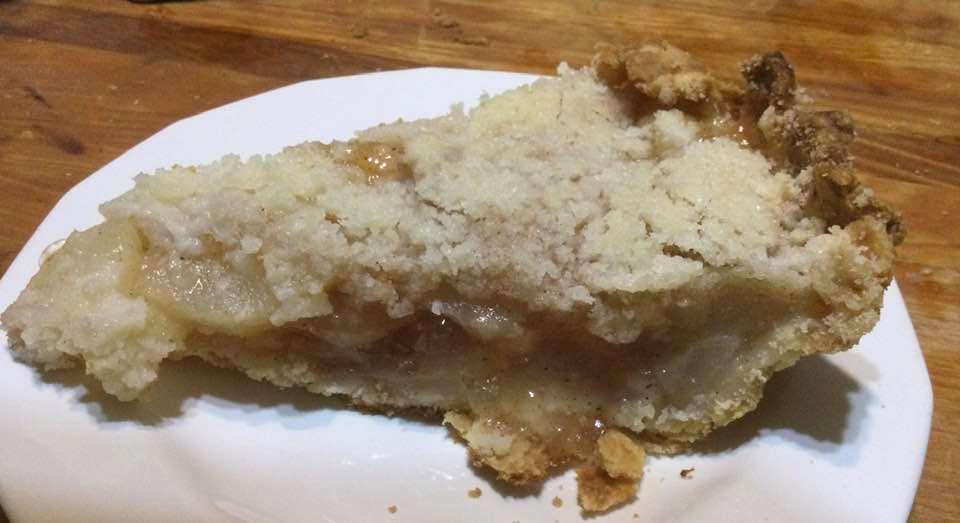
pie made with King Arthur Basic GF flour blend
My recipes generally tell you which flour blend I used. You cannot sub in measure for measure for a basic blend. Nor can you use a baking mix for anything but a recipe meant specifically for a baking mix. Get the right flour and you will have a great start towards a delicious result. I hope I have educated you on this issue so you can be successful if you need to bake gf this holiday season. Have fun baking!
PS: I am baking Christmas cookies Sunday afternoon at a friend’s house; we will be using measure for measure mix for some recipes and King Arthur Basic GF Blend for some other recipes; it really depends on the recipe. I anticipate some delicious tender cookies that everyone will love whether they are eating gf always or just at this family’s gathering.
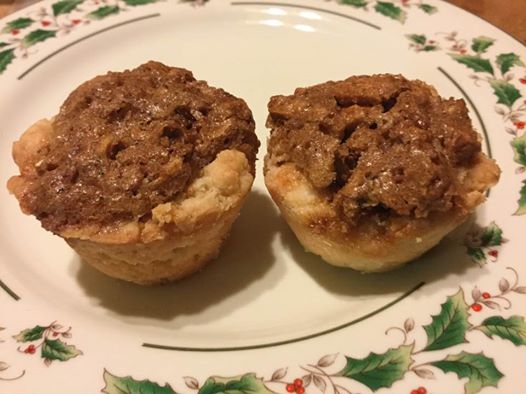
If you don’t have quite enough apples for a pie you can make this quick and delish apple pan dowdy. It sounds very old fashioned and I think it is just that: old school yummy. I believe the name comes from the messy way you create the final look; turning the crust under the hot fruit and baking again so that crust get finished as it soaks in the juices and your dessert becomes a bit more like an apple crisp than a pie. I believe my recipe came originally from a very old Betty Crocker cookbook. I have adapted it to make it gluten free. Its one of my favorite quick fruit desserts for cold winter nights.
Dowdy means not very pretty, drab and this is a bit of a hot mess in its looks but the flavor is spicy, fruity and far more exciting than a plain apple pie. I think it has spoiled me from apple pie. Definitely worth a try.
I have made it with golden raisins, regular raisins or currents which are tiny raisins. All work great.
Please use a firm baking apple that will hold its shape for a decently long bake. I used yellow delicious this time. I have used a number of different baking apples for this; Rome, Braeburn work fine; just don’t use red delicious which is an eating only variety. Green granny smiths tend to be a bit too firm for this recipe while Empire apples get a bit too squishy and applesauce like. Most any other type of apple will do.
This might be my second favorite apple dessert; after my French apple tart that I make regularly; easy, fairly low sugar and oh so delightfully cinnamony and lemony at the same time.
Messy but oh so tasty!
Apple Pan Dowdy
Crust:
1 c plus 2 Tbsp. brown rice flour mix (at bottom of recipe)
2 Tbsp. sweet rice flour
1 Tbps. granulated sugar
½ tsp xanthan gum
¼ tsp salt
6 Tbps. cold butter cut into 6 chunks
1 lg egg
2 tsp fresh orange or lemon juice
Butter the inside of a glass baking dish: I used a 9 inch glass pie pan.
Mix dry ingredients in bowl of stand electric mixer. Add butter and mix until crumbly and resembling coarse meal. Add egg and juice. Mix until it comes together into big chunks. Shape into a ball with your hands. Put it on a crust sized piece of wax paper (14 x 14 inches more or less), flatten the crust ball some; put on top of it another piece of wax paper and chill it all in your fridge 15-20 minutes while you prepare the filling.
Filling:
1/3 cup golden or regular raisins
2 Tbsp. peach schnapps
5-6 large Golden Delicious apples
1 Tbsp. fresh lemon juice
1/3 cup sugar
Heaping ½ tsp. cinnamon
1/8 tsp. nutmeg
Sprinkle ground cloves
1 tsp. lemon zest if you like
1 -2 tsp. softened butter
Directions: Put raisins in a small glass dish, add schnaps, microwave one minute on high. Let stand so the booze soaks into the raisins. Peel apples, cut in quarters, remove cores, cut each quarter into 4 or 5 slices. Place in a large mixing bowl, sprinkle with lemon juice. Mix the dry ingredients in a cup; pour over the slices, toss with a big spoon; sprinkle with lemon zest if desired.
Pour the apple mixture into the glass pie pan that you had rubbed with soft butter. Get out the crust and roll it out; just slightly bigger than the top of your baking dish. Lay it on top of the apple slices and tuck in the edges so nothing hangs down over the edge. Bake for 30 minutes in a 375 degree oven. Remove from oven, use a sharp knife to cut a cross hatch into the top (4 big cuts) so you end up with 9 pieces. Use a big serving spoon to gently tip up the crust and get it under some of the hot apples. Don’t worry if it breaks up further or looks like a mess. That’s part of its charm! Let bake 25 to 30 more minutes. The crust (whatever peeks out of the messy fruit pieces) should be very lightly browned and the apples are bubbling. Let it rest a bit; don’t serve boiling hot but warm will be awesome. Slice and top with a big dollop of vanilla ice cream, crème or yogurt if you like that sort of thing. We ate it with ice cream and then the next time I had some plain – just my favorite way to appreciate the flavor and texture of this spicy treat. Enjoy!
Brown Rice Flour Mix (same as King Arthur basic gf blend)
2 c brown rice flour
2/3 c potato starch – not potato flour!
1/3 c tapioca flour
The crust recipe is from Annalise Roberts great cookbook, GF Baking Classics, Second Edition.
I am betting you have some roast turkey in the freezer, maybe a pint of gravy too? Well, I have just the recipe for you, courtesy of Rachel Ray and foodnetwork.com. It is nothing like most traditional turkey leftover recipes. It is a slightly spicy Mexican stew; posole stew can easily be gluten free. Just use care choosing your chicken broth and your tortilla chips that accompany this savory soup. One of these years I will remember to buy an extra carton of gf turkey broth and use in instead of chicken broth; turkey broth disappears immediately after thanksgiving; a bit of a bummer….
I have been making it every fall after Thanksgiving and always look forward to a few bowls of it. Spicy, crunchy, tangy; unlike any other soup I make. Posole stew can be made with roasted pork and I have done so but I like it far better created with leftover roast turkey, especially the dark meat. I have served this stew to many people, and it is always well received and enjoyed, even by my elderly mother. I made a batch yesterday and it was so delish! You can cut this recipe in half easily which I did this time; didn’t have enough turkey for a whole recipe and my fridge is pretty full anyway; my posole turned out great and I am thrilled to be enjoying it again.
Ingredients
2 tbsp mild olive oil or canola oil
2 medium onions chopped
4 cloves garlic chopped fine
1-2 jalapeno peppers, seeded and chopped fine –use two if you like it spicy, I use one!
1 tbsp. ground cumin
1 GF beer (can use 1 cup water if you want but it gives more flavor)
Coarse salt and pepper
12-16 tomatillos; about 2 lbs, take off the paper cover, rinse and chop up. Can coarsely chop in food processor
5-6 sprigs fresh thyme; chop it up off the stems.
2 15 ounce cans hominy
1.5 qt chicken stock (can be part gravy)
1 ½ to 2 lbs chopped turkey meat; can be mixture of light and dark
1 lime juiced
Chopped cilantro leaves to garnish (optional)
Tortilla chips; the ones with lime go particularly well with this.
Cook first six ingredients about 5 min in a large stock pot. Add beer or water, cook one minute. Add chopped tomatillos and cook 5-6 minutes until softened. Add hominy, thyme and stock and cook 15 minutes. Add chopped turkey and lime juice, stir. Taste and add salt and pepper, stir well. I never use cilantro; something I just don’t like, but feel free to add it as the original recipe uses a bunch of it.
Then ladle the posole into bowls and serve lots of white tortilla chips to crunch over the top of the hot soup. As the soup disappears from my bowl I like to add more chips to keep the crunch going.
Notes: I halved the garlic and tomatillos this time. Used most of a good sized jalapeno pepper and one 20 ounce can of hominy. I used a cup and a quarter of water for the beer and a carton of gf chicken broth. About a tablespoon of homemade turkey gravy this time: ate the rest on hot sandwiches. Anyway, it was delish!
The more jalapeno pepper you add the hotter it will be. I have tried canned tomatillos and they are not really a good substitute. You can get them fresh (found near the fresh tomatoes) in many stores including Giant. They are used in Hispanic and Mexican cooking and add a lot of flavor and tartness to the soup. I have heard that some folks use salsa verde instead of tomatillos but it really isn’t hard to chop them up so I recommend the real deal.
Hominy is a corn product; whole kernels soaked in lye to swell and soften. The kernels have a mild corn flavor plus they soak up other flavors quickly and add a certain texture and body to the stew.
The wild turkey is native to North America and one turkey species is originally from Mexico. So turkey is a natural component in this stew. The Aztecs revered corn and liked to cook it with meat. Tomatillos are native to Mexico, related to cape gooseberries. They are used in salsa verde and other Mexican dishes. So this compilation of turkey, corn, tomatillos and lime is a natural combination that will be easy to make and fun to eat. Go on, be adventurous and enjoy a steaming hot bowl of delicious posole and use up that turkey in a totally different way!
Fresh tasting, locally sourced fruits are a major reason for success in fruit pie baking. I usually got mine from the local orchard where they were grown; about 2 miles from my house. This fall I missed the pear harvest and got there a few weeks too late so this time I bought some organic Bartlett pears at Aldi’s; you could use bosc but they would be a bit firmer and not as juicy as Bartletts.
This recipe is a blending of my own pie filling and the pie crust and crumb recipes from Annalise Robert’s cookbook, Gluten-Free Baking Classics. I used slightly less sugar, more fruit, and made a few other changes to create my own special pie using pears instead of apples. Her cookbook is a fabulous resource and I can’t recommend it enough to anyone trying to bake gluten free for a family member. This pie is like apple pie’s little sister; delicate, tender and so pretty. I promise even pear haters will enjoy a slice of this and we who love pears are just in heaven when we bite into a generous slice of this juicy sweet pie. My guy always claimed to hate pears; so fickle; unripe and then suddenly mushy overripe – I can relate to that happening occasionally but I persisted and now he enjoyed this pie quite a lot; took home a huge slice of it last night. Go on; make it; you might change someone’s mind too!
Angie’s GF Pear Crumb Pie
Crust:
1 c plus 2 Tbsp. brown rice flour mix (at bottom of recipe)
2 Tbsp. sweet rice flour
1 Tbsp.. granulated sugar
½ tsp xanthan gum
¼ tsp salt
6 Tbsp.. cold butter cut into 6 chunks
1 large egg
2 tsp fresh orange or lemon juice
Spray 9 1/2 metal pie pan with cooking spray, dust with white rice flour.
Mix dry ingredients in bowl of stand electric mixer. Add butter and mix until crumbly and resembling coarse meal. Add egg and juice. Mix until it comes together into big chunks. Shape into a ball with your hands. Put it on a crust sized piece of wax paper (14 x 14 inches more or less), flatten the crust ball some; put on top of it another piece of wax paper and chill it all in your fridge 15-20 minutes while you chop the peeled and cored fruit into ¼ to 1/3 inch slices. I use my plastic pie bag; sturdy and helps me roll the crust thin in the middle.
Filling:
6 cups barely ripe Bartlett pears; peeled, cored, and sliced thin – place in medium bowl, pour over it 1 Tbsp. lemon juice
Mix the following dry ingredients in a small bowl and pour over the sliced pears:
1/2 cup granulated sugar
3 tbsp. quick cooking instant tapioca
1/4 rounded tsp. cinnamon
1/8 tsp. nutmeg
Stir gently with a big spoon to blend well. Let stand while you roll out the crust; this time will allow the tapioca to soak up the fruit juice and become that lovely goop my family yearns for!
Crumb topping
Put all four ingredients in the same mixing bowl you made the bottom crust in and mix well with mixer paddle until crumbs form.
¾ c brown rice flour mix
½ c granulated sugar
½ tsp xanthan gum
1/3 c cold butter cut into six chunks
Directions: Roll out pie crust in a pie bag or between the two sheets of wax paper; try to get the thickness even, no thick middle! Peel off one side of paper and place in pie pan, centered. Remove other slice of wax paper. Crimp edges all around. Fill with sweetened fruit mix. Pour the crumb topping (1 to 1½ cup) evenly over this mixture. The more crumbs the thicker the crust they will form; for a really thick crust use all the crumbs from the recipe below.
If you love your pie really sweet add another ¼ cup granulated sugar to the dry mix part of the filling. I found the pie to be plenty sweet but everyone has their own sweetness level.
Bake in a preheated 400 degree oven for 30 minutes with a piece of aluminum foil on top of the pie, then lower the temperature to 375 and bake 20 more minutes uncovered until bubbly and the crust is light brown. I put a pie guard underneath my pie while it bakes to catch any drips. Cool at least 2 hours before serving at room temperature.
Note: I bake pies on the lowest shelf of my oven and that gives me a great browned crust. If your oven doesn’t give a strong bottom heat you might want to pre-bake the crust 10 minutes before filling and topping the fruit.
Naked raw pear pie, I promise it will get tastier looking!Pear pie crumbed and ready for the oven
Brown Rice Flour Mix (same as King Arthur’s Basic gf Flour mix)