Spicy Chicken Tenders

There are a lot of commercial food items that I don’t get to eat anymore, specifically most fast food being a major no no.  I miss crispy chicken like I used to enjoy at Wendy’s.  When I saw this recipe referenced on facebook I immediately went to the site, read the recipe and decided I had to try it.  I had some chicken breast tenders and all the ingredients except the gf Bisquick.  I looked on Glutenfreeonashoestring and lucky me; she has a recipe for making your own gf Bisquick; it is attached to a recipe for mini breakfast pancake bite muffins. I had the flours needed; white rice, potato starch and tapioca flour plus the add ins of baking powder, baking soda, salt, and sugar.  Easy peasy to put a double batch together; I will keep it in my freezer in a Ziplock freezer bag; sure have been wanting some of that Bisquick!

I lowered the hot sauce to half, ditto for the cayenne powder as I was pretty sure I didn’t want it so spicy; do as you wish. It was simple to do; mix the spices with the Bisquick, mix the hot sauce with the water, dip the chicken in the spices, then the hot water and back in the spiced flour and fry. The second time I made this I used a non stick stainless steel pan and 1/4 inch canola oil.  It was almost like deep frying but not quite.

I didn’t eat it as a sandwich the first time; had two juicy tenders with a baked potato and some summer squash.  It was very tasty and not too spicy for me.  I had it in a gf bun for a meal, complete with lettuce, tomato and mayo, and it was wonderful. You can also cut the chicken up into chunks, pound them briefly and you have lovely fingers that are somewhat smaller, great for kids. Fried chicken tenders are not something I would eat every week but it sure was yummy! I think this recipe is well worth trying even if you just buy some gf Bisquick.

Gluten-Free Spicy Chicken Sandwich (like Wendy’s)


2-3 Tbsp. Frank’s Red Hot Sauce  (the second time I made this I used another red hot sauce so it doesn’t have to be Franks to turn out great)

1/2 c Water

1/2 c Gluten-Free Bisquick

1 Tsp. Sea Salt

1-2 Tsp. Cayenne Pepper (use 1/2 tsp. if you want it close to mild)

1/8 Tsp. Fine Ground Pepper

1/4 Tsp. Paprika

1/4 Tsp. Garlic Powder

1 lb. Chicken Breast tenders – pound them a bit if they are very fat; you want it ½ inch or thinner.

Mix together the Gluten-Free Bisquick, Salt, Cayenne Pepper, Pepper, Paprika and Garlic Powder in a low bowl.  I used a wide soup bowl.

In a separate cereal bowl mix together Frank’s Red Hot Sauce and water. In a  high-sided sauté pan heat 1 cup of canola oil – it should come up about 1/2 inch the side of the pan depending on the size of your pan. I started it on medium heat and put in a candy thermometer to regulate the temperature; I got it pretty hot; 350 degrees before putting in the chicken.  Or use my frying pan method I described above; less oil for that and no thermometer needed. Take one chicken breast tender at a time and dredge it in the GF Bisquick mixture, then roll it in the hot sauce/water mixture and then put it back in the Bisquick mixture and roll it to coat.  This can get messy; try to keep one hand dry and one for the water/hot sauce part. I slid one into the hot oil and then a second one. Cook chicken for about 5 minutes, until they are golden brown and no longer pink in the center (I used a meat thermometer just to make sure).

Remove from the oil and drain on paper towels to blot any excess oil. If you have the oil hot enough they shouldn’t be greasy. If you want a sandwich, serve on a gf bun and top with mayonnaise, tomato and an additional piece of lettuce.

Go ahead, indulge in this delicious chicken and I promise you it will be a hit with your family!

Adapted from creativecookinggf.wordpress.com, February 2011.

Reblogged from a post in August 2015. Minor changes.

A Fresh Start for Better Health

Eight weeks ago today I had my right knee replaced, that demon osteoarthritis did some really major damage inside there.  Now I am feeling somewhat recovered but those first few weeks were pretty hairy.  I lost my appetite on top of all that pain and it was difficult to eat enough to keep my blood sugar decent, I have pre-diabetes as well as my celiac disease. Normally I control that with exercise, healthy snacks and less sweets but when your knee keeps you from all exercise for four months…things can get a little screwed up.  So, I found my self craving fresh produce when I was home from the hospital. Heck, I ate a veggie plate there and a fruit and cottage cheese plate so it began even before I got home. Oranges, tangerines, cuties, grapefruit, berries, snap peas, even broccoli tasted amazing and I couldn’t enjoy a meal without at least a couple fruits and veggies.  That and my reduced appetite gave me a ten pound weight loss which I was more than happy with.  More interesting yet is that I still don’t seem to crave the processed sweets half as much as before.  Oh, they be creeping back somewhat  but I am trying not to buy much of that sort of thing beyond crackers to pair with cheese, plain nuts and some organic baked cheese puffs white-cheddar-puffsI am treating myself to.  Thinking about my close proximity to diabetes plus my recovery time cravings – produced serious soul searching and I have made the decision to try to keep with this program of less processed snack foods and less sugar.

We folks with celiac feel we deserve a treat or two and I am no different from anyone else.  But, now I try to treat those cravings with fruit, nuts or maybe a square of dark chocolate.  Aldi’s has great dark chocolates aldi's chocolate
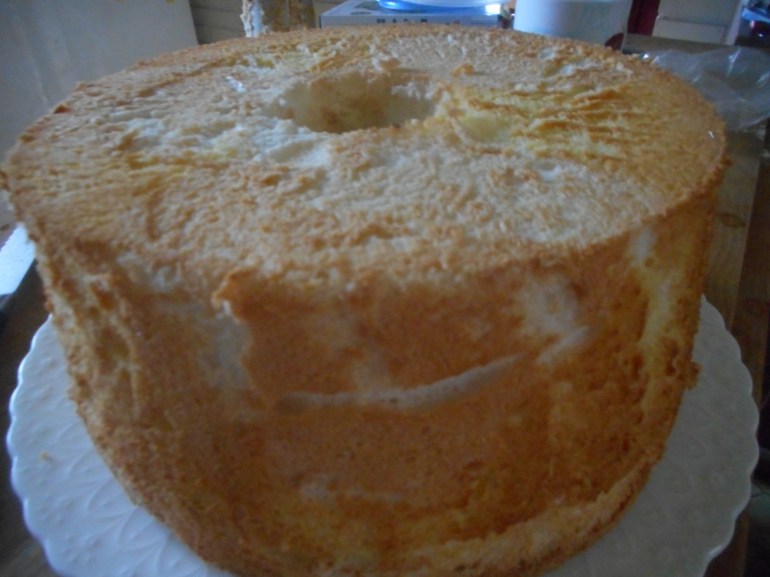
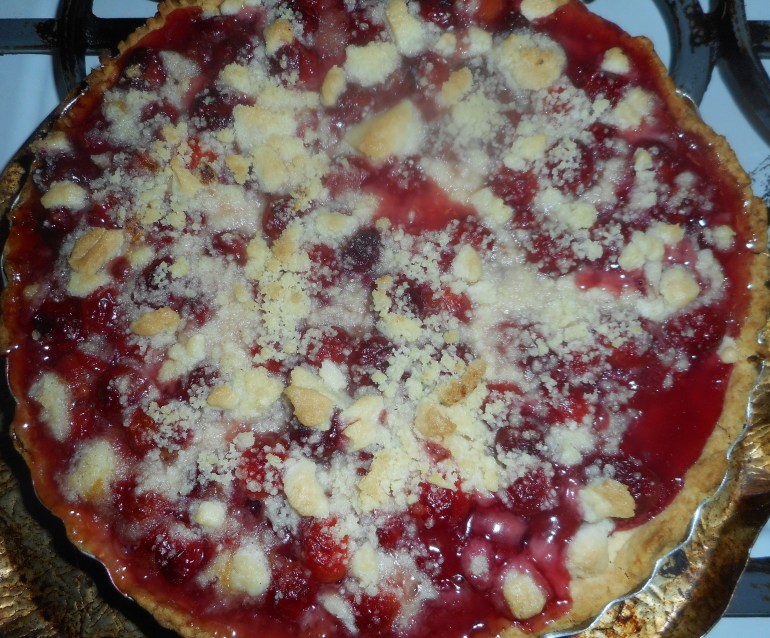
and some nuts that are free of cross contamination. As before, I eat a muffin for a snack most days but it is homemade and baked using coconut palm sugar which has a lower hypoglycemic index which bodes well for my sugar levels. Oh, I’m no saint and I can’t resist an occasional treat of some kind but I am trying to not bake the cakes and cookies I used to delight in.  Pies, tarts, galettes and tartlets are still on my recipe plans so there will be tasty items here on my blog in the future but other than angel food cake or a family birthday party, cake be a rare treat from here on out. I can’t promise no cookies, woman does not live by pie alone…gotta have cookies!

mass upload 8-22-16 561

I will see how the next two months go and let you know if I can keep my plan working.  If you are trying to lower your sugar intake you might want to try some of what I am eating…a good place to start are muffins made with coconut palm sugar.  They are yummy, easy and healthy.  Join me on this new journey and enjoy great homemade foods with less sugar! cranberry-blueberry-muffins

Cloud Bread – Yup…That’s Its Name!

Finding or baking decent gf bread can be problematic.  Poor texture, weird flavors, big holes the middle of the loaf, leaden brick like baked products, high prices and lots of ingredients which must be compiled exactly according to the recipe.  It adds up to a fair amount of stress as to just having a sandwich.

A year ago I made some really interesting bread called “cloud bread” (also called oopsie bread) and it has no flour, no oats nor any grains.  I was intrigued when I saw this cloud bread popping up in my support group messages and just had to try it. My recipe has five ingredients but three should be in your pantry already.  It was very easy, quick and yes; tasty.  So it made a super bread for a ham and cheese sandwich and a ham/turkey and cheese sandwich.  I ate one warm out of the oven, also enjoyable. Great with a little jam or jelly on top.  Posted it back last March and sharing again so you who missed it can give it a try.

I added a couple toppings which add a lot to the flavor and look of it.  I recommend them but it sure can be made plain.   You have to use full fat cream cheese to make it work, only a few tablespoons so don’t get all freaked out over that issue!

Cloud Bread/Rolls

3 eggs, separated

3 ounces cream cheese at room temperature

1 tsp. baking powder

1 tsp. honey

Pinch salt

Toppings; sesame seeds and a tbsp. of chopped fresh rosemary


Directions

Beat the egg yolks with the cream cheese until it is very smooth, lemon yellow. Add the baking powder and honey, beat in.

Beat the egg whites until foamy, add a sprinkle of salt. Beat until stiff peaks form.  Fold together with the yolk mixture until mostly blended together.

While the egg whites were beating I lined a big baking sheet with parchment paper and sprayed it lightly with Pam.  Heat oven to 300 degrees. Some people heat the pan in the oven before spreading the dough; I didn’t bother but feel free to preheat your pan.

Using a big spoon spread the bread mixture on in six big circles spaced 1-2 inches apart.  Sprinkle with sesame seeds and or finely chopped fresh rosemary. Bake until golden brown between 20 and 30 minutes.  Using a spatula separate them from the parchment paper. Let cool.  Store in a ziplock bag overnight; they will get soft and be ready for sandwiches.  Keep them in the fridge. I put slices of wax paper between them to avoid sticking.  shoe fly pie, hash 012
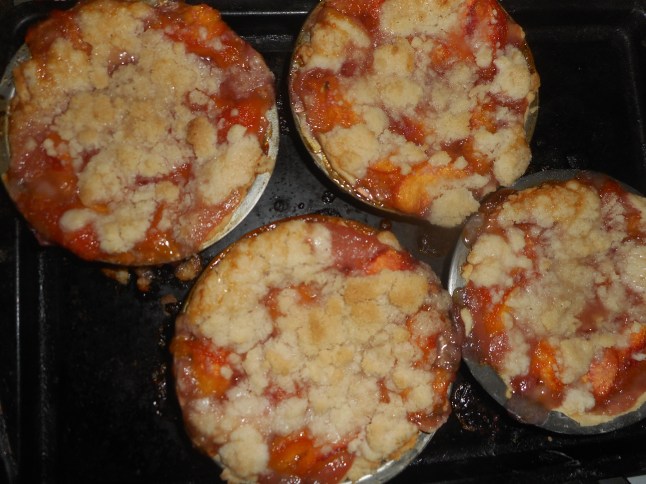
They keep about 3 days there and a week in the freezer.  Wonderful for sandwiches: I used one for the top and a second one as the bottom of the sandwich.  Did I mention they are virtually no carbs in this bread? Yeap; great for my low carbing friends!

Originally posted in spring of 2016. Minor changes, none to the recipe.

Old School Pie; Banana Custard

Early spring brings a dearth of fresh fruit.  I find the apples to be less than optimal for pies after about February.  I was looking for something fresh and fruity.  No frozen fruit either; pricy to fill a whole pie and I really try to find things that are seasonal.  I had a pie to bake for Joe, he loves a pie so what should I chose? My sister said why not the venerable banana cream pie. Bananas are here and fresh so yes!

My mom used to make this pie when I was in my early adulthood; for some reason she never made it for us as kids.  I used to cut up and set the banana rounds in the baked pie shell for her.  The contrast of the rich custard, the flaky crust and the fluffy cream with the delicate banana flavor is just so memorable.  And if you can bake an empty pie crust and make custard this pie is really simple.  If you want, buy a crust in a package to bake; that will simplify things even more.  I assume you can use a box pudding but I highly recommend this custard, straight out of Betty Crocker’s 1978 cookbook.

Angie’s Mom’s Banana Cream Pie

Crust:

1 c plus 2 tbsp brown rice flour mix (at bottom of recipe)

2 tbsp sweet rice flour

1 Tbps. granulated sugar

½ tsp xanthan gum

¼ tsp salt

6 Tbsp. cold butter cut into 6 chunks

1 large egg

2 tsp fresh orange or lemon juice

Spray 9 inch metal pie pan with cooking spray, dust with white rice flour.

Mix dry ingredients in bowl of stand electric mixer.  Add butter and mix until crumbly and resembles coarse meal.  Add egg and juice.  Mix until it comes together into big chunks.  Shape into a ball with your hands. Put it on a crust sized piece of wax paper (14 x 14 inches more or less), flatten the crust ball some; put on top of it another piece of wax paper and chill it all in your fridge 15-20 minutes while you prepare the filling.

Filling:

2/3 cup sugar

1/4 cup corn starch

½ tsp sea salt

3 cups whole milk or 2 percent, no lower fat than that

4 egg yolks beaten lightly

3 tbsp. butter cut into small cubes.

2 tsp. pure vanilla extract

2 large bananas

Topping: 1 cup whipping cream, ¼ cup powdered sugar and ½ tsp. vanilla

Directions: Mix the dry ingredients in a 1 ½ qt sauce pan, Add the milk and stir as it heats.  Once it reaches a boil time it for one minute.  Then add 1/3 of it to the egg yolks, stir and return all to the pan, bring back to boil and time for one minute stirring constantly.  Add the butter and stir as it melts, then the vanilla, stir.  Pour into a mixing bowl, let cool a bit and then put a film of plastic wrap on the top; press it down onto the custard.  Chill at least an hour before using.

Roll out pie crust in a pie bag or between the two sheets of wax paper, try to get the thickness even, no thick middle! Peel off one side of paper and place in pie pan, centered.  Remove other slice of wax paper.  Crimp edges all around.  Prick with a fork evenly every inch so it won’t bubble as it bakes.

Bake in a preheated 400 degree oven for 12-18 minutes until the crust is light brown.  Cool at least 15 minutes

Cut peeled bananas into 1/2 inch rounds and cover the bottom of the pie crust with them close together.  Pour the custard over the sliced fruit and smooth the top.

Chill pie 1- 4 hours before slicing and serving cold topped with a big dollop of real freshly whipped cream.

Whipped cream: Beat 1 cup cold whipping cream with an electric mixer until it holds soft peaks; add a quarter cup powdered sugar and ½ tsp. vanilla.  Do not beat any more, just stir in.

I think it is best served the same day you make it, or no more then 12 hours after baking for optimal flavor.  The crust will get soggy if too much time passes. Mine was still very good the next day; just not as great as when really fresh.

Originally posted on my blog in April 2016.  Making one later this holiday week!

Daffodil Cake – Delish Spring Dessert

My resolution this year was to eat less cake and I am doing pretty well at it so far but sometimes it is about using the ingredients you have and the holiday that is at hand.  I have some egg whites in the freezer and have to use them up. Defrost and I have everything else in the fridge or pantry: go daffodil cake. Looks like an angel food cake on the surface but it is an old fashioned confection known as a daffodil cake.  The insides have some white and some yellow cake. I found the recipe in my 1970s Betty Crocker, a great standard cookbook I would never want to be without.  Was making it for many years before my diagnosis with celiac so once I got comfy baking gf I figured I could make it gf and it is perhaps even better than it was with gluten based flour.

I make them on occasion for my mom who is a big fan of said cake.

She is still not sure I am making it gf but it is totally gf and totally delicious.  daffodil cake, french apple tart 014

So all you gluten free disbelievers, this cake will change your mind. It is tender, moist and delicately flavored, not to mention very pretty and perfect in spring for Easter.  It is after all, a daffodil cake and spring is the only time in the year they bloom. Make some now folks! It makes a wonderful birthday or party cake; you could put a thin vanilla powdered sugar glaze on top to make it fancy for such an occasion.

Notes: I save egg whites; in a Tupperware container in the freezer, until I have a cup of them.  Then I am ready to put this beauty together. Or just use enough eggs to make a cup of whites. If you don’t have guar gum you can use xanthan gum.

A few words on separating eggs: this can be tricky and I have learned from bad experiences not to separate directly into the measuring cup full of whites; do it into a small bowl and dump. You can NOT get ANY egg yolk in the whites or they won’t beat properly.  Best to set any egg that breaks or becomes contaminated with even a speck of yolk aside and make an omelet for supper! I crack each egg on the edge of my counter, split its shell in half and dump it over one cupped hand. The white flows through into the bowl underneath and I drop the yolk into the mixing bowl. Be gentle so the yolk does not break  Don’t use old tired eggs or the yolks are more likely to break; fresh is best but they need to come to room temperature before cracking so the whites beat to a high volume.  FYI: When baking gf all ingredients should be room temperature unless the recipe tells you otherwise.

Put the yolks in the medium mixing bowl and add those six whites in with the other cup of whites: 1 ½ cup total egg whites.  I know, a crazy lot of eggs in this but remember, no fat what-so-ever! Angel food cake is a good choice for your diabetic friends, or so they say. I just think those folks love a good angel food cake. This cake is even better, a masterpiece of delicate melt in your mouth cakey delight.

Angie’s GF Daffodil Cake

1 cup egg whites (room temp)

6 whole large eggs (room temp)  separated

1 ¼ cup powdered sugar

1 cup brown rice flour blend (recipe below)

½ tsp guar gum

1 ½ tsp. cream of tarter

¼ tsp salt

1 tsp. pure vanilla extract

½ tsp. almond extract

1 cup granulated sugar


Directions:


Heat oven to 375 degrees.  Put baking rack on second slot from the bottom.  You need a ten inch tube pan with removable bottom, do not spray.

Mix and sift the powdered sugar, flour, guar gum in a bowl at least once.

Pour the egg whites (should add up to 1 ½ cups) into a stand mixer bowl, add cream of tarter and salt.  Start at medium speed.  Beat until foamy, increase speed until high, wait for soft peaks and add cup of granulated sugar a tbsp or two at a time as it beats.  No bowl scraping or stopping.  Beat at highest speed until you have stiff peaks.  Beat briefly after adding the two flavoring extracts. Set aside.

In small bowl beat the 6 egg yolks about 4 minutes until thick and lemon yellow colored.

Fold the flour mixture into the egg whites, I do about a quarter cup at a time sprinkled all over the top and I fold it with a spatula or spoonula.  Be gentle and smooth; don’t worry if it isn’t perfectly smoothly mixed.  Put about half of the mixture into a separate large mixing bowl.  Add the beaten egg yolks; gently fold until it is pretty well blended.

Put big glops of the plain mixture into the baking tube pan; I like 3 big ones.  Put three big glops of the yellow blended mix between them. Top with more glops of the mixes, using it all up.  Gently stir through the pan with your spoonula to swirl it a bit and smooth the top with the spoonula.

Put into preheated oven, bake 35 minutes, until when you press gently on the top it springs back.

Remove from oven, turn it over and hang on an empty wine bottle neck or a big funnel. Let cool totally in this upside down state before cutting it out of the pan. I use a sharp serrated bread knife, cut around the outside edge and the center tube. Lift it out and then slice under the cake all around.  Place a cake plate over the top and gently flip it. daffodil cake, french apple tart 014

I store it in a plastic cake saver or just in the microwave away from breezes and hungry folks.  You could wrap it in plastic wrap too. It is best eaten within 3 days.  It generally doesn’t last that long around here.

Brown Rice Flour Mix base mix 

(This mix is the same as King Arthur’s basic gf blend)
2 c brown rice flour

2/3 c potato starch

1/3 c tapioca flour

This recipe is my variation on the angel food cake you will find in Annalise Roberts’ Gluten-Free Baking Classics cookbook.   This post was first published in April 2016.