
Subscribe to continue reading
Subscribe to get access to the rest of this post and other subscriber-only content.


Subscribe to get access to the rest of this post and other subscriber-only content.
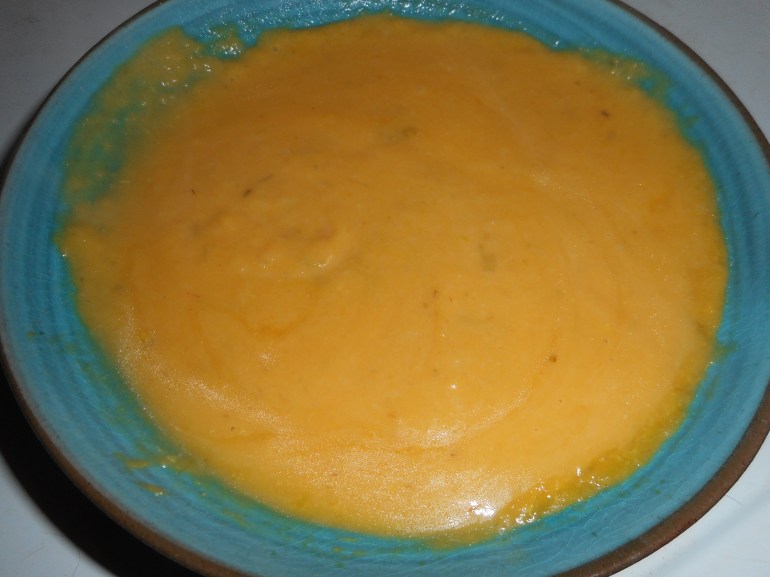
Blast this like-winter weather. It’s no fun unless you like to slog through cold rain or sloppy snow. Soup is often my remedy for winter chillies. This is a simple soup made of roasted produce thinned with chicken broth and a touch of milk. It will warm your tummy and fill you up without too many calories. The leek adds a slightly different flavor and the apple a touch of sweetness which I find refreshing. This mellow winter treat is great with a salad for lunch or a sandwich. No fuss, very little muss. Just a short list of ingredients and a fairly simple recipe. Enjoy!

Roasted Butternut squash Soup
1 decent sized butternut squash
1 medium onion
1 leek
2 fat carrots
1 Rome or Gala apple (any baking apple except Granny Smith will do)
1 garlic clove, unpeeled
3-4 cups of chicken broth, preferably homemade
½-3/4 cup of half and half or whole milk, even 1 percent will work!

Directions:
First, cut the butternut squash down the length and scoop out the seeds. No need to peel. Place cut side down on a rimmed baking sheet sprayed with cooking spray. Cut the onion in half and likewise the apple, the leek and carrots; cut off the leek above the light green portion and core the apple halves. Put apples cut side up. Roast them all in a 375 degree oven until the squash is tender when poked with a fork. About 35 to 45 minutes depending on the size of your squash. If the other fruits and veggies are browned and done early slide them off to a plate to cool. Caramelized is fantastic but no burnt leeks in my soup thank you!
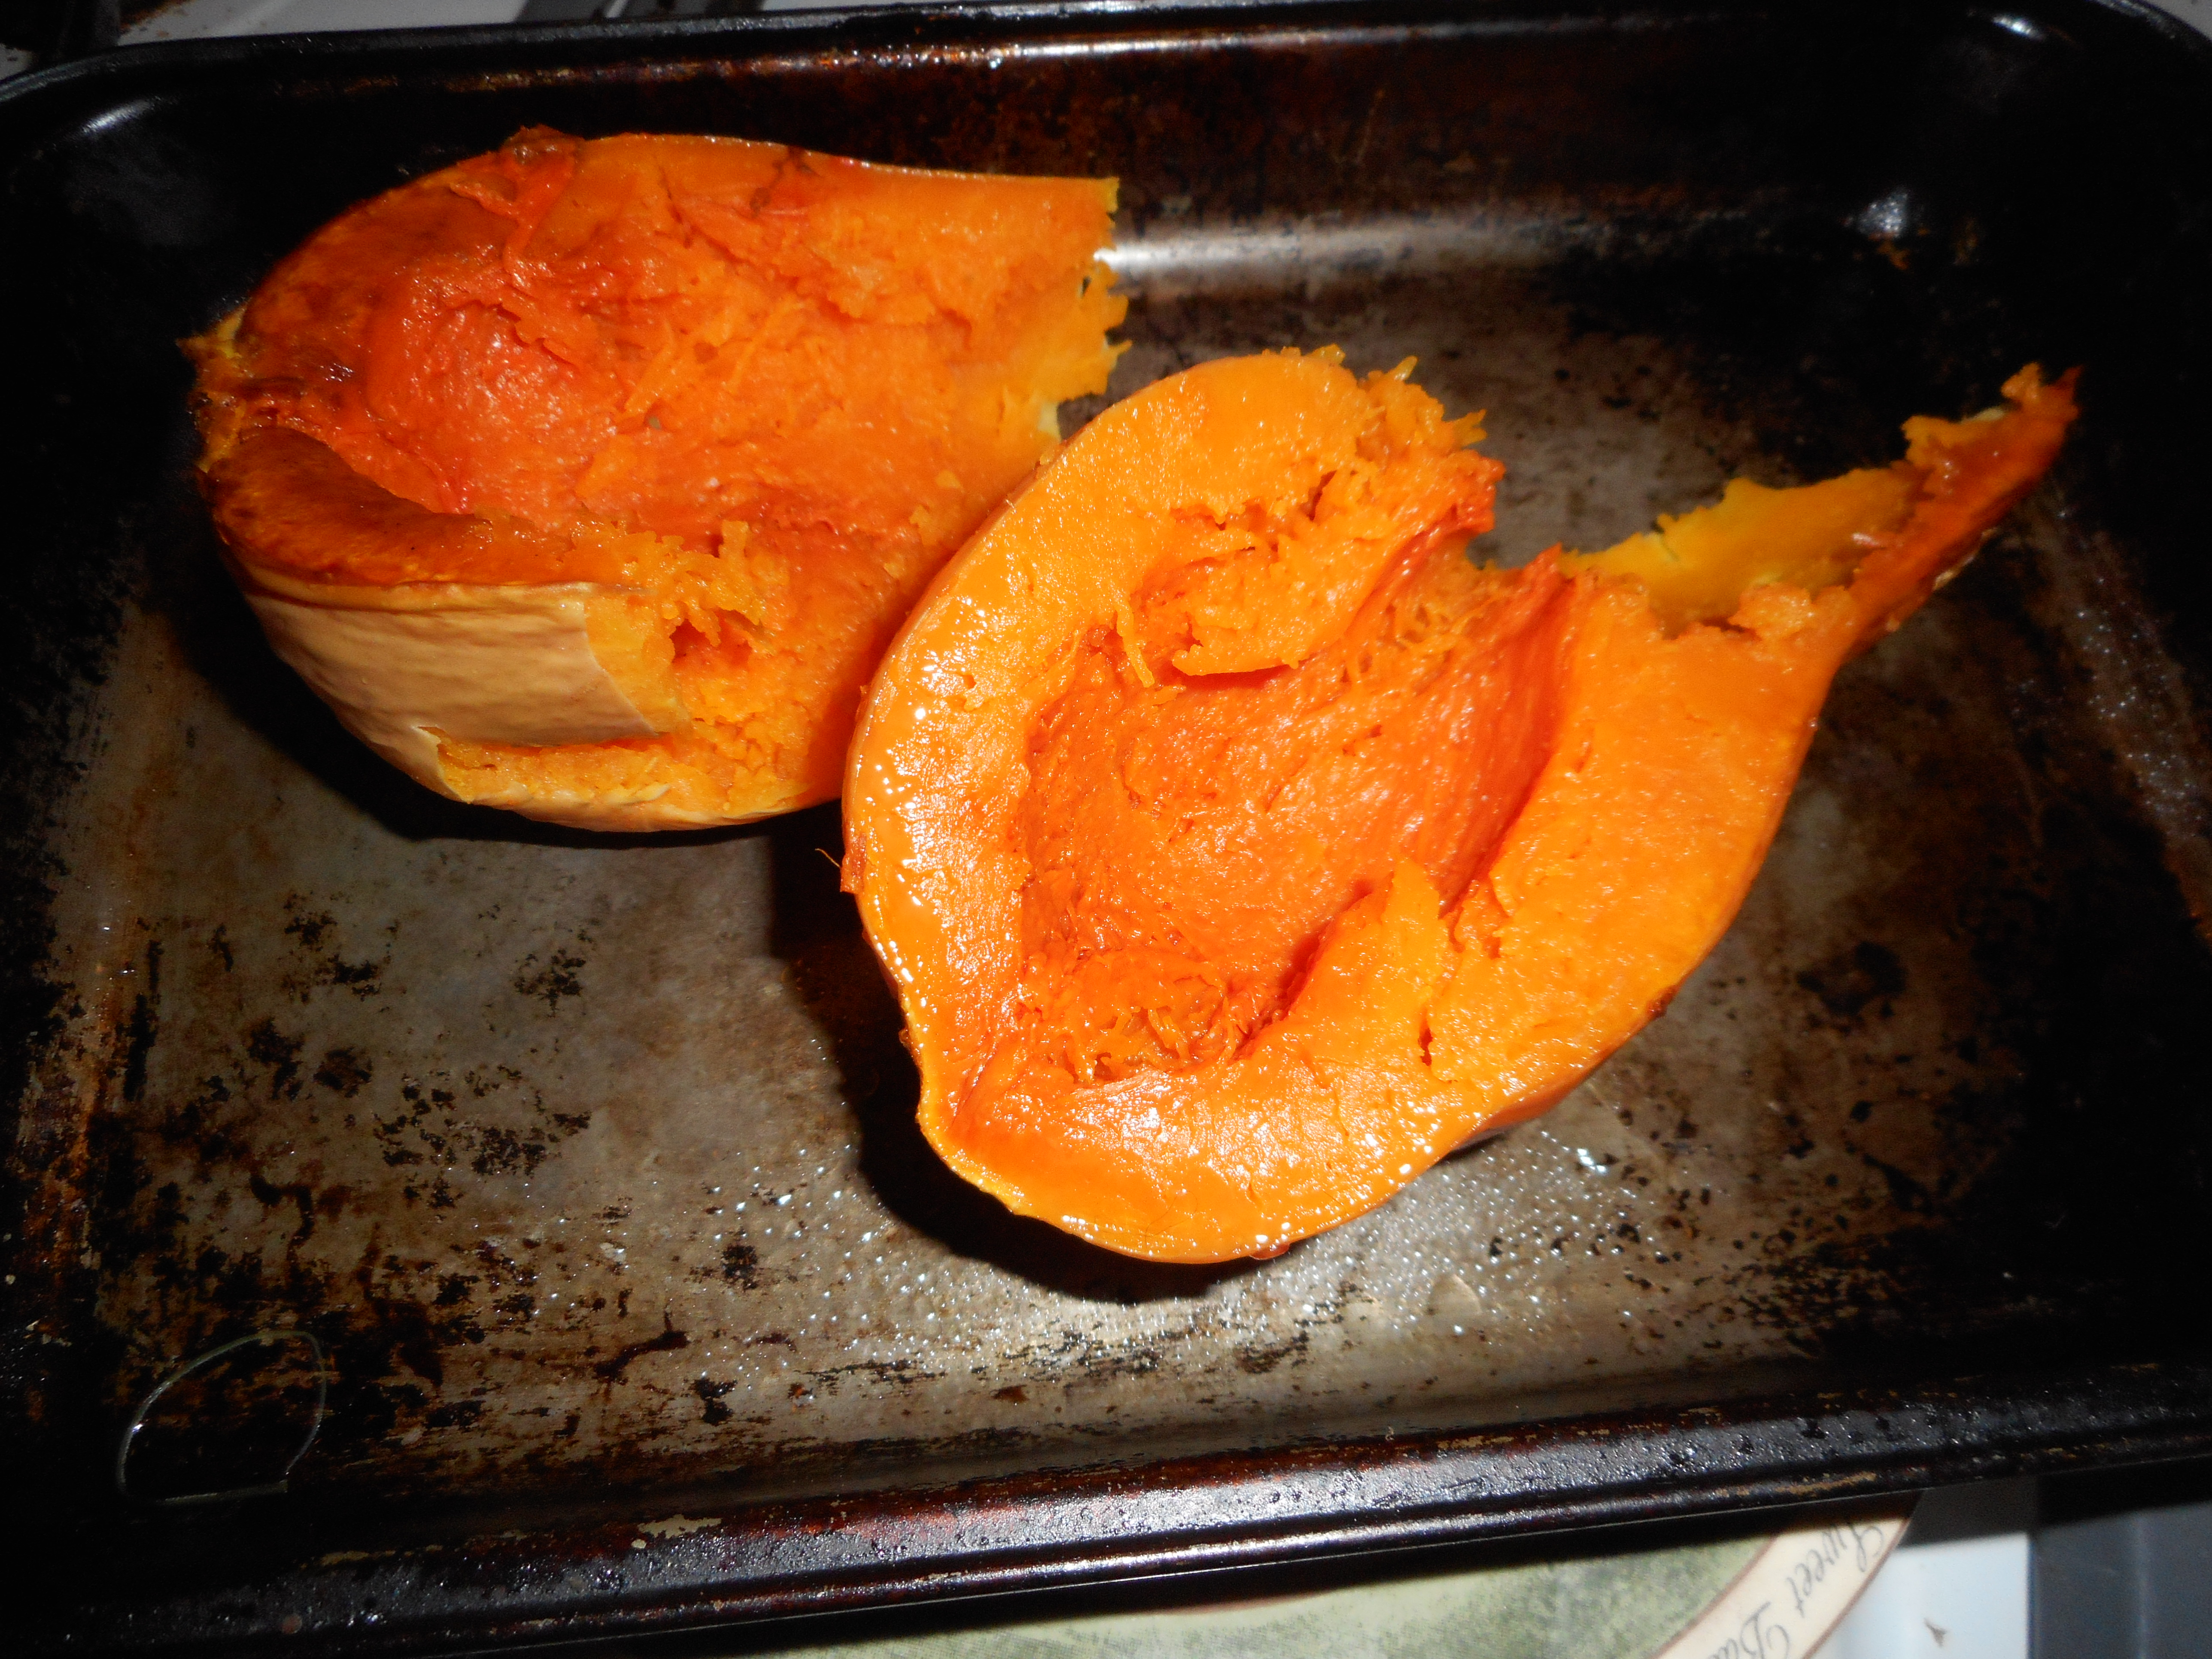
When the squash is cool enough to handle, use a big spoon to scoop out all the meat of it into your blender. Add the scooped out contents of the apple halves, the garlic you have squeezed out of its skin, the carrots and leek halves. Pour in 2-3 cups of chicken broth, blend until smooth, and add more broth until you reach a consistency you like. Mine was kinda thick and porridgey. If you prefer to use a food processor that will work or put the scooped out veggies into a large sauce pan and blend with your immersion (boat motor) blender. This will not be as smooth as the blender makes it but it is more fun and less cleaning as no blender container to wash!
After the blending is done pour it into a large sauce pan and add up to ¾ of a cup of half and half or whole milk. I used a half cup but you may like it creamier.
Originally posted in 2014, no recipe changes made to this version.
Subscribe to get access to the rest of this post and other subscriber-only content.

Apples are a favorite American fruit, and they are the main ingredient in America’s favorite pie. This crumb topped pie is easier to construct than a two-crust pie. I gave you the amounts for a 9-inch pie; I myself generally make it 10 inches; use 9-10 cups sliced apples and higher end of amounts of sugar, tapioca and spices. Bake this bigger pie for 55-60 minutes.
I like to use 2-3 kinds of apples in my pie; my favorites include golden delicious, Cortland, Pink Lady, Empire, Rome or Ida apples but if you want to use one variety my favorite is golden delicious, and they generally are apple perfection, great flavor and hold their shape without any crunchiness. They also play well in pies made with other baking apples like Empire, Ida Red, Rome to name a few. Just skip Red Delicious; only for eating raw and their texture doesn’t hold up in a pie.
I generally make my own crust but you can use a Bob’s Redmill GF crust mix; pretty decent if a bit trickier to roll out than my usual homemade crust. Definitely a good choice when you don’t have the time for a scratch pie crust. I always use my homemade crumbs. They are easy to make and taste the best!
I put this pie together in a few steps; make the crust dough; put it in fridge to chill while I peel, slice and cut up the apples. I also throw together the crumbs before rolling out the pie; you don’t need to rinse the mixer bowl from the crust then. If you plan to prebake your crust those ten minutes of baking the empty pie crust are also a good time for making the crumbs and preparing the apples too! I generally move an oven shelf to the very bottom of my oven and that helps the bottom pie crust bake fully.
Note that I love using coconut palm sugar in place of brown sugar as it is lower on the hypoglycemic index which is better for your pancreas if you are avoiding sugar. I am pre-diabetic, so I have switched to coconut palm sugar whenever possible for that reason and it is working great for me! It has a lovely caramel flavor too!
Each step is fairly easy, but the results are spectacular. Of course, you could buy a readymade unbaked crust but this roll out crust I prefer to use is really tasty: my mom never believed it was gluten free! This disbelief of hers was proof of the great flavor and texture of this particular basic gf pie crust.
It goes without saying that this pie is great with a slice of vanilla ice cream. Fall is the best season for apple pie as they are fresh and full of juicy flavor. Be seasonal whenever possible when it comes to fruits, and you will get the best taste in your fruit-based desserts.


Apple Crumb Pie
Crust:
1 c plus 2 Tbsp. King Arthur Basic GF blend or the brown rice flour mix at bottom of my recipe
2 Tbsp. sweet rice flour
1 Tbsp. granulated sugar
½ tsp xanthan gum
¼ tsp salt
6 Tbsp. cold butter cut into 6 chunks
1 lg egg
2 tsp fresh orange or lemon juice
Directions: Spray a nine-inch pie pan with cooking spray, dust with white rice flour. Set aside.
Mix dry ingredients in bowl of stand electric mixer. Add butter and mix until crumbly and resembling coarse meal. Add egg and juice. Mix until it comes together into big chunks. Shape into a ball with your hands. Put it on a crust sized piece of wax paper (14 x 14 inches more or less), flatten the crust ball some; put on top of it another piece of wax paper and chill it all in your fridge 15-20 minutes.
Roll out the flattened ball into a pie crust in a pie bag or between the two sheets of wax paper, try to get the thickness even, no thick middle! Peel off one side of paper and place in the pie pan, be sure to center it. Remove other slice of wax paper. Crimp edges all around.
Filling:
8 cups thin apple slices from 8-9 medium-large sized apples, I like a mixture of yellow delicious and at least one other cooking variety; red Rome, Jonathan, empire, Courtland, or any tart apple you like to bake with. Note: I have made it just with Cortland or with Golden Delicious apples; excellent pies! Peel apples, quarter, cut out core, slice into 1/3-inch-thick slices. Place apple slices in a large bowl and sprinkle top with 1 Tbsp lemon juice. Mix the following dry ingredients in a small bowl and then pour over the apples and mix up with a big spoon.
¼ cup brown sugar or coconut palm sugar (my new fav sub for brown sugar)
3-8 Tbsp. granulated sugar (3= pretty tart, 8 if you like it sweet)
2 Tbsp. minute tapioca or tapioca flour
1 tsp. cinnamon
A good sprinkle of ground nutmeg
A small sprinkle of ground ginger (optional)
Directions: After you mix up the apples and topping then heap the apples in your uncooked pie crust.
Crumb topping
Directions: Put all four ingredients in the same mixing bowl you made the bottom crust in and mix well with mixer paddle until crumbs form.
¾ c brown rice flour mix
½ c sugar
½ tsp xanthan gum
1/3 c cold butter cut into six chunks
Finishing directions: Sprinkle the top of the pie with crumb mix; use as much as you like. I like about 2/3-3/4 of the mixture. Up to your personal taste… Bake in a preheated 375-degree oven for 50-60 minutes until bubbly and the crust is light brown. You can cover the pie loosely with aluminum foil for the first 30 minutes. I bake my pies at the lowest possible level shelf, so my crust gets crisp but if you have issues with soggy bottom crusts; prebake your crust for 10 minutes; then fill and bake immediately.
Cool the pie at least 3 to 4 hours before serving at room temperature.
Brown Rice Flour Mix
2 c brown rice flour
2/3 c potato starch
1/3 c tapioca flour
The crust and crumbs are from Annalise Roberts’ great cookbook: Gluten-Free Baking Classics. My filling is slightly different.
Originally posted February 2015. Revised slightly and updated for this 11/1/24 post.
I make a lot of blueberry cobbler when we are camping. Since the blueberry season is pretty much over, I decided to add some fresh apple cubes and they made it taste so bright and lively, cobbler delightful!
This recipe is modified from one in Bette Hagman’s book, More from the Gluten-Free Gourmet and is based on a flour mix that will give you 4 cups of the dry ingredients. One cup is the base for an 8×8 pan of cobbler topping. I bet two cups dry mix will make a big 9×13 cobbler. Store the dry mix in an airtight container in the freezer to keep it fresh.
I have tried a number of cobbler recipes but nothing has been better than this one, so I generally stick to what works for me. But I have modified it a bit lately; cut out one egg, less milk, coconut palm sugar in the filling and I grate cold butter on large hole side for great dumpling texture.
I always get the fruit cooking before putting the topping together so the fruit is hot and ready for the topping and can go right into the oven. I always let it stand 10-20 minutes as it is way too hot to eat fresh off the campfire or the oven.
Dry Cobbler Mix
2 ¼ cups white rice flour
½ cup potato starch
½ cup tapioca flour
1 tsp. baking soda
4 tsp. baking powder
1 tsp salt
1 tsp. xanthan gum
1/3 cup sugar
Cobbler Topping
1 cup dry baking mix
1 egg
2 tbsp grated cold butter
1/4 cup milk/buttermilk
½ tsp. vanilla
Mix the wet ingredients and then add to the dry mix in a big bowl. Grate in butter BEFORE adding the wet ingredients; i stir it gently after grating it in.
Fruit Filling
2 cups blueberries
2 cups cubed peeled and cored apples; 2 medium apples was enough.
1/3 ½cup coconut palm sugar
2-3 tbsp. GF flour like rice flour, tapioca flour (use 3 if juicy)
½ tsp cinnamon
Directions:
Put the fruit in a thick bottomed saucepan. Stir together the sugar, cinnamon and flour and mix into the fruit. Cook on the stove top for 3-5 minutes until it is thickened and hot. Pour into a buttered 8 inch square or round oven pan, top with big blops of the cobbler topping. Bake immediately: at 350 degrees for 25 minutes. The top should be light brown and spring back when you poke it with your finger. If it looks damp or squishy bake it 5 more minutes. This happens if I use more than 4 cups of fruit; slows it down, sometimes even ten extra minutes if you put 5 or so cups of fruit in it.
Let cool 10-20 minutes before serving as it will burn your mouth right out of the oven! Some people love it with a scoop of vanilla ice cream. Cobbler is perfect just on its own.
Note: if you use oil and almond milk then this cobbler will be dairy free. Spray the cobbler pan with cooking oil instead of rubbing with butter. I think you can use any sort of milk you can find or even fruit juice.
No new pictures; we were camping and I didn’t take any pictures.
