Demystifying GF Flours for Holiday Baking Fun

Mid-December is upon us. Pies are being baked for desserts, fancy cake is on the menu and cookie season is pretty much here. I have already had emergency calls about gf flour choices and substitutions in creating something gf when the baker is not gf and is more than a little confused. So, I am reposting this flour treatise from last year, in the hopes that folks will read it and use this information to have the best possible results. GF baking is more technical than wheat flour-based recipes. Substituting is trickier especially flour subbing. So, before you make those gf cookies for a family member, read up on the differences, so you use the right flour. The wrong one will give you a poor result; so important to know what you are doing flour wise.

So, I am writing this post for a friend who wants to cook gf cookies for someone in her family for the holidays. I want to go over the flour issue particularly for someone new to cooking gf meals. It is slightly tricky, so I am going to try to make it clear for everyone: there are a lot of issues and different scenarios so be sure to read the whole article. So, here are my best thoughts and advice on using gf flours for gravy, and especially for baking.

You could use this rice flour for gravy making.

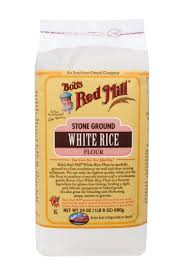
There are individual gf flours like rice flour, buckwheat flour, oat flour, tapioca flour, sweet rice flour, potato starch, cornstarch, sorghum flour, brown rice flour, etc.! A bewildering array of choices as almost any grain can be ground into a flour. Flour can then be processed to create a starch, which tends to be nearly flavorless but often has a big purpose in gf baking. I rarely use just one flour in a baking recipe. Why? Because a single flour is often missing an important characteristic of what we want in a baking result. A mixture has different kinds of flours to replicate all purpose flour (wheat based) or whole grain flour (also wheat based). Without the gluten there are a number of ways to make it a useful blend for cooking or baking. That said, I use just single flour blends in sauces. Just for sauces people!

I usually use blends for baking, 2-6 flours that work together to mimic wheat-based flour in different applications like bread, cake, cobbler, cookies, pastry or pasta dough. I have a number of them, but my favorite is one you can buy in most stores.  King Arthur’s Basic GF Blend; made of a proportional blend of brown rice flour, potato starch and tapioca starch.  I use it for over 90% of my baking and cooking needs. There are a number of blends available from companies like Bob’s Red Mill or Jeanes. One of my favorites is Better Batter; never see it in the store but it can be found online. There are many, many blends provided in gf cookbooks.  It can cause a traffic jam of jars/cans/zip lock bags of blends labeled and stored in your freezer or fridge.  Some of these blends have a gum like xanthan gum included. The gum helps your finished bread/cookie/cake hold together – in wheat based recipes it is the gluten that is the “glue” that holds things together. My blend doesn’t have it so I add it based upon my recipe. Xanthan or guar gum are commonly used. Doesn’t take much xanthan gum; ½-1 tsp is often enough in any recipe. You should always check on this gum issue; if none in the flour mix you will need to add some; often about 1/2 teaspoon per cup of flour. This amount of gum does vary due to what you are making. Look at a similar gf recipe and add as much gum as that recipe does. There also is psyllium gum but it is mainly used in breads and rolls. Not so much for cookies and cakes.

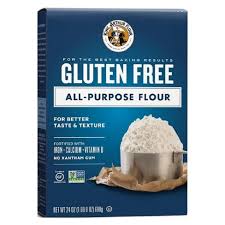
If your recipe is a recipe not formatted for gluten free baking, you must use a special blend meant for that circumstance. They are called measure for measure, or one-for-one blends. They were not around a decade ago; fairly new. They are carefully calibrated to sub in for all-purpose flour. They may not work as a substitute for whole wheat or rye flour, yeast baking is not where this flour is meant to be used, great for your old all purpose flour cookie or cake recipes.

I have used this measure for measure blend and had good results. It is calibrated to be substitutable in any gluten flour-based recipe except I would not recommend it for yeasted breads.
Amazon.com : Bob's Red Mill Gluten Free 1-to-1 Baking Flour, 44-ounce :  Grocery & Gourmet Food
Bob’s Red Mill calls it 1 to 1 Baking Flour; same idea as measure for measure. Again, use this in your regular recipe instead of the all-purpose flour in the recipe. This is an excellent flour blend but is Not suggested for yeast breads.

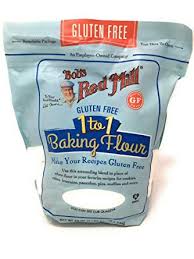
As I wrote above, measure for measure flour is fairly new and very useful. They are for when you want to make a normally gluten-based recipe but use a gf flour. FYI: most gf recipes have been altered from their original recipe or were created just for gf flour. If you want to make those cookies, you can’t enjoy anymore and sub in gf flour these new measure for measure blends is perfect to do that. You generally don’t need to alter your recipe or add gum. The flour blend is made to mimic regular all-purpose flour. It is not interchangeable with things like the Basic GF Blend from King Arthur that I mention above. Don’t use measure for measure in a gf calibrated recipe, use it to make stuff from your old wheat flour-based recipes. King Arthur or Bob’s Red Mill or a few other companies have a measure for measure blend so get that if you want to take your gluten-based recipe and change it to gf. I must caution you that these flours don’t work well if you are replacing flour in a yeast bread recipe. Works for quick breads, cookies, muffins, and many cakes but I wouldn’t make my old fav Italian bread recipe with these measure for measure as the result is unlikely to be similar to the recipe as made with wheat-based flour. Besides, I have an awesome gf Italian bread recipe my family clamors for!

One more thing, many companies now have gf baking mixes that can be used to make muffins, cookies, cakes, pancakes, etc. They are different from the blends described above. Do not substitute those blends for a basic blend like the one I use. These blends already have gum, baking powder, salt, etc. added to the flour. They are very convenient and there are lots of recipes formulated for using them. There are bread flour mixes that can be used to create shaped pastries; I just bought 1 boxes of Chebe All Purpose Bread Mix. Can’t wait to test it in a pastry recipe I found recently.

King Arthur Flour Baking Mix, All Purpose, Gluten Free | Flour & Meals |  Edwards Food Giant
I used an image for King Arthur baking mix as this is the only premade mix I have tried. It works great!

To repeat; there are single flours, there are blends with or without gum added, there are measure for measure blends for use in gluten-based recipes you want to recreate as a gf dish and there are baking mixes that can be used as a starting place for a quickly constructed baked good like a cake, cookie or muffin. I know, it seems complicated but read your recipe carefully, so you get the right kind of flour to make it successfully. The wrong flour will give you a poor result as gf baking is relatively unforgiving of big errors like that.

Oh, and there are read-made cake or brownie mixes just like you can buy with wheat-based flour; you add eggs, milk/water and oil to them to complete the mixture. The grocery store will likely have a number of choices for gf mixes to make brownies, cakes and other baked goods. Amazon has lots too! It’s where I got the Chebe flour mix.

Here is that Chebe Bread mix I mentioned above.

None of these blends/mixes are interchangeable between other types of blends. Use the blend the gluten free recipe asks for. If it is an old all-purpose flour-based recipe use the measure for measure. Except, do not use that measure for measure for a yeasted bread; quite unlikely to work especially when you use over 1 1/4 cups of it in a recipe; the more the recipe is depending on the flour the less likely it will be successful.

A pie made with King Arthur Basic GF flour blend for the crust.

My recipes generally tell you which flour blend I used. You cannot sub in measure for measure for a basic blend.  Nor can you use a baking mix for anything, but a recipe meant specifically for a baking mix. Get the right flour and you will have a great start towards a delicious result. I hope I have educated you on this issue so you can be successful if you need to bake gf this holiday season. Have fun baking!

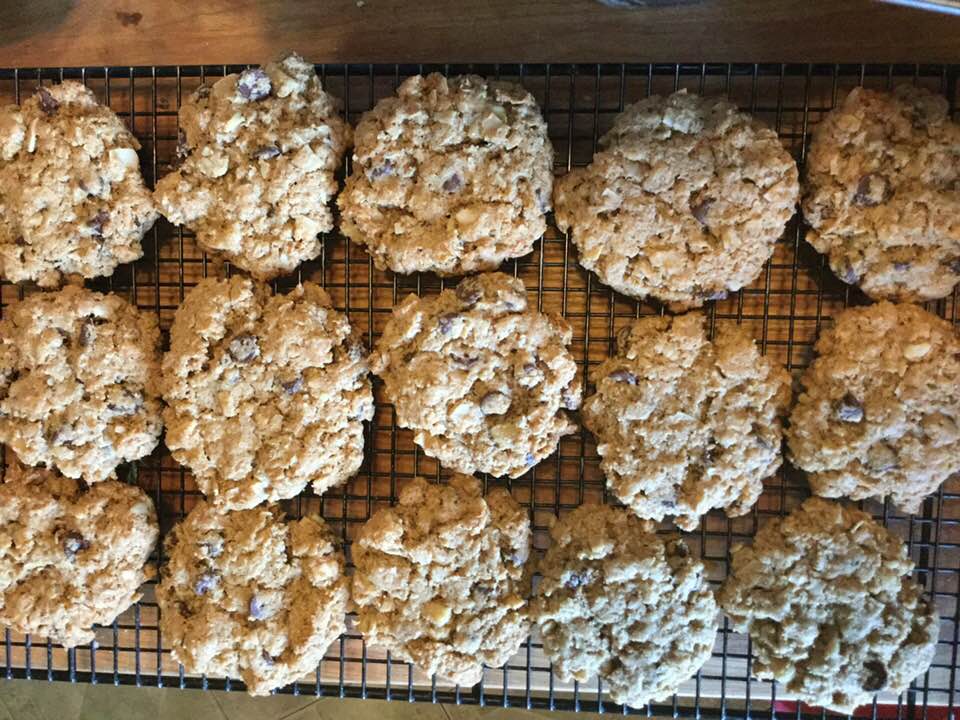
PS: I was baking Christmas cookies last Sunday afternoon at a friend’s house; we used measure for measure mix for some recipes and King Arthur Basic GF Blend for some other recipes; it really depends on the recipe. We baked some delicious tender cookies that everyone will love whether they are eating gf always or just at this family’s gathering.

Sugar cookies made with a Measure for Measure flour blend in my old (pre-celiac) Betty Crocker cookie recipe.

Christmas Stollen, 2.0…Even Better!

Gluten-Free Holiday Stollen Yield: two 10″ loaves

The classic Christmas stollen bread is made with yeast. So don’t tell your gluten eating friends that this quicker, easier gluten-free version, made with baking powder as the rising agent, is even tastier in my humble opinion. Filled with dried fruit and toasted almonds and covered with a layer of melted butter and powdered sugar, this is more like pastry and is delicious with a cup of coffee or tea. Great choice for when company is coming as it isn’t that much work or time needed to create this masterpiece. Everyone will think you slaved all day to bake it. No need to tell them how easy it is! Its origins are Germanic but it isn’t heavy or dry; flaky and tender, pastry perfection. If you are searching for the perfect gluten free holiday treat; look no further. I cannot say enough good things about this treat. It is loved by all, and that second loaf makes a wonderful gift. I am looking forward to enjoying stollen this afternoon; in the oven baking right now!

I first made it about 6 years ago, lost the recipe; had to get it again from the King Arthur Flour’s web site customer service center as they had removed it from their recipe rotation. They said it needed some tweaking. I disagree, it is just delectable although shaping it can be rather messy. It is far easier made without yeast which adds steps and can be finicky. I frankly don’t miss the yeast like I once thought I would. This dough is very tender and flavorful, I have been known to eat leftover tidbits raw it is that tasty. My family adores this pastry treat and will do nefarious things to get more stollen at Christmastime.

Notes: You could use orange rind instead of lemon rind and the dried fruit selection is entirely up to your tastes or your pantry. If you dislike the raisins substitute more dried fruit. One more good thing; it doesn’t require aging like a fruit cake. As soon as it cools you can cut a fat piece and enjoy a slice of heaven on earth!

Adding the butter
Butter is now integrated into dough using pastry cutter

Dough

2 1/4 cups King Arthur basic blend Gluten-Free Flour

1/2 cup granulated sugar

1 1/2 teaspoons baking powder

1/2 teaspoon salt*

3/4 teaspoon xanthan gum

1/2 cup (8 tablespoons) cold butter

3/4 cup ricotta cheese, part-skim milk type, let warm a bit to get it close to room temp. Can use whole milk ricotta if that is what you have.

2 large eggs, room temp

1 teaspoon vanilla extract

Grated rind of 1 small lemon; or 1/4 teaspoon lemon oil, or 1/4 teaspoon lemon extract

1/2 cup golden raisins

1/2 cup of your favorite dried fruits, chopped to 1/2″ pieces Yes, dried, not fresh. (I do apricots, cherries, currents, raisins or peaches/pears)

1/3 cup slivered almonds, toasted and cooled

—————

*Reduce the salt to 1/4 teaspoon if you use salted butter.

dried fruit and citrus zest

Topping

the dried fruit is mixed in!

Adding the toasted almonds
Adding the wet mixture into the dry dough
formed stollen ready to bake
baked and powdered
More powdered sugar sprinkled on using a sieve

4 tablespoons butter, melted

2/3 cup confectioners’ sugar

Directions

1. Preheat your oven to 325°F. Lightly grease a baking sheet, or line it with

parchment.

2. Whisk together the flour, sugar, baking powder, salt, and xanthan gum in a mixing bowl.

3. Cut the cold butter into small chunks, then blend it into the flour mixture to form uneven crumbs.

4. In a separate bowl, mix together the cheese, eggs, vanilla, and flavors.

5. Toss the fruit and almonds with the flour mixture until evenly distributed. Then combine the wet and dry ingredients, mixing until most of the flour is

moistened.

6. Turn the dough out onto a lightly floured work surface, and knead it two or three times, until it holds together. Divide it in half.

7. Pat each piece of dough into an 8″ x 7″ oval about 1/2″ thick.

8. Fold each piece of dough roughly in half, leaving the edge of the top half about 1/2″ short of the edge of the bottom half. Should you fold the long way, or the short way? The long way will give you a longer, narrower stollen, with shorter slices; folding the short way will give you a wider, fatter stollen, with longer slices.  I do the long way, your choice.

9. Use the edge of your hand to press the dough to seal about 1″ in back of the open edge; this will make the traditional stollen shape. It’s also the familiar Parker House roll shape, if you’ve ever made them. The dough will probably crack; that’s OK, just smooth it out as best you can.

10. Carefully place the shaped stollen on the prepared baking sheet.

11. Bake the stollen until they’re very lightly browned around the edges and on top, about 40 minutes. A cake tester inserted into the center should come out clean.

12. Remove the stollen from the oven, and transfer them to a rack. Brush them each with 2 tablespoons melted butter. Sprinkle heavily with confectioners’ sugar.

13. Allow the stollen to cool, then brush with butter again, and sprinkle with sugar again. Wrap in plastic wrap until ready to serve; serve within a week. If desired, sprinkle with additional sugar just before serving.

14. Yield: two 1-pound stollen loaves. I like to freeze one for another occasion if I am not gifting it right away. Enjoy!

Dutch Apple Crumb Pie

Apples, is a favorite American fruit and the main ingredient in America’s favorite pie.   This crumb topped pie is easier than a two-crust pie. I gave you the amounts for a 9-inch pie; I myself generally make it 10 inch; use 10 cups sliced apples and higher end of amounts of sugar, tapioca and spices.  Bake 55-60 minutes.

I used just golden delicious apples in this most recent apple pie, and they were apple perfection, held their shape without any crunchiness. They also play well in pies made with other baking apples like Empire, Ida Red, Rome to name a few.

I used a Bob’s Redmill GF crust mix someone gave me; pretty decent if a bit trickier to roll out than my usual homemade crust. Definitely a good choice when you don’t have the time for a scratch pie crust. I did use my homemade crumbs. They are the best!

I put this pie together in a few steps; make the crust dough; put it in fridge to chill while I peel, slice and cut up the apples. I also throw together the crumbs before rolling out the pie; you don’t need to rinse the mixer bowl from the crust then.  If you plan to prebake your crust those ten minutes of baking the empty pie crust are also a good time for making the crumbs and preparing the apples too! I generally move an oven shelf to the very bottom of my oven and that helps the bottom crust bake fully.

Each step is fairly easy but the results are spectacular.  Of course, you could buy a readymade unbaked crust but this crust I use is really tasty: my mom never believed it was gluten free!  This disbelief of hers was proof of the great flavor and texture of this particular basic gf pie crust.unbaked-apple-crumb-pie

It goes without saying that this pie is great with a slice of vanilla ice cream.  Fall is the best season for apple pie as they are fresh and full of juicy flavor.   Be seasonal whenever possible when it comes to fruits, and you will get the best taste in your fruit-based desserts.

Apple Crumb Pie

Crust:

1 c plus 2 Tbsp. brown rice flour mix (at bottom of recipe)

2 Tbsp. sweet rice flour

1 Tbsp. granulated sugar

½ tsp xanthan gum

¼ tsp salt

6 Tbsp. cold butter cut into 6 chunks

1 lg egg

2 tsp fresh orange or lemon juice

Directions: Spray a nine-inch pie pan with cooking spray, dust with white rice flour. Set aside.

Mix dry ingredients in bowl of stand electric mixer.  Add butter and mix until crumbly and resembling coarse meal.  Add egg and juice.  Mix until it comes together into big chunks.  Shape into a ball with your hands. Put it on a crust sized piece of wax paper (14 x 14 inches more or less), flatten the crust ball some; put on top of it another piece of wax paper and chill it all in your fridge 15-20 minutes.

Roll out the flattened ball into a pie crust in a pie bag or between the two sheets of wax paper, try to get the thickness even, no thick middle! Peel off one side of paper and place in the pie pan, be sure to center it.  Remove other slice of wax paper.  Crimp edges all around.

Filling:

8 cups thin apple slices from 8-9 medium-large sized apples, I like a mixture of yellow delicious and at least one other cooking variety; red Rome, Jonathan, empire, Courtland, or any tart apple you like to bake with. Note: I have made it just with Cortland or with Golden Delicious apples; excellent pies!

Peel apples, quarter, cut out core, slice into 1/3 inch thick slices. Mix in a large bowl with:

¼ cup brown sugar

3-8 Tbsp. granulated sugar (3= pretty tart, 8 if you like it sweet)

2 Tbsp. minute tapioca or tapioca flour

1 tsp. cinnamon

A good sprinkle of ground nutmeg

A small sprinkle of ground ginger (optional)

1 Tbsp lemon juice

Heap in pie crust.

Crumb topping

Put all four ingredients in the same mixing bowl you made the bottom crust in and mix well with mixer paddle until crumbs form.

¾ c brown rice flour mix

½ c sugar

½ tsp xanthan gum

1/3 c cold butter cut into six chunks

Finishing directions: Sprinkle the top of the pie with crumb mix; use as much as you like.  I like about 2/3 of the mixture.  Up to your personal taste…  Bake in a preheated 375-degree oven for 55-60 minutes until bubbly and the crust is light brown.  You can cover the pie loosely with aluminum foil for the first 30 minutes.  I bake my pies at the lowest possible level shelf, so my crust gets crisp but if you have issues with soggy bottom crusts; prebake your crust for 10 minutes; then fill and bake immediately.

Cool the pie at least 3 to 4 hours before serving at room temperature.

Brown Rice Flour Mix
2 c brown rice flour

2/3 c potato starch

1/3 c tapioca flour

The crust and crumbs are from Annalise Roberts’ great cookbook: Gluten-Free Baking Classics. My filling is slightly different.

Originally posted February 2015. Revised slightly and updated 10-29-23.

Peach Crisp with Oat Topping

I rarely make peach crisp and this small pan of crisp I whipped up by lunchtime today made me wonder why that is. It is so peachy flavored and the topping is perfectly crisp; I am just sad that peach season is about over, and I only made it this once. Sigh. Well, I plan to enjoy it even though it is not a huge pan; all the remaining peaches I had after a cobbler and peaches on my cereal every day for a week… Plus, I dislike soggy crisp, so it seemed perfectly sized to be all eaten before any sog sets in. I did poach the peaches 2 minutes in a hot water bath to make the skins slip off easily; I strongly suggest you do the same. Let them cool 5 minutes before you peel and slice them. So much easier than using a peeler and laboriously peeling with it. Plus, now they are nicely warmed from the poaching and ready to make into crisp. Don’t be tempted to use canned peaches; that would be a sad parody of peach crisp. Get fresh ones! There are still peaches at Bechdolt’s Orchard.

Notes: This recipe is a slightly different version of the fruit crisp in Annalise Robert’s Classic GF Baking Cookbook. I like less sugar and I like oats in mine plus I downsized it by approximately one quarter. It is easy to throw together in 15 or so minutes and bakes up golden and sweetly crisp. So peachy I wanted to devour the entire pan full! This hastily taken picture give you some idea of its looks; I was in a hurry to eat some before heading out to an appointment, so my photog skills were somewhat impaired.

Angie’s Small GF Peach Crisp

Fruit filling Ingredients:

3 1/2 cups of skinned, pitted and sliced fresh peaches

1/4 cup of sugar

A heaping 1/4 tsp. of cinnamon

3 Tbsp. tapioca flour

2 Tbsp. fresh lemon juice

Directions:

Heat oven to 375 degrees, put shelf in middle position for baking; I used a 6-cup size glass rectangular baking dish. Next, put sliced peaches in a large mixing bowl, blend the dry ingredients in a separate bowl and pour over the fruit, mix with a spoon and pour into the baking dish that you have sprayed with cooking spray. Sprinkle with the lemon juice. Make the topping next.

Topping:

3/4 cup gf flour (I like King Arthur’s basic GF blend)

1/4 cup packed brown sugar

1/4 scant tsp. sea salt

1/4 tsp. cinnamon

1/4 heaping tsp. of xanthan gum

3.5 Tbsp. butter, melted

1/4 cup old fashioned oats, gf

Directions:

Mix together dry ingredients except oats and pour melted butter over the mixture. Stir briefly and then add the oats and stir until blended and sort of clumping. Spoon over the peaches. Bake 30-35 minutes. Let cool at least 15 minutes before serving it in dessert dishes. I like it plain but some people I know love all things peach with a scoop of vanilla ice cream. Enjoy!

Peach Blueberry Crumb Pie

In eastern Pennsylvania we are past the peak of blueberry season, but both are still plentiful, and I was craving a great late summer pie.   The resulting pie was delicious down to the last slice.

blueberry peach pie slice

This is so easy to make: slice and dump together the filling, crumb topping gets made in the mixer bowl you just used for bottom crust. You can store any leftover crumb mixture in a sealed container in the fridge; it keeps a few weeks.  This GF crumb topping is perfect for most any fruit pie.

I used a lot more peaches than blueberries; the proportions are up to you.To peel peaches; heat 3 inches of water to a boil, drop the peaches gently in 3-4 at a time and poach them 1-3 minutes.  Allow to cool somewhat before peeling.  I like to do that over a bowl to catch the juices as I slice each peach.

Bake and enjoy summer in a pie in just a few minutes of work.  Don’t eat it piping hot; it should be cooled to close to room temperature.  You could certainly serve this with vanilla ice cream.  And this pie works perfectly with fresh nectarines.  Bonus: no peeling required!

GF Blueberry Peach Crumb Pie

Crust:

1 c plus 2 tbsp brown rice flour mix (at bottom of recipe)

2 tbsp sweet rice flour

1 Tbps. granulated sugar

½ tsp xanthan gum

¼ tsp salt

6 Tbps. cold butter cut into 6 chunks

1 lg egg

2 tsp fresh orange or lemon juice

Directions:

Spray 9 or 10 inch metal pie pan with cooking spray, dust with white rice flour. I confess I forget to do this more often than I remember…still works.

Mix dry ingredients in bowl of stand electric mixer.  Add butter and mix until crumbly and resembling coarse meal.  Add egg and juice.  Mix until it comes together into big chunks.  Shape into a ball with your hands. Put it on a crust sized piece of wax paper (14 x 14 inches more or less), flatten the crust ball some; put on top of it another piece of wax paper and chill it all in your fridge 15-20 minutes while you prepare the filling.

crust

Filling:

5 cups sliced fresh peaches, peeled and cut in thick slices

1 cup fresh blueberries – rinse and place in medium bowl

Mix with:

½ cup sugar

½ tsp. cinnamon

3 Tbsp. quick tapioca

Add and stir in

2 tbsp. fresh lemon juice

blueberry peach pie filling

Let the filling stand while you prepare the crust, important for the tapioca so it does its job optimally.

Roll out pie crust in a pie bag or between the two sheets of wax paper, try to get the thickness even, no thick middle! Peel off one side of paper and place in pie pan, centered.  Remove other slice of wax paper.  Crimp edges all around.  Fill with fruit mixture.

blueberry peach pie unbaked

Crumb topping

Put all four ingredients in the same mixing bowl you made the bottom crust in and mix well with mixer paddle until crumbs form.

¾ c brown rice flour mix

½ c sugar

½ tsp xanthan gum

1/3 c cold butter cut into six chunks

Directions:

Sprinkle the top of the pie with crumb mix; use as much as you like.  I like about a heaping cup and a half of the mixture.  Up to your personal taste… It sinks partially into the fruit mixture and adds lots of sweetness and eye appeal.

blueberry peach pie, done

Bake in a preheated 400 degree oven for 45-50 minutes until bubbly and the crumb crust is light brown.  I put a piece of aluminum foil on top for the last ten minutes.  Cool at least 2 to 4 hours before serving at room temperature.  I think it is best served the same day you make it, or no more then 10 hours after baking for optimal flavor.  The crumbs will get soggy if too much time passes.

Note: if you find your bottom crust is not browning enough bake it empty at 375 degrees for ten minutes before filling it with the fruit.  I have a bottom heat oven which gives me perfect pie crust if I put the pie on the very lowest shelf so I don’t ever have pale pie crust.

Brown Rice Flour Mix
2 c brown rice flour (finely ground)

2/3 c potato starch – Not potato flour!

1/3 c tapioca flour