Info on My Blog Posts

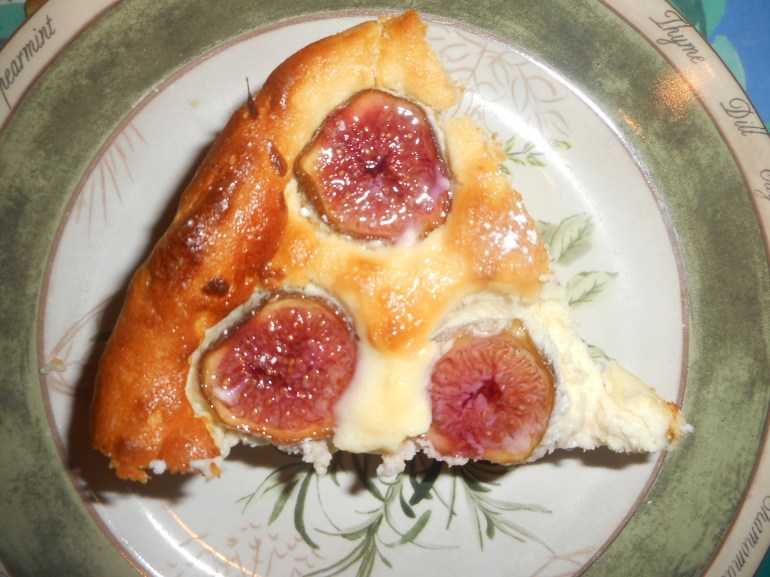
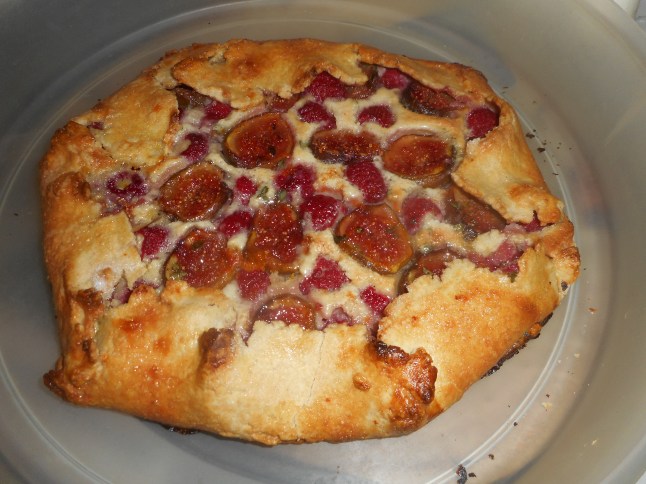
Sometimes I get questioned on the recipes I put up on my blog. I never post anything I have not made myself.  Know too, that if it doesn’t taste great it doesn’t get on this page!  I make many things that never reach print for one reason or another.   I go back and bake/cook a lot of these things again a year or two later; most of the recipes I post become true favorites of mine.  For example, I am making a fig and yogurt cake this afternoon with some of my last few figs. I made the first one for me two weeks ago and knew it was a keeper on my first bite, see the blog post from two week ago.  Today I am making it with some orange extract I bought for the purpose to see if that was even better than the lemon extract I used last time.  I often switch things up a bit to try different flavors for new results.  Next fall, you better believe that I will be making this cake again once the figs ripen.  Ditto for that fig and raspberry galette of last week; it was an amazing dessert for sure.

fig-galette-016

Feel free to change things if you make my recipes; if you hate a seasoning use something you prefer.  I do suggest that it may not go so well if you change the proportions in pie crusts, breads or quick breads as baking is really a science; there you need to stick closer to the proportions and ingredients.  You still can switch the seasonings if that floats your boat!

chicken-gumbo-002

If you are new to my blog know that I tend to cook seasonally with fruits and vegetables are they are harvested and ripe. I like using organic and local grown produce as often as possible.  I tend to add extra veggies to soups, stews and stir fries as I am a lover of them to a bit of an extreme.  My herbs are often grown in my own yard for best flavor and freshness but I do buy them when I don’t have and need them for a dish.

chicken-gumbo-005My food is totally gluten free as I must remain gf due to celiac disease.  But that doesn’t mean my meals are less than fantastic or that the plate of cookies I bring to your house won’t be delicious. They will, I promise!  Gluten free from scratch baked goods CAN taste great.  Do not think otherwise and bake gf with confidence for your loved ones.

I cook with love for my friends and family. I cook with joy for the process and I cook with great anticipation for the flavors and textures of my home cooked from scratch gluten free meals.  Enjoy!

Apple Crisp: Easy and Tasty

Apples are the centerpiece of the fall harvest culture.  Pumpkins are popular but they are a relatively new comer to the contest.  Some may think pumpkins are the way to go in baking but I firmly believe the apple is king in Autumn in America.  Crisp, sweet, flavorful and so very good for you.

If you can, get the organic ones as the sprays they use on growing apples are not at all good for you.  I recently made apple crisp with some baking apples from a pick it yourself farm near Milford NJ and it was very tasty indeed.  I especially suggest you get your apples at an actual apple orchard.  Another orchard just south of Hellertown is Bechdolt’s Orchard which grows many apple varieties.  Go there if you want the freshest tastiest apples in the Saucon Valley area.  Apples grow all over the globe so shop where you can get them fresh and crisp! The variety is up to you but I would not suggest any that are not meant for baking; don’t use red delicious as they are for eating only, same goes for honey crisp apples. apple-cart

This recipe is out of Gluten-Free Baking Classics Cookbook by Annalise G. Roberts with a few minor changes.  I am betting you can use any GF flour mix in this recipe, not like a cake or other baked goods that have very specific flour requirements.

And it is so much easier than a pie.  No crust to mix or roll out.  Just a simple mixed up topping to add to the cut up apples.  Bake it and voila: a yummy yet fairly healthy dessert!

I have made the topping several ways.  You can cut un-melted butter into the dry ingredients; it makes for a firmer crumb than the melted version below. I have made it egg free but it really somehow needs that egg to pull it together to mimic a wheat flour based crisp.  The oats can be left out if you don’t like them or can’t eat them. I personally love oats in my crisp.  A quarter cup of chopped nuts can be added to the topping; really a nice touch too!  I don’t like it too sweet so I use the lesser amount of sugar.  This is entirely a personal choice.  You can up the nutritional value by adding flaxmeal to the dry mix; 2-3 tbsp.

For those who love ice cream, this recipe is absolutely perfect with a big scoop of vanilla ice cream next to it.  I like it warm from the oven but it also is tasty cold the next day, if you have any left over that is!

pork tenderloin, banana choco cupcakes 007

Angie’s Apple Crisp


1 cup GF flour (mix below)

½ to ¾ cup sugar (I prefer brown sugar)

½ cup old fashioned gf oats

1 ¼ tsp baking powder

1 tsp cinnamon

Sprinkle of nutmeg

½ tsp xanthan gum

½ tsp. salt

1 large egg

6 cups peeled and thinly sliced apples

¼-1/3 cup butter, melted


Heat oven to 350 degrees.   Put rack in center level of oven.  Lightly butter a 9 inch square pan or spray with cooking spray.


Combine all the dry ingredients.  Add egg and stir to mix well.   Place apples in the baking pan, top with the dry mix and sprinkle with the melted butter.  Bake 40-50 minutes until bubbly and the topping is lightly browned. Let cool at least 10 minutes before dishing out. Six servings.


Brown Rice Flour Mix (same as King Arthur’s GF blend)
2 c brown rice flour (finely ground)

2/3 c potato starch – Not potato flour!

1/3 c tapioca flour


Originally posted by me October 2015.

Eggplant Potato Moussaka: Opa!

It being fall, the garden is winding down but there are still eggplants to pick in my garden.  Kinda tired of the usual stuff I make with eggplants so I did some research and came up with moussaka, a Greek eggplant casserole.  I made it once long ago and remembered it as tasty. This recipe is from food network and is by Emeril Lagasse, he of the “Bam” exclamation.  It is a fair amount of work; took me about 90 minutes to put it together, 45 minutes to bake and another 50 minutes of resting time before you can cut into it.  Gotta say it was worth the effort. Everyone who ate it were crazy about the flavors.mousakka-014

My alterations: I used a mixture of ground pork and ground lamb (recipe is 50/50 ground beef and ground lamb) and subbed in white wine for red as that was all I had.  Ditto in my subbing of a red onion for the yellow onion and chopped fresh tomatoes for the crushed tomatoes.  Sometimes I am unwilling to make a second run to the grocery store to spend $ for something if I can sub in a different but similar ingredient.  To make it gf I used white rice flour; it was okay; next time I am trying brown rice flour or a flour blend to see if it sticks tighter and browns better. Worked but not sure white rice was the best flour choice.  I used brown rice flour in the sauce but I am guessing any gf flour will work.  The cheese I used was fresh grated Parmesan; three choices are provided.  Never heard of Kefalotiri and I am allergic to Romano.  Plus: that’s what I had in the cheese drawer.

I read some of the comments people made on the recipe; I’m thinking about roasting my eggplant slices if I am in a hurry. I used less oil than the recipe and some of my oil was canola as I was running out of olive oil; couldn’t tell the difference in the final product. I might add a touch of cinnamon and nutmeg next time too, and there will be a next time as this tastes amazing.  PS: I used a mixture of whole milk and 1 percent for the béchamel sauce.

This recipe is too involved to put in my post; here is a link to the recipe.  http://www.foodnetwork.com/recipes/emeril-lagasse/eggplant-and-potato-moussaka-recipe.html

mousakka-015

Have fun making it; a great recipe for 2-3 folks to work on together.  Super entrée choice for a family gathering.  Enjoy!

Peach Melba: Peachy Perfect

Peach season is nearly done.  I have enjoyed excellent cobbler, spectacular peach tartlets and whole peaches au natural, the peach fuzz is full of fiber!  One more easy peach recipe for you: one with no cooking.  A recipe for a company dessert with next to no work, that sounds about perfect for my busy life.  raspberry-jam-014

Your success depends on the quality of the three ingredients. Yes, just three so they better be the best you can find!  I like peaches direct from the orchard, the best quality raspberry jam you can afford (homemade jam is the bomb for this recipe!) and excellent vanilla ice cream; I prefer Turkey Hill handmade vanilla. I got my pturkey-hill-vanilla-ice-cream
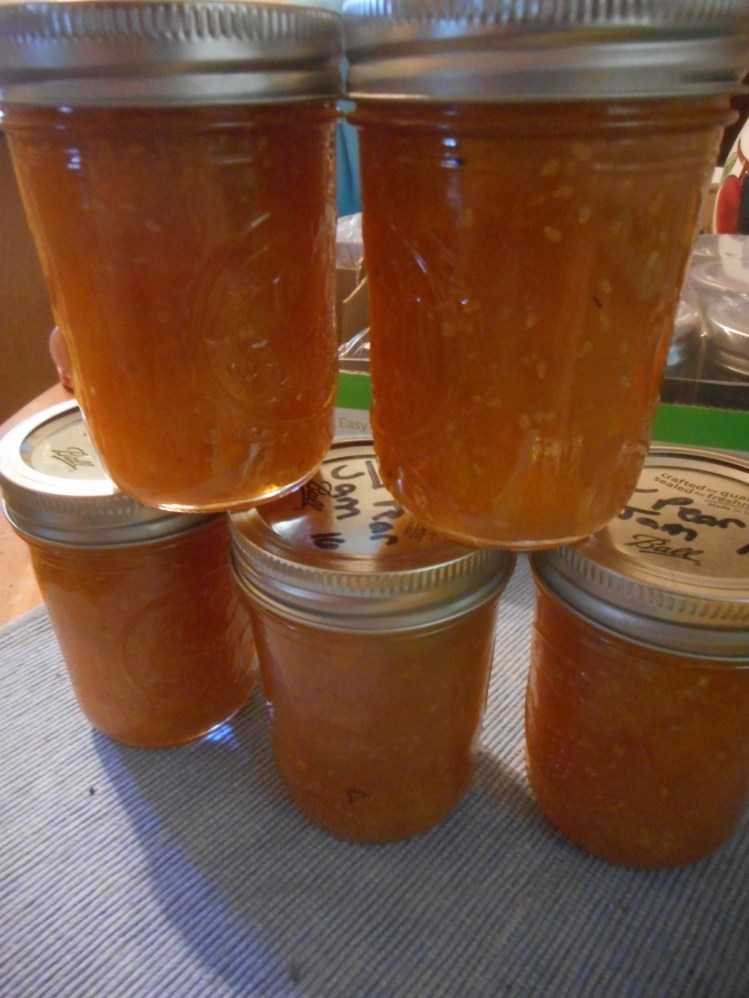
eaches at Bechdolt’s Orchard. Perfect full peachy flavor. Yessss.

I made raspberry jam this week; we picked raspberries at a pick your own farm in NJ.  Cooked down with sugar and pectin to give me 4 half pints and a quarter pint.  The flavor is intensely raspberry.  I highly recommend making your own jam for this recipe; it makes the flavor spectacular. raspberry jam 013.JPG

This post is about Peach Melba, created by that world renowned French chef Escoffier in honor of an Australian opera singer, Nellie Melba back in the early 1890’s.  If you look it up on line you can find fancy versions in stemmed glassware using a whole peach.  It is old school but truthfully the classics never go out of style. The flavors are just perfect together with next to no effort on your part.

My version of peach melba is very rustic; in a desert bowl, no stemmed foot ware, no six dollar a pint ice cream, but delightful.  A friend of mine wanted something special for company dessert, no baking, no gluten and fruit based.  I gave her this recipe and it was a huge hit.  Even a non-cook can put this beauty together in less then 10 minutes.

Peach Melba

(quantity per person)

One perfect ripe peach

One-two scoops vanilla ice cream

1 Tbps. raspberry jam, stirred up until it is semi-liquid

Directions:

Heat a pot of hot tap water just deep enough to immerse your peaches, bring it to a boil.  Gently drop in the peaches, turn heat down to medium and simmer for 3 minutes, remove with a slotted spoon.  Cool enough to be able to peel.  Peel the fruit, cut in half and remove the pit.

Place the peach halves in a dessert cup.  Top with 1-2 scoops of high quality vanilla ice cream and then drizzle the raspberry jam over the peaches and ice cream.  That’s all there is to peach melba.  Takes like 5 minutes to put together.  You can gild the lily with slivers of almonds but I prefer it with no additions.  The peaches and raspberries play off each other perfectly and the vanilla ice cream is the ideal base for them to be showcased with.  Enjoy this naturally gluten free treat before all the good peaches are gone!

Originally posted September 2015, with minor revisions.

Yellow Pear Tomato Jam…Yeap That’s A Real Jam

When I was a kid my mom used to make this jam out of yellow pear tomatoes.  Those are small and yellow; about the size of a large grape tomato, and yes, they are shaped like a pear.  Just really tiny.  They grow in a viney mess of a plant and are definitely old school tomatoes but you can still buy the seeds from superseeds.com. yellow-pear-tomato-jam-001

It had a cinnamon flavoring cooked deep into the conserve. It is sweet as any fruit jam generally is, so get that flavor of traditional tomato sauce totally out of your head!  Yes, sweet cinnamony tomato jam.  It can be done and is amazingly yummy.

Mom made this jam for my father every late summer when the yellow pear tomatoes were loaded with ripe fruit. He loved chowing down on it smeared thickly on a big slab of homemade white bread coated with fresh butter. I couldn’t find a recipe anywhere online so I have been experimenting for a couple of years.  Finally, I think I have perfected my version replicating Mom’s delicious conserve.  I think the secrets are to cook it long and slow until it is truly jammy in texture and the spices are enough but not overwhelming the tomatoes. We will be enjoying it this winter…on gluten free bread, of course!  You could also eat it on top of cream cheese spread on a cracker. Or use it in a recipe to add flavor; maybe a broiled fish dish?  I am going to experiment a bit with it to find more ways to enjoy my tomato jam.


Daddy’s Yellow Pear Tomato Jam
Yield: five 8-ounce jars

Ingredients
1 lemon
3 1/2 pounds yellow pear tomatoes
2 cups sugar
3 small cinnamon sticks
4 or 5 whole cloves
4 tsp pectin mixed with 2 tsp. sugar

Directions

Wash the yellow pear tomatoes,  chop up somewhat; halve the larger ones.  Then put in heavy wide sauce pan, add the sugar. Turn on low and let the sugar melt, once sugar is melted turn up some, stir frequently. Using a zester, remove the zest from the lemon in wide strips, leaving the bitter white pith behind. Cut the lemon in half and squeeze the lemon juice through a strainer into a dish. Add the lemon zest, lemon juice, cinnamon sticks, and cloves to the cooking tomatoes. Cook over medium-high heat, stirring occasionally, until the tomatoes are juicy and the sugar dissolves, 15 to 20 minutes.  Add the pectin and sugar mixture. Continue to cook, stirring occasionally, until the tomatoes are dark and syrupy and a candy or deep-fry thermometer registers 220 degrees F, 40 to 50 minutes (the timing may vary depending on the juiciness of the tomatoes). Reduce the heat if the mixture starts to scorch. I didn’t really use the thermometer this last time; just stirred it often and waited for it to reduce down to a thick jammy consistency.  That consistency is key

Discard the cinnamon sticks and cloves.  They have done their part in flavoring the jam and you sure wouldn’t want to bite down on a clove hiding on your jammed up toast! Sometimes I wash up the cinnamon sticks, let them dry and put them in a small dish as a room potpourri, waste not want not! They still have a lot of cinnamon flavor left in them….

Meanwhile, sterilize five 8-ounce canning jars and lids in boiling water.  I think 15 minutes in bubbling water for jars, and 5-6 for lids is fine.

Fill the jars with the tomato jam mixture, leaving 1/4 inch headspace, then seal and process ten minutes in a hot water bath.  Cool and store in a dry, cool, non sunny location.  I always label my jam; sometimes we forget and it is just safer to write a label of what it is and when it was canned so you will know 10 months later just what you have in that jar…  Enjoy!