Luscious Lemon Tart…A True Classic


Who doesn’t love a luscious fruit tart? But it’s the middle of winter.  What can you make that is fresh…seasonal?  2016 is my big pie year after all.  Gotta come up with something good.

How about a classic lemon tart? Lemons are in season, in fact, I have some fresh homegrown Meyer lemons my brother sent me from Texas.  And a couple off my man’s little lemon bush he grows in a pot, it is in his kitchen keeping warm for the winter.  Sweet!

Can’t think why it took me this long to make this wonderful yet very traditional lemon tart.  The recipe is fairly simple although you can’t step away from the stove while you cook the filling.  You must hang there and keep stirring or you are gonna have scrambled lemon eggs!  The crust is easy as they come; mix in mixer bowl and press into the pan, bake.  Done. Bam!

I am sure it would be just as tasty with the lemons from the grocery store but I loved being able to make a treat out of homegrown lemons.  This can’t be made with canned or bottled lemon juice; got to be fresh real lemons. I used the lesser amount of sugar and found it plenty sweet. And it is a great choice for anyone; use the crust you prefer, gluten free or not. Sure you could buy one similar to it at a bakery but this would surely wow your family when you say, “I made it myself!”

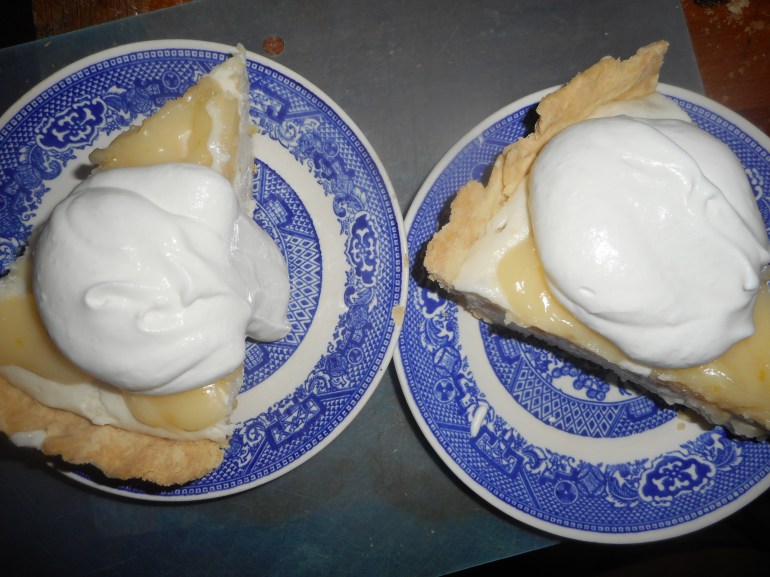
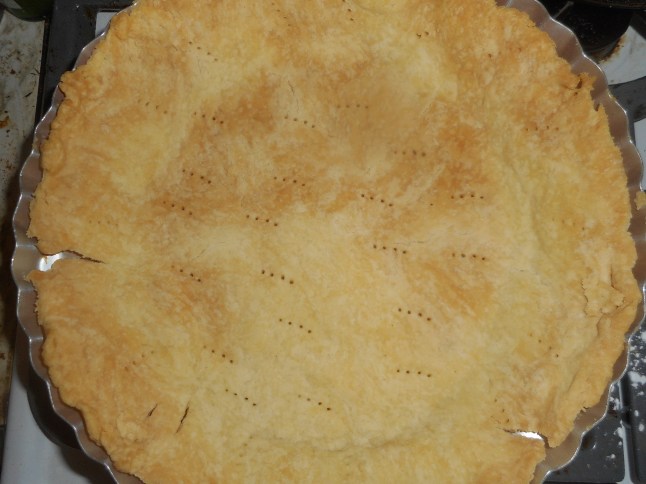
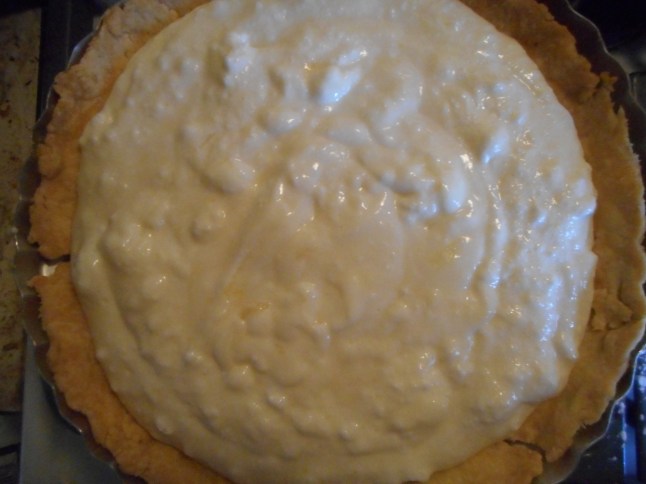
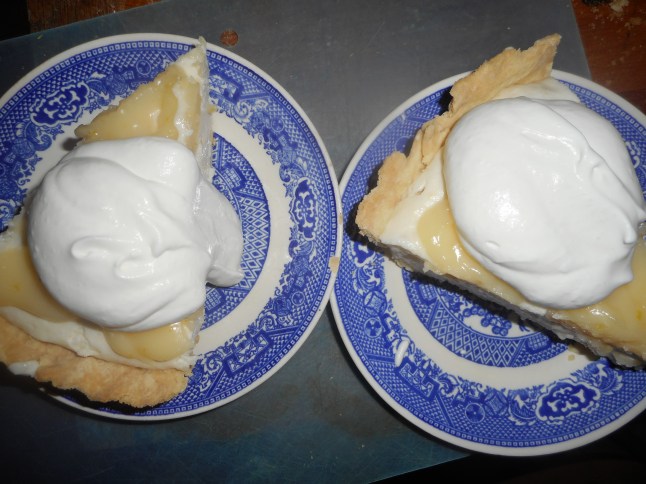
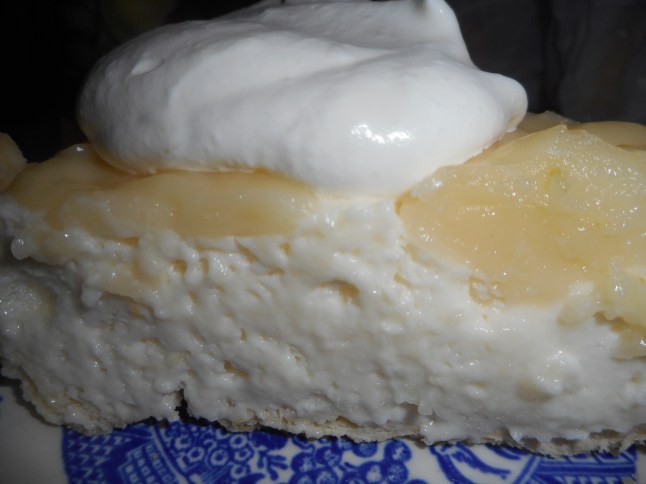
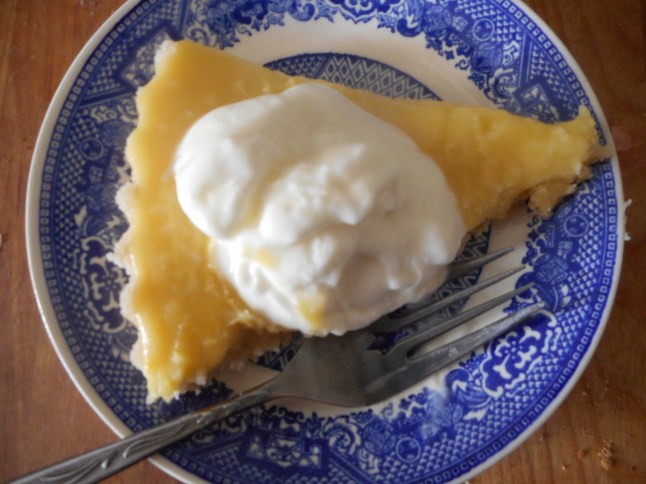
Some photos of the tart making process. I forgot to take one of the finished whole filled tart and there isn’t much left of it…so that ship has sailed… lemon tart 001

lemon tart 002lemon tart 003lemon tart 014

Classic Lemon Tart

1 pre-baked cookie crust tart shell (recipe at bottom of post) baked in removable bottom round pan.

2/3 cup fresh lemon juice

2/3-3/4 cup sugar

4 large eggs

2 egg yolks

1 tsp. grated lemon rind

½ tsp. lemon extract

½ cup butter cut into 4 chunks.

Directions; combine lemon juice, sugar, eggs, yolks in a medium saucepan and cook over medium low heat until thickened.  Stir constantly, don’t step away for even a moment.  When it thickly coats a spoon it should be done, do not let it boil.  The stirring process takes about 10 minutes.  Remove from heat and add the butter chunks, stir them a few moments and add the lemon rind and extract.  Stir the filling until butter melts.  Pour into a small mixing bowl and cover the surface of the filling with plastic wrap pressed right onto it.  Refrigerate until room temperature; 10-15 minutes.

Pour filling into cooled tart shell.  Refrigerate several hours until well chilled. Remove from tart pan and slice.  Recipe is from my new favorite source: Annalise Roberts latest cookbook, GF Baking Classics, The Heirloom Collection. If you love home baking and are gluten free it is a must purchase.

I like to serve it with a healthy dollop of Stonybrook Farm’s low fat organic yogurt.  The tangy fresh flavor of this topnotch yogurt makes a perfect contrast with the sweet lemon filling.  I served it like that to my mom and she thought it was some kind of special whipped cream.  It is that rich tasting even though it is low fat.  I can’t say enough about this yogurt.  I love it on other dessert treats: guilt free and surprisingly yummy. Great to cook with and to enjoy for a snack.

Crust

1 cup brown rice flour mix

¼ cup sugar

1 tsp. xanthan gum

5 tbsp. cold unsalted butter, in 5 chunks

1/2 tsp. vanilla extract

½-1 tsp. water

Mix the dry ingredients in a stand mixer, cut in the butter by mixing it at a med low speed until crumbly.  Add vanilla and mix well.  If it is really dry looking add the tsp. of water.  Press into the bottom and up the sides of your tart shell as evenly as you can make it. I suggest you spray the pan first with cooking spray and sprinkle it with rice flour. Do not press the dough in too hard or you will have a tough time digging out slices….

For this recipe I use a 9 inch tart pan with a removable bottom.   I think any low pie pan or tart pan will work.  Bake it at 350 degrees for 18-20 minutes.

Brown Rice Flour Mix  Identical to King Arthur’s gf blend.
2 c brown rice flour (finely ground)

2/3 c potato starch – Not potato flour!

1/3 c tapioca flour


Lemon Velvet Pie…Heavenly Treat

I hereby declare 2016 the Year of the Pie.  I plan to post a pie recipe every single week.  Well, maybe some of them will be tarts, galettes, tartlets and rustic tarts but all in the pie clan!  Since I want to eat less sugary desserts I am going to step away from cakes and turn to something my family all adores.  Pie.  It’s time to make more pies.  Full of fruit pies, nut tarts, citrus chiffon pies, jam tarts, and chocolate pies of all sorts.  Pie and more pie.  Sounds delightful doesn’t it?

My first entry is something out of my Farm Journal’s Best Ever Pie Cookbook published in 1981.  My dear sister Margie gave it to me a long time ago and I have baked a number of sweet pie treats out of it. This is a lemon pie but unlike any I have ever made.  It is called a lemon velvet pie.  I think of it as a puffy lightly lemon cloud of a treat.  Impressive and delicious. My guy is already bugging me to make it again for him and I just made it yesterday! Actually he saw the recipe and asked me to make it so I did.  It has a lot of elements to it but no step is that difficult to conquer. It might strike you as the offspring of the union of a chiffon pie and lemon meringue pie!  Anyway, it is melt in your mouth and delicate especially if you make it with Meyer lemon as I did.

Per my New Year’s promise I did cut the sugar down quite a bit.  This filling is naturally gluten free.  My wheat eating friends can use a regular pie shell to make this treat.  I am betting it might be also great with my cookie/tart pie crust. This pie will be the talk of your next gathering if you whip it up!

———–

Here are some impromptu shots as I made this pie: the crust, yeap I see those cracks! No matter…covered up by the pie filling. And yes; the top layer refused to totally spread out for me.  Next time I might warm it a tad so it spreads smoothly. But it is one tasty pie!lemon velvet pie 005

lemon velvet pie 007lemon velvet pie 009lemon velvet pie 012lemon velvet pie 013lemon velvet pie 014

Lemon Velvet Pie

2/3 cup of sugar (can add another 1/3 cup if you like it sweet)

6 tbsp. corn starch

½ tsp. salt

1 ½ cups cold water

2 eggs separated

2 tbsp. butter

1 tsp. lemon zest, grated fresh

1/3 cup fresh lemon juice

1 tsp. vanilla extract

1 tbsp. (1 packet) unflavored gelatin

¼ cup cold water

1 cup light cream

A baked 9 inch pie shell

1 cup heavy cream, whipped with 2-3 tbsp. powdered sugar and 1/2 tsp. vanilla

Directions; bake the pie crust and let cool. See any of my past pie blog posts for a crust recipe.  I bake it about 20-25 minutes until it is light brown.

Combine sugar, cornstarch and salt in 1 ½ to 2 qt saucepan, stir in water, cook over medium heat until it thickens and mounds when dropped from a spoon; stirring constantly. Might take 3-5 minutes.  Stir a couple of spoons of it into the two stirred up egg yolks. Add right back into pan and stir well, cook 2 minutes on low stirring constantly. Remove from heat, add butter, stir, add the zest, lemon juice and vanilla, stir well. Remove one cup of filling and set aside.

Soften gelatin in the cold water for 5 minutes.  Add to the remaining hot filling in pan, stir to dissolve it.  Gradually stir in light cream, cool slightly to firm a bit.

Beat egg whites until firm and glossy, using electric mixer at high speed.  Fold into the pan of cooling filling.  I used a rubber spoonula. Pour mixture into baked pie shell, Refrigerate 15 minutes.  Top with the remaining cup of plain filling you set aside.  It will be thick; I put small spoonfuls all over the top.  Chill in fridge at least 2 hours to set the pie.

Whip the cream, add some powdered sugar and vanilla to sweeten lightly and serve slices with big dollops of cream on top.

Eggs Benedict – DIY Hollandaise Sauce

Eggs Benedict is kinda old school elegant – but if you enjoy egg sandwiches you will definitely want to read this post. We love eggs benedict for brunch or Sunday supper. Since I went gluten free due to celiac disease I had to find gf English muffins that were more than just edible as the muffin is the base for the layers that create this tasty dish. I have made three different recipes. First two were just “okay.” This most recent one is from America’s Test Kitchen’s “The How Can It Be Gluten Free Cookbook” published in 2014. It uses their make-it-yourself flour blend. There is no need for muffin rings unlike the other recipes I have made. The dough is very sticky; a stand mixer is pretty much required. You form it into balls using wet hands, let the dough rise an hour on baking sheets sprinkled with corn bread. They are briefly cooked on the stove top in a frying pan and then baked in the oven for 30 minutes. The flavor and texture are outstanding for gf bread. They remind me of homemade wheat flour muffins I used to enjoy years ago. I highly recommend this recipe. Fairly easy and I was thrilled with the flavor and texture. I am not sure what I will do with those darn muffin rings I bought a year ago…  cranberry tartlets 006 cranberry tartlets 007

I am not going to provide the muffin recipe today; you could consult the ATK cookbook for that, or use another gf muffin recipe or buy some gf English Muffins. But I will give my recipe for the easiest and best hollandaise sauce ever. It is a cherished family recipe my mom always used and although I have tasted other sauce versions I always come back to this one for its outstanding flavor. My family loves it over broccoli for our favorite side dish.

eggs benedict 002eggs benedict 003eggs benedict 004eggs benedict 006

Mom’s Hollandaise Sauce

Makes about ¾ cup.

1 stick salted butter
2 egg yolks (from large eggs)
Juice of ½ a lemon

Please, no substitutions of any kind will work for this recipe and you MUST make it in a Pyrex measuring cup placed in a pan of hot water; just below the boil and going no more than ½ the way up the sides of the glass measuring cup. pyrex measuring cupThe glass insulates the contents and allows for a slow measured melting of the butter and an equally slow and almost alchemical blending of these three ingredients into a smooth sauce. Unsalted butter gives a pale unbalanced sauce and not enough lemon makes the flavor insipid. Any leftover sauce can be gently reheated in a microwave or over water; stir a lot and you can add ¼ tsp. hot water if it separates. Beat it with a spoon until it comes back together.

Anyway, back to the recipe! Cut the stick of butter into 8 chunks and place in a Pyrex glass measuring cup; one cup size please. Add the yolks and the lemon juice, no pits either! Place in a sauce pan half full of hot water. Do not let the water boil or go more than half way up the measuring cup. Stir often with a spoon; I leave the spoon right in the cup. It will be hard to stir at first as the butter is still solid but the stirring will get easier. Stir almost constantly until the sauce thickens to coat the spoon and then continue stirring it to an almost custard like thickness. Take the cup of sauce out of the water bath and cover it with aluminum foil while you poach the eggs.

Egg Directions:

4 eggs
2 English muffins
4 slices Canadian bacon (round thin slices)

Eggs: get the best and freshest quality eggs possible. Old eggs spread out as they poach and you will have the perfect shaped poached eggs with really fresh ones. I got mine from a friend who raises chickens; far superior in flavor and freshness to anything from a store.

Spray a frying pan with cooking spray. Fill it with warm water. Bring the water to an active bubble, add a tbsp. vinegar. Break each egg into a short cup and gently tip into the hot water. Do not boil the water. Poach them 3 minutes for a soft squishy egg and 4-5 for firmer eggs. Some like lots of egg yolk liquid and others like a firmer textured egg. Do not overcook them or they are just hard boiled eggs. They should not be firm when you remove them. Lift out with a slotted spoon and drain briefly on a paper towel.

While those eggs were poaching gently heat the bacon in a small frying pan with a tsp of butter. Cook about 2 minutes and flip, cook 2 more minutes.

Muffins; split each open with a dinner fork and toast in toaster; pale tan; not really browned.

eggs benedict 006

My sauce was leftover from the day before; slightly separated. Still tasted fantastic.

Assembly: place two hot muffin halves on each plate. Top with a slice of Canadian bacon and then a poached egg. Pour a big dollop of sauce on top. We like them served with briefly steamed asparagus spears in the spring and steamed broccoli spears the rest of the year.  Dig in!

Perfectly poached eggs make the best eggs benedict! Messy but yummy!

Perfectly poached eggs make the best eggs benedict! Messy but yummy!

Lemony and Refreshing Quinoa Salad

I made some lemony quinoa salad the other day, the same one I posted last year stuffed in tomatoes.  This time I just mixed in chunks of ripe homegrown tomatoes and it was very tasty as a side dish to a meal.  Kept well in my fridge for the 2 more days it took me to finish it. So easy to make too.  You could even make it the day before; just add the tomatoes before serving. So I am posting it here so you can try it; one caveat; only use local tomatoes.  Do NOT make this with those pale imitation supermarket tomatoes. It is not possible to create something tasty if you start with poor quality ingredients and those plastic flavored “tomatoes” just will not work in this salad.

quinoa salad 8-14

gazpacho and pork steak 014

Lemony Quinoa Salad

Makes four servings.

Ingredients:

½ cup regular quinoa, (not red or black)

1 cup water

½ a veggie bullion cube

2/3-3/4 cup small dice burpless cucumber

½ cup small dice zucchini

1/3 cup small dice red onion

2 tbsp. fresh mint or parsley, diced finely

1 lemon

3 tbsp.  EVOL (extra virgin olive oil)

1 tbsp. red wine vinegar

Sea salt and fresh black pepper to taste.

2 large ripe tomatoes cut in chunks

Directions

Put the quinoa in the water.  If it doesn’t say rinsed you should put it in a strainer and rinse it for a minute to get off any coating which can be bitter.  Add the half bullion cube, bring to a boil. Reduce heat to a simmer and cook 15 minutes.  Let cool to room temperature before continuing.

Place the cooled quinoa in a mixing bowl.  Dump in the finely chopped veggies and stir.  Sprinkle the fresh herbs on top; even fresh chives chopped fine or basil will work great.   Use a zester or a very fine grater and get as much zest off the lemon (wash the lemon first); you can zest right into the quinoa mixing bowl.  In a small mixing bowl put the juice of that same lemon, the EVOL and red wine vinegar.  If you have more than 3 tbsp of lemon juice add a bit more EVOL and whisk to combine; add in up to ½ tsp salt and ¼ tsp freshly grated black pepper.  Pour ¾ of it over the quinoa and veggies and stir to combine.  Taste and adjust seasoning and add the rest of the dressing if it is needed.  Chill at least 30 minutes. Add the chunked tomato and serve.

gazpacho and pork steak 008

This is a great side dish or, if you have a vegetarian visiting, it is a substantial main dish choice as quinoa has a lot of complete protein in it.

So simple but the combination of fresh lemon juice, lemon zest, red wine vinegar and EVOL makes a great salad dressing.  Do not cook the zucchini – if it is fresh and tender it is fantastic raw in a salad.  If you can’t get one of those European cucumbers use a small regular one and peel the skin off it before dicing. If the seeds are large do not use the center with the seeds.  Your salad will not be as pretty if there are sloppy cucumber seeds in it.

Quinoa salad will keep a few days in the fridge, if it lasts that long! Try it with different fresh herbs: it just won’t taste the same without the fresh summer veggies.  I try to eat seasonally and this is definitely a summer treat!

Simply Smashing Slow Cooker Citrus Chicken

I really love my new slow cooker with a timer and that great oval shape.  I have made some really yummy suppers in it.  As I have said before, I am not a fan of overcooked vegetables so I am rather choosy in what I make if it has to cook for 4 hours.  This citrus chicken is a variant on a recipe in that gf slow cooker cookbook by Carrie Forbes that I bought last fall.

I changed boneless chicken breast into thighs with bones; more flavor as far as I am concerned.  I didn’t have orange marmalade so I used some of my homemade lemon marmalade.  I added some slices of lemon.  All to the good of the flavor parade.  It was addictively fantastic served over brown rice with a side of asparagus.  I made the rice the night before so all I had to do was heat my serving of rice and top with the hot chicken.

Another lovely easy meal is created in my magical time machine slow cooker!.  Not that pretty to look at, maybe slightly more handsome than the Peruvian chicken.  But oh the flavor!  Serves 4 if you can restrain yourself from eating more than one thigh.  I used 4 in my recipe; I think you could put in up to 6, less sauce per serving which I frankly object to as this sauce is the bomb! I ate it four days in a row and each night I couldn’t wait for dinner because of this sauce and this dish.  One of those recipes where the results seem more than the sum of the ingredients.

citrus chicken, blueberry muffins 020

Citrus Chicken Thighs

4-5 chicken thighs

1 medium onion diced

½ cup orange juice; I made mine from concentrate

3 tbsp. orange or lemon marmalade

1 tbsp. brown sugar

1 tbsp. apple cider vinegar

1 tbsp. Worcestershire sauce (GF of course)

1 tsp. Dijon mustard

½ a lemon sliced in ¼ inch thick rounds

1 tbsp. cornstarch mixed with 2 tbsp. hot water

Grated rind of one naval orange

Directions

Spray the inside of your slow cooker with cooking spray.  Lay the chicken thighs in the bottom.  I left the skins on but I am sure you could remove them if that is your preference.  Top with the onions.  Mix the oj, marmalade, brown sugar, vinegar, Worcestershire sauce and mustard in a small bowl.  Pour over the chicken. Top with the lemon slices.  Cook 4 hours on high.  Add the cornstarch water mix, cook ten more minutes. Add the grated rind and stir. It’s that simple!  I serve it over rice.  I sided it with asparagus once and with a lovely salad of greens, european cucumber, chickpeas and avocado with my own vinaigrette another evening. Enjoy!