Banana Cream Pie Pleasures

Early spring brings a dearth of fresh fruit.  I find the apples to be less than optimal for pies after about February.  I was looking for something fresh and fruity.  No frozen fruit either; pricey to fill a whole pie and I really try to find things that are seasonal.  No rhubarb yet, just made a shoofly pie… hummn. I had a pie to bake for Joe’s birthday, he loves a pie so what to make, he isn’t a pear fan either. My sister said why not a banana cream pie? Bananas are here and fresh so yes! Besides, 2016 is my year of the pie plus I just love sharing a great pie recipe.  Here goes…

My mom used to make this pie when I was in my thirties; for some reason she never made it for us as kids.  I remember cutting up and setting the banana rounds in the baked pie shell for her.  The contrast of the rich custard, the flaky crust and the fluffy cream with the delicate banana flavor is just so memorable.  And if you can bake a pie crust and make custard this pie is simple.  If you want, buy a crust in a package to bake; that works too.  I assume you can use a box pudding but I highly recommend this custard, straight out of Betty Crocker’s 1978 cookbook.  It is an easy pie to convert to gluten free; just get that pie crust baked fully as it doesn’t go back in the oven.

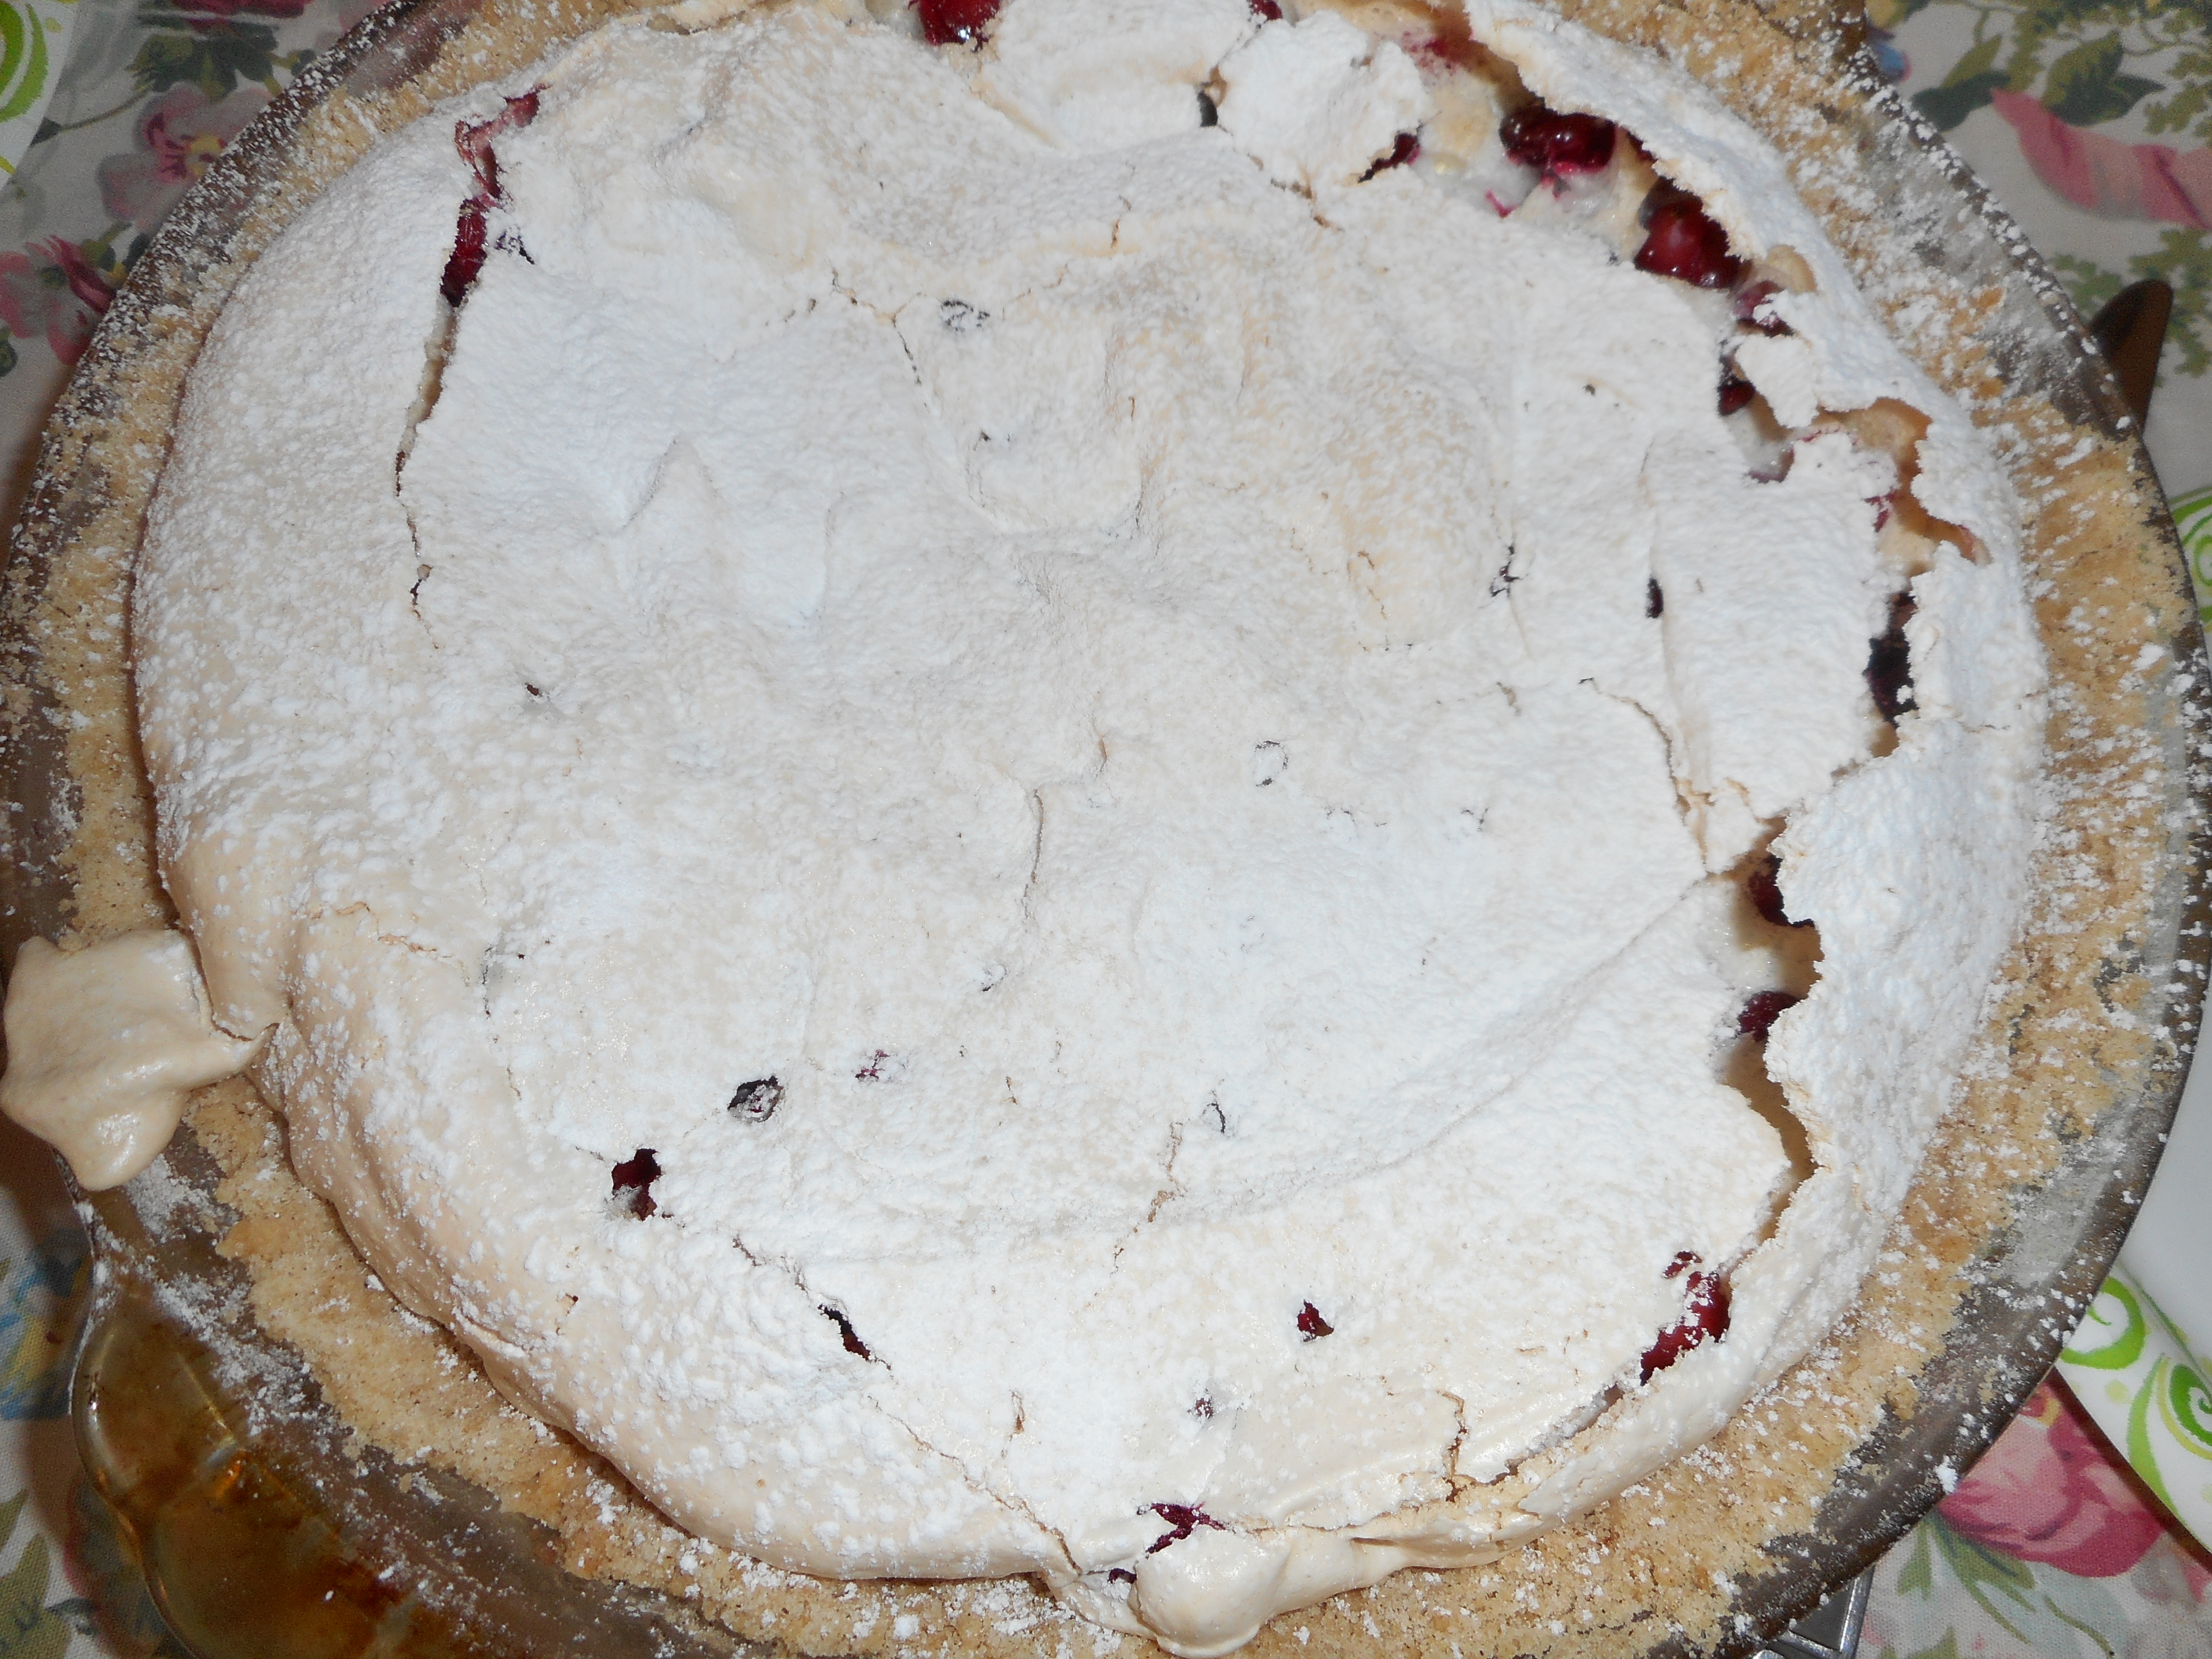
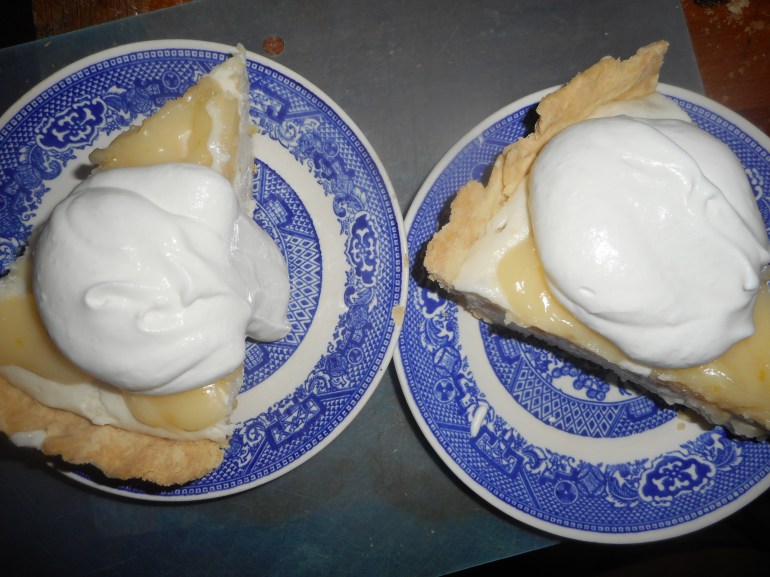
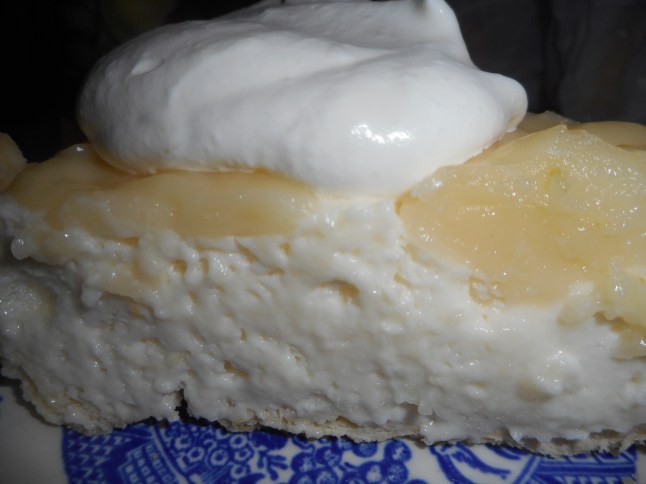
I only have a couple of pictures and I have to say my pie filling was soft so the pictures do not do this pie justice; I guess I need to make it extra firm for some better shots. Trust me; it taste much better than my pictures hint at.

curry, shepherds pie, banana cream pie 024curry, shepherds pie, banana cream pie 025curry, shepherds pie, banana cream pie 029

Mom’s Banana Cream Pie

Crust:

1 c plus 2 tbsp brown rice flour mix (at bottom of recipe)

2 tbsp sweet rice flour

1 Tbps granulated sugar

½ tsp xanthan gum

¼ tsp salt

6 Tbps cold butter cut into 6 chunks

1 large egg

2 tsp fresh orange or lemon juice

Spray 9 inch metal pie pan with cooking spray, dust with white rice flour.

Mix dry ingredients in bowl of stand electric mixer.  Add butter and mix until crumbly and resembling coarse meal.  Add egg and juice.  Mix until it comes together into big chunks.  Shape into a ball with your hands. Put it on a crust sized piece of wax paper (14 x 14 inches more or less), flatten the crust ball some; put on top of it another piece of wax paper and chill it all in your fridge 15-20 minutes while you prepare the filling.

Filling:

2/3 cup sugar

1/4 cup corn starch

½ tsp sea salt

3 cups whole milk or 2 percent, no lower fat than that

4 egg yolks beaten lightly

2 tbsp. butter cut into small cubes.

2 tsp. pure vanilla extract

2 large bananas

Topping: 1 cup whipping cream, 1/4 cup powdered sugar, 1/2 tsp. vanilla extract

Directions: Mix the dry ingredients in a 1 ½ qt sauce pan, Add the milk and stir as it heats.  Once it reaches a boil time it for one minute, STIRRING CONSTANTLY.  Then add 1/3 of it to the egg yolks, stir and return all to the pan, bring back to boil and time for one minute stirring constantly.  Add the butter and stir as it melts, then the vanilla, stir.  Pour into a mixing bowl, let cool a bit and then put a film of plastic wrap on the top; press it down onto the custard.  Chill at least an hour before using. Do not use until cold.  I must confess I nearly burnt my custard and actually strained it to get out any lump or browned bits.  It had a bit of a caramelized flavor due to the near disaster but I loved that sugary taste so I will maybe let it get like that next time too.

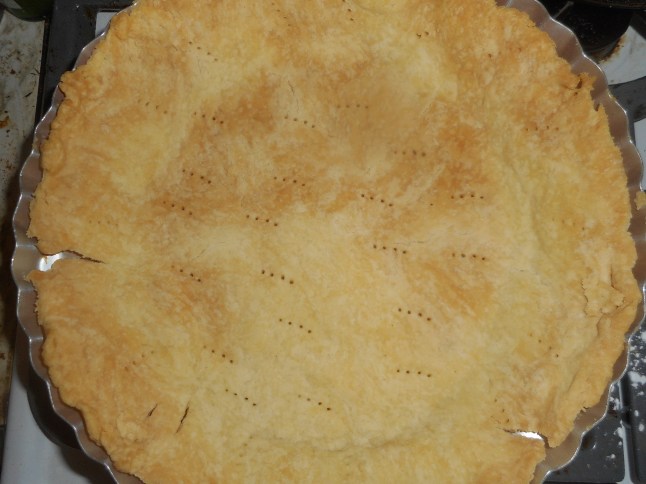
Roll out pie crust in a pie bag or between the two sheets of wax paper, try to get the thickness even, no thick middle! Peel off one side of paper and place in pie pan, centered.  Remove other slice of wax paper.  Crimp edges all around.  Prick with a fork evenly every inch so it won’t bubble as it bakes.

Bake in a preheated 400 degree oven for 12-18 minutes until the crust is light brown.  Cool at least 15 minutes

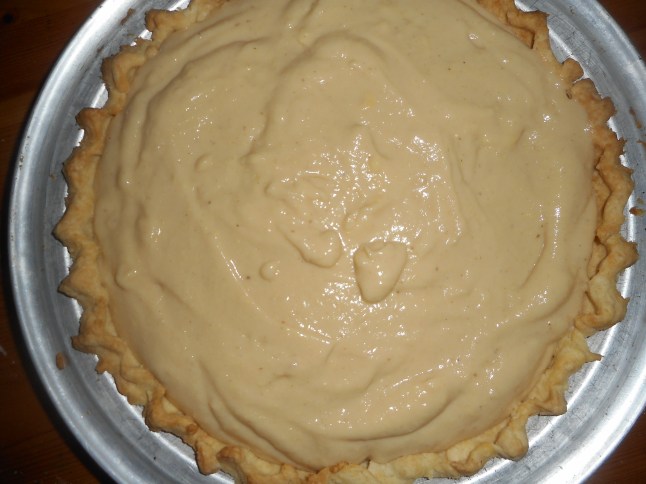
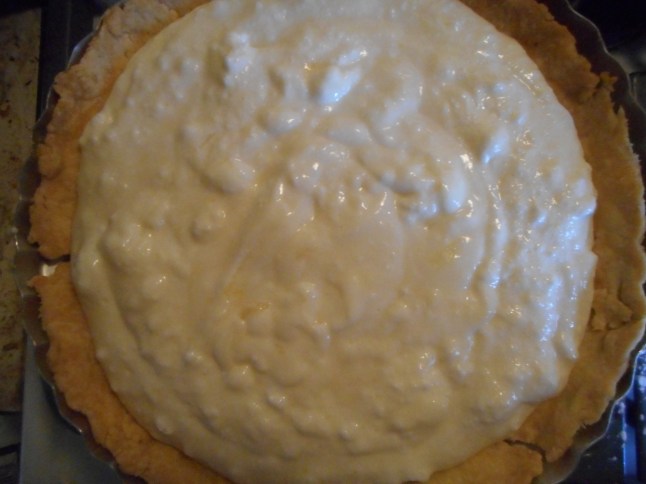
Cut peeled bananas into 1/2 inch rounds and cover the bottom of the pie crust with them close together.  Pour the custard over the sliced fruit and smooth the top.

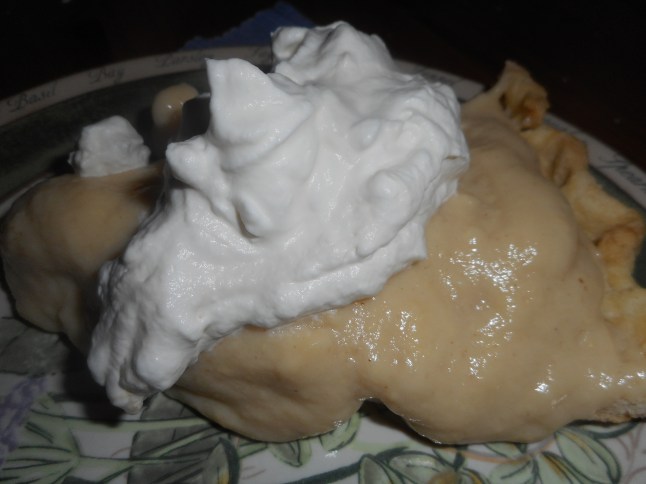
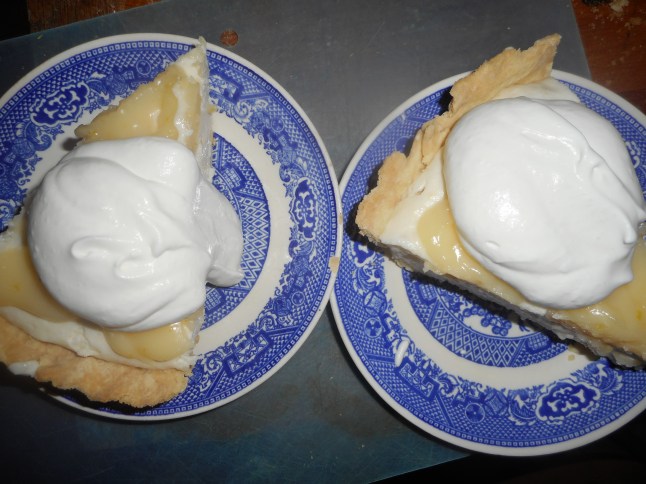
Chill pie 1- 4 hours before slicing and serving cold topped with a big dollop of whipped cream.

Whipped cream: Beat cold whipping cream with an electric mixer until it holds soft peaks; add a quarter cup powdered sugar and ½ tsp. vanilla.  Do not beat any more, just stir in.

I think it is best served the same day you make it, or no more then 12 hours after baking for optimal flavor.  The crust will get soggy if too much time passes. Mine was still very good the next day; just not as great as when really fresh.

Note: I froze my egg whites for later use in a cake. No wasting them, that’s for sure!

Brown Rice Flour Mix (Same as King Arthur GF All purpose blend)
2 c brown rice flour (finely ground)

2/3 c potato starch – Not potato flour!

1/3 c tapioca flour

** Pie filling from Betty Crocker Cook Book, 1978 Edition.

Cherry Crumb Pie…More Pie!!

Pie is a classic American dessert, what guy doesn’t like a fat slice of juicy pie? Cherry pie is perfect for the weeks before and after the Fourth of July or anytime you can get frozen sour cherries. Like this past weekend for a belated President’s Day pie.  My sister sometimes uses jarred cherries but I prefer fresh or frozen sours.  You can make it gf easily with this recipe – my crust is really tasty; my family practically cheers when I serve homemade pie and the rest of my family does not eat gluten free.

Fresh tasting, locally sourced fruits are exactly in the spirit of summer.  I picked mine this past July at an orchard down in Bucks County near the Turnpike along Limekiln Pike, about 20 minutes from Hellertown. Froze some of my pickings and here they are in this yummy treat; like a taste of high summer.

The sugar, cinnamon and almond extract create an intense cherry flavor but it will still be very cherry without the extract; left it out in the pie I made Saturday.  If you prefer a lattice it can be made by doubling this pie crust and some careful construction work.  I tend to go the easy route of the crumb as everyone loves it. You could make a smaller 8 inch pie; use a cup less fruit and cut the sugar some, ditto for the tapioca. This pie is fantastic with a scoop of vanilla ice cream on the side.  It is also yummy with some good quality plain organic yogurt, really!  Very healthy, tasty and no guilt with this treat.kolrabie 025

This recipe is a blending of my own pie filling and the pie crust and crumb recipes from Annalise Robert’s cookbook, Gluten-Free Baking Classics.  I used a touch less sugar, more fruit, and made a few other changes to create my own special pie.  Her cookbook is a fabulous resource and I can’t recommend it enough to anyone trying to bake gluten free for a family member.  There is nothing like the classic desserts that we used to enjoy seasonally to comfort a celiac who can’t eat what they used to.

 kolrabie 017

Angie’s GF Cherry Crumb Pie

Crust:

1 c plus 2 tbsp brown rice flour mix (at bottom of recipe)

2 tbsp sweet rice flour

1 Tbps. granulated sugar

½ tsp xanthan gum

¼ tsp salt

6 Tbps. cold butter cut into 6 chunks

1 lg egg

2 tsp fresh orange or lemon juice

Directions:

Spray 9 inch metal pie pan with cooking spray, dust with white rice flour.

Mix dry ingredients in bowl of stand electric mixer.  Add butter and mix until crumbly and resembling coarse meal.  Add egg and juice.  Mix until it comes together into big chunks.  Shape into a ball with your hands. Put it on a crust sized piece of wax paper (14 x 14 inches more or less), flatten the crust ball some; put on top of it another piece of wax paper and chill it all in your fridge 15-20 minutes while you pit the fruit.

Filling:

6 cups pitted fresh sour cherries: place in medium bowl (If frozen do not defrost and bake the pie maybe ten to fifteen extra minutes until good and bubbly)

Mix the following in a small bowl and pour over the cherries.  I used my frozen fruit and poured the following right into the bag and squished it around a bit before pouring into the pie crust.

¾ cup granulated sugar

4 tbsp. tapioca flour

½ tsp. cinnamon

1/2 tsp. almond extract

Directions:

Roll out pie crust between two sheets of wax paper or in a pie bag; try to get the thickness even, no thick middle! Peel off one side of paper and place in pie pan, centered.  Remove other slice of wax paper.  Crimp edges all around.  Fill with sweetened fruit mix.  Sprinkle the crumb topping (1 to 1½ cup) evenly over this mixture.  The more crumbs the thicker the crust they will form; for a really thick crust use all the crumbs from the recipe below.

If you love your pie really sweet add another ¼ cup granulated sugar to the dry mix part of the filling.  I found the pie to be plenty sweet but everyone has their own sweetness level.

Bake in a preheated 400 degree oven for 30 minutes with a piece of aluminum foil on top of the pie, then 20 more minutes uncovered until bubbly and the crust is light brown, longer if you are using frozen fruit.  Cool at least 2 hours before serving at room temperature.

Note: I bake pies in my bottom heat pizza oven and it gives me a great browned crust.  If your oven isn’t bottom heat you might want to pre-bake the crust 10 minutes before filling and topping the fruit.

Crumb topping

Put all four ingredients in the same mixing bowl you made the bottom crust in and mix well with mixer paddle until crumbs form. Don’t over mix or you will get a soft dough; not a good thing…done it and not happy with myself…still usable; just big crumbs.

¾ c brown rice flour mix

½ c granulated sugar

½ tsp xanthan gum

1/3 c cold butter cut into six chunks

———-

Brown Rice Flour Mix  (Same as King Arthur All purpose GF Blend)
2 c brown rice flour

2/3 c potato starch

1/3 c tapioca flour

Originally posted by me here in July 2015.  Minor revisions made.

Lemon Velvet Pie…Heavenly Treat

I hereby declare 2016 the Year of the Pie.  I plan to post a pie recipe every single week.  Well, maybe some of them will be tarts, galettes, tartlets and rustic tarts but all in the pie clan!  Since I want to eat less sugary desserts I am going to step away from cakes and turn to something my family all adores.  Pie.  It’s time to make more pies.  Full of fruit pies, nut tarts, citrus chiffon pies, jam tarts, and chocolate pies of all sorts.  Pie and more pie.  Sounds delightful doesn’t it?

My first entry is something out of my Farm Journal’s Best Ever Pie Cookbook published in 1981.  My dear sister Margie gave it to me a long time ago and I have baked a number of sweet pie treats out of it. This is a lemon pie but unlike any I have ever made.  It is called a lemon velvet pie.  I think of it as a puffy lightly lemon cloud of a treat.  Impressive and delicious. My guy is already bugging me to make it again for him and I just made it yesterday! Actually he saw the recipe and asked me to make it so I did.  It has a lot of elements to it but no step is that difficult to conquer. It might strike you as the offspring of the union of a chiffon pie and lemon meringue pie!  Anyway, it is melt in your mouth and delicate especially if you make it with Meyer lemon as I did.

Per my New Year’s promise I did cut the sugar down quite a bit.  This filling is naturally gluten free.  My wheat eating friends can use a regular pie shell to make this treat.  I am betting it might be also great with my cookie/tart pie crust. This pie will be the talk of your next gathering if you whip it up!

———–

Here are some impromptu shots as I made this pie: the crust, yeap I see those cracks! No matter…covered up by the pie filling. And yes; the top layer refused to totally spread out for me.  Next time I might warm it a tad so it spreads smoothly. But it is one tasty pie!lemon velvet pie 005

lemon velvet pie 007lemon velvet pie 009lemon velvet pie 012lemon velvet pie 013lemon velvet pie 014

Lemon Velvet Pie

2/3 cup of sugar (can add another 1/3 cup if you like it sweet)

6 tbsp. corn starch

½ tsp. salt

1 ½ cups cold water

2 eggs separated

2 tbsp. butter

1 tsp. lemon zest, grated fresh

1/3 cup fresh lemon juice

1 tsp. vanilla extract

1 tbsp. (1 packet) unflavored gelatin

¼ cup cold water

1 cup light cream

A baked 9 inch pie shell

1 cup heavy cream, whipped with 2-3 tbsp. powdered sugar and 1/2 tsp. vanilla

Directions; bake the pie crust and let cool. See any of my past pie blog posts for a crust recipe.  I bake it about 20-25 minutes until it is light brown.

Combine sugar, cornstarch and salt in 1 ½ to 2 qt saucepan, stir in water, cook over medium heat until it thickens and mounds when dropped from a spoon; stirring constantly. Might take 3-5 minutes.  Stir a couple of spoons of it into the two stirred up egg yolks. Add right back into pan and stir well, cook 2 minutes on low stirring constantly. Remove from heat, add butter, stir, add the zest, lemon juice and vanilla, stir well. Remove one cup of filling and set aside.

Soften gelatin in the cold water for 5 minutes.  Add to the remaining hot filling in pan, stir to dissolve it.  Gradually stir in light cream, cool slightly to firm a bit.

Beat egg whites until firm and glossy, using electric mixer at high speed.  Fold into the pan of cooling filling.  I used a rubber spoonula. Pour mixture into baked pie shell, Refrigerate 15 minutes.  Top with the remaining cup of plain filling you set aside.  It will be thick; I put small spoonfuls all over the top.  Chill in fridge at least 2 hours to set the pie.

Whip the cream, add some powdered sugar and vanilla to sweeten lightly and serve slices with big dollops of cream on top.

Apple Pear Carmel Pie Perfection

Pie has always been a classic holiday dessert. But sometimes we want something a bit different. Maybe, right now you are frantically looking for an alternative to pumpkin pie or apple pie; they seem kinda ho hum. Look no further, apple pear caramel crumb pie to the rescue!

Fresh tasting, locally sourced fruits are exactly in the spirit of Thanksgiving. The apple is the predominant flavor but the pear adds sweetness and a special flavor. The sugars, spices and lemon peel create a yummy caramely sauce. It is not that really sweet caramel of sauces; just enough sweetness to tease your palette.

This pie is fantastic with a scoop of vanilla ice cream on the side. I even tried a slice with some sharp cheddar in the British pie tradition; it was nice but I really like it best all alone, so the delicate fruit and spices show their winning flavors.

apple pear pie, squash, chicken and dumplings 010

apple pear pie, squash, chicken and dumplings 011

This is the dry blend you mix the fruit slices with before pouring in the crust.

apple pear pie, squash, chicken and dumplings 012

Loaded with crumb topping and ready for the oven!

This recipe is a blending of my own pie filling and the pie crust and crumb recipes from Annalise Robert’s cookbook, Gluten-Free Baking Classics. I used less sugar, more fruit, and made a few other changes to create my own special pie using apples and pears. Her cookbook is a fabulous resource and I can’t recommend it enough to anyone trying to bake gluten free for a family member. There is nothing like the classic desserts that we traditionally enjoy at celebrations and feasts to comfort a celiac who can’t eat what they used to.apple pear pie, squash, chicken and dumplings 019

Angie’s GF Apple Pear Crumb Pie

Crust:
1 c plus 2 tbsp brown rice flour mix (at bottom of recipe)
2 tbsp sweet rice flour
1 Tbps. granulated sugar
½ tsp xanthan gum
¼ tsp salt
6 Tbps. cold butter cut into 6 chunks
1 lg egg
2 tsp fresh orange or lemon juice

Spray 9 inch metal pie pan with cooking spray, dust with white rice flour.

Mix dry ingredients in bowl of stand electric mixer. Add butter and mix until crumbly and resembling coarse meal. Add egg and juice. Mix until it comes together into big chunks. Shape into a ball with your hands. Put it on a crust sized piece of wax paper (14 x 14 inches more or less), flatten the crust ball some; put on top of it another piece of wax paper and chill it all in your fridge 15-20 minutes while you chop the peeled and cored fruit into ¼ to 1/3 inch slices.

Filling:

5 cups peeled, cored, and thin sliced cooking apples (4 big apples)
2 cups (2 large pears) bosc pears; peeled, cored, and sliced thin – place in medium bowl

Mix the following in a small bowl and pour over the sliced apples and pears:
1/4 cup granulated sugar
1/4 cup light brown sugar
2 tbsp. tapioca flour
1/4 tsp. nutmeg
1 tsp. cinnamon
1 tsp. grated or zested lemon peel (I zested)

Roll out pie crust between the two sheets of wax paper; try to get the thickness even, no thick middle! Peel off one side of paper and place in pie pan, centered. Remove other slice of wax paper. Crimp edges all around. Fill with sweetened fruit mix. Sprinkle the lemon peel evenly over top and pour the crumb topping (1 to 1½ cup) evenly over this mixture. The more crumbs the thicker the crust they will form; for a really thick crust use all the crumbs from the recipe below.

If you love your pie really sweet add another ¼ cup granulated sugar to the dry mix part of the filling. I found the pie to be plenty sweet but everyone has their own sweetness level.

I put a pie guard under my pies to contain any oven accidents. If you make many pies it is a must. pie guardBake in a preheated 375 degree oven for 30 minutes with a piece of aluminum foil on top of the pie, then 30 more minutes uncovered until bubbly and the crust is light brown. Cool at least 2 hours before serving at room temperature.

Note: I bake pies in my bottom heat pizza oven and it gives me a great browned crust. If your oven isn’t bottom heat you might want to pre-bake the crust 10 minutes before filling and topping the fruit.

Crumb topping

Put all four ingredients in the same mixing bowl you made the bottom crust in and mix well with mixer paddle until crumbs form.

¾ c brown rice flour mix
½ c granulated sugar
½ tsp xanthan gum
1/3 c cold butter cut into six chunks
Brown Rice Flour Mix (same as King Arthur GF blend)
2 c brown rice flour
2/3 c potato starch (not potato flour)
1/3 c tapioca flour

Cranberry Crackle Tart: Light and Flavorful

I discovered this recipe on line, back before last Thanksgiving, at splendidtable.com. I loved the look and sound of it but didn’t find time to make it until last Christmas. Love at first bite. Like a fruit tart and a pavlova had a baby: this is the felicitous result. Light and delicate making it perfect after a hearty Thanksgiving feast. It is really guilt free if you eat it minus any toppings. I devoured it with vanilla ice cream on top at last year’s Christmas luncheon, nice flavor combination. I want to make one for Thanksgiving, maybe this time I will be serving it like you do a Pavlova, with lightly sweetened real whipped cream on top. Yumm!

It is really easy to throw together. If you are gluten free you can use the recipe provided below, which I adapted the splendid table recipe to make it gluten free. At holidays like Thanksgiving and Christmas Wegmans often has gf redi-made crusts. So does Frey’s Better Foods in Hellertown. If you are a wheat eater use whatever cookie tart crust you like. I added the cinnamon to my crust and found it added a lot to the complexity of the flavors. The crust absolutely needs to be prebaked before you put the tart together.

I should say I seldom use fresh cranberries; I generally make a fresh relish – old family recipe – for Thanksgiving but never got it made last November. So I had the bag of cranberries in the fridge in the fruit bin. Yeah, it sat there a month: I did have to pick through it (you always should) after I rinsed them and remove and squishy ones. There are usually a few of those mixed in and they aren’t great for anyone to eat. Let the picked over berries dry. Anyway, my point is; this tart is fantastic tasting even if you aren’t a huge cranberry fan.

I used some smooth raspberry jam (what I had) but you could probably use most any jam. Just chose one full of real fruit in a flavor you like as you can definitely taste the jammy flavor mixed in with the crust and the meringue topping. I loved it with raspberry jam, a favorite flavor for me.

crackle tart 006crackle tart 007

Sweet Cookie crust

Place the following in a stand mixer bowl and combine

1 cup GF flour (recipe below)
¼ cup granulated sugar
1 tsp xanthan gum
½ tsp. cinnamon
Add 5 tbsp cold butter, cut into 6-7 chunks. Mix on low until the butter is just crumbs blended in.
Add 1 tsp. vanilla extract and 1 tbsp water. Blend well.

Pour the crumbs into a ten inch tart pan that was sprayed with cooking spray. Or a glass pie pan. Spread it up the sides. Press gently in so it is a cohesive crust but do not press really hard or it will be like concrete when you finish baking it!

Bake at 350 degrees for 18 minutes. Set the crust on a rack to cool to room temperature. Do not let it get more than light brown.

Brown Rice Flour Mix (Same as King Arthur’s GF Blend)
2 c brown rice flour
2/3 c potato starch
1/3 c tapioca flour
Filling

2 tablespoons chunky cherry, raspberry or strawberry jam
2 large egg whites, at room temperature
Pinch of fine sea salt
1/2 cup sugar
1 1/2 cups cranberries (if they’re frozen, don’t thaw)
Confectioners’ sugar, for dusting

Directions: When you’re ready to fill and bake the tart: Preheat the oven to 300 degrees F.

Gently spoon the jam on top of the crust and spread it evenly over the bottom, I used the back of my big spoon for this operation. In a large bowl with a hand mixer, beat the egg whites with the salt at medium speed just until they are fluffy and fairly opaque. With the mixer going, add the sugar in a slow, steady stream, then keep beating on high until the whites are shiny and form definite peaks; they will look like marshmallow. This is a meringue.

Pour the cranberries into the bowl of meringue and, using a flexible spatula or spoonula fold them into the meringue. Try to distribute the fruit evenly, but don’t mix too much– you want to keep the meringue fluffy. Spoon the meringue over the jam and spread it to the edges, making it swirly if you’d like. The jam might push up around the sides of the meringue, and that’s fine. Don’t fret if it looks like not enough filling, it will puff up in the oven to fill the pie pan.

Bake the tart for 1 hour, at which point the top will be light beige and cracked here and there. (If you’d like more color, you can bake it a bit longer or even put it under the broiler.) I did not go there! Transfer the tart to a cooling rack and cool to room temperature. I did cut it while slightly warm and we all thought that was just perfection. If you’d like, and I do, dust the tart with confectioners’ sugar before serving. Whipped cream on top is also great.

Storing: The tart is best the day it’s made, although it’s still pretty nice the next day. Leave the tart at room temperature, covering only the cut part with a piece of wax paper or plastic wrap. I doubt you will have any the second day anyway. It is that tasty.