Lemon Meringue Pie

This pie is old school delicious. This is my mom’s bastardized version of a Betty Crocker recipe made gluten free with my favorite crust.  It has no gelatin for you gel haters! I make it with the lesser amount of sugar in the filling, but you can more than double it if you are a sweet freak.  I have never met a man who didn’t love it, well…maybe one. My friend Russel doesn’t care for anything with lemons. But his wife Claire adores lemon so this pie is for her and in loving memory of my mom who passed away in October 2020.

If I have them, I love to use Meyer lemons for this recipe.  Your pie will have a really delicate flavor – so light I sometimes call it lemon cloud pie!  Don’t worry; regular lemons work just fine. It can be difficult to find Meyer lemons and pricey too.

I never got my mom to admit it but I am positive she added extra egg whites to her meringue.  Her pie was towering with the white fluffy stuff unlike my nearly level pie made with just three whites.  It is up to you how impressive you want your dessert to look. But if you have company you might want to go for the big bang of a four- five egg white meringue topping for maximum wow power

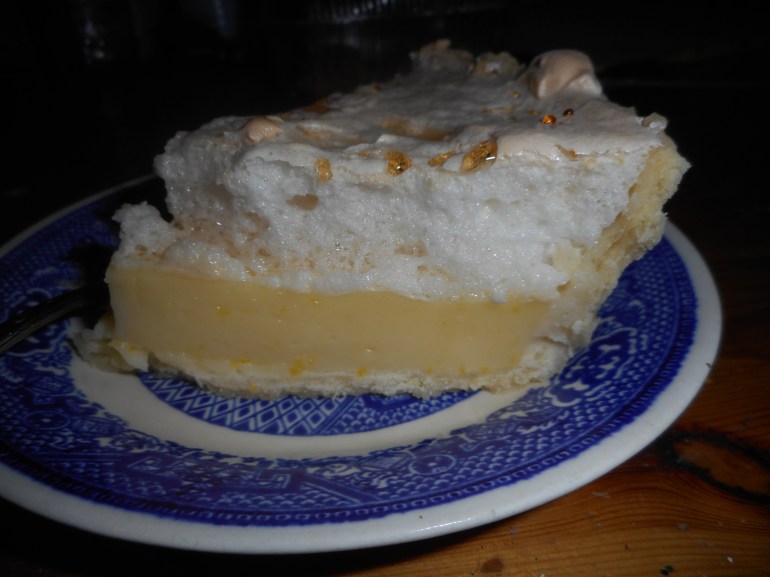
My mom added the touch of corn syrup to replace some of the less sugar and because it makes the texture of this pie creamier and more delicate.  Don’t make this pie on a very humid or rainy day or the meringue will weep and bead on the top.  It will taste fine, but the look will suffer from the humidity. My slice picture shows some of that beading; it started to get humid that day and my pie still tasted fantastic even with the slight beading issue.

Store any leftover pie in the fridge. It doesn’t keep more than two days but frankly none of it ever lasts more than two days.

Mom’s Lemon Meringue Pie

Crust:

1 c plus 2 tbsp brown rice flour mix (at bottom of recipe) [King Arthur Basic GF mix]

2 tbsp sweet rice flour

1 Tbps. granulated sugar

½ tsp xanthan gum

¼ tsp salt

6 Tbps. cold butter cut into 6 chunks

1 lg egg

2 tsp fresh orange or lemon juice

Spray 9 inch metal pie pan with cooking spray, dust with white rice flour.

Mix dry ingredients in bowl of stand electric mixer.  Add butter and mix until crumbly and resembling coarse meal.  Add egg and juice.  Mix until it comes together into big chunks.  Shape into a ball with your hands. Put it on a crust sized piece of wax paper (14 x 14 inches more or less), flatten the crust ball some; put on top of it another piece of wax paper and chill it all in your fridge 15-20 minutes. Then roll it out and line a 9 inch pie pan with it.  Make sure you get the middle nice and thin; this crust can be tough to get the center as thin as the edges. Prick it all over with a fork to keep it from bubbling out and bake the empty crust at 375 for 10-12 minutes until light brown.  Let cool.

Lemon Filling:

Ingredients:

1/3 to ¾ cup sugar

1/3 plus 1 tbsp. corn starch

1 ½ cup water

3 eggs, separated; yolks for filling, save whites for meringue

1-2 tsp. lemon zest

½ cup fresh lemon juice

2-3 tbsp. clear corn syrup

3 tbsp. butter cut in small chunks

Directions:

Start oven heating to 400 degrees for browning the topped pie.

Mix the sugar and corn starch in a heavy bottomed medium sized saucepan.  Add the water, stirring.  Heat until it boils, stirring constantly, boil one minute, take off heat.  Beat yolks briefly in a small mixing bowl, then add the hot stuff slowly to it; half the hot mixture, stirring constantly.  Then dump it all back into the saucepan, bring to a boil, stir like a crazy person so it doesn’t scorch. Boil 1 minute at medium heat.  Remove from heat, stir in the lemon juice and zest and then stir in the butter.  Let it melt as you stir.  Glug in some corn syrup. Pour the hot lemon filling into the pie crust.  Top while still hot with the meringue you just beat up. Make sure you get the meringue all the way across the top and along every single edge. No cracks, no gaps. Bake it 10-11 minutes until light brown. Cool to room temperature and then chill for 2-6 hours.  Slice and serve.

Meringue topping

The three egg whites (or 4-5)

¼ tsp. cream of tarter

6 tbsp. granulated sugar (or 8-10 tbsp.)

Beat the whites and the cream of tarter until it is past the foamy stage, add the sugar half a tbsp. at a time beating on high until the whites are stiff and glossy.  This will take several minutes.

If you add one or two extra egg whites add another ¼ tsp. cream of tarter and add 2 tbsp. sugar for each extra white.

—————–

Brown Rice Flour Mix (Same as King Arthur Basic GF blend)
2 c brown rice flour

2/3 c potato starch

1/3 c tapioca flour

Originally posted March 2015, slightly revised in 2016, unchanged since then.

Cherry Sunrise Pie…an Easter Tradition

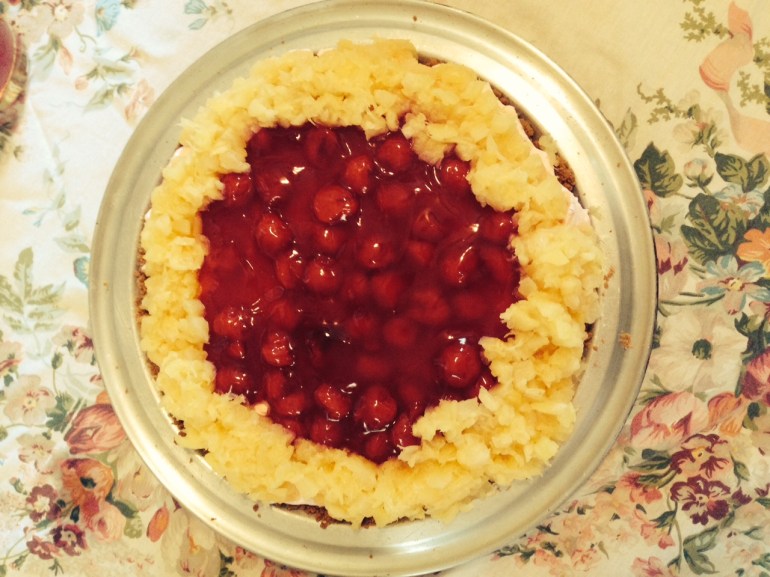
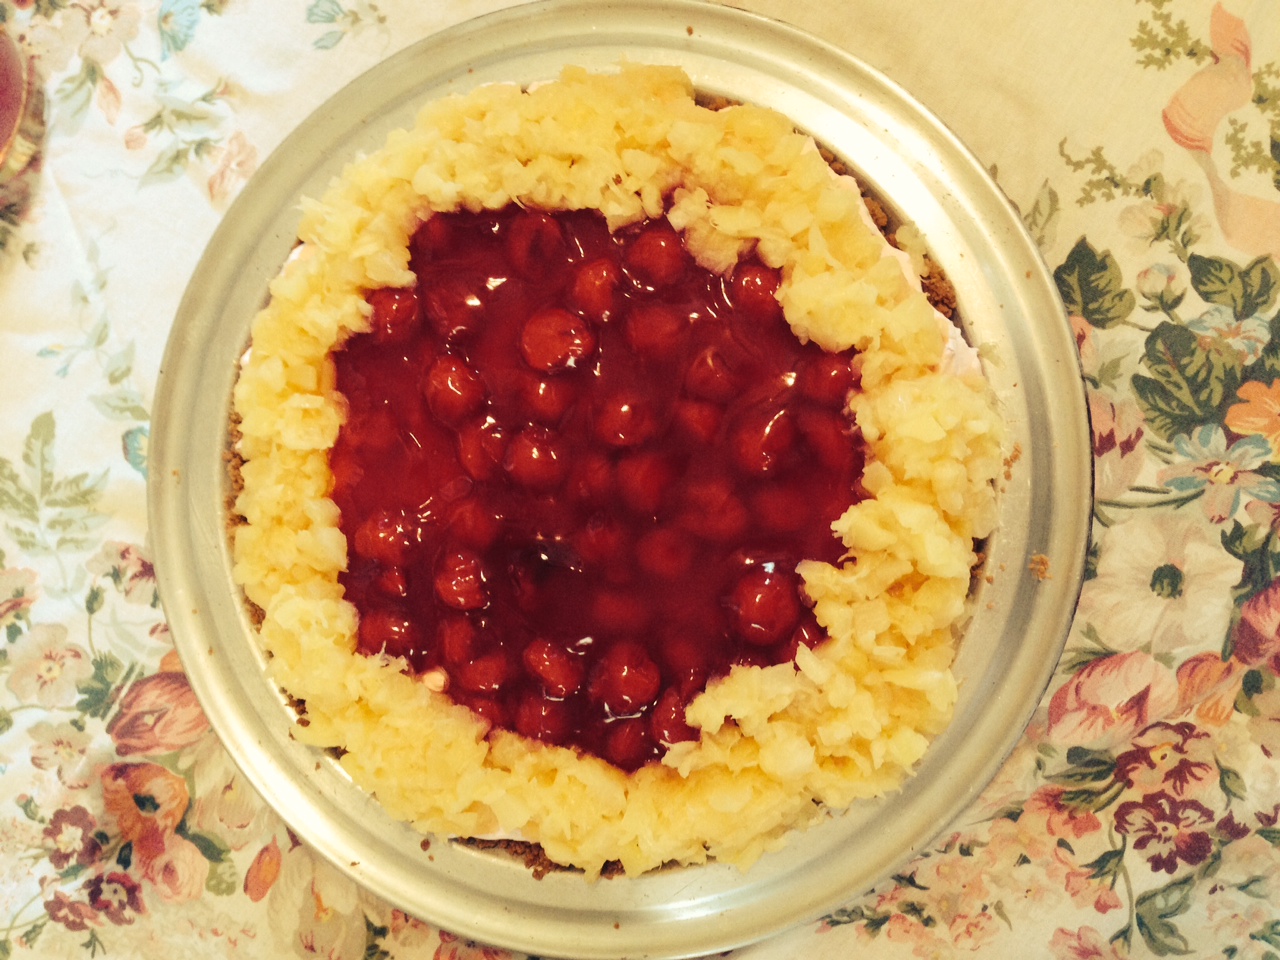
In a few days it will Easter, the day of baked ham, chocolate candy and dyed or decorated eggs…. For any holiday meal, I want dessert to be special yet not too heavy: an attractive fruit-based pie, but easy to construct and yummy: a tall bill to fill but this cherry sunrise pie checks off all those requirements.  The last time my sisters came for Easter Karen asked me to make it for the big meal and she melted my heart when she said it felt like Easter when we ate that pie! They chow down as they are cherry lovers plus my sisters especially like how light it tastes and how it doesn’t land like a heavy chunker in your tummy.  I share it so you can make it anytime you want an easy company dessert.   You should make it the night before, so it is chilled enough to eat by 1 pm.cherry sunrise pie

It has to have a gluten free crust for me and I have one we bought at Wegmans or if you are making it for the wheat eating public there are redi-made crusts out there that will make this so simple yet so delightful. I usually make gf scratch graham crackers ahead of time, so they set a couple of days before I crush most of them into crumbs for the crust; homemade is pretty easy and cheap and they taste phenomenal compared to store bought gf graham cracker crumbs. Just saying! I love eating the leftover crackers as cookies; so yummy.

Cherry Sunrise Pie

One pie crust: you can make it from an 8 oz box of gluten free graham crackers crushed and mixed with 1/3 cup melted butter and pressed gently into a 9-inch pie pan.  Bake at 375 degrees for 9 or 10 minutes.  Let cool completely before filling. Or buy one; they sell them at holiday times in the gluten free area in my local supermarket and at the local natural food store. Will save time to buy one…

Ingredients for filling

18 or 19 oz can crushed pineapple in own juice

1 21 oz can of cherry pie filling

1 8 oz pkg light cream cheese, room temp.

½ tsp vanilla

1 cup heavy cream

¼ cup powdered sugar

Directions

Drain the pineapple for 20 min; save the juice!  I used my microwave to gently warm the cream cheese; it has a softening setting for cream cheese which works perfectly. I unwrapped it and placed the cold slab on a small plate and warmed it on a very low heat until supple and smooth.  Dump in a mixing bowl, add 2 tbsp pineapple juice, the vanilla, 1/3 cup crushed pineapple, ½ cup cherry pie filling.  If you are smart you will mostly use the goopy stuff and not too many cherries.  Save them for on top! Next, stir this all together really well.

Then whip the chilled heavy cream in a separate bowl with an electric

mixer until soft peaks form, add powdered sugar and mix well with the mixer; be careful not to over beat it.  If it gets clumpy you went too far.  Fold this into the cream cheese mix until it isn’t streaky with white areas.

photo 1

Gently spoon the filling into the pie shell, spread it out to fill the entire bottom.  I used a spoonula (blend of spoon and spatula) and smooth the top with a flat cake spatula.  I like to leave a sort of tiny ridge on the outer edge to keep the pineapple from spilling out onto the crust.  Then carefully pour the rest of the cherry pie filling in the center spreading it to cover ¾ of the top from the center out.  Finally, use a spoon to put pineapple around the outer rim of the cherry filling.  Chill at least 2 hours, preferably 4.  Cut and slice. No adornments are needed. It has a light fluffy consistency, and it isn’t that sweet.  Great to top off a big meal; not too filling and the fresh fruity taste is a spring treat.  Try it soon and you will be giving the recipe out afterwards!

I have no pictures of creating this pie; maybe this Easter I will take the time to snap a few and add them to this post at a later date.

This is about the seventh time I have blogged this recipe; first was in 2014. Been making it for like 20 years!

Shoo Fly Pie (Shoe Fly Pie at my house!)

This sweet pie is a Pennsylvania Dutch tradition. It is quick to go together, needs neither refrigeration, nor a long chilling down before consuming it, pleases most everyone and best of all it can be made in any season; no fruit needed.  It wasn’t too hard to change from my old recipe to a gluten free version.  I recommend it for celiacs who miss that old time flavor of shoe fly pie.  Note: some folk say shoo fly pie but my recipe used the spelling you see in this post.  I believe either is appropriate.

I know folks who shy away from gluten free baking thinking it is too complicated.  Well, a couple years ago I featured pies and this is the easiest pie around so I dedicate this to a few friends who have been too scared to bake gf.  You can do this one! If you want, buy a ready made uncooked crust but I swear that with a stand mixer this is the easiest and best gf crust around.

This shoe fly pie recipe is a blending of the filling I have used for years, (my sister Margie gave me the recipe a long time ago) and the pie crust and crumb recipes from Annalise Robert’s cookbook, Gluten-Free Baking Classics.  Her cookbook is a fabulous resource and I can’t recommend it enough to anyone trying to bake gluten free for a family member.

My shoe fly pie is considered a “wet bottom” pie; not too crumbish.  If you want it drier use ½ cup molasses and ½ cup water.  I love it soft and moist so my version always is a wet bottom shoe fly pie.

Angie’s Shoe Fly Pie

Crust:

1 c plus 2 tbsp brown rice flour mix (at bottom of recipe)

2 tbsp sweet rice flour

1 Tbps. granulated sugar

½ tsp xanthan gum

¼ tsp salt

6 Tbps. cold butter cut into 6 chunks

1 lg egg

2 tsp fresh orange or lemon juice

Spray 9 inch metal pie pan with cooking spray.

Mix dry ingredients in bowl of stand electric mixer.  Add butter and mix until crumbly and resembling coarse meal.  Add egg and juice.  Mix until it comes together into big chunks.  Shape into a ball with your hands. Put it on a crust sized piece of parchment or wax paper (14 x 14 inches more or less), flatten the crust ball some; put on top of it another piece of parchment or wax paper and chill it all in your fridge 15-20 minutes. Make the crumb topping while it chills.

Crumb topping

Put all four ingredients in the same mixing bowl you made the bottom crust in and mix well with mixer paddle until crumbs form.  You will only use 1 ½ cups of the crumbs; put it in a jar and store it in the fridge until your next pie; it keeps well for several weeks.

¾ c brown rice flour mix

½ c granulated sugar

½ tsp xanthan gum

1/3 c cold butter cut into six chunks

Next, roll out pie crust between the two sheets of parchment or wax paper; try to get the thickness even, no thick middle! Peel off one side of paper and place in pie pan, centered.  Remove other slice of wax paper.  Crimp edges all around.  Then make filling and pour half into the crust, careful not to splash it out.

Filling:

2/3 cup molasses, I used Grandma’s

¾ cup boiling water

½ tsp. baking soda

1/4 tsp. cinnamon

Mix the ingredients in a medium mixing bowl with a spoon until blended. It will foam up a bit as the baking soda mixes with the molasses! Gently pour half of the molasses mixture into the raw pie shell.

Then pour half the crumb topping (1 1/4 to 1½ cup total) evenly over this mixture.  Add the rest of the molasses liquid and sprinkle the rest of the crumbs on top.

Bake in a preheated 350 degree oven for 30-35 minutes Cool at least ½-1 hour before serving or let cool to room temperature.

Note: I used to bake pies in my bottom heat pizza oven and it gaveme a great browned crust. No longer have that oven so I put the wire rack as close to the bottom as possible and it really helps the bottom of my pie to brown.  One other option: if your oven isn’t bottom heat you might want to pre-bake a gf crust 10 minutes before filling.

Brown Rice Flour Mix (King Arthur’s basic gf blend)
2 c brown rice flour

2/3 c potato starch

1/3 c tapioca flour

** This blog post first appeared in March of 2016, revised slightly in 2023 to clarify the directions.  Enjoy!

Black Bottom Pie A Southern Treat!

This is a humdinger of a pie, from the South but definitely a pie we love here in Pennsylvania. A gingersnap crust topped with a thin layer of dark chocolate custard and then a high layer of rum flavored custard which I like to top with lightly sweetened freshly whipped cream. Heaven on a plate.

This pie is slightly tricky but honestly I have never had a fail and I have made it like 2 dozen times over the years. My mom used to make it and I often make it during the Christmas season. We had some on New year’s Eve to celebrate. My guy claims to not like gingersnaps but once he eats a freshly baked one made from scatch he suddenly becomes a fan! So, you could use a graham cracker crust but I urge you to try this with the gingersnap version. The rest of it is hard to sub in anything. I generally like dark rum but in a pinch I have used white rum more than once. I use bittersweet chocolate but you could try it with semi-sweet or even 50/50 bittersweet and unsweetened chocolate.

Black Bottom Pie

Make a gingersnap crust; 1 1/2 cup crushed gingersnaps; I do it in the blender

1/3 cup melted butter; mix in a bowl and pour into a 9 inch pie pan; spread evenly on bottom and sides. I like to use a sheet of wax paper to easily spread it. Bake at 350 degrees for 8 minutes. Let cool completely.

Filling

Ingredients

1/2 cup sugar mixed with 1 Tbsp and 2 tsp. cornstarch

2 cups whole milk heated to quite hot in the microwave; I do 2 minutes

4 eggs separated; put yolks in a small bowl and lightly beat with a whisk

1.5 ounces of bittersweet chocolate melted

1 tsp. vanilla extract

1 Tbsp plain gelatine mixed with 2 Tbsp. cold water in a small dish; let stand a minute before using

1/4 tsp. cream of tarter

2 Tbsp rum, preferably dark rum

a cup of cold heavy cream

Directions: Mix the sugar and cornstarch and add to the milk in 1.5 quart saucepan, heavy if you have such. Stir as it heats on medium. I use a heat diffuser between the heat and the pan. Cook slowly, do not let boil. Stir a lot so it heats evenly. It needs to coat the spoon; won’t get that thick and this generally takes 8-10 minutes at least. Then use a measuring cup to dip out 1/3 or so cup of it and stir into the egg yolks. Then pour the egg yolk mixture into the hot milk and stir well. Then cook on medium heat for a minute. Meanwhile… Melt that chocolate; I do it in my microwave. Dip out or pour a cup to 1.25 cups custard into a small bowl; pour in melted chocolate, stir good and add the vanilla, stir and let cool a couple of minutes before pouring into the crust. evenly coating the bottom. Put in fridge to chill.

Whip the egg whites and cream of tartar until forming soft peaks. Add 1/3 cup sugar very slowly as it beats to firm peaks. Pour the melted gelatin into the remaining hot custard, stir in until it is melted. Add rum and fold together with the beaten egg whites until no white shows, pull the crust out of the fridge and gently pile the rum custard on top of the chocolate custard. Chill at least 3 hours. Serve topped with whipped cream sweetened with a little powdered sugar; 1 cup heavy cream plus 2 Tbsp. powdered sugar.

Delicious Nectarine Blueberry Pie

 This July post never got uploaded, when I discovered that, I decided to add it to my blog so it’s available next summer. The resulting pie was delicious down to the last slice.

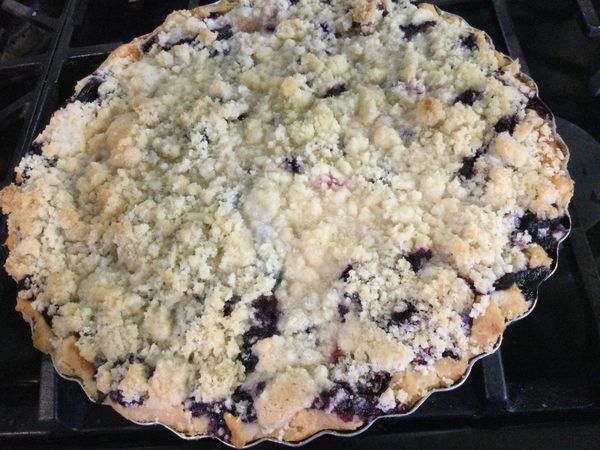
This is so easy to make: slice and dump together the filling, crumb topping gets made in the mixer bowl you just used for bottom crust. You can store any leftover crumb mixture in a sealed container in the fridge; it keeps a few weeks.  This GF crumb topping is perfect for most any fruit pie.

I used a lot more nectarines than blueberries; the proportions are up to you. The nectarines don’t need to be peeled like peaches. I used coconut palm sugar in my crumbs; it does darken them but lowers the hypoglycemic level of the pie; good for those of us who are prediabetic or just avoiding white sugar. You can also replace some or all of the sugar in the filling with coconut palm sugar. I like to do 50/50 sugar and c coconut palm sugar.

You could make this pie with frozen fruit; just add at least 10-20 minutes of time to the bake time. Don’t defrost them fully; can defrost somewhat but not completely before putting it together to bake.

Bake and enjoy summer in a pie in just a few minutes of work.  Don’t eat it piping hot; it should be cooled to close to room temperature.  You could certainly serve this with vanilla ice cream. 

GF Nectarine and Blueberry Crumb Pie

Crust:

1 c plus 2 tbsp brown rice flour mix (King Arthur Basic GF blend or use the recipe at the bottom of recipe)

2 tbsp sweet rice flour

1 Tbps. granulated sugar

½ tsp xanthan gum

¼ tsp salt

6 Tbsp. cold butter cut into 6 chunks

1 lg egg

2 tsp fresh orange or lemon juice

Directions:

Spray 9 or 10 inch metal pie pan with cooking spray, dust with white rice flour. I confess I forget to do this more often than I remember…still works.

Mix dry ingredients in bowl of stand electric mixer.  Add butter and mix until crumbly and resembling coarse meal.  Add egg and juice.  Mix until it comes together into big chunks.  Shape into a ball with your hands. Put it on a crust sized piece of wax paper (14 x 14 inches more or less), flatten the crust ball some; put on top of it another piece of wax paper and chill it all in your fridge 15-20 minutes while you prepare the filling.

crust

Filling:

5 cups sliced fresh nectarines, unpeeled and cut in thick slices

1 cup fresh blueberries – rinse and place in medium bowl

Mix with:

½ cup sugar (or use coconut palm sugar for half of the sugar)

½ tsp. cinnamon

3 Tbsp. quick tapioca

Add and stir in

2 tbsp. fresh lemon juice

Let the filling stand while you prepare the crust, important for the tapioca so it does its job optimally.

Roll out pie crust in a pie bag or between the two sheets of wax paper, try to get the thickness even, no thick middle! Peel off one side of paper and place in pie pan, centered.  Remove other slice of wax paper.  Crimp edges all around.  Fill with fruit mixture.

Crumb topping

Put all four ingredients in the same mixing bowl you made the bottom crust in and mix well with mixer paddle until crumbs form.

¾ c brown rice flour mix

½ c sugar or a blend of coconut palm sugar and granulated sugar

½ tsp xanthan gum

1/3 c cold butter cut into six chunks

Directions:

Sprinkle the top of the pie with crumb mix; use as much as you like.  I like about a heaping cup and a half of the mixture.  Up to your personal taste… It sinks partially into the fruit mixture and adds lots of sweetness and eye appeal.

Bake in a preheated 400-degree oven for 45-50 minutes until bubbly and the crumb crust is light brown.  I put a piece of aluminum foil on top for the last ten minutes.  Cool at least 1 to 4 hours before serving at room temperature.  I think it is best served the same day you make it, or no more than 10 hours after baking for optimal flavor.  The crumbs will get soggy if too much time passes.

Note: if you find your bottom crust is not browning enough there are a couple of choices; you could bake it empty at 375 degrees for ten minutes before filling it with the fruit. Choice 2: I bake pies on a rack placed at the very bottom of my oven which gives me perfect pie crust; I don’t ever have pale pie crust.

The topping is extra brown due to coconut palm sugar instead of all granulated sugar.

Brown Rice Flour Mix
2 c brown rice flour (finely ground)

2/3 c potato starch – Not potato flour!

1/3 c tapioca flour