Don’t know why but I’ve been totally craving Chinese food lately. Quick stir fry meals served over rice, with rice noodles. With lots of veggies. With beef, chicken, tuna. You name I crave it! And I make it ‘cause there isn’t any gluten free Chinese restaurant within easy reach of my house. So when I saw this recipe for Mongolian stir fried beef I knew I wanted to re-create it. I confess I made changes. Yeap; I did. Honestly, I almost always change recipes some. Just the way I roll. This time I added lots of veggies and took out the deep frying aspect. Oh, and I took most of the brown sugar out. ¾ of a cup of brown sugar is close to insane in a stir fry. Just trying to keep things healthy folks. 
And it worked. Yummy meal over rice and no guilt because low in fat, sugar and full of healthy vegetables. Sure there is beef in there but not that much and it is lean rather than fatty meat. I used beef sirloin but the original recipe off of food.com used flank steak. Use whatever cut of beef you like, if it is too chewy it will give you a chewy result; this is not a low braise but a fast stir fry. I used plain sesame oil (not toasted!) but canola or mild olive oil both work well in rapid stir fries.

So stop whining about there being no P.F. Changs around here. You can do this, it’s not that difficult. You do need a wok if you want to do it half decently. And yes, a gas range works hugely better for woking. I have a big one but my favorite kitchen pan is my baby wok. Makes up to four servings in it easily and fits on burner a heck of a lot better than my big old wok from years gone by. You can use a big one but honestly, my baby wok does 99 percent of my stir frying. If you need to double this recipe, well then maybe you need a full sized wok. But for 4 or less; small is best! 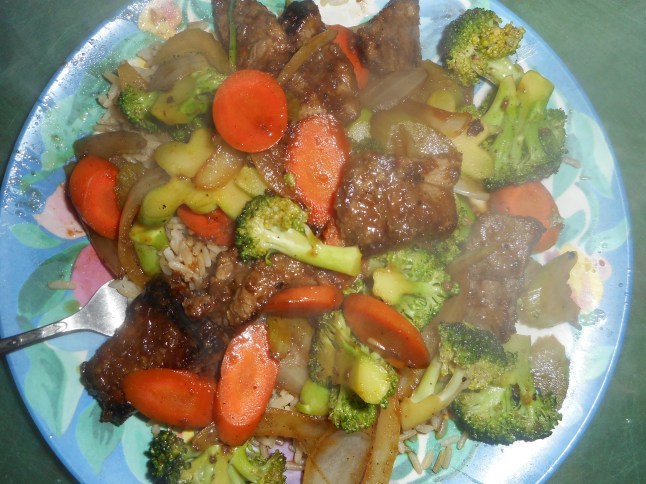
You may wonder why I need to make this recipe myself and call it gluten free when there is no naturally occurring gluten in it. Well, a lot of soy sauces have gluten in them. And a lot of Chinese restaurants do not prevent cross contamination. If you have celiac even a tiny amount of gluten is a serious problem. So I really can’t chance eating food from a Chinese take out place or most restaurants unless I am sure they understand this issue fully and can make truly safe food for me. Annoying for sure as sometimes I do miss eating Chinese take out…. For now though, I am more than satisfied by the authentic flavor of my new fav stir fry dish!
Angie’s Mongolian Beef with Veggies
Serves 3-4
¾ lb of beef round sliced into ¼ inch thick by 1 inch pieces
3-4 tbsp. corn starch
1 tsp. ginger
1 tbsp. oil for stir frying
1 large onion sliced top to bottom into long segments
2 cups or so of raw broccoli florets; make them like 1 inch wide and I cut the lower parts of the stems into 1/8 inch slices
2 carrots, cut on the bias to make long ovals. 1/8 inch thick
2 celery stalks cut on the bias to make long half moon slices; 1/8 to 1/4 inch thick
1 tbsp canola or sesame oil
2 garlic cloves, minced
1 tsp. fresh ginger minced or grated frozen ginger
1 heaping tbsp. brown sugar
1-2 tbsp. gf soy sauce or tamari sauce
3-4 green onions cut into slivers, optional
Directions
Sprinkle the ginger powder over the cornstarch on a sheet of wax paper, stir around. Roll the beef pieces around to coat them well.
Let stand while you cut up the veggies, up to ten minutes.
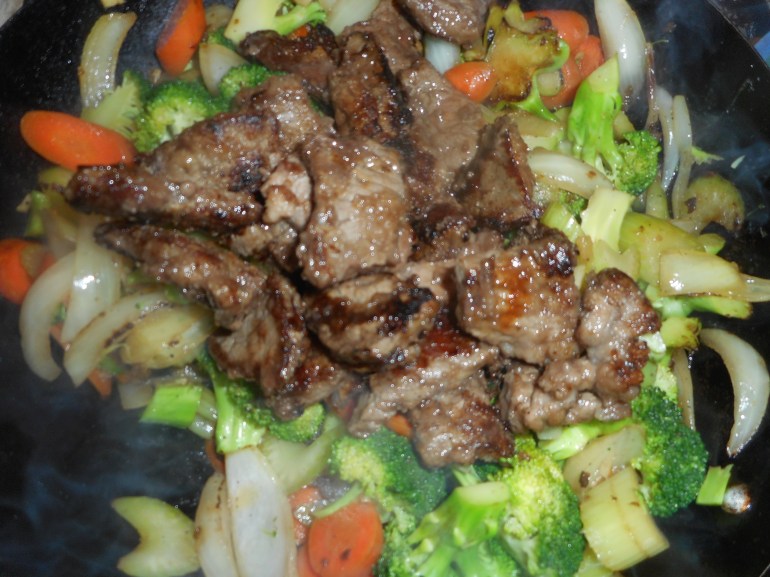
Heat the cooking oil in a wok to almost smoking hot. Add the beef. Cook a couple of minutes on the first side, stir up and cook a couple more minutes. The heat should be fairly high to cook things fast. You want the meat to get crusty but not hugely overdone. Remove to a plate; cover to keep warm.
Add another tbsp. of oil to the same pan. Throw in the cut up onion and carrots. Stir a minute. Add the celery slices. Stir another minute. Add the broccoli stems, stir and then throw the rest of the broccoli on top. Add 2-3 tbsp. of water and let steam a minute or two uncovered. Add the garlic and fresh ginger. Cook a minute. Return the beef to the pan, dump the brown sugar on top, add the soy sauce. Add the green onions if you want some, I went without this time but I plan to add them next time I made this yummy meal. Stir a minute or two. Add more water to create sauce if there isn’t enough.
Serve over brown rice or white rice.
Note, these stir fry times and amounts are flexible. If you don’t want one of the veggies leave it out or sub in something else. If you want more soy sauce or more sugar; add more and taste to see how you like it. I like things a tiny bit crunchy; taste and see if you need to cook another minute or two before you turn off the burner. I find stir frying rather freeform and fun. It can use what you have available in your fridge and pantry. I also would like to try this dish made with chicken. Enjoy!
Original recipe inspiration from food.com.