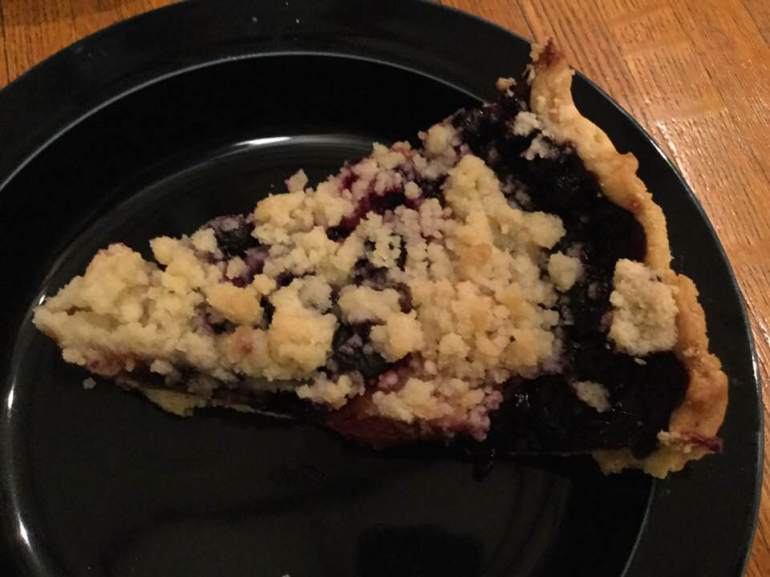
Blueberry Peach Crumb Pie

In Pennsylvania we are past the peak of both peach and blueberry season but we were both craving a great late summer pie.   The resulting pie was flavorful down to the last slice.

blueberry peach pie slice

This is so easy to make: slice and dump together the filling, crumb topping gets made in the mixer bowl you just used for bottom crust. You can store any leftover crumb mixture in a sealed container in the fridge; it keeps a few weeks.  This GF crumb topping is perfect for most any fruit pie.

To peel; heat 3 inches of water to a boil, drop the peaches gently in 3-4 at a time and poah them 1-2 minutes.  Allow to cool somewhat before peeling.  I like to do that over a bowl to catch the juices as I slice each peach.

Bake and enjoy summer in a pie in just a few minutes of work.  Don’t eat it piping hot; it should be cooled to close to room temperature.  You could certainly serve this with vanilla ice cream.  And this pie works perfectly with fresh nectarines or apricots.  Bonus: no peeling required!

GF Blueberry Peach Crumb Pie

Crust:

1 c plus 2 tbsp brown rice flour mix (at bottom of recipe)

2 tbsp sweet rice flour

1 Tbps. granulated sugar

½ tsp xanthan gum

¼ tsp salt

6 Tbps. cold butter cut into 6 chunks

1 lg egg

2 tsp fresh orange or lemon juice

Directions:

Spray 9 inch metal pie pan with cooking spray, dust with white rice flour. I confess I forget to do this more often than I remember…still works.

Mix dry ingredients in bowl of stand electric mixer.  Add butter and mix until crumbly and resembling coarse meal.  Add egg and juice.  Mix until it comes together into big chunks.  Shape into a ball with your hands. Put it on a crust sized piece of wax paper (14 x 14 inches more or less), flatten the crust ball some; put on top of it another piece of wax paper and chill it all in your fridge 15-20 minutes while you prepare the filling.

crust

Filling:

2 cups sliced fresh peaches, peeled and cut in thick slices

3 cups fresh blueberries – rinse and place in medium bowl

Mix with:

½ cup sugar

½ tsp. cinnamon

¼ cup quick tapioca

Add and stir in

2 tbsp. fresh lemon juice

blueberry peach pie filling

Let the filling stand while you prepare the crust, important for the tapioca so it does its job optimally.

Roll out pie crust in a pie bag or between the two sheets of wax paper, try to get the thickness even, no thick middle! Peel off one side of paper and place in pie pan, centered.  Remove other slice of wax paper.  Crimp edges all around.  Fill with fruit mixture.

blueberry peach pie unbaked

Crumb topping

Put all four ingredients in the same mixing bowl you made the bottom crust in and mix well with mixer paddle until crumbs form.

¾ c brown rice flour mix

½ c sugar

½ tsp xanthan gum

1/3 c cold butter cut into six chunks

Directions:

Sprinkle the top of the pie with crumb mix; use as much as you like.  I like about a heaping cup and a half of the mixture.  Up to your personal taste… It sinks partially into the fruit mixture and adds lots of sweetness and eye appeal.

blueberry peach pie, done

Bake in a preheated 400 degree oven for 45-50 minutes until bubbly and the crumb crust is light brown.  I put a piece of aluminum foil on top for the last ten minutes.  Cool at least 2 to 4 hours before serving at room temperature.  I think it is best served the same day you make it, or no more then 10 hours after baking for optimal flavor.  The crumbs will get soggy if too much time passes.

Note: if you find your bottom crust is not browning enough bake it empty at 375 degrees for ten minutes before filling it with the fruit.  I have a bottom heat oven which gives me perfect pie crust if I put the pie on the very lowest shelf so I don’t ever have pale pie crust.

Brown Rice Flour Mix
2 c brown rice flour (finely ground)

2/3 c potato starch – Not potato flour!

1/3 c tapioca flour

Greek Chicken Kabobs

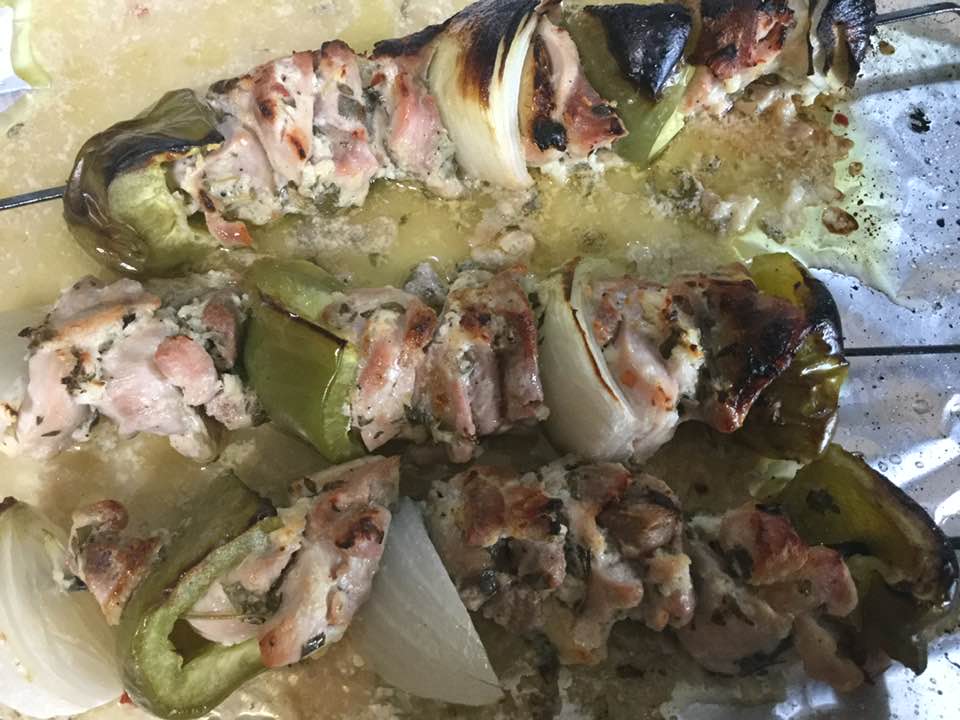
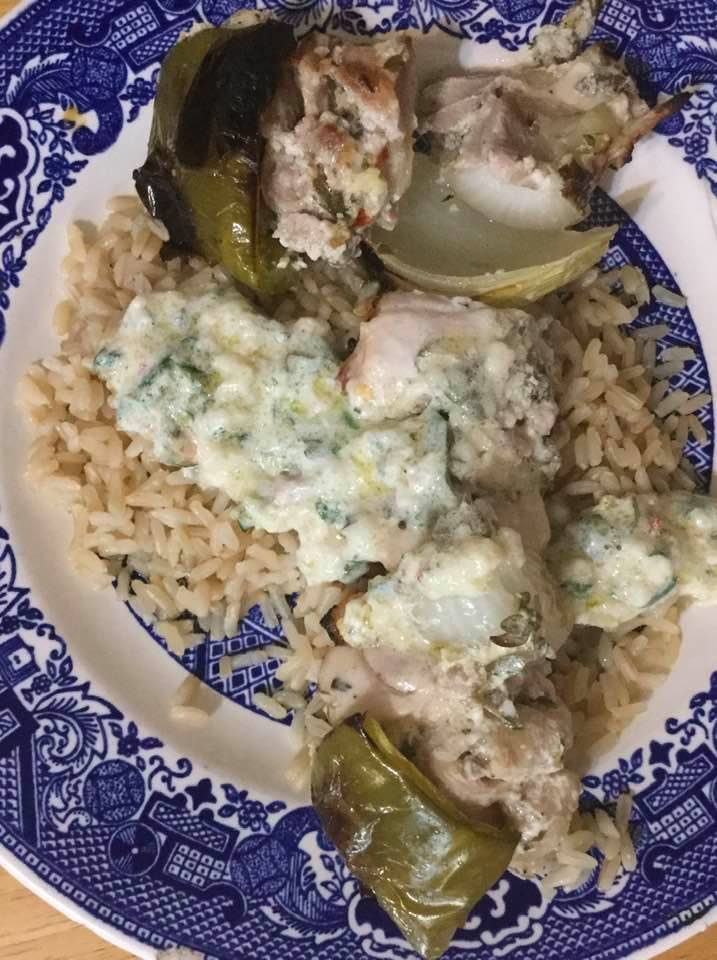
Grilled chicken is a summer standard.  But sometimes I want something a bit different than basic barbecued chicken.  My sister had made something much like this and it inspired me to make my own Greek chicken kabobs. I enjoyed with steamed rice and also with a small baked potato. I made it not too garlicky. Up to you how much you put in. FYI: it is naturally gluten free so no special measures required to create a delicious meal for your entire family.

I baked it; it was not a good day to grill and so I baked for 30 minutes and broiled for 2-4 minutes to char it a bit; was moist and perfect. You could certainly grill it for maybe 6 -8 minutes and flip and do another six minutes.

I used boneless chicken thighs but you can do boneless breasts for sure. Just cook for a bit less. Great with a salad of some sort and an iced tea. Enjoy the burst of flavor from the lemon, the herbs, and that garlic!

Greek Chicken Kabobs

Marinade: ½ cup plain Greek yogurt; preferably whole milk yogurt

¼ cup fresh lemon juice

Zest of a half a lemon or a whole one if you want more zing

1 Tbsp. white balsamic vinegar if you have it; optional

2 Tbsp. chopped fresh oregano leaves

1 Tbsp. chopped fresh thyme leaves

4-5 garlic cloves minced

1 tsp. kosher salt

¼ tsp. fresh ground pepper

Dash to a quarter tsp. red pepper flakes

Chicken: 4 boneless chicken thighs cut into 1 inch chunks

1 large bell pepper cut into 1 1/2 inch chunks

1 medium large red or yellow onion cut into 8ths from top to bottom.

Mix the marinade; add chicken. Let marinade 2-12 hours. Put chicken onto skewers; I used metal ones but you can use bamboo ones soaked in water for an hour. I started with a pepper chunk then 2-3 chunks of chicken; then onion then more chicken and then a pepper on the end to sort of bracket in the raw meat. I lined a sheet pan with aluminum foil and heat ed my oven  to 375 degrees.  I baked the skewers 30 min; turned over half way through. Then I turned to oven to broil and put the tray on the top rack to char for 2-4 minutes tops; watch it closely; burnt is not a goal here! I actually microwaved my leftover marinade for 1 minute; stirred half way through and served it on the rice for more flavor.  It was hot and fairly cooked by that minute but you could do more if you want; just keep it from drying up. 

I served it over brown rice with a tomato salad. Enjoy!

Sheet Pan Chicken with Roasted Eggplant and Raw Veggie Caponata

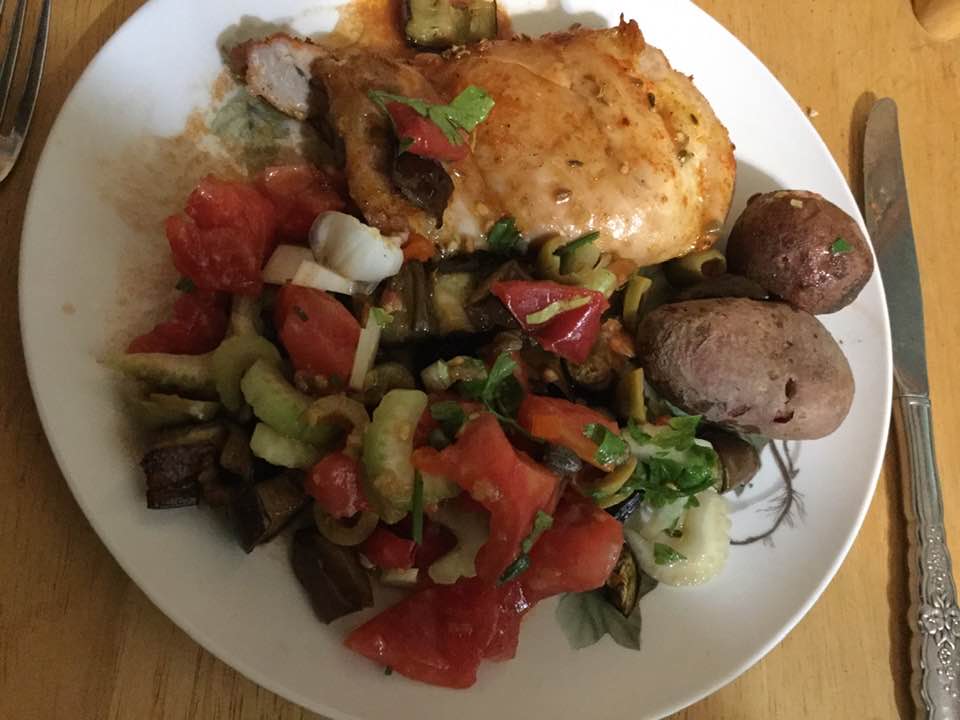
This heat…I hate to run the oven.  But sometimes it is just worth it. This only bakes 30 minutes tops in a hot (450*) oven. I used boneless thighs. So I did  them a few minutes less than 30. No long marinading although I did put the cubed eggplant in salted water for a couple hours.  I had 3 Japanese eggplants from my garden and ripe  homegrown tomatoes galore. Chicken bought from Aldi’s. I found this recipe on Pinterest. I am so glad I tried it. The freshness of the raw and pickled vegetables in the caponata are what makes it so good. The chicken roasts on the sheet pan surrounded by the eggplant cubes tossed with olive oil.  While it roasts make the raw component. I am not really sure I will make this in the winter as summer tomatoes are just so superior in raw preparations like this delicious dish.

Here below is a link to the recipe. I will give the ingredients below. so you know what is needed to make it.  I promise you will love it.  I used some awesome paprika my goddaughter bought me in Germany.  Superior flavor. I used less red pepper flakes as I like most foods not too spicy.  I served mine with some small roasted potatoes I grew myself. So tasty.

https://www.simplyrecipes.com/recipes/sheet_pan_chicken_with_roasted_eggplant_caponata/

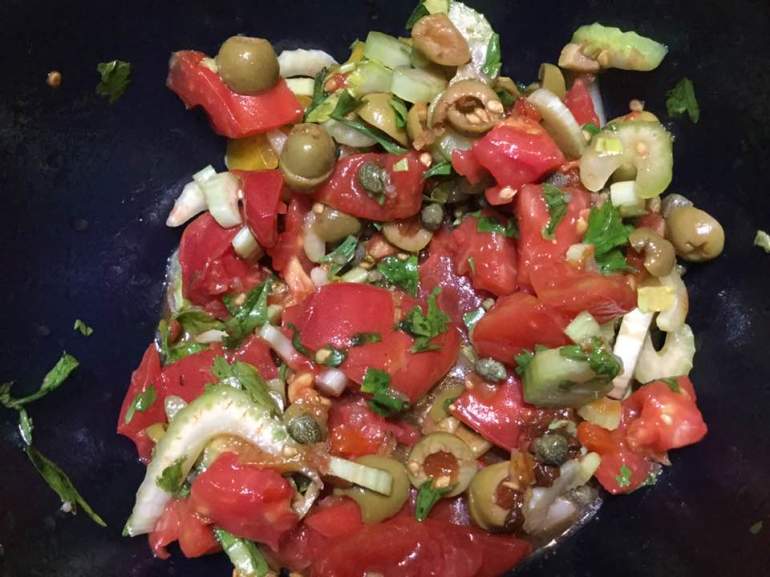
tomato caponata salad

This is my slightly different version:

Sheet Pan Chicken with Eggplant and Raw Caponata

Ingredients: 

Chicken: 4 boneless chicken thighs

Rub: 1 tsp. sea salt

1 1/2 tsp. sweet paprika

1/4 tsp. crushed red pepper flakes

1 tsp fennel seeds

1/8 tsp fresh ground pepper

2 Tbsp olive oil.

Eggplants:

2 lbs of cubed eggplant, 1 Tbsp olive oil

Caponata:

2 cups chunky fresh tomatoes cut in 1/2 inch cubes or sliced cherry tomatoes

1/2 cup sliced green olives

2 stalks celery sliced thin; hearts are best

2 Tbsp. fresh parsley chopped fine

2 Tbsp tiny capers

2 garlic cloves minced

Dressing: 2 Tbsp. balsamic vinegar; 2 Tbsp. EVOL and  1/2 tsp honey

I loved the fennel seeds in the roasted chicken and the raw salad. Enjoy!

roasted chicken and raw caponata


Savory Zucchini Cheese Tart

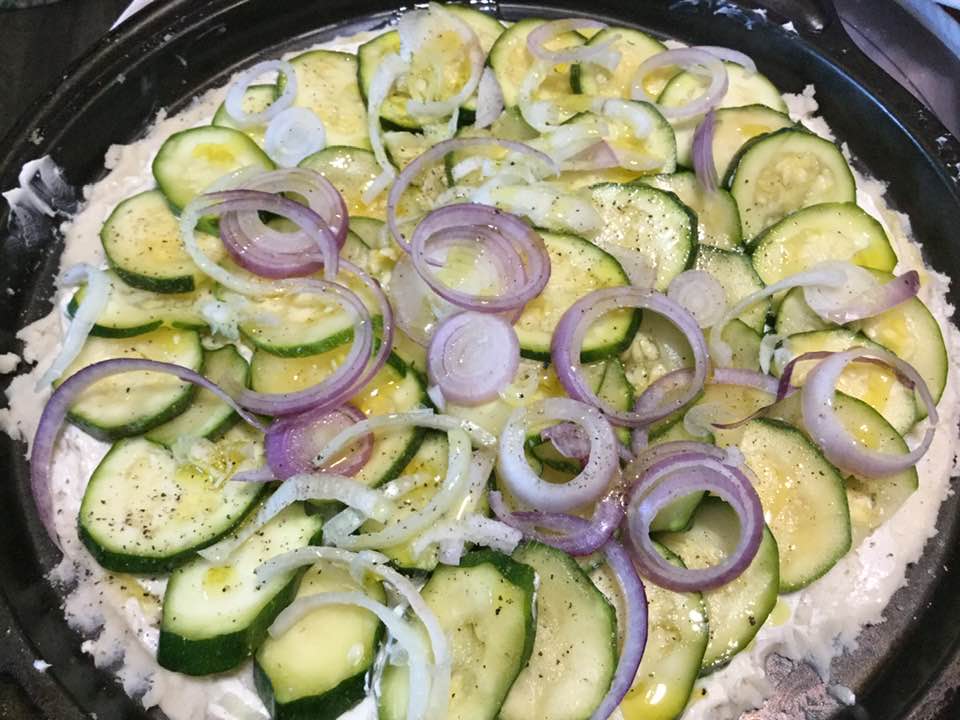
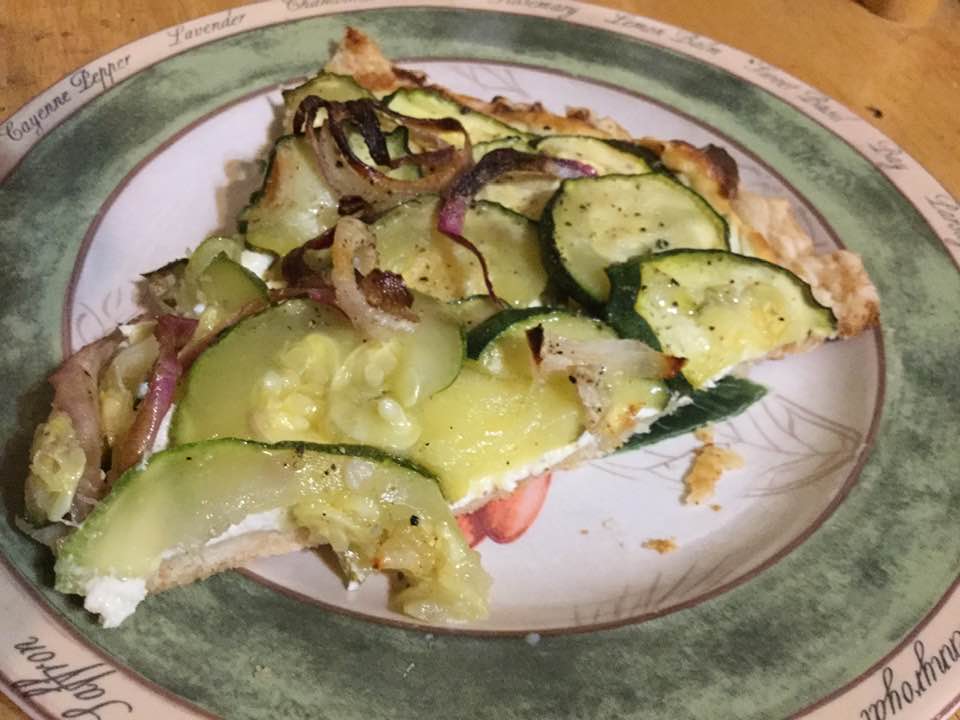
It is hot as heck today so what I chose to do was bake. Something simple though. And I actually used a pie crust mix I got for my birthday as a gift. I measured out half the package and used it for the base of my zucchini tart. Yeap I know; folks complain about too many zukes and too little flavor. Not this gorgeous tart. It is thin slices layered over a thin lemony cream and goat cheese filling and topped with very thin sliced onions. Baked until the crust was crunchy. Really perfect crust and it is so rich and creamy plus this is super easy to make. Nothing needs to be cooked or fried – all raw; layer it on the raw crust. Bake, Slice, Enjoy. Winner winner hot night’s dinner.

You can use store zuke: I did; had none of my own yet. I did use my own red onion. I bet you could try other veggies but this combo was just so sublime. Narrow slices would make amazing appetizers or maybe cut it into small squares.  If you don’t like goat cheese just use all cream cheese. This is a variation on a Ina Garten recipe; she is a master at this sort of recipe.  Enjoy!

zuke tart, unbaked

zuke tart bakedLemony Zucchini and Cheese Tart


Ingredients

One pie crust; I used Bob’s GF Pie crust mix; y ou need 10 Tbsp cold butter or combo of butter and some other buttery spread, 3 Tbsp ice water and that’s it! Follow the directions. Mine needed a good chilling in the fridge before rolling out.

2 medium small zucchinis

1 medium red onion (can use regular yellow onion) sliced very thin (1/2 cup)

4 oz goat cheese plain or herbs (I used herbed) at room temp

4 oz cream cheese at room temp

Zest of half a lemon and about 1-2 Tsp juice from it

½ an egg beaten well

¼ Tsp fresh rosemary, minced finely

½ Tsp. fresh thyme leaves, off stem

EVOL; about 1-2 Tbsp.

Fresh ground black pepper

Directions: Made the pie crust, let chill while you do the veggies.  Slice the zucchini about 1/8 thick; less than ¼ inch thick.  I used a sharp paring knife. I know, the mandolin slicer; I do have one but sometimes it is just seems like too much work to get it out and set it up. I didn’t want the slices super thin anyway. Plus I enjoy knife work. Suit yourself.  Slice the peeled onion across in very thin circles. Put zuke slices in a colander and sprinkle with sea salt; ½-1 Tsp.; try to get it on both sides. Let stand 30-40 minutes. Then wipe with a few paper towels or a lint free tea towel to get off most of the moisture.  In a small bowl mix the two cheeses until smooth; add egg, lemon zest, lemon juice, herbs. Blend well.

Heat oven to 400 degrees. Roll out pie crust into 11 inch circle; put on heavy pizza pan. Top with cheese mix; spread to ½ inch of the edge of your crust. Top with the thin slices of dried off zuke overlapping a bit in concentric circles. To fill the entire area with the cheese spread. Then sprinkle on top the red onion, which you have separated into rings. Top with a good drizzle of decent EVOL and a few grinds of fresh pepper.

Bake for 40-45 minutes. Until crust is well browned. If it is getting too brown turn oven down to 375; I did. Monitor closely; no burnt top please! Let cool before cutting. Enjoy.  zuke tart slice

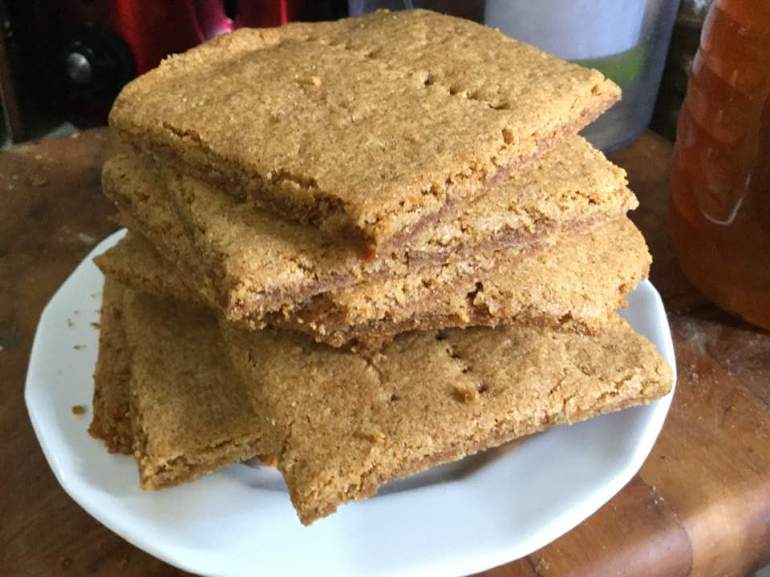
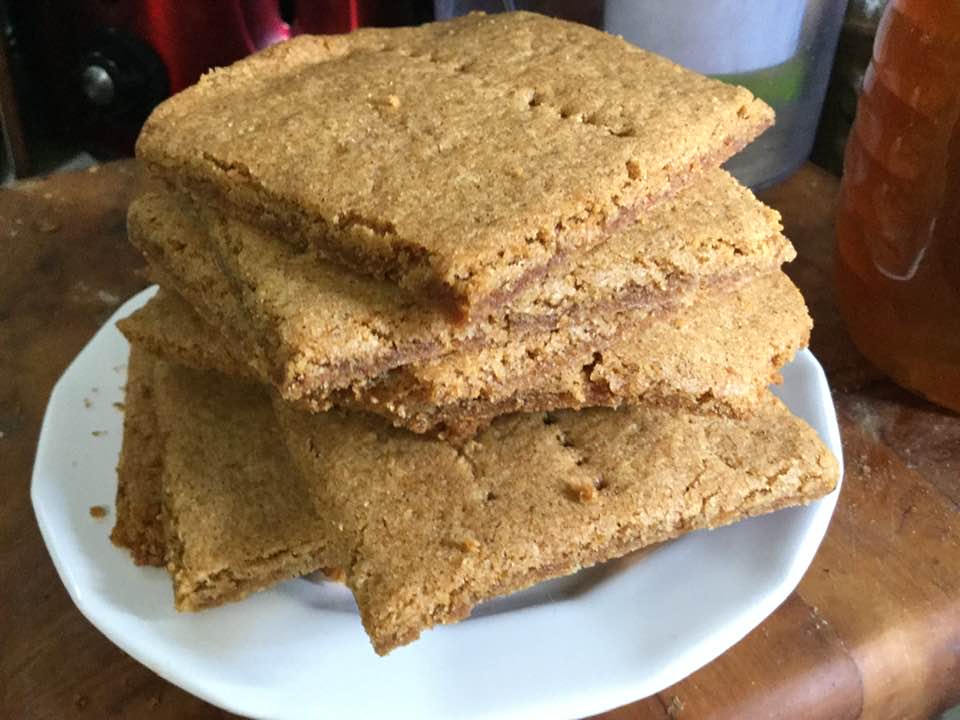
Graham Crackers 2.0…. GF and BETTER

Graham crackers make great pie crust for unbaked pies. And for cheesecakes. But GF ones are kinda lacking in the texture and flavor department if you eat a whole one; so hard on the teeth and they are soo expensive for the few you get. So I finally decided to try and make my own. Read a few recipes and then modified to make them my own. These are made with Earth Balance spread as I had some I wanted to use, no eggs; practically vegan; just the honey is an issue.

Pretty easy to make in my stand mixer. Then you roll out between two sheets of parchment and use the pizza cutter to draw lines between them. Can prick with a fork to form perforations. They will be soft and take the impressions of what you draw on. They do puff up some in the oven; beware edges falling off: a bit fell off one edge of my sheet of crackers and burnt up. Stinky when burnt!

graham crackers unbaked

Not too excited before baking, rolled out between parchment paper, kinda sad looking.

graham crackers out of oven

Freshly baked. Still soft and un-separated from other crackers.

GF Graham Crackers

Ingredients:

1  1/2 cups King Arthur Basic GF blend

1/2 cup brown sugar

1  1/2 tsp. cinnamon

1 tsp. baking powder

1/2 tsp. baking soda

1/2 cup butter or Earth Balance spread; cold

1 tsp. vanilla

3 Tbsp. water

3 Tbsp. honey

Directions: Put dry ingredients in stand mixer bowl. Blend. Add butter cut in cubes; blend until crumbly. Add vanilla, honey, water. If needed add an extra tsp of water.

Lay out a sheet of parchment paper on big baking board. Blop out batter on it. Top with another sheet of baking paper and roll thin to fill the space. Cut apart with a pizza cutter to make 15 cookies. Poke with a fork to add perforations as desired. Bake at 325 degrees for 17-20 minutes. At 17 minutes they will be soft cookies. 20 is needed for crunchy ones to break up for pie crust or to make s’mores with.  Let cool in pan 10 minutes then cool completely on drying rack. Store in plastic bag to keep moisture out.  They are delicious all by themselves. The homemade s’mores turn out well too!graham crackers on plate