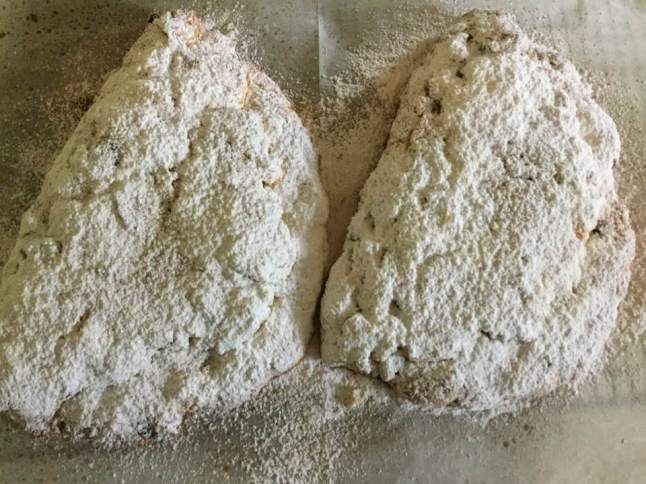
Banana Custard Pie, 2.0


My mom used to make a similar banana custard pie when I was in my thirties and I moved back to PA – lived close enough to come home some weekends; for some reason she never made it for us as kids.  I remember cutting up and setting the banana rounds in the baked pie shell for her.  The contrast of the rich custard, the flaky crust and the fluffy cream with the delicate banana flavor is just so memorable.    Today I used a shortbread crust for first time and it was very well received.  My grandson said it was my best pie ever! Easy as can be too!

Notes: I will freeze the egg whites to make angel food cake this winter. Waste not want not!!  In a past version I used a slightly different egg custard – both are delish!  This one might be slightly easier to construct and it sure got firm; I have had one or two failure custards that never did fully gel. I suppose you could use a box custard but this is infinitely superior.

Nonna’s Banana Custard Pie

Make the custard first as it takes a while to cool down. Next do the crust.  Don’t do the bananas until you are ready to pour the custard. The whipped cream should be make right before you use it.

Filling:

4 egg  yolks

2/3 cup sugar

1/4 cup corn starch

½ tsp sea salt

2 cups whole milk or 2 percent, no lower fat than that

1 tbsp. butter cut into small cubes.

2 tsp. pure vanilla extract

2 large ripe bananas

Directions: Beat the egg yolks until thick; add the sugar in a slow stream. Heat the milk in a 1 ½ qt sauce pan, add the cornstarch and salt to the egg/sugar mix; then add the hot milk in a slow stream beat/stir with a metal whisk as it heats. Pour it all back into the saucepan and cook on medium low heat, stirring constantly with a wire whisk. Once it reaches a boil; turn heat down to low and time it for one minute, STIRRING CONSTANTLY.  Add the butter and stir as it melts, then the vanilla, stir.  Pour into a mixing bowl, let cool a bit and then put a film of plastic wrap on the top; press it down onto the custard.  Chill at least an hour before using. Do not use until cold.

CRUST: I am still not rolling out pie crust;  so I made a crumb filling like shortbread cookies using my stand mixer:

1 cup KA all purpose gf flour

¼ c sugar

1 tsp. xanthan gum

¼ tsp. cinnamon

Mix in stand mixer and add 5 Tbsp. cold butter cut up in 6-7 pieces; blend until crumbly and press in pie pan

Bake in a preheated 350 degree oven for 17-18 minutes until the crust is light brown.  Cool at least 30 minutes.

Cut peeled bananas into 1/3-1/2 inch rounds and cover the bottom of the pie crust with them close together.  Pour the custard over the sliced fruit and smooth the top.

Chill pie 1- 4 hours before slicing and serving cold topped with a big dollop of whipped cream.  Note: I confess we didn’t do this step of chilling it; we ate it right away as there was no time for chillin.

Whipped cream: Beat cold whipping cream with an electric mixer until it holds soft peaks; add 2 Tbsp. powdered sugar and ½ tsp. vanilla.  Do not beat any more, just stir the sugar in. I didn’t bother with vanilla; made this part in my mom’s assisted living room; left the vanilla bottle at home. Still great.  banana custard pie

I think it is best served the same day you make it, or no more than 12 hours after baking for optimal flavor.  The crust will get soggy if too much time passes. Mine was still very good the next day; just not as great as when really fresh.

Note: I froze my egg whites for later use in a cake. No wasting them, that’s for sure!

Brown Rice Flour Mix (Same as King Arthur GF All purpose blend)
2 c brown rice flour (finely ground)

2/3 c potato starch – Not potato flour!

1/3 c tapioca flour


Almond Frangipane Tart

I still am not rolling out pie dough so I did my favorite shortbread cookie crust made in my stand mixer in a few minutes with no real work. This simple press in crumb recipe by Annalise Roberts is sweet and has a perfect texture. And so easy… There were still apples from our fall picking expedition so that seemed to be what I could plan a family dessert around.

I had a bag of whole almonds that needed to be used up.  So, I went with the classic frangipane filling under thin slices of Granny Smith apples. I used the almonds to make my own almond paste (the recipe is a blog post by me last year) but you can buy some if you prefer. I pre-baked the crust as I feared the almond filling might make the raw crust

The tart was a rousing success; the crust tasted delicious; the almond filling fused the skinny apple slices into the crust as a cohesive whole that was delightfully almondish!

Notes: I used Granny Smith as they hold their shape under oven heat; some baking apples can mush down too much. Don’t change that or you might end up with a saggy top.

apple tart with frangipane filling only

apple frang tart with applesapple frang tart baked
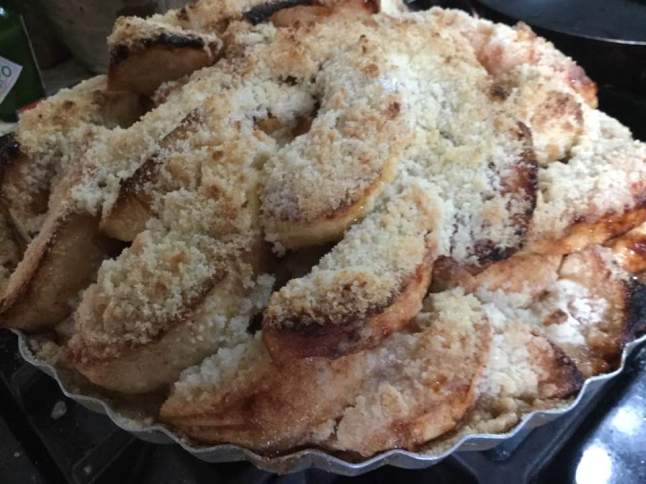
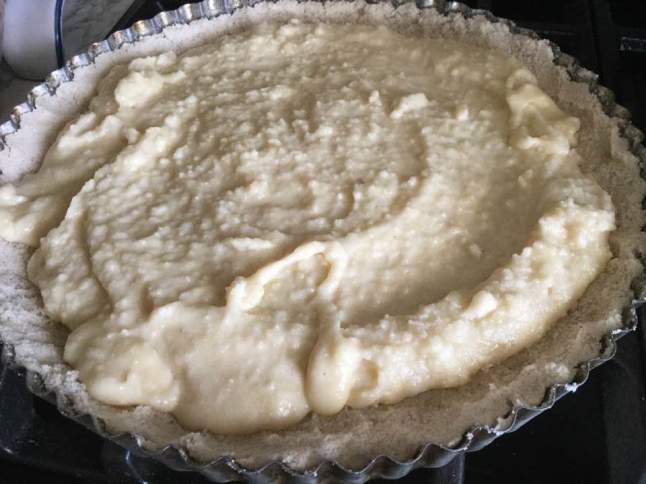
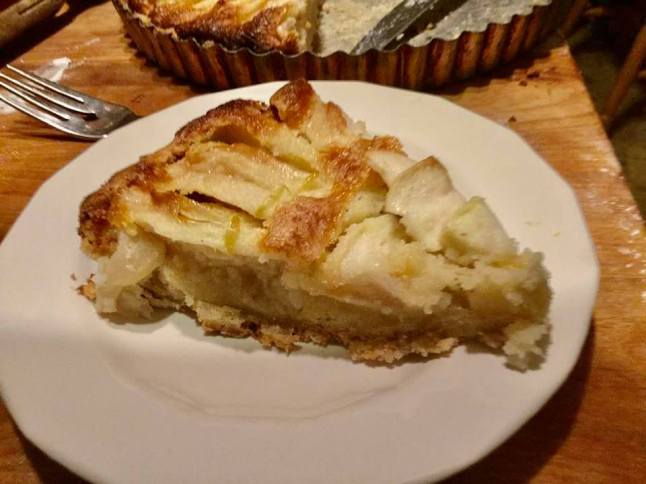
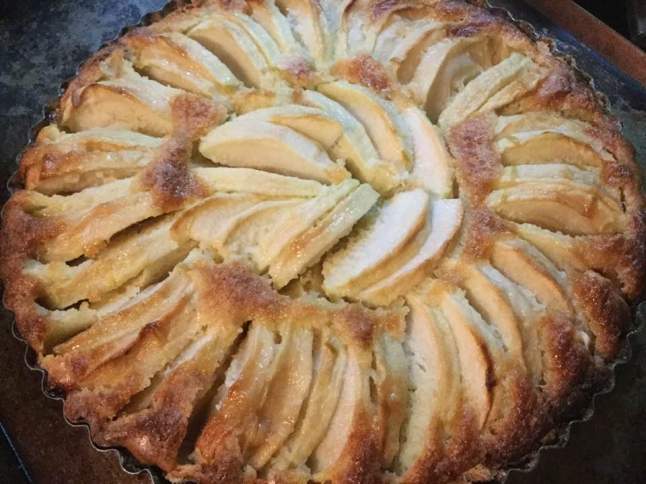
Apple Frangipane Tart with Cookie Crust


Ingredients:

CRUST:

1 cup gf flour (King Arthur basic gf blend)

¼ cup sugar

1 tsp. xanthan gum

¼ tsp. cinnamon

5  Tbsp. cold butter

FILLING:

8 oz almond paste

1/3 cup sugar

1/4 butter, softened

2 eggs

3 Tbsp.  KA basic gf blend

3 cups of peeled, cored and thinly sliced Granny Smith apples (3 large  apples)

1 Tbsp melted butter

1 Tbsp. coarse sugar for topping

DIRECTIONS: Crust: use a stand mixer; put dry ingredients in bowl, add cut up butter and mix on medium until crumbly. Spray 9 inch tart pan with cooking spray and press in crust, heat oven to 375 degrees.  My pan has a removable bottom but I don’t see why you couldn’t use a plain pan.  Bake crust 6-7 minutes; let cool while you make filling.

Filling: Mix filling in medium bowl; put almond paste (break up if chunky: can grate it if hard) and sugar. Mix a bit, add butter; mix well, add eggs one at a time, beat well between eggs and 3 minutes after second egg; add flour; chill. Gently spoon into tart pan on cooled crust, fan out apple slices in circles or any pattern you like, brush with melted butter and sprinkle top with coarse sugar.

Heat oven to 400 degrees. Bake on lowest shelf in oven, 35-40 minutes until lightly browned. Remove from oven and cool at least 30-60 minutes before serving. Best eaten within 2 days; I thought it was actually even better the next day. Vanilla ice cream is great with apple tart! Enjoy. apple frang tart slice

Apple Tart…Veganized But Still Yummy


My assignment was to make a vegan (and gluten free) dessert to take to a small gathering out of town. I have to confess I am not particularly fond of some vegan desserts I have tried: the mouth feel is sometimes odd and the texture can be heavy especially icings. But I felt those things could be avoided. There were still plenty of apples from our picking expedition in October so that seemed like a great place to plan from. I am not yet rolling out pie dough plus it has an egg in it so that’s a no…so I did a shortbread cookie crust made in my stand mixer in a few minutes with no real work. I really didn’t miss the rolled out crust; this simple press in crumb recipe by Annalise Roberts is the very best crust for sweetness and texture. And great for gimpy folks like me!

The tart was a complete success; the crust tasted delicious and not weird. All gone in moments; silence as everyone inhaled their slice. Shortly thereafter two other non-vegan guests sidled up to me and quietly thanked me for a great dessert; they were probably glad there was no weird icing involved, LOL! This could be an excellent holiday dessert if you need one that is vegan.  It travels great; I have a pie saver – big diameter, low cylinder tupperware meant just for pies and tarts.

Notes: I used a mixture of baking apples; some golden delicious and Jonagold. Any baking apples will work (Not red delicious as they are best eaten raw) …no honeycrisp either; best raw.

vegan apple tart unbaked

vegan apple tart baked

I forgot to take a picture of my slice before devouring it: sorry; it was great looking, everything held together perfectly.

Apple Tart with Vegan Cookie Crust

Ingredients:

CRUST:

1 cup gf flour (King Arthur basic gf blend)

¼ cup sugar

1 tsp. xanthan gum

5  Tbsp. cold Earth Balance (sold in sticks just like butter)

FILLING:

3 -4 cups of peeled, cored and sliced cooking apples (4 good sized apples)

1 Tbsp. fresh lemon juice

2 Tbsp. Tapioca flour or KA basic gf blend

1/3 c sugar

1/2 tsp. cinnamon

1 Tbsp. coarse sugar for topping

DIRECTIONS: Crust: use a stand mixer; put dry ingredients in bowl, add cut up Earth Balance and mix on medium until crumbly. Spray 9 inch tart pan with cooking spray and press in crust, heat oven to 375 degrees.  My pan has a removable bottom but I don’t see why you couldn’t use a plain pan.

Filling: mix dry ingredients in a small bowl, Mix filling in medium bowl; dump in apples, sprinkle with lemon juice and then sprinkle over all with all of the dry mix. Gently place into tart pan on crust and sprinkle top with coarse sugar. I took the time to arrange mine in a pretty pattern but you can just pile it in if you are in a rush.

Bake on lowest shelf in oven, 35-40 minutes until lightly browned and bubbling. Remove from oven and cool at least 30-60 minutes before serving. Best eaten within 24 hours. Vanilla ice cream is great with apple tart! Enjoy.

Note: You can use the convection setting; takes about 25-30 minutes to bake.

Bratwursts From Aldi’s are the Best!

This re-post is one of my most popular posts ever. I don’t think any other product review even comes close. We had them for supper tonight. As great tasting as ever. So here it is again!

I bought the package of 4 uncured Bavarian bratwurst at Aldi’s. They were pale and unexciting looking in the shrink wrap but when I pan fried them in a bit of olive oil they browned up nicely. Each brat was still juicy and tender with a delicate flavor I was very impressed with. bratwurst


I have bought brats before at other grocery stores and found them rather dull and pedestrian. These are thinner, longer and far tastier.  bratwurst packageUncured means they have less junk added in the curing process of many sausages.  Definitely a yummy and healthy-ish choice for sausage in any recipe. They cook in about 8-10 minutes. They make a quick supper with some pan fried potatoes and a veggie. And grilling them is on the package as an alternative to the frying pan.I need try them on my grill. Maybe for camping next year…

They are imported from Germany and I have heard that they are very authentic compared to most of the brats made in the USA. I give these an A plus in every category. Enjoy!

Originally posted June 2018.

Mad for Waffles!

Camping is fun for me; I love to cook over an open fire or on the camp stove. Summer is a great time for fresh produce. If you can combine cooking and being in nature that is the best deal for me!

Now this is car camping, you know… where you drive there with a trunk full of sleeping bags, tent, tarps, comfy clothes, cook stove, lanterns, and coolers of food… So I had lots food and I also brought my cast iron waffle maker; an antique from the 1920s that was my sister Margie’s and before that my parents.  It was kinda messed up when she gave it to me but Joe and I worked hard to bake off the crud and now it works fantastically… and corn on the cob, shrimp and swordfish (frozen), half frozen chicken thighs, lamb loin chops and a zillion other food items.   Nothing like traveling light!

So we enjoyed some good food. For breakfast I made waffles, then  pancakes, and then more waffles the third morning.  The pancakes are lovely; for a year or two I just couldn’t find any pancakes that measured up to what I felt they should taste like.  These are from Elizabeth Hasselbeck’s cookbook. Sometimes I add extra milk if they are too thick. I pour the batter right out of a mixing bowl with a pour spout onto the griddle.

And, again, I forgot to take pix of the waffle iron in action; so here is that recipe (my version; based on a pancake recipe in Gluten-Free Baking Classics by Annalise Roberts. This recipe is great for camping because buttermilk travels better than regular milk and it also uses oil not butter in the waffle; easier to deal with than melting butter on the camp stove…. The other week I was out of buttermilk and used kefir, a fermented milk; worked fantastically.

waffle

Cinnamon Waffles (for 2; double for 4 people)

1 cup brown rice flour mix

1 tbsp. sugar

¼ tsp. salt

1 ¾ tsp. baking powder

½ tsp. baking soda

½ tsp. cinnamon

1 large egg, well beaten

2 tbsp. canola oil or melted butter plus extra for greasing griddle.

2/3 cup buttermilk

½ tsp. vanilla extract

cooking spray (kind with no flour in it)

Directions:  To make it portable; measure the dry ingredients into a zip-lock baggie. I like to write the other ingredients on with a black Sharpie marker and label it waffles…so you don’t use the pancake mix by mistake!  Beat the egg in a large mixing bowl, add the oil, buttermilk and vanilla (optional when camping but I did bring it this summer and they were so yummy). Pour the dry mix into the bowl and whisk briefly until fairly well mixed.

While you are doing that mixing step the waffle iron should be heating.  I use a round cast iron waffle iron; please do spray it with cooking spray before heating and then I melt about 1-2 tsp. of butter into the 4 quarters; I blop the chunk around with a fork so some melts into each part of the iron.  Flip the iron over just before putting in the batter. I use a big spoon to glop it into the waffle iron.  One big glop in each half.  Close the iron and let it bake about 2 minutes. Flip it and bake 1-2 more minutes, or however long your waffle iron takes.  I serve it with real maple syrup; something this good deserves the best.  Before I serve the first waffle I break off a section and eat it hot and plain; you can really taste the cinnamon that way.  Make sure your waffles are crisp not soft. The crisp is Everything!

We had scrambled eggs and maple flavored sausage links; both go fantastically well with waffles.

Brown Rice Flour Mix (it is the same as King Arthur’s gf flour mix)
2 c brown rice flour

2/3 c potato starch

1/3 c tapioca flour

Originally posted in July 2015 and again in 2016  and 2017 with minor text revisions. Recipe the same.