Blueberry Cobbler Time!

Love this cobbler for how quickly it goes together plus it takes less fruit than a pie.  And it is gluten free for all of you who must avoid gluten. I honestly thought I had posted a recipe for this treat a year or two ago. Shocked to find no such recipe in my blog archives. It be blueberry season so perfect timing to post this classic dessert.

This recipe is the same basic one I posted for peach cobbler and for rhubarb cobbler in the past; it is modified from a muffin dry mix in Bette Hagman’s book, More from the Gluten-Free Gourmet and uses a flour mix that will give you 4 cups of the dry ingredients.  One cup will make an 8×8 pan of cobbler topping.  I keep the rest of my dry mix in the freezer and a pan of cobbler can be thrown together in less than 10 minutes plus baking time.  What a time saver this mix is! I make all sorts of cobblers with it.

It’s best to always get the fruit part cooking before putting the topping together so the fruit is hot and ready for the topping and can go right into the oven.

I make this blueberry cobbler most every time we go camping; put the dry cobbler mix in a baggie labeled cobbler, topping mix of sugar and flour in a separate labeled baggie.  I bring a small mixing bowl and whisk; don’t recommend mixing the cobbler cake in a baggie: it is difficult to mix it properly.  I start the fruit cooking on the camp stove and then after I mix up the cobbler topping and it’s ready to bake, I cover the pot with foil and bake it on the grill over the campfire. Takes a bit longer to bake; keep checking it every 5 minutes once it has baked 30 minutes. Make sure your pot is fire proof…

Angie’s Blueberry Cobbler

Dry Cobbler Mix use one cup for this recipe and freeze the rest

2 ¼ cups white rice flour

½ cup potato starch (not potato flour!)

½ cup tapioca flour

1 tsp. baking soda

4 tsp. baking powder

1 tsp salt

1 tsp. xanthan gum

1/3 cup sugar

Fruit Filling

4 cups fresh blueberries; rinsed and stems removed

½-2/3 cup sugar –more or less depending on sweet tooth

2 tbsp. GF flour; I use tapioca flour

1/4 tsp cinnamon

Directions:

Place the fruit in a sauce pan. Stir together the sugar, cinnamon and flour and mix into the fruit.  Cook on the stove top for 5-10 minutes until it is thickened and hot.  Stir often so it doesn’t stick or burn. If you are worried it will burn, add a tbsp. of water to it and keep stirring. Pour into a buttered 8 inch square or round pan, top with big blops of the cobbler topping.

Cobbler Topping

1 cup dry baking mix

2 large eggs

2 tbsp melted butter or canola oil

¼ to 1/3 cup milk/buttermilk

½ tsp. vanilla  *optional

Mix the wet ingredients and then add to the dry mix in a big bowl.   Mix briefly: do not over-mix for best texture.  Use a big spoon to plop it right away on the hot fruit.  Bake immediately as baking soda and powder can’t stand around waiting or they lose their oomph!

Bake at 350 degrees for 25 minutes.  The top should be lightly browned and spring back when you poke it with your finger.  If it looks damp or squishy bake it 5 more minutes before removing from oven.  cobbler in dish

Let cool 5-7 minutes before serving as it will burn your mouth right out of the oven!  Some people love it with a scoop of vanilla ice cream.  This tasty cobbler is perfect just on its own.

Notes: I use canola oil most of the time but butter is great too. The original recipe was 1/3 cup milk but I have cut back to ¼ and I like it a bit better; less runny. I also use buttermilk for mine but you can use milk, fruit juice or even water for the liquid. Can’t say it will taste as good…but if you have to avoid dairy….
Blueberry Tartlets That Thrill!


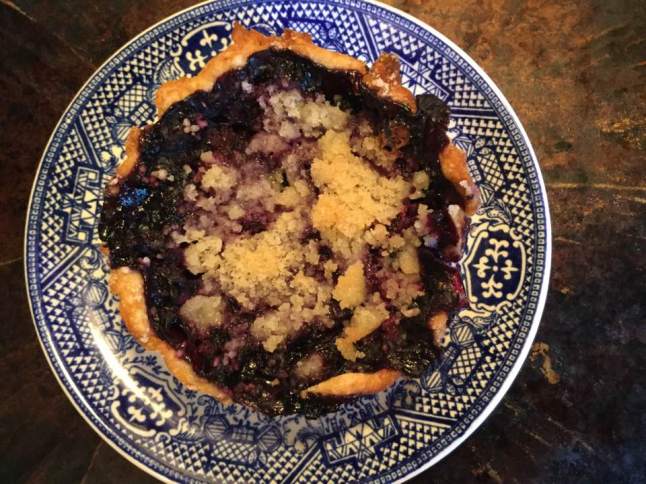
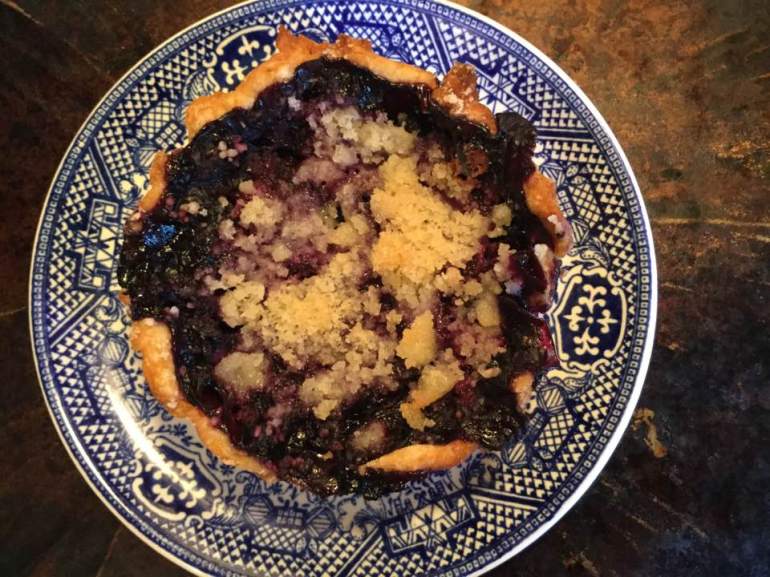
Blueberries rule my universe right now; plentiful and sweet.  The flavor can’t be beat. My guy loves them and I have to agree; they are the tastiest and healthiest fruit for me. Haha! Seriously this is all true and I am in love with these tartlets. The crust to fruit ratio is perfect and I made them with a minimum of sugar as these ripe berries are already quite sweet. I got my fruit at Aldi’s for a great price; every grocery store has blueberries by the pint, often on sale. They are very good for your body; full of fiber, low in sugar, and full of other nutrients. They are especially you have blood sugar issues.  See http://www.medicalnewstoday.com/articles/287710.php for more information.

Tips: Try not to bake in a hot kitchen; it makes it hard to roll out dough or even make the crumb mix. If it gets above 76 degrees you should turn on the air to keep your crust from acting weird.  I had to put mine in the freezer for a bit to help it hold the desired shape.

Don’t eat these tartlets fresh from the oven; they should be cooled to just warm or room temperature or even a bit chilled. They were perfect, just like a big pie only tiny each is one individual dessert.  You could certainly serve them with vanilla ice cream. We had them that way the other night and that was a treat indeed.

My apologies: these pictures were taken in a hurry; hot day and there was no spare time so they are looking rustic and crumbs dot the baking pan but frankly rustic tartlets are lovely. Be as tidy as fits your needs.

Angie’s GF Blueberry Crumb Tartlets: makes 6

Crust:

1 c plus 2 tbsp brown rice flour mix (at bottom of recipe)

2 Tbsp. sweet rice flour

1 Tbsp. granulated sugar

½ tsp xanthan gum

¼ tsp salt

6 Tbsp. cold butter cut into 6 chunks

1 large egg

2 tsp fresh orange or lemon juice

You will need 6 flat bottom 4 inch tartlet pans if you make them all at once. My pans are 4 in an attached group. I baked 4 one day and 2 the next day

Mix dry ingredients in bowl of stand electric mixer.  Add butter and mix until crumbly and resembling coarse meal.  Add egg and juice.  Mix until it comes together into big chunks.  Shape into a ball with your hands. Put it on a crust sized piece of wax paper (14 x 14 inches more or less), flatten the crust ball some; put on top of it another piece of wax paper and chill it all in your fridge 15-20 minutes while you prepare the filling.

Filling:

2 1/3 cups fresh blueberries, place in medium bowl

Mix with:

6 Tbsp. sugar

2 Tbsp. quick tapioca

¼ tsp. cinnamon

Let stand while you prepare the crumb crust. This is important so the tapioca can soften and absorb some juices before baking. If you like things tart add a tsp or two of fresh lemon juice to the berries.

Tartlet construction: Break dough into a large ball and a small one. Roll out big ball in a pie bag or between the two sheets of wax paper, try to get the thickness even and somewhat thin, no thick middle! Peel off one side of paper and place in 4 set tartlet pan, centered.  Remove other slice of wax paper.  Cut into 4 pieces with a sharp knife. Mold the crust to fill each tartlet shape with no holes or thin spots. Do the same with the smaller ball and create 2 more tartlet crusts. If you only have one pan you can refrigerate the dough and make the two other tartlets later.  Fill each tartlet with fruit mixture to the top of the dough… after you have the crumb topping ready to go.

Crumb topping

Put all four ingredients in the same mixing bowl you made the bottom crust in and mix well with mixer paddle until crumbs form. If you let them go extra long you get big fat crumbs if you want that look and I did!

¾ c brown rice flour mix

½ c sugar

½ tsp xanthan gum

1/3 c cold butter cut into six chunks

Sprinkle the top of each tartlet with crumb mix; use as much as you like.  I didn’t measure; just sprinkled until the fruit was barely visible through the crumbs. Up to your personal taste… It sinks partially into the fruit mixture and adds lots of sweetness and eye appeal.

Bake in a preheated 375 degree oven for 30-32 minutes until bubbly and the crumb crust is light brown.  Cool at least a half hour before serving at room temperature.  I think it is best served the same day you make it, or no more then 12 hours after baking for optimal flavor.  The crumbs will get soggy if too much time passes. Mine was still very good the next day; just not as great as when really fresh.

blueberry tartlet 2017

Note: if you find your bottom crust is not browning enough bake it empty at 375 degrees for 5-8 minutes before filling it with the fruit.  I have a bottom heat pizza style oven which gives me perfect pie crust so I don’t ever have pale pie crust. This is a big benefit of having this type of oven; it is a two oven range with a full sized lower oven.

Brown Rice Flour Mix (Same as King Arthur GF All purpose blend)
2 c brown rice flour

2/3 c potato starch – Not potato flour

1/3 c tapioca flour

Note: the crust and crumb recipe are out of Annalise Roberts cookbook, Gluten Free Baking Classics, Second Edition. Adaptation and filling recipe are mine.

Strawberry Shortcake – GF 2.3

Strawberry shortcake is a classic and no one turns down a slice of it at at a family gathering. I am not sure where I got the gf shortcake recipe; maybe my old Bette Hagman Gourmet Cookbook. I used to make shortcake a lot when I could still use all purpose flour but my gf biscuit version is pretty tasty. But there is one thing, you gotta make it with the best freaking strawberries you can find.  None of those ultra firm ones with whitish cores that are shipped in from far away.  You need juicy ripe scented red berries that are served over a gluten free short bread.  Yes, my local season is done but it can be done with other than local produce – the riper the better and it will taste great!

My mom always made a gorgeous version of strawberry shortcake. When I was a kid she would serve it as an entire meal.  I have done that and it is kinda cool.  Pre gluten free I generally made a huge oval biscuit with a smaller topping biscuit that I split off and buttered the split area before topping with berries and the smaller biscuit and topped with more ripe berries and a pillow of softly whipped heavy cream.  Oh berry perfection!  Now I bake it in two separate pans but the construction of the final product is the same otherwise.

Mom’s Strawberry Shortcake, GF2.3

Biscuit dough

1 cup white rice flour

2/3 cup potato starch flour

4 tsp. baking powder

1 tsp. baking soda

2 tbsp. sugar

½ tsp. salt
½ tsp. xanthan gum

6 tbsp cold butter

1 medium egg

2/3 cup buttermilk

2-3 tsp. sugar (optional)

2 tsp. soft butter

Other ingredients:

2 quarts ripe strawberries

½ cup sugar

2-3 tbsp. Karo light syrup

1 cup heavy whipping cream

½ tsp. real vanilla

2 tbs. powdered sugar (if you like your cream sweet)

Directions
Heat oven t0 400 degrees. Mix the dry ingredients in a medium mixing bowl. Cut in the cold butter until it is small pebbles.  Add the egg and most of the buttermilk.  Mix with a spoon; add rest of buttermilk if you need it.  It should be a bit sticky, don’t over mix; just until dry is blended in.  Spray the inside of an eight inch cake pan and a 6 inch cake pan with cooking spray.  If you don’t have a small pan just use two 8 inch ones.  Pat ¾ of the dough into the 8 inch; make it about ¾ to 1 inch thick and try to smooth the top and side edges a bit.  Put the rest of the dough in the smaller pan and do the same smoothing.  Make that one ½ to ¾ inch thick.  Optional: take 2-3 tsp. of granulated sugar and sprinkle it over top of them. I think it gives a great finish to the shortcake. Bake them about 20 to 25 min; the smaller one should be done in 20 minutes; a golden light brown. Set on a cooling rack for a few minutes.

While it bakes, get the berries ready.  Hull 2 quarts of fresh ripe berries.  Place them in a glass mixing bowl; chop through them a few strokes with a sharp knife.  Add ½ cup sugar and about 2-3 tbsp. Karo light corn syrup to the berries.  Stir well and refrigerate until the shortcake is baked.  You could do this berry preparation up to two hours in advance.  No more or they will start to disintegrate.

Place the fairly hot bigger layer on a large platter, one big enough to hold the shortbread and still have room for a generous overflow of strawberries. Butter lightly if you wish.  Top with several big spoonfuls of berries.  Don’t worry if there is juice in the berry bowl; there should be; melted down sugar and karo syrup with berry juice will give you a delish berry liquid.  Top with the second smaller biscuit and then more berries.   Cut into chunks.  Top with freshly whipped cream; beat a cup of heavy whipping cream until it is softly whipped.  Add ½ tsp. vanilla and ¼ cup sugar if you wish it sweet.  Be sure to pour the berry juice over your shortcake; it soaks in and adds to the strawberry experience.  My dad liked to pour unbeaten cream over his shortcake. My mom usually set out the whipped cream, a jug of cream and some whole milk so you could chose how to finish off your personal shortcake.  I might add that I grew up on a farm so this was raw milk from grass pastured cows; fantastic cream equaling a freaking perfect shortcake topper.  We also grew our own berries; no chemical sprayed on them ever.’

shortcake, one serving

If there is any left over it makes a great breakfast the next morning!

Originally published in June 2014.

Rhubarb Cobbler – Tender and Tasty

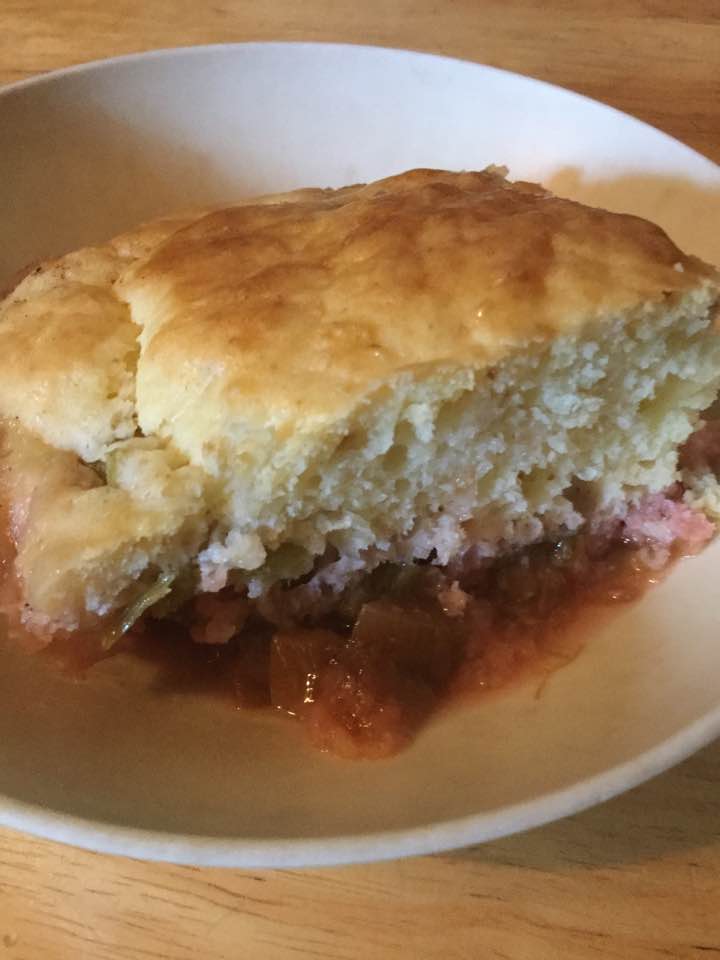
Rhubarb….yes another yummy recipe using rhubarb. My spring mission: to convince you rhubarb haters to try one of these recipes.  This one is delicate in flavor with a fluffy yet satisfying cobbler topping and no sour ickiness as some say rhubarb can be.  It takes a bit less fruit than a pie and goes together in just a few minutes.  And it is gluten free for all of you who must avoid gluten which means wheat, rye or barley flours are a no-no in baking.

This recipe is the same basic one I posted about for peach cobbler in the past; it is modified from a muffin dry mix in Bette Hagman’s book, More from the Gluten-Free Gourmet and uses a flour mix that will give you 4 cups of the dry ingredients.  One cup will make an 8×8 pan of cobbler topping.  I keep the rest of my dry mix in the freezer and a pan of cobbler can be thrown together in less than 10 minutes plus baking time.  What a time saver this mix is! I make all sorts of cobblers with it.

I always get the fruit part cooking before putting the topping together so the fruit is hot and ready for the topping and can go right into the oven.

My mom and I enjoyed this on this past Sunday. She really loved the rhubarb flavor and the cobbler topping. Joe, who used to be quite skeptical about rhubarb until he had my rhubarb custard crumb pie, loves this dessert.  He always asks for some to take for lunch the next day!

rhubarb cobbler

Angie’s Rhubarb Cobbler

Dry Cobbler Mix – use one cup for this recipe and freeze the rest

2 ¼ cups white rice flour

½ cup potato starch (not potato flour!)

½ cup tapioca flour

1 tsp. baking soda

4 tsp. baking powder

1 tsp salt

1 tsp. xanthan gum

1/3 cup sugar


Fruit Filling

4 cups sliced rhubarb

½ tsp. almond extract

½-2/3 cup sugar –add more or less depending on how sweet you want it

2 tbsp. GF flour

1/4 tsp cinnamon

Directions:

Mix the fruit and almond extract in a sauce pan. Stir together the sugar, cinnamon and flour and mix into the fruit.  Cook on the stove top for 5-10 minutes until it is thickened and hot.  Pour into a buttered 8 inch square pan, top with big blobs of the cobbler topping.

Cobbler Topping

1 cup dry baking mix

2 eggs

2 tbsp melted butter or canola oil (both work fine)

1/3 cup milk/buttermilk (I skimp a tbsp off to keep it from being runny)

½ tsp. vanilla

Mix the wet ingredients and then add to the dry mix in a big bowl.   Mix briefly: do not over-mix for best texture.  Use a big spoon to plop it right away on the hot fruit.  Bake immediately as baking soda and powder can’t stand around waiting or they lose their umph!

Bake at 350 degrees for 25 minutes.  The top should be light brown and spring back when you poke it with your finger.  If it looks damp or squishy bake it 5 more minutes before cutting.

Let cool 5-7 minutes before serving as it will burn your mouth right out of the oven!  Some people love it with a scoop of vanilla ice cream.  This tender rhubarb cobbler is perfect just on its own.

Reposted with minor changes from June 2015.


Apple Crisp: Easy and Tasty

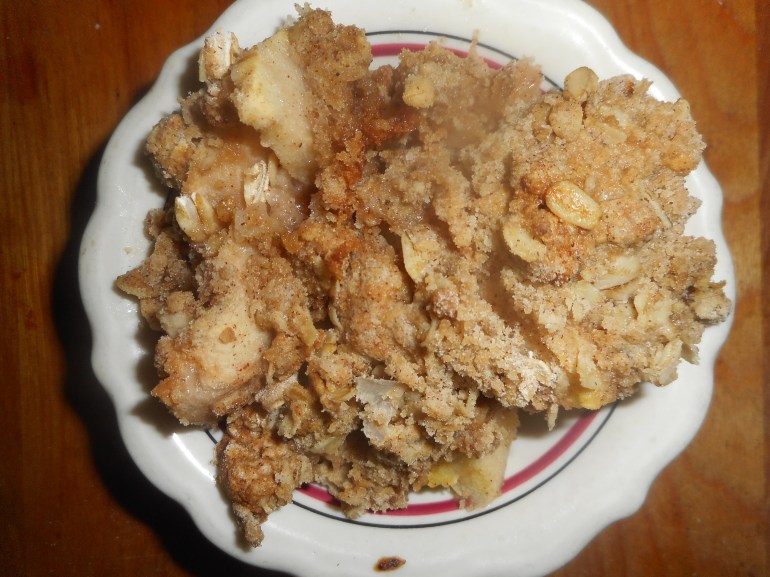
Apples are the centerpiece of the fall harvest culture.  Pumpkins are popular but they are a relatively new comer to the contest.  Some may think pumpkins are the way to go in baking but I firmly believe the apple is king in Autumn in America.  Crisp, sweet, flavorful and so very good for you.

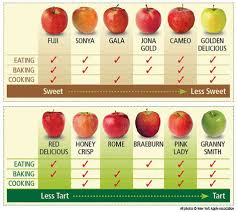
If you can, get the organic ones as the sprays they use on growing apples are not at all good for you.  I recently made apple crisp with some baking apples from a pick it yourself farm near Milford NJ and it was very tasty indeed.  I especially suggest you get your apples at an actual apple orchard.  Another orchard just south of Hellertown is Bechdolt’s Orchard which grows many apple varieties.  Go there if you want the freshest tastiest apples in the Saucon Valley area.  Apples grow all over the globe so shop where you can get them fresh and crisp! The variety is up to you but I would not suggest any that are not meant for baking; don’t use red delicious as they are for eating only, same goes for honey crisp apples. apple-cart

This recipe is out of Gluten-Free Baking Classics Cookbook by Annalise G. Roberts with a few minor changes.  I am betting you can use any GF flour mix in this recipe, not like a cake or other baked goods that have very specific flour requirements.

And it is so much easier than a pie.  No crust to mix or roll out.  Just a simple mixed up topping to add to the cut up apples.  Bake it and voila: a yummy yet fairly healthy dessert!

I have made the topping several ways.  You can cut un-melted butter into the dry ingredients; it makes for a firmer crumb than the melted version below. I have made it egg free but it really somehow needs that egg to pull it together to mimic a wheat flour based crisp.  The oats can be left out if you don’t like them or can’t eat them. I personally love oats in my crisp.  A quarter cup of chopped nuts can be added to the topping; really a nice touch too!  I don’t like it too sweet so I use the lesser amount of sugar.  This is entirely a personal choice.  You can up the nutritional value by adding flaxmeal to the dry mix; 2-3 tbsp.

For those who love ice cream, this recipe is absolutely perfect with a big scoop of vanilla ice cream next to it.  I like it warm from the oven but it also is tasty cold the next day, if you have any left over that is!

pork tenderloin, banana choco cupcakes 007

Angie’s Apple Crisp


1 cup GF flour (mix below)

½ to ¾ cup sugar (I prefer brown sugar)

½ cup old fashioned gf oats

1 ¼ tsp baking powder

1 tsp cinnamon

Sprinkle of nutmeg

½ tsp xanthan gum

½ tsp. salt

1 large egg

6 cups peeled and thinly sliced apples

¼-1/3 cup butter, melted


Heat oven to 350 degrees.   Put rack in center level of oven.  Lightly butter a 9 inch square pan or spray with cooking spray.


Combine all the dry ingredients.  Add egg and stir to mix well.   Place apples in the baking pan, top with the dry mix and sprinkle with the melted butter.  Bake 40-50 minutes until bubbly and the topping is lightly browned. Let cool at least 10 minutes before dishing out. Six servings.


Brown Rice Flour Mix (same as King Arthur’s GF blend)
2 c brown rice flour (finely ground)

2/3 c potato starch – Not potato flour!

1/3 c tapioca flour


Originally posted by me October 2015.