Peach Oatmeal…It’s What’s For Breakfast at My House!

Healthy breakfasts are a way to start the day off great.  One of my go to breakfasts is oatmeal.  I love it the way it comes out in this recipe; not sticky or goopy, no way I would eat that kind of glop!  I use a lot of water and drain it before adding yummy stuff.  This substantial breakfast is minimal work and I let it cook while I made my lunch or feed the animals.  Less than ten minutes later I am eating a healthy tasty bowl.

A year ago I posted on making healthy breakfasts; there was an instant oatmeal I raved about as well as a bunch of other choices https://myworldwithoutwheat.wordpress.com/2014/12/02/gf-breakfast-is-doable-and-delish/.  Nice, but this whole oatmeal recipe is my fav and I wanted to share my recent fruit topping discovery.  It sounds so elementary but I just never seemed to try it…until now.    Here goes.

oatmeal peachy 001

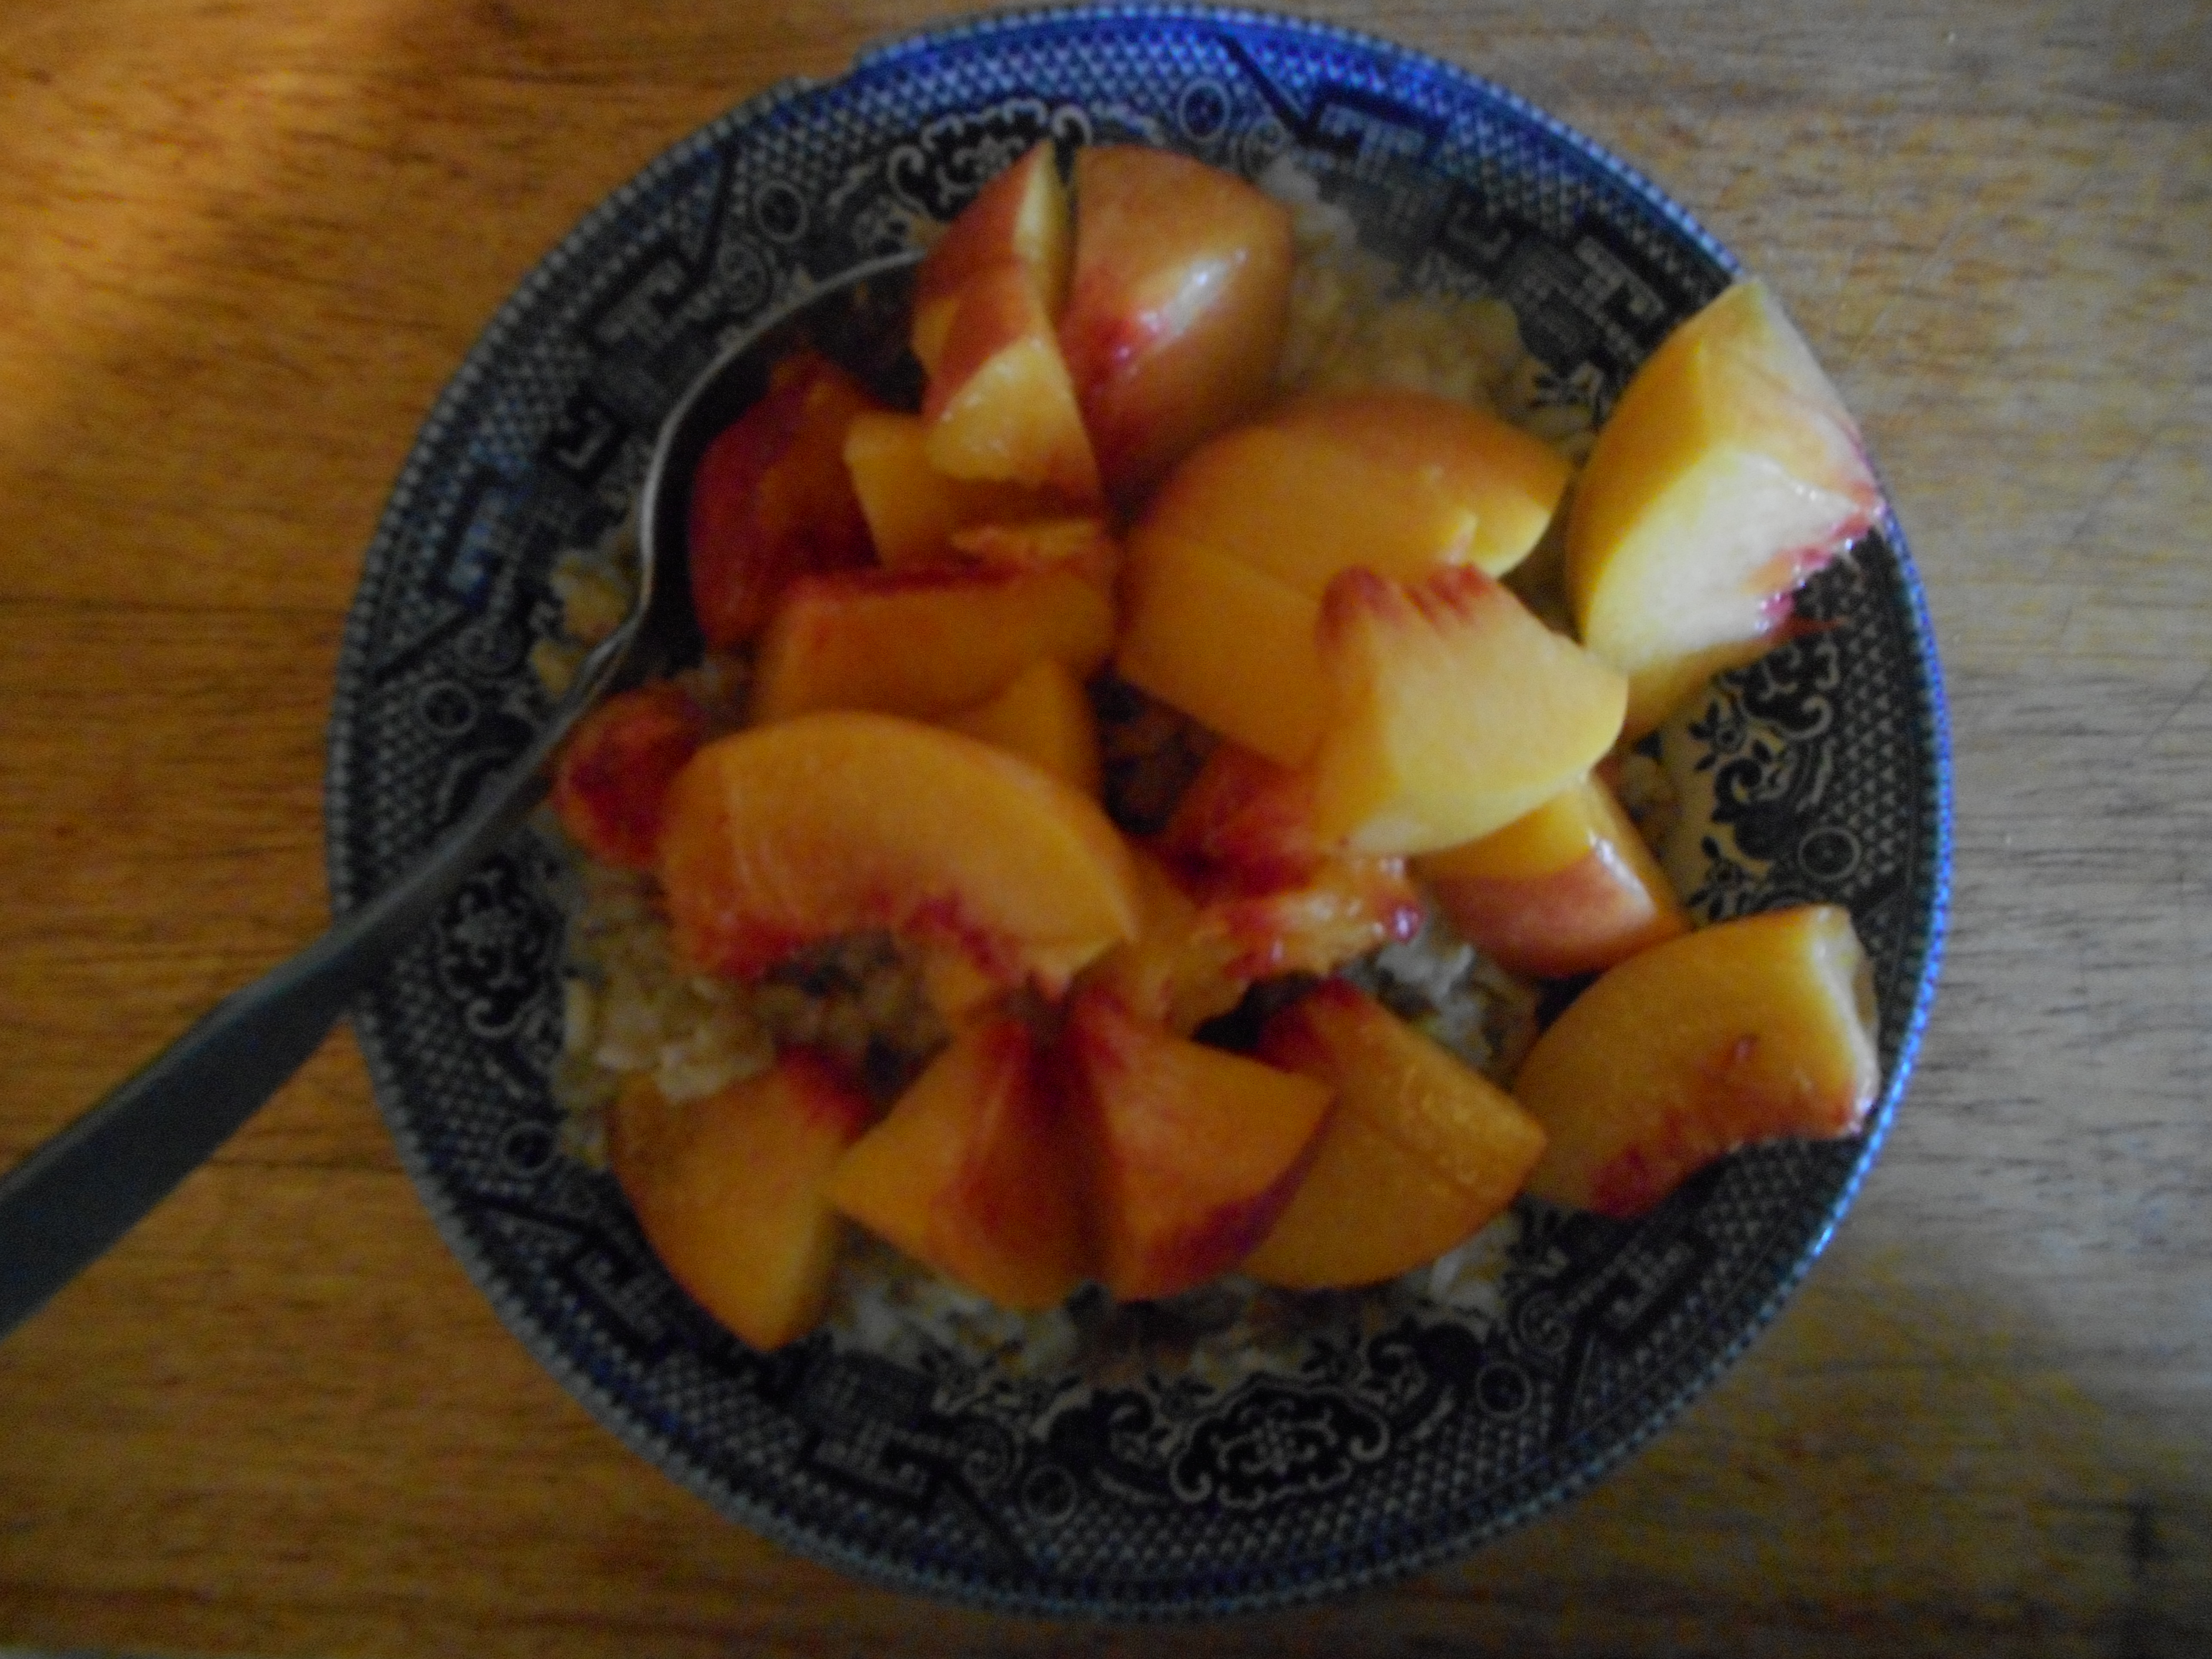
This was a big juicy peach I cut up for this breakfast treat.

Angie’s Oatmeal with Fresh Peach (one serving)

½ cup old fashioned oatmeal, gluten free if you have celiac

Sprinkle of salt

1 tsp. butter

1 tbsp. brown sugar

1 peach

Sprinkle of cinnamon (optional)

Directions:

Heat a quart pot 2/3 full of water, sprinkle in some sea salt.  When it comes to the boil add the oatmeal.  Turn heat to medium low.  Cook 8 to 9 minutes.  Drain into a strainer.  Pour into a bowl, add butter, sprinkle with brown sugar and a peach that you have diced into small bits.  Cinnamon on top if you like that sort of flavor too. It’s that simple and that peachy good! Great use of late season peaches…could use frozen ones once the fresh ones are gone.

I also make this with sliced bananas or blueberries.  So healthy and very filling. Sometimes I make it topped with dried cranberries, chunks of walnuts, a tiny bit of butter and some real maple syrup.  I sprinkle that version with cinnamon and nutmeg.

oatmeal

Oatmeal is naturally gluten free but it is often processed on equipment that does wheat or is contaminated with wheat kernels from the farm; if you have celiac you really need to buy oatmeal that is labeled gluten free so your chances of cross contamination are nil.

I do eat instant or dry cereal but this oatmeal is so much more satisfying.  And so little effort too.  Enjoy!

Bread and Butter Pickle Project – Beautiful Pickles!

I am watering someone’s plants while they take an extended vacation.  Since their pickling cucumbers are going to waste I decided to try something new; I made pickles this week.  Old fashioned bread and butter pickles which are tangy and sweet slices of yummy pickly goodness.  I think the name may come from the Depression era; from poor folk eating them often like you might enjoy bread and butter for a cheap meal.

This recipe comes out of an old Rodale cookbook, Stocking Up.  I did swap honey for sugar; not enough honey around here this week and I will have to try that next summer.  Plus I cut the recipe in like a fourth; not enough cukes for a huge batch; otherwise pretty close translation.  FYI: they need to have sugar, turmeric, mustard and onions to be called bread and butter pickles.

They have to sit a few weeks so I am trying to be patient.  Want pickles now.  Oh well, I guess store pickles will have to do at present.

cuke 010

If you get a few pickling cukes; they are kinda cute; all bumpy and gray green, try this recipe and impress your family. Pickle making seemed so mysterious but it is really not hard at all and I enjoyed the process.  They are fun to make and gluten free, of course!

pickles 005pickles 006pickles 009

Bread and Butter Pickles

6 decent sized pickling cucumbers

2 medium sized onions

2 tsp. sea salt.

+++++++++

2 ¼ cups white vinegar

1 1/3 cup sugar

¾ tsp. celery seed

¾ tsp. ground ginger

¼ tsp turmeric

¾ tsp. mustard seed

Directions: Rinse off your cucumbers, peel the onions, slice cucumbers into rounds and onions into medium thick slices, put in colander, sprinkle with salt. Let stand an hour. Drain well.  Make a vinegar mix with the rest of the ingredients; put in a pot and bring to a boil.  Add the cukes and onions, bring back to boil.  Pack in sterilized pint jars using a ladle; leaving ¼ inch head space.  Put on brand new lids and rings (which can be used) – tighten, process ten minutes in a boiling water bath.  Let cool, store a few weeks before opening. Enjoy! Makes 4 pints.

Summer Tomato Soup’s On!

Summer is tomato time around here.  I had tomato salad the other day, a big tomato sandwich Thursday and for lunch I am having homemade tomato soup, made it yesterday.  Last October I made a big batch and froze it in plastic containers, each two servings.  I felt like I was back in summer whenever I had it for lunch last winter. I am freezing lots of it this summer; here are about 9 servings about to go in my big freezer for winter lunches.

rustic apple tart 014

So make some, it is Ina Garten’s recipe simplified a tad.  If you don’t like it creamy leave out the cream or use half and half or whole milk for less calories.  If you are a vegetarian use veggie broth instead of chicken broth.  You can strain it but I prefer it unstrained and chunky. It has a fair amount of garlic which you can reduce as wished.  I cut back on the salt but you can cut it even further as you wish.

Your family will love this soup with a sandwich or salad. It is naturally gluten free.  GF croutons would bring a lovely crunch to it if you have any.

tomato soup

Messy rim but yummy soup!

Cream of Tomato Soup
Ingredients
3 tablespoons extra virgin olive oil
1 1/2 cups chopped red or yellow onions (2 onions)
2 carrots, unpeeled and chopped
1 tablespoon minced garlic (3 cloves)
4 pounds vine-ripened tomatoes, coarsely chopped (5-6 large)
1 1/2 teaspoons sugar
1 tablespoon tomato paste
1/4 cup packed chopped fresh basil leaves

3 cups chicken stock, preferably homemade
2 tsp. kosher salt
1 tsp. freshly ground black pepper
3/4 cup heavy cream

Directions
Heat the olive oil in a large, heavy-bottomed pot over medium-low heat. Add the onions and carrots and sauté for about 10 minutes, until very tender. Add the garlic and cook for 1 minute. Add the tomatoes, sugar, tomato paste, basil, chicken stock, salt, and pepper and stir well. Bring the soup to a boil, lower the heat, and simmer, uncovered, for 30 to 40 minutes, until the tomatoes are very tender.

Add the cream to the soup and process it by blending with an immersion blender or run it through your food processor. I use my cute little boat motor blender and leave it chunky just as I love soup to be. Reheat the soup over low heat just until hot and serve plain or with julienned basil leaves and/or GF croutons.

Read more at: http://www.foodnetwork.com/recipes/ina-garten/cream-of-fresh-tomato-soup-recipe.  Originally published August 2014, modified for this post.

Sweet Corn on the Cob Without A Hot Kitchen

Sweet corn season is here.  In many places really good sweet corn can be had, like farms markets, road side stands and even Wegmans!  You can get it at Musikfest at a price; $4 for an ear. aw shucks corn

It is delicious but really? That’s a lot of moola for an ear that costs 40 cents at my local grocery store. Big mark up going on! So make it at home. I don’t know about you but when I only am making one or two ears it seems silly to fire up a tall pot of water.  I do steam the corn which only takes an inch or so of hot water but still…too much to do.

Last summer, on a hot day, I realized there was a quick and easy way to make an ear…or two without that big hot pan of water and steam. I just take a large frying pan, put a quarter inch of water in it, sprinkle of salt and let it heat until bubbling.  I then lay in my ear or two (I think you could squeeze in three) which I have husked and removed all the silk.  Then the pan is topped with a lid or a metal pizza pan if your frying pan is too big for your lids.  Cook it the usual time; depends on how fresh the corn is.  The fresher your corn ears, the less cooking time you need.  The steam in the pan will cook it really fast.  Maybe 6 to 8 minutes.

corn 002

And the bonus is that if it runs out of water your ear will get a bit of carmelization going which only adds to the flavor.  In fact I hope it gets browned a bit; sometimes I rotate the ear to brown it on another side.  Remove with tongs when your corn reaches the done stage you like.  Sometimes I take a quick bite to test for eating readiness!

corn 004

Carmelization…Yummy!

Serve your ear(s) with salt and butter and enjoy fresh corn without heating the kitchen up much.

Originally published June 2015: I thought some of you needed a gentle reminder to try this; gonna be hot in the next seven days here in PA!

Spicy Chicken Tenders, GF and Totally Tasty

There are a lot of commercial food items that I don’t get to eat anymore, specifically most fast food being a major no no.  I miss crispy chicken like I used to enjoy at Wendy’s.  When I saw this recipe referenced on facebook I immediately went to the site, read the recipe and decided I had to try it.  I had some chicken breast tenders and all the ingredients except the gf Bisquick.  I looked on Glutenfreeonashoestring and lucky me; she has a recipe for making your own gf Bisquick; it is attached to a recipe for mini breakfast pancake bite muffins. I had the flours needed; white rice, potato starch and tapioca flour plus the add ins of baking powder, baking soda, salt, and sugar.  Easy peasy to put a double batch together; I will keep it in my freezer in a Ziplock freezer bag; sure have been wanting some of that Bisquick! bisquick

wendy chicken sandwich wendy's chicken tenders

Here are pictures of Wendy’s spicy chicken; in sandwich or tenders. Not for me!

I lowered the hot sauce to half, ditto for the cayenne powder as I was pretty sure I didn’t want it so spicy; do as your taste buds wish. It was simple to do; mix the spices with the Bisquick, mix the hot sauce with the water, dip the chicken in the spices, then the hot water and back in the spiced flour and fry. It was almost like deep frying but not quite.  Not something I would eat every week but it sure was yummy!

I didn’t eat it as a sandwich the first time; had two juicy tenders with a baked potato and some summer squash.  It was very tasty and not too spicy for me.  I had it in a gf bun for a meal, complete with lettuce, tomato and mayo, and it was wonderful. I think this is well worth trying even if you just buy some gf Bisquick.

spicy chicken, noodle stir fry 004

Gluten-Free Spicy Chicken (like Wendy’s)

2-3 Tbsp. Frank’s Red Hot Sauce

1/2 c Water

1/2 c Gluten-Free Bisquick

1 Tsp. Sea Salt

1-2 Tsp. Cayenne Pepper

1/8 Tsp. Fine Ground Pepper

1/4 Tsp. Paprika

1/4 Tsp. Garlic Powder

1 lb. Chicken Breast tenders – pound them a bit if they are very fat; you want it ½ inch or thinner. I didn’t pound mine and they were fine.

1 cup frying oil; canola, peanut oil are two that I can suggest

Directions:

Mix together the Gluten-Free Bisquick, Salt, Cayenne Pepper, Pepper, Paprika and Garlic Powder in a low bowl.  I used a soup bowl.

In a separate cereal bowl mix together Frank’s Red Hot Sauce and water. In a  high-sided sauté pan heat 1 cup of canola oil – it should come up about 1/2 inch the side of the pan depending on the size of your pan. I started it on medium heat and put in a candy thermometer to regulate the temperature; I got it pretty hot; 350 degrees before putting in the chicken.

Take one chicken breast tender at a time and dredge it in the GF Bisquick mixture, then roll it in the hot sauce/water mixture and then put it back in the Bisquick mixture and roll it to coat. I slid one into the hot oil and then a second one. Cook chicken for about 5 minutes, until they are golden brown and no longer pink in the center (I used a meat thermometer just to make sure).

Remove from the oil and drain on paper towels to blot any excess oil. If you have the oil hot enough they shouldn’t be greasy. If you want a sandwich, serve on a gf bun and top with mayonnaise, tomato and an additional piece of lettuce.

chicken sandwich 001

Go ahead, indulge in this delicious chicken and I promise you it will be a hit with your family!

Adapted from creativecookinggf.wordpress.com, February 2011.