Chicken Angelique

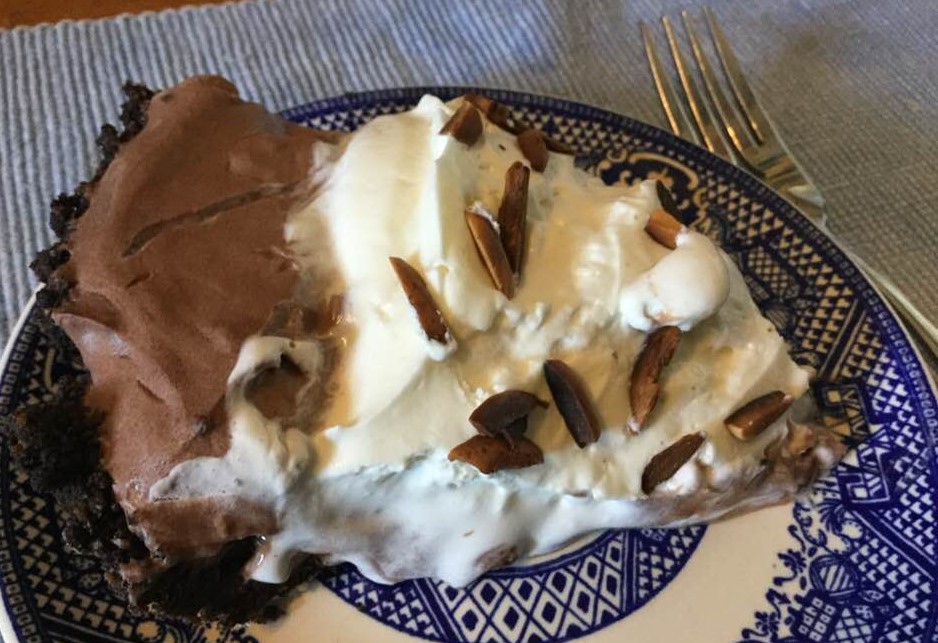
My family had this special dish that my mom found in a magazine. She always called it Chicken Angelique and I have never seen it in a cookbook. It was small bite sized cubes of chicken breast fried until browned and done inside. You make a lovely French sauce of celery, green onions, garlic, bacon, broth and milk. Serve it on top of fluffy white rice and have a side dish of steamed fresh asparagus and it was a meal for royalty. My mom made it only for company like my grandparents or aunts and uncles. She served it on her and my father’s twenty fifth wedding anniversary when I was a kid. When Mom turned 100 my sister Karen and I made it for her birthday supper and it was a good as I ever remembered it. A small labor of love for our lovely mother and she was thrilled to enjoy it on that momentous occasion. 

Notes: The raw chicken cuts into cubes better if it is partially frozen. I had frozen it for 5 days and I cut it up before it thawed fully.  Do use the entire scallion minus the roots of course! It adds a nice hint of scallion to the sauce. My sister put enough of the green leaves that her sauce was pale green; quite lovely actually. That one slice of bacon is very important; adds a special bit of flavor. Do not use anything less than 2 percent milk in the sauce. I prefer whole milk which is what my mom used. We had a milk cow, and she used a mechanical separator machine that gave a stream of milk and a lesser stream of thick cream. Use tender celery and real butter for the best flavor. I used rice flour, but you can use all-purpose flour if you don’t need to be gluten free.  Enjoy!

This is the only picture I took of it, the one of it in the pan was slightly out of focus; I was just too busy cooking and wasn’t thinking much about sharing pictures.
I did take a picture of the rice! Lovely fluffy basmati rice.

Mom’s Chicken Angelique,  serves 4-5

Ingredients:

2 chicken breasts

½ tsp. salt and 3 Tbsp. rice flour (pepper is optional)

1 Tbsp and 1 tsp. butter

1-2 Tbsp. mild olive oil or canola oil

Sauce:

1 slice cold bacon; mince it up

1 smaller rib celery chopped finely

4 green onions chopped finely

1 small clove garlic minced

1 Tbsp. mild olive oil

2 chicken bouillon cubes dissolved in 1 cup boiling hot water

1 small bay leaf

1/8 tsp. thyme, skimp it a bit

2 Tbsp rice flour or slightly less all purpose flour

1 cup plus 3 Tbsp. whole milk

1 medium egg yolk (I used the smallest egg out of a dozen large ones) Stirred up a bit

8 oz fresh small mushrooms; slice them medium thin after cutting of the bottom of the stem

1 tbsp butter and 1 tsp. oil

Make the sauce first. Using a large sauce pan; heat it; add oil, bacon, celery, green onions; cook 2-3 minutes; add the garlic and cook another minute. Light brown; not dark brown. Add the hot bullion, the bay leaf and the thyme. Simmer it covered for 15 minutes. (while the sauce simmers, slice the raw mushrooms and cook them in a tablespoon of butter and a dash of cooking oil. Turn off when they look done. Back to the sauce: you can then blend it in a blender until smooth but we never bother with that step. Mix a tablespoon of flour with half a cup of the milk and add to the sauce; heat on medium stirring constantly until it starts to thicken. Put the rest of the flour in with another half cup of milk; add to sauce and cook a few moments. Add a half cup of the sauce into the cup with the stirred-up egg yolk to warm it up and then dump it all back into the sauce pan. Stir well as you add the rest of the milk. It should be like slightly thick gravy. Add the sautéed mushrooms to it. Turn to the lowest setting to keep it warm while you make the chicken.

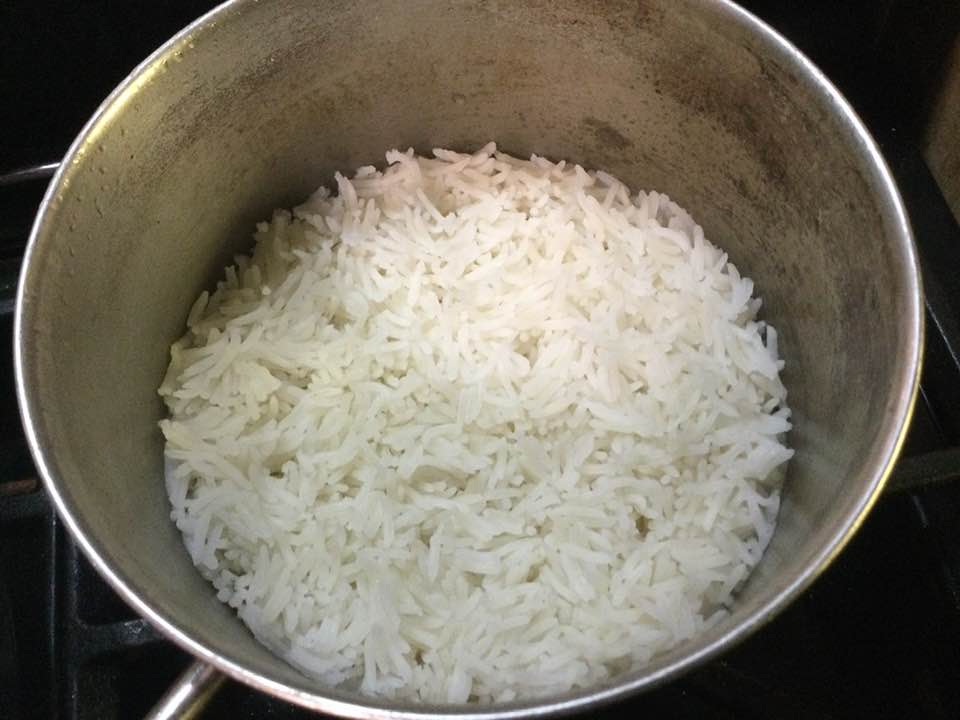
The chicken should be skinless; cut it up into 1-inch cubes. Roll in flour that you salted a bit. Heat a large saucepan, add the oil and butter. I did my chicken in 3 batches. There should be a bit of space between the cubes. Turn them 1-2 times to brown the sides. I used a dinner fork to do that. I put the done ones into a bowl, and you will probably need to add another tablespoon of oil for each batch.  When they are all browned you are ready to bring It together with the sauce. You should have made some white rice to serve with them. And a vegetable like asparagus, peas or whatever you enjoy. Pour the hot cooked cubes into the sauce and serve it on a bed of hot rice. Some people sprinkle some paprika or fresh parsley on top, but I don’t really bother with that. Enjoy!

Homemade Chili Rellenos and Super Easy Mexican Rice Made in an IP

Chili Rellenos and Mexican Rice

Chilly nights make me long for spicy food and I turn to Mexican dishes as well as Indian curries. They can warm your tummy and brighten up a dull day with vibrant flavors. Curries and Mexican food can be hot as in super spicy; depends on the pepper type and quantity added. I love zingy food but, my idea of spicy is probably on the mild side compared to many folks. Of course, you can always up the spicy ingredients, the jalapeno pepper in this comes to mind. Or cut back if you want it milder.

One of my favorites that I don’t get to eat these days are chiles rellenos. Spicy peppers stuffed with cheese, battered and fried. I bought a few poblano peppers at the farmer’s market for this purpose. I had Mexican cheese in the fridge. The rest of the ingredients were on hand. I do say that next time I will try it with Monterrey Jack cheese; in many of the recipes I previewed in my search for a suitable one that was the cheese of choice. I think it would have a bit more flavor and more melty quality so I do suggest you use that. I made 4 peppers; the recipe I altered was for 6, next time I will do six for sure. I did find the poblanos to be on the hot side for me. Thinking Anaheim for next time. I’m always tweaking recipes to make them more perfect, for me anyway!

The Mexican rice was to be from scratch and I wanted to go a bit more healthy; I used par cooked brown rice; cooked it 7 min in my IP. I think 6 minutes would be enough. If you use regular brown rice you will need to cook it much longer; more like 25 minutes so I suggest the par-boiled rice for quicker cooking.

I started the peppers; charred them in my broiler for about 5-6 minutes on opposite sides and then covered and let stand 10 minutes while I got the rice going. Once it was in the IP and the lid on I went back to the chile rellenos recipe and they both were done around the same time. Success!

Chili Rellenos

Pepper Ingredients:

6 big mildly hot peppers; choose Anaheim or Poblano

3 eggs, separated

6 sticks of Monterey Jack cheese; ½ inch dimeter and the length so they fit inside the pepper.

¼ cup white rice flour mixed with ¼ tsp. sea salt; on a plate

Canola oil to put 1/4-1/2 inch deep in medium fry or sauce pan. 1-2 cups

Sauce ingredients;

1 Tbsp mild olive oil

2-3 Tbsp. minced onion

¼ tsp. cumin

4 ounces tomato sauce (half an 8 ounce can; the rest gets used in the Mexican rice)

Directions: turn on oven to broiler. Place the whole peppers on a piece of aluminum foil on a small sheet. Broil 5-6 minutes until charred; take out and turn over with tongs or fingers. Do other side 5-6 minutes. Do stay near by to yank out before they get over done. Cover with foil and let stand 10 minutes. Then peel off skin of peppers, don’t worry if you can’t get all of it. Then cut a slice in one side and remove all the seeds. Then stuff the pepper with a fat stick of cheese. Fasten with 1-2 toothpicks to keep cheese in. Place on plate until you are ready to finish the dish.

Mexican Rice

Ingredients:

3-4 Tbsp. mild olive oil

1 ¼ cup par boiled brown rice (do not rinse)

¼ cup chopped onion

½-1 jalapeno pepper minced, no seeds unless you want it hotter

1 tsp. minced garlic

1 ½ cup water mixed with one veggie bouillon cube

4 ounces tomato sauce *the other half of the 8 oz can

1 carrot diced

½ cup frozen peas

Directions: turn IP onto sauté. Add oil, let warm a moment and add brown rice, stir with oil; let brown for 2 minutes. Add the onion and cook 2-3 minutes. Add minced pepper and garlic. Stir and cook 2-3 minutes. Add broth you created with water and bouillon cube, the tomato sauce and the chopped carrot. Stir up and put the lid on. Cook under pressure 6-7 minutes. Let stand 10 minutes. Release pressure, open, add peas, put lid back on (no need to lock) and let stand 2-3 minutes. Open, fluff gently with fork so peas are getting a bit blended in without breaking the rice grains. Serve and enjoy! This would be perfect with almost anything Mexican like tacos or enchiladas.

Continuation of peppers: while the rice cooks in the IP: fry those pepper babies up!

Use a small electric mixer to whip whites in a medium mixing bowl until they are stiff and then add egg yolks one at a time and blend briefly to make an even mixture. Heat the oil on your stove until hot but not smoking. I used an 8 inch fry pan that would hold 2-3 peppers at a time. Then roll the stuffed peppers one at a time in flour mixture. Next, dip them in the egg fluff coating and gently lay one in the hot oil. I tried to get as thick a coat as possible and cover the entire pepper. Get a second one ready and put it in there too. Turn them over gently once the bottom is a nice medium brown. I used a long big metal spoon with holes in it, tongs might help. As they get done remove them to a oven safe plate lined with paper towels. Add a third once you take the first pepper out. And so on; Put the plate in the oven warmed to 200 degrees while the rest fry. Meanwhile I put the sauce oil and onion in a small pan and let them cook 2-3 minutes. I added the cumin and stirred it. Cooked 30 seconds, added tomato sauce and cooked on low for 4-7 minutes.

Serve by placing some sauce on the plate and top with the fried peppers; 2 per person. Add Mexican rice to the dinner plate. I had a salad too afterwards to settle my fiery tummy, LOL! Those poblanos were a bit hot for me! Still delish…Ole!

Sausage Pasta Cheese Bake

It is summer and hot as heck (at times)  but you still gotta eat supper every day. Tonight I threw together a modified pasta bake that was quick to make, and, although it wasn’t too pretty to look at, the flavor was delicious and I know I want to make it again. This entrée used Italian sausage liberated from its casing.  It is a rustic Italian delight and all you need is a green salad and you have a satisfying meal to enjoy. My oven is well insulated so it really didn’t make my house feel that hot. The stove top portion is about 15 minutes worth of cooking, again, not too excessive in my book.

You could make this with spicy Italian sausage if that is more your style. Mushrooms are optional but I love the flavor they add. You could use spiral pasta. I, of course, used gf pasta; this time it was Aldi’s store brand which is inexpensive and has a great flavor. This bake seems slightly dry but the cheese makes a delightful bit of sauce with the tomatoes and veggies.  You don’t need to have a lot of tomato sauce to taste that Italian pasta bake flavor. Summer pasta on a plate! Leftovers are highly anticipated by me… I won’t have to cook much this week. Win win! If you have a big family this might be a go to recipe to quickly toss together and please the kiddos and the dad!

I know; not impressive but trust me; the flavor is building!
Another less than inspiring picture; just imagine it all melty and gooy with that yummy sausage sauce mixed in.

Angie’s Penne, Sausage and Cheese Bake

Ingredients

5 Italian sausage links, uncased (1 pound)

Cooking spray

1 large red or yellow onion, diced

1 large carrot diced

3 large cloves of garlic; put through the garlic press

1 14oz can diced tomatoes and juice

Rounded half tsp of sea salt, dried basil and dried oregano

A few grinds of black pepper

3 cups uncooked penne

1 small can sliced mushrooms (optional but I love them in this dish)

1 8 oz block of mozzarella cheese, grated on large hole side of your grater

Directions: Heat a large frying pan that you sprayed with cooking spray. I like olive oil spray. Add the sausage that you uncased, press it a bit to spread it out and turn in 2-3 minutes. I used a Teflon pan turner to chop up the links into small bits. Cook about 5 minutes until it doesn’t look pink. Carefully remove the sausage and let it rest in a bowl. Leave about a tablespoon of sausage oil in the pan.

Start a large sauce pan to cook the pasta; fill with salted water and get it heating.

Add the carrot to the frying pan and cook a minute, add the red onion; cook 2-3 minutes, add the garlic, cook one minute, stir well. Add The tomatoes and then return the sausage to the pan. Add the basil, oregano, salt and black pepper and stir well, lower heat to a simmer and cook for 10 minutes. While that simmers, cook the pasta. I cooked mine 3-4 minutes less than the package said since we will bake this in the oven. Drain it. I also grated the mott cheese during these 10 minutes and heated the oven to 375 degrees. Add the drained mushroom to the frying pan for the last minute of cooking. Stir the pan well before ladling it into the casserole.

Get out a 2 quart casserole, I used a tall sided glass one. Put a ladle of the sausage sauce in the bottom, add 1/3 of the hot pasta and 1/3 of the cheese, layer it up two more times with the last bit of cheese on top. Put a piece of aluminum foil over the top to keep in the moisture and bake it for 30 minutes. Let stand 5-10 minutes before serving.  You might want to stir it up before ladling out servings to ensure it is well mixed. It looks like a bit of a mess but I promise you will really enjoy this easy sausage and pasta bake. It makes about 6-8 servings, 4 if folks are starving! Enjoy.

There it is; a hodgepodge looking dish but you are gonna love it! And yes; do make that salad to accompany it; mine has some homemade green goddess dressing. Mmmm.

Cloud Pie, Yes…that’s a Thing!

choc cloud pie

It’s spring but not much fresh fruit is out for pies; I am rather tired of apples pulled from refridgerated storage, ditto the pears. And peaches/plums.necterines are here after traveling thousands of miles from South America. So for a quick dessert try this recipe: a chocolate cloud pie. This works well with a premade graham cracker crust. My guy actually liked it better that way. I especially loved the version I made once with a mixture of chocolate cookies and ginger snaps. Do any crust you like.

chocolate pudding

It is not hard to make: I throw it together in three easy steps. It was one of those recipes where the sum of the ingredients is far tastier than the components would lead one to believe. The first time I made it everyone devoured their slice. some took slices home. The name came from the fact that it is as light as a fluffy cloud and from my love for my older sister who died over eight years ago. Margie’s love of pie was renown in our family and I am absolutely sure she would have adored this pie. Whip some up this week and woo your family with chocolaty goodness that should please everyone. choco cloud pie slice (2)

Notes: I used Amaretto this time instead of rum as I was out. I think cognac would be nice too. I have used bourbon too; works fine! I used 3/4 cup almonds as that’s all I had; worked great; I put 2 Tbsp. aside for topping and rest went on top of the baked cookie crust. You can buy a crust or make your own. I often leave out the almonds on the crust before you put in the filling. I don’t really miss them…good to know if you don’t have a full cup of almonds. A healthy slice is like eating a chocolate cloud….with puffs of cream and the crunch of toasted almonds. I used a hybrid crust when I made it a couple of years ago; I was tired of my gf oreos; so I scraped out and discarded the filling and crunched up the cookies, I thought I was a bit short on cookies so I added 7-8 gingersnaps I still had from my last cookie crust. Crunched up and mixed with butter, baked into what became a flavor delight of a cookie crust! One of the best pies I have ever made. And I make a lot of pies….

Chocolate Cloud Pie

Ingredients
1 pre-made graham crumb crust, GF
1 pkg chocolate pudding, the kind you have to cook
2.5 cups whole milk
1 tbsp cornstarch
1 tbsp cocoa

1 tbsp dark rum, Amaretto, brandy, coniac
3/4 cup slivered almonds, divided
1 1/3 cup heavy cream, divided

4 Tbsp. powdered sugar

Pour the almonds into a frying pan, no oil and toast them, stirring constantly. Alternately you could do this in the oven at a low temperature but I prefer the frying pan. Stop when they are medium brown, try not to let them get black on the sides.

Cook the filling; put the whole milk into a medium sized heavy sauce pan, Then add the dry pudding mix, the corn starch and the cocoa. Stir with a whisk as it heats on medium heat. Once the mixture is bubbling all over the surface turn off the heat and add the rum. Pour into a bowl, cover with plastic wrap and chill until cooled. Take ½ cup heavy cream and whip. Add this to the pudding and whisk until blended. Take 4 tbsp of almonds and set aside for garnishing the pie later. Sprinkle the rest of the toasted almonds over the chocolate pie crust Gently spoon the filling into the pie shell on top of the toasted almonds. Chill at least 2 hours until set and cold. Whip the rest of the heavy cream in a chilled bowl, adding the sugar near the end of the whipping. Gently put dollops of it all over the pie top. Sprinkle the reserved almonds on top. Enjoy!

Originally posted March 2014. No changes to recipe.

Sheet Pan Chicken with Roasted Eggplant and Raw Veggie Caponata

This heat…I hate to run the oven.  But sometimes it is just worth it. This only bakes 30 minutes tops in a hot (450*) oven. I used boneless thighs. So I did  them a few minutes less than 30. No long marinading although I did put the cubed eggplant in salted water for a couple hours.  I had 3 Japanese eggplants from my garden and ripe  homegrown tomatoes galore. Chicken bought from Aldi’s. I found this recipe on Pinterest. I am so glad I tried it. The freshness of the raw and pickled vegetables in the caponata are what makes it so good. The chicken roasts on the sheet pan surrounded by the eggplant cubes tossed with olive oil.  While it roasts make the raw component. I am not really sure I will make this in the winter as summer tomatoes are just so superior in raw preparations like this delicious dish.

Here below is a link to the recipe. I will give the ingredients below. so you know what is needed to make it.  I promise you will love it.  I used some awesome paprika my goddaughter bought me in Germany.  Superior flavor. I used less red pepper flakes as I like most foods not too spicy.  I served mine with some small roasted potatoes I grew myself. So tasty.

https://www.simplyrecipes.com/recipes/sheet_pan_chicken_with_roasted_eggplant_caponata/

tomato caponata salad

This is my slightly different version:

Sheet Pan Chicken with Eggplant and Raw Caponata

Ingredients: 

Chicken: 4 boneless chicken thighs

Rub: 1 tsp. sea salt

1 1/2 tsp. sweet paprika

1/4 tsp. crushed red pepper flakes

1 tsp fennel seeds

1/8 tsp fresh ground pepper

2 Tbsp olive oil.

Eggplants:

2 lbs of cubed eggplant, 1 Tbsp olive oil

Caponata:

2 cups chunky fresh tomatoes cut in 1/2 inch cubes or sliced cherry tomatoes

1/2 cup sliced green olives

2 stalks celery sliced thin; hearts are best

2 Tbsp. fresh parsley chopped fine

2 Tbsp tiny capers

2 garlic cloves minced

Dressing: 2 Tbsp. balsamic vinegar; 2 Tbsp. EVOL and  1/2 tsp honey

I loved the fennel seeds in the roasted chicken and the raw salad. Enjoy!

roasted chicken and raw caponata