Yummy Bacon Quiche!

Quiche has sort of a clichéd reputation.  Something ladies eat for lunch. Something real men avoid.  A boring slice of eggy stuff. All NOT true. Well, except for it being a luncheon treat. I love a well crafted quiche. They can be pretty nasty though if not carefully made. I don’t want to go into negative details but what I aim for is a flaky crust, lots of fresh flavors and a creamy filling. I have an alternative crust if you are feeling lazy; you can butter the pie pan and lay down a single layer of buckwheat grouts (2/3 cup) and any left over go thinly over the first layer.  As it bakes they swell and create a sort of a crust. Nice, but today we are going for fantastic and that means real crust.  It is just like my fruit pie crust but minus the tablespoon of sugar.  You can use a store bought unbaked crust and no one will call you out.

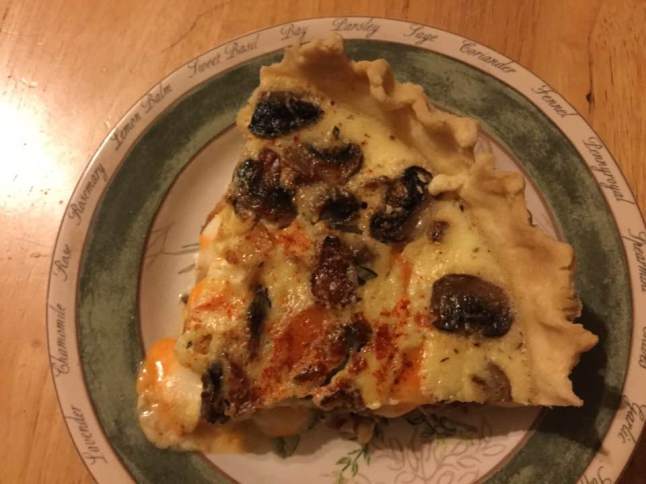
To fill it I like mushroom slices, bacon and onions sautéed in the leftover bacon grease.   Totally yummy and a bit oinky especially when you add some cheese cubes. For this quiche I used fresh mushrooms which amped up the flavor quite a bit but generally the canned mushrooms are how I roll.

The egg/cheese part that holds it together; mine is a bit different than most. I use a mixture of cottage cheese, eggs and milk; blended in my blender. Easy peasy. I confess I never measure the cottage cheese but you might be more cautious so I gave an amount. My recipe adds cubes of cheese to amp up the cheese factor. I used Colby here but often I chose sharp cheddar, Swiss or Munster cheese.

If you are gluten free like me check the bacon package for a gf label as I have gotten quite ill from bacon that had gluten in it. I know…why would you put gluten in bacon? I guess it is in the brining solution? Or the spices?? No idea, but do be careful. I used four slices but if you are a bacon lover you could add two more slices and that will increase the pork factor a tad.

Sometimes I vary the filling a bit; sautéed chunks or slices of summer squash are nice.  Ham instead of bacon works nicely. Don’t use too much filling or it won’t hold together.


quiche sliceBacon and Mushroom Quiche  six servings

 Crust:

1 c plus 2 tbsp brown rice flour mix (at bottom of recipe)

2 tbsp sweet rice flour

½ tsp xanthan gum

¼ tsp salt

6 Tbsp. cold butter cut into 8-9 chunks

1 lg egg

2 tsp fresh orange or lemon juice

Mix dry ingredients in bowl of stand electric mixer.  Add butter and mix until crumbly and resembling coarse meal.  Add egg and juice.  Mix until it comes together into big chunks.  Shape into a ball with your hands. Put it on a crust sized piece of parchment or wax paper (14 x 14 inches more or less), flatten the crust ball some; put on top of it another piece of parchment or wax paper and chill it all in your fridge for about 15 minutes. Make the filling while it chills.

Filling

4 slices gluten free bacon

1 small can mushroom slices or 1/3 lb fresh mushrooms

1 medium onion

1 ½ cup plain cottage cheese

3 eggs

1/3 cup whole milk or half and half

A chunk of bar cheese; about 2 inches of it: cheddar, Colby, muenster

Sprinkle thyme

Sprinkle paprika or smoked paprika

Filling preparation: cut the bacon into large dice; sauté in frying pan, stir often. Remove to a paper towel lined plate when nearly crisp.  Slice the onion in half rounds, not too thick and not thin and cook slowly in the bacon fat until soft but not browned; about 5-8 minutes.  Remove to a paper towel lined plate to drain a bit.  If using canned mushrooms drain them. If fresh; slice and sauté  in a clean fry pan in about a tbsp of butter and a tbsp. of olive oil until fairly cooked; about 5 minutes.

Heat oven to 350 degrees. I use my bottom heat oven for this recipe to bake the crust nicely.

Put cottage cheese, eggs and milk in blender; put lid on. Blend 10-15 seconds or until well mixed.

quiche blender

Cut the cheese chunk into small cubes.

Assembly: Roll out the pie crust; fit into 9 inch pie pan. Flute or crimp the edge. If you don’t have a bottom heat oven bake it about 8 minutes before filling. Gently spread the onion then mushroom, then bacon on the raw or par-baked crust. Pour in the blender mixture. Spread evenly all the cheese cubes over the top. Sprinkle with just a bit of dried thyme and a touch of paprika.  Bake for 35-40 minutes until the center is just barely giggly when you bump it.  Cool at least 30 to 60 minutes before slicing. That is non negotiable; it will be a mess and not taste great if you cut it hot.

Keeps about 3 days in the fridge if it lasts that long; I cover it tightly with plastic wrap. To reheat, I warm a slice in the microwave about a minute until the cheese starts to bubble. Enjoy!

Banana Custard Pie…in a Chocolate Crust…Luxury Made Easy

The ultimate perfect old school pie… so yummy and all you really need to make is some custard. I changed up my crust from a traditional flaky crust to a gf chocolate cookie crust that I bought at Wegmans. You can too and save the time you would have spent making a crust. No baking for me this time: no hot oven!

My mom used to make this pie when I was in my early adulthood; for some reason she never made it for us as little kids.  I used to cut up and set the banana rounds in the flaky baked pie shell for her.  She never used a chocolate crust so this is a slightly different take on this custard pie. The contrast of the rich custard, the crunchy chocolate crust and the fluffy cream with the delicate banana flavor is just so memorable.  And if you can make custard this pie is simple. I assume you could use a box pudding but I highly recommend this traditional stove top egg custard, straight out of Betty Crocker’s 1978 cookbook.

Angie’s Banana Cream Pie

 A chocolate ready-made crust


Filling:

½ to 2/3 cup sugar (I went with ½ cup and it was plenty sweet)

1/4 cup corn starch

½ tsp sea salt

3 cups whole milk or 2 percent, no lower fat than that

4 egg yolks beaten lightly

3 tbsp. butter cut into small cubes. (optional- skipped it this time)

2 tsp. pure vanilla extract

2 large bananas

Topping: 1 cup whipping cream, ¼ cup powdered sugar and ½ tsp. vanilla

Directions: Mix the dry ingredients in a 1 ½ qt sauce pan, Add the milk and stir constantly as it heats.  Once it reaches a boil time it for one minute. My secret trick is that if I don’t feel it was fully boiling when I started my minute; I add another minute to the process to be sure it is going to turn out thick. Stirring as it boils is mandatory; not the time to walk away from this process.  Then add 1/3 of the hot custard to the egg yolks as you stir, stir some more and return all to the pan, bring back to boil and time for one minute, yeap: stirring constantly.  Add the butter and stir as it melts, then the vanilla, stir.  Pour into a mixing bowl, cool five minutes and then put a film of plastic wrap on the top; press it down onto the custard. let cool a while more; maybe 30 minutes Chill in refrigerator at least an hour before using.

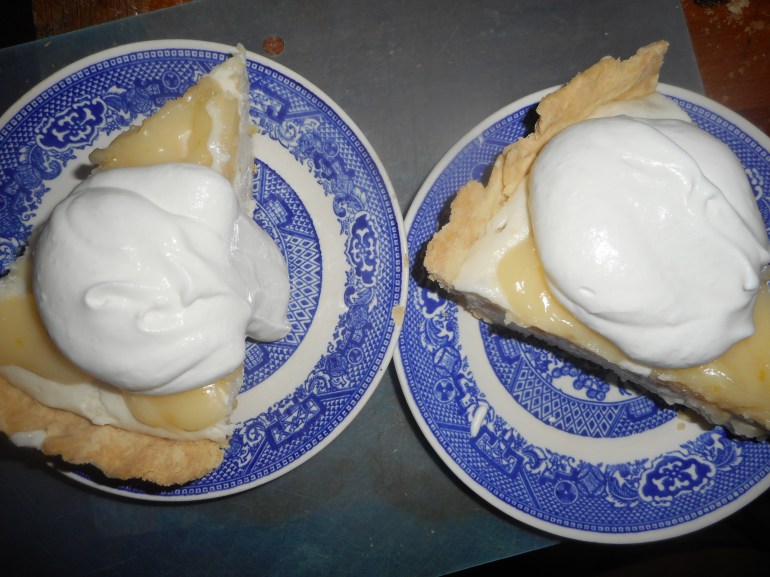
banana custard pie

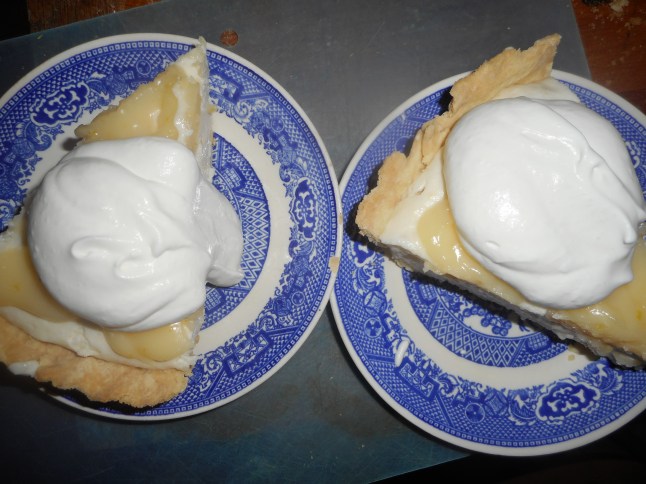
banana custard pie 002

These slices were served a day after I made it.  Still yummy.  Forgive the paper plates and the poor quality picture. My mom’s room is not the best place for taking pix!


Cut peeled bananas into 1/2 inch rounds and cover the bottom of the pie crust with them close together.  Pour the custard over the sliced fruit and smooth the top.

Chill pie 1- 2 hours before slicing and serving cold topped with a big dollop of real whipped cream.

Whipped cream: Beat 1 cup cold whipping cream with an electric mixer until it holds soft peaks; add a quarter cup powdered sugar and ½ tsp. vanilla.  Do not beat any more, just stir in.

I think it is best served the same day you make it, or no more then 12 hours after assembly for optimal flavor.  The crust will get soggy if too much time passes. Mine was still very good the next day; just not as great a crust as when really fresh.  I like to top my slices of pie with extra rounds of banana to up the nanner flavor.  I liked the chocolate crust but I think I might go back to a homemade crust; either a flaky one or maybe one made with gf gingersnaps. Now that sounds like a winner!

Note: I froze my egg whites for later use in a cake. No wasting them, that’s for sure.

——————-

Pie filling from Betty Crocker Cook Book, 1978 Edition.


Old School Pie; Banana Custard

Early spring brings a dearth of fresh fruit.  I find the apples to be less than optimal for pies after about February.  I was looking for something fresh and fruity.  No frozen fruit either; pricy to fill a whole pie and I really try to find things that are seasonal.  I had a pie to bake for Joe, he loves a pie so what should I chose? My sister said why not the venerable banana cream pie. Bananas are here and fresh so yes!

My mom used to make this pie when I was in my early adulthood; for some reason she never made it for us as kids.  I used to cut up and set the banana rounds in the baked pie shell for her.  The contrast of the rich custard, the flaky crust and the fluffy cream with the delicate banana flavor is just so memorable.  And if you can bake an empty pie crust and make custard this pie is really simple.  If you want, buy a crust in a package to bake; that will simplify things even more.  I assume you can use a box pudding but I highly recommend this custard, straight out of Betty Crocker’s 1978 cookbook.

Angie’s Mom’s Banana Cream Pie

Crust:

1 c plus 2 tbsp brown rice flour mix (at bottom of recipe)

2 tbsp sweet rice flour

1 Tbps. granulated sugar

½ tsp xanthan gum

¼ tsp salt

6 Tbsp. cold butter cut into 6 chunks

1 large egg

2 tsp fresh orange or lemon juice

Spray 9 inch metal pie pan with cooking spray, dust with white rice flour.

Mix dry ingredients in bowl of stand electric mixer.  Add butter and mix until crumbly and resembles coarse meal.  Add egg and juice.  Mix until it comes together into big chunks.  Shape into a ball with your hands. Put it on a crust sized piece of wax paper (14 x 14 inches more or less), flatten the crust ball some; put on top of it another piece of wax paper and chill it all in your fridge 15-20 minutes while you prepare the filling.

Filling:

2/3 cup sugar

1/4 cup corn starch

½ tsp sea salt

3 cups whole milk or 2 percent, no lower fat than that

4 egg yolks beaten lightly

3 tbsp. butter cut into small cubes.

2 tsp. pure vanilla extract

2 large bananas

Topping: 1 cup whipping cream, ¼ cup powdered sugar and ½ tsp. vanilla

Directions: Mix the dry ingredients in a 1 ½ qt sauce pan, Add the milk and stir as it heats.  Once it reaches a boil time it for one minute.  Then add 1/3 of it to the egg yolks, stir and return all to the pan, bring back to boil and time for one minute stirring constantly.  Add the butter and stir as it melts, then the vanilla, stir.  Pour into a mixing bowl, let cool a bit and then put a film of plastic wrap on the top; press it down onto the custard.  Chill at least an hour before using.

Roll out pie crust in a pie bag or between the two sheets of wax paper, try to get the thickness even, no thick middle! Peel off one side of paper and place in pie pan, centered.  Remove other slice of wax paper.  Crimp edges all around.  Prick with a fork evenly every inch so it won’t bubble as it bakes.

Bake in a preheated 400 degree oven for 12-18 minutes until the crust is light brown.  Cool at least 15 minutes

Cut peeled bananas into 1/2 inch rounds and cover the bottom of the pie crust with them close together.  Pour the custard over the sliced fruit and smooth the top.

Chill pie 1- 4 hours before slicing and serving cold topped with a big dollop of real freshly whipped cream.

Whipped cream: Beat 1 cup cold whipping cream with an electric mixer until it holds soft peaks; add a quarter cup powdered sugar and ½ tsp. vanilla.  Do not beat any more, just stir in.

I think it is best served the same day you make it, or no more then 12 hours after baking for optimal flavor.  The crust will get soggy if too much time passes. Mine was still very good the next day; just not as great as when really fresh.

Originally posted on my blog in April 2016.  Making one later this holiday week!

Lemon Velvet Pie

My first pie post this year is something out of my Farm Journal’s Best Ever Pie Cookbook published in 1981.  My dear sister Margie gave it to me a long time ago and I have baked a number of sweet pie treats out of it. This is a lemon pie but unlike any I have ever made.  It is called a lemon velvet pie.  I think of it as a puffy lightly lemon cloud of a treat.  Impressive and delicious. It has a lot of elements to it but no step is that difficult to conquer. It might strike you as the offspring of the union of a chiffon pie and the venerable and much loved lemon meringue pie!  Anyway, it is melt in your mouth delish and delicate especially if you make it with Meyer lemon as I did.

Per my New Year’s promise I did cut the sugar down quite a bit.  This filling is naturally gluten free.  My wheat eating friends can use a regular pie shell to make this treat.  I am betting it might be also great with my cookie/tart pie crust. This pie will be the talk of your next gathering if you whip it up!

lemon velvet pie 013

Lemon Velvet Pie


2/3 cup of sugar (can add another 1/3 cup if you like it sweet)

6 tbsp. corn starch

½ tsp. salt

1 ½ cups cold water

2 eggs separated

2 tbsp. butter

1 tsp. lemon zest, grated fresh

1/3 cup fresh lemon juice

1 tsp. vanilla extract

1 tbsp. (1 packet) unflavored gelatin

¼ cup cold water

1 cup light cream

A baked 9 inch pie shell

1 cup heavy cream, whipped with 2-3 tbsp. powdered sugar


Directions; bake the pie crust and let cool. See any of my past pie blog posts for a crust recipe.  I bake it about 20-25 minutes until it is light brown.

Combine sugar, cornstarch and salt in 1 ½ to 2 qt saucepan, stir in water, cook over medium heat until it thickens and mounds when dropped from a spoon; stirring constantly. Might take up to 5 minutes.  Stir a couple of spoons of it into the two stirred up egg yolks. Add right back into pan and stir well, cook 2 minutes on low stirring constantly. Remove from heat, add butter, stir, add the zest, lemon juice and vanilla, stir well. Remove one cup of filling and set aside.

Soften gelatin in the cold water for 5 minutes.  Add to the remaining hot filling in pan, stir to dissolve it.  Gradually stir in light cream, cool slightly to firm a bit.

Beat egg whites until firm and glossy, using electric mixer at high speed.  Fold into the pan of cooling filling.  I used a rubber spoonula. Pour mixture into baked pie shell, Refrigerate 15 minutes.  Top with the remaining cup of plain filling you set aside.  It will be thick; I put small spoonfuls all over the top.  Chill in fridge at least 2 hours to set the pie.

Whip the cream, add some sugar to sweeten lightly and serve slices with big dollops of cream on top. Velvety lemon delight on a plate.

Originally posted in January 2016, minor text changes, no recipe changes.


Cranberry Crackle Pie

If you bought an extra bag of cranberries I got the perfect recipe for dessert. Easy, not too rich or filling and very tasty. I found this recipe on line, several years ago, at splendidtable.com.  I loved the look and once I tasted it; love at first bite.  Like a fruit tart and a pavlova had a baby: this is the felicitous result.  Light and delicate making it perfect after a hearty feast.  It is really guilt free if you eat it minus any toppings.  I devoured it with vanilla ice cream on top at a Christmas luncheon. Maybe next time I will be serving it like you do a Pavlova, with lightly sweetened real whipped cream on top. Yumm!

It is really easy to throw together.  If you are gf you can use the cookie crust recipe I provide, I adapted the splendid table recipe to make it gluten tree using Annalise Roberts’great cookie crust. At holidays,like Thanksgiving and Christmas, Wegmans often has gf ready-made crusts. So does Frey’s Better Foods in Hellertown. If you are a wheat eater use whatever cookie tart crust you like.  I added the cinnamon to my crust and found it added a lot to the complexity of the flavors.  The crust absolutely needs to be prebaked and cooled before you put the tart together.

I made it in a glass pie tin but often use a ten inch ceramic tart pan.  Both work great; so it is a tart or a pie depending on the vessel you bake it in!

I should say I now love to use fresh cranberries; I made a raw relish – old family recipe – for Thanksgiving and a cooked one from fresh cranberries.  A big favorite of mine are cranberry muffins; making some this weekend. Before I discovered this recipe and those muffins I never used fresh cranberries except to make relish.  Anyway, my point is; this tart is fantastic tasting even if you aren’t a huge cranberry fan.

I used some homemade raspberry jam (what I had and what the recipe called for) but you could probably use most any jam.  Just chose one full of real fruit in a flavor you like as you can definitely taste the jammy flavor mixed in with the crust and the meringue topping. I love it with raspberry jam, a favorite flavor for me.

Sweet Cookie Crust

Place the following in a stand mixer bowl and combine

1 cup GF flour (recipe below)

¼ cup granulated sugar

1 tsp xanthan gum

½ tsp. cinnamon

Add 5 tbsp cold butter, cut into 6-7 chunks.  Mix on low until the butter is just crumbs blended in.

Add 1 tsp. vanilla extract and 1 tbsp water.  Blend well.

Pour the crumbs into a ten inch tart pan that was sprayed with cooking spray.  Or a glass pie pan which is how I made it this past weekend.  Spread it up the sides.  Press gently in so it is a cohesive crust but do not press really hard or it will be like concrete when you finish baking it!

Bake at 350 degrees for 18 minutes. Set the crust on a rack to cool to room temperature.  Do not let it get more than light brown.

Filling

2 tablespoons chunky cherry, raspberry or strawberry jam

2 large egg whites, at room temperature

Pinch of fine sea salt

1/2 cup sugar

1 1/2 cups cranberries (if they’re frozen, don’t thaw)

Confectioners’ sugar, for dusting

When you’re ready to fill and bake the tart: Preheat the oven to 300 degrees F.

Cranberry prep: I rinse them and remove any squishy ones.  There are usually a few of those mixed in and they aren’t great for anyone to eat.  Let them dry.

Gently spoon the jam on top of the crust and spread it evenly over the bottom, I used the back of my big spoon for this operation. In a large bowl with a hand mixer, beat the egg whites with the salt at medium speed just until they are fluffy and fairly opaque. With the mixer going, add the sugar in a slow, steady stream, then keep beating on high until the whites are shiny and form definite peaks; they will look like marshmallow.  This is a meringue.

Pour the cranberries into the bowl of meringue and, using a flexible spatula or spoonula fold them into the meringue. Try to distribute the fruit evenly, but don’t mix too much– you want to keep the meringue fluffy. Spoon the meringue over the jam and spread it to the edges, making it swirly if you’d like. The jam might push up around the sides of the meringue, and that’s fine.  Don’t fret if it looks like not enough filling, it will puff up in the oven to fill the pie pan.

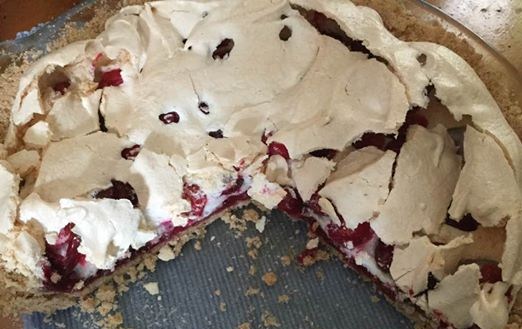
Bake the tart for 1 hour, at which point the top will be light beige and cracked here and there. (If you’d like more color, you can bake it a bit longer or even put it under the broiler.)  I did not go there!  Transfer the tart to a cooling rack and cool to room temperature.  I did cut it while slightly warm and my slice was just perfection.  If you’d like, and I do, dust the tart with confectioners’ sugar before serving. Ice cream, whipped cream or even organic plain yogurt on the side is also great.
cranberry-crackle-tart-cut

Storing: The tart is best the first two days after it’s made, although it’s still pretty nice the third day. Leave the tart at room temperature, covering only the cut part with a piece of wax paper or plastic wrap.  I doubt you will have any after the second day anyway. It is that tasty.

Brown Rice Flour Mix  (Same as King Arthur’s GF Blend)
2 c brown rice flour

2/3 c potato starch

1/3 c tapioca flour