Cranberry Orange Muffins for Beginners

Gluten free baking can be fraught.  You put all your energy and a lot of expensive ingredients into a baked good that can turn out like a lead brick. I just did that with a lemon pound cake.  Yeap; it was very bricklike.  So I wanted to share a new recipe that I feel is pretty fool proof.   Cranberry nut muffins….muffin mania strike again!

I won’t go far from my best recipes to make these treats. This is a riff on a 2015 blueberry muffin post which was my riff on a muffin recipe out of Annalise Roberts’ cookbook; Gluten-Free Baking Classics. Her gf quick breads are delicious and we enjoy them often. I love that they seem foolproof if you follow the basic format carefully.  I have made many variations and they all turn out great.  So I recommend them to those just learning to bake gluten free. You can do these muffins, I promise, even if you are totally new to baking gluten free.

Never been a big fan of cranberries until last winter when I decided to experiment with them and found that they work very well with a variety of fruits/nuts for muffins, tarts, pies and crisps.  The cranberries brighten the flavor and add a lovely rosy color.  Do look beyond your prejudices to their sharp flavor and give them a try.  I am so glad I did.

These muffins did not disappoint: delicate texture yet slightly crunchy outside with a great cranberry orange flavor and just enough sugar for me.  The streusel topping adds a cinnamon flavor and insures that they look straight from the bakery. I made a 3×5 mini loaf as well as muffins and it was delightful sliced thick and served with a cup of tea.  I baked it a bit longer; 35-40 minutes should do it.

lemon blooms and beef with broccoli 003lemon blooms and beef with broccoli 004lemon blooms and beef with broccoli 005lemon blooms and beef with broccoli 007

There are walnuts in there to so you get some really great nutrients from the fruit and nuts. I swap the white sugar I used to use for coconut palm sugar which is very low as far as raising blood sugar.  Not much guilt in eating one of these treats! Note: You need a little extra milk if you use the coconut palm sugar; at least two extra tbsp. maybe three.

Cranberry Nut Muffins

2 cups brown rice flour mix (see below)

2/3 cup granulated sugar or coconut palm sugar

1 tbsp. baking powder

1 tsp. baking soda

¾ tsp. xanthan gum

¼ tsp. salt

1/2 tsp cinnamon

grated zest of one orange

1 1/3 cup fresh or frozen cranberries

1/3 cup chopped walnuts

2 large eggs

½ cup (plus 2 tbsp. milk if you use coconut palm sugar,) 1 or 2 percent

½ cup canola oil

———

Topping: Mix the following in a bowl, make sure the butter is in tiny pebbles; use your fingertips to blend.

½ cup rolled oats                    1½ tbsp. butter

¼ cup brown sugar                 ¼ tsp. cinnamon

2 tbsp. almond meal

——-

Directions: Heat your oven to 375 degrees, placing the rack in middle of oven.  Spray muffin pans with cooking spray.  One batch makes 12-16 muffins.  I got 16 when I made them yesterday.

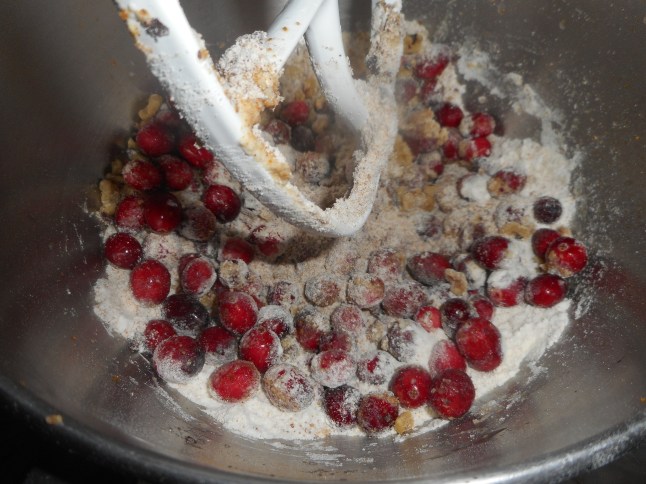
Mix all dry ingredients in bowl of stand mixer or big bowl Add fruit and walnuts; stir to coat them with dry mix.  Combine milk and oil.  Beat in eggs, add vanilla.  Add liquids to big bowl; stir just until blended.  It is a very thick batter.

Fill muffin pans 2/3 full.  I use a big serving spoon and fill it about half way to dump in each muffin space. Sprinkle the top with the topping. Press it in a bit so it won’t flake off after baking. Bake 21-23 min until golden brown. Do not over bake or they will taste dry.  Remove immediately from the pans and cool on a rack.  Keeps in fridge (well wrapped) or an airtight cookie jar for 2-3 days. It is smart to freeze any you won’t eat in two days time; a zip lock freezer bag works great.

Brown Rice Flour Mix base mix 

(This mix is the same as King Arthur’s basic gf blend)
2 c brown rice flour

2/3 c potato starch

1/3 c tapioca flour


Soft GF Pretzel Success Story

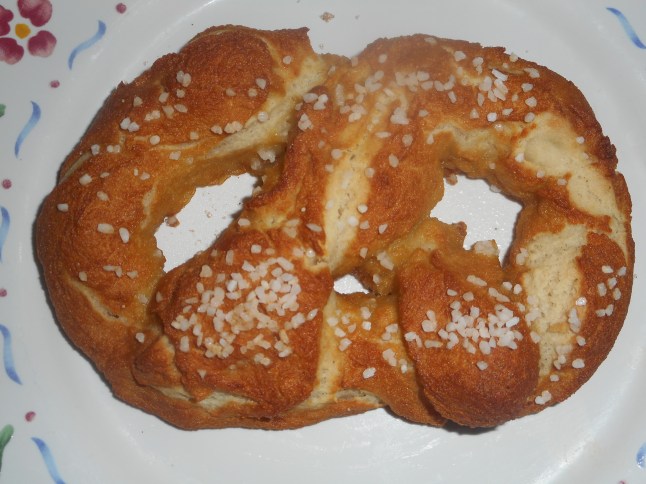
Something I had missed desperately was soft pretzels.  Just not to be found gluten free, at least not in my geographic area.  Maybe some frozen ones out there but I haven’t come across them.  Plus you know me, I Love to bake and prefer homemade to a bought baked good. So when I saw a soft pretzel picture in an email from King Arthur Flour I knew I had to give them a try. pretzels 011

The dough was very easy to make, dump and mix.  pretzels 006I did only a half batch because there is just me to eat them and I didn’t want a huge bag of pretzels in my freezer.  Rolling them out was a bit tricky but very do-able.  I sprinkled the dough with more flour and soon my pretzels were ready for their baths!  Yes – you read that right.  Pretzels get a bath in a special combination; this one was boiling water with baking soda and sugar added.  You drop them in one at a time and they lay on the bottom of the pot for 2-3 seconds before slowly rising to the water’s surface. Once they reach the surface you can scoop them up.  I have a flat wide spoon covered with small holes which is just perfect for pretzel scooping.  They get firm and less fragile in that 5 second bath…just lay each on the baking sheet.  pretzels 007If you want them with salt, sprinkle it on. I happened to have some actual pretzel salt; fat white crystals. Just sprinkle and bake about 18 minutes.  pretzels 009If you want cinnamon sugar leave them naked and when they come out of the oven brush each pretzel with melted butter and then with cinnamon sugar.

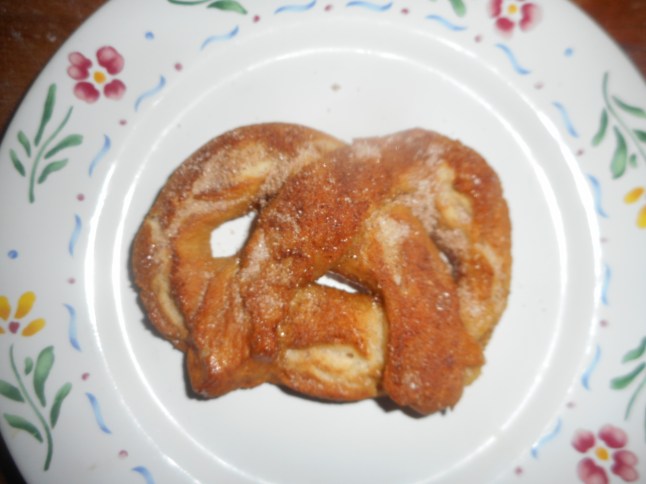


The recipe can be found at http://www.kingarthurflour.com/recipes/gluten-free-soft-pretzels-recipe#

pretzels 008


The flavor and texture are great especially eaten as soon as they are cooled enough to handle.  Read pretty hot for me! I adored the cinnamon sugar and enjoyed the salted ones. If you want them soft, bake them the minimum time; check a minute early and pull then if they are to your liking.  pretzels 012

They do freeze well and when you warm them up in the microwave the pretzels are fairly close to how they were fresh.

Just do it: make them this weekend; you know you have been dreaming of a gluten free soft pretzel for years now……

Cherry Kefir Quick Smoothie

Sometimes I want a healthy snack that is in a drink format.  Especially if I am in a rush I can drink a glass of something while I change clothes, feed the cats, put out the garbage and then run out the door to my second job.  So a liquid snack is welcome.  I don’t want to drink ensure; not even sure it is safe for me so I thought of kefir. pots 003

I make my own kefir, a fermented beverage that is usually made with milk although you can use coconut water or even plain water, I think, in creating it. It is chock full of healthy probiotics that everyone could use in making a healthy environment in your gut, especially we celiacs. You can buy kefir at the grocery store in a bottle; a bit pricier than making your own.  They sell fancy flavors of kefir.

But my plain kefir can be boring after a while. I like to mix it with fruit juice like pineapple juice.  Then, the other day I had a brain storm and took some Ocean Spray Cherry Juice Cocktail (about 4 ounces) and mixed it in my blender with a banana, 2-3 ice cubes and some of my kefir (about 4 ounces); magically transforming the bland kefir into a fancy cherry smoothie.  cherry kefir and winter wonderland 001The resulting tall cold glass of pink yummy stuff was so much more healthy than soda or Gatorade and as quick to make as most smoothies.  The cherry juice drink has 55 calories for 4 ounces and your kefir’s calories will depend on what kind of milk you made it from.  The banana’s calories depends on it’s size; not much regardless. No added sugar by me either. Regardless, it is healthy, tasty and a great change of pace.  Try one made with your favorite juice beverage.  Let me know of any good combos you create!
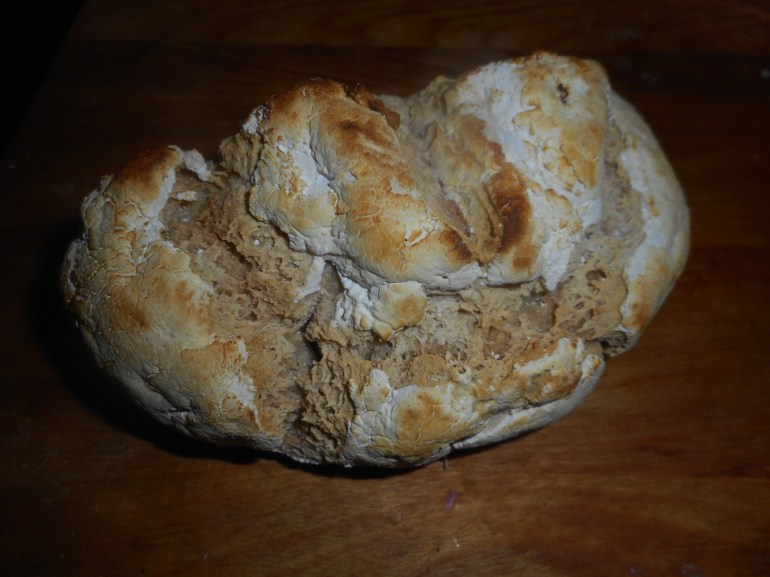
Artisan Bread and Gluten Free…Yes!

Ever in search of the elusive tasty gluten free bread…. I saw a fb post that promised just that.  So I couldn’t resist the temptation.  I tested out the recipe.  Made the flour mix, yeap ANOTHER gf flour mix… OMG! I must have a dozen mixes stored in my house between freezer and cupboards.  This time, I told myself,will be different, this will be the best freaking gf bread I have ever made. Will it be worth the effort…I hope… Hope springs eternal in the breasts of all celiacs for bread that we can enjoy, bread without giant holes in it or that crumbles to an unholy mess when made into a sandwich.

Okay, one giant jar of flour mix later and one batch of sticky dough whipped up.  You keep the dough in the fridge and use a big chunk of it when you want bread.  I only made a half batch.  There is just me here and the dough needs to be used up in 5 days. Ten if you make it egg free but I read a lot of comments on how the egg whites are very important to the texture of this bread.  So egg whites in, tick tick my bread baking clock is running down….

The flour mix isn’t all that different from my favorite mix, has some sorghum flour which is the new darling around gf circles for making great texture and flavor in gf baking. It also has the xanthan gum already in it.  The big jar is still ¾ full after my mixing efforts.

I had made the dough mixture up Saturday but upon reading comments that it was best eaten within 2 days and that the refrigerator time contributed to a sourdough taste, I delayed baking a test loaf until Sunday.

Laid down a piece of parchment paper after Sunday lunch and scooped up half my squishy dough. Wet my hands and carefully formed it into a round small loaf.  It seemed a tad flat.  But I let it rise the required hour; added maybe 15 more minutes. You use a bread stone to bake the bread on; slide it in right on it’s parchment paper. Paper gets brown but doesn’t burn…hopefully anyway!

pretzels 003

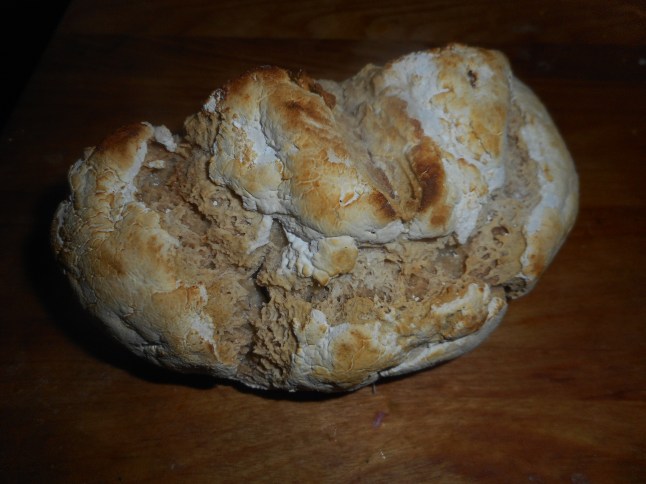
Baked okay; not as high a rise as I might wish.  I let it cool a long while per the directions.  Took it with me to my mom’s assisted living.  We had it with the lentil stew I made earlier this past storm weekend. She adored the bread! It has a good outside crunch, close moist texture. Great artisan look and taste.  Score!

pretzels 004

Here is the recipe; way too long for me to post. http://www.artisanbreadinfive.com/2014/11/03/master-recipe-from-gluten-free-abin5

Debating buying the cookbook…..maybe as there are a lot of other great recipes in it.

Anyway; if you miss that chew and flavor of artisan breads; this recipe is for you.  I have one more loaf to make; waiting until Thursday; I want to see if it gets like sourdough. Hoping!

Leeks, Bacon, Creamy Sauce = Yummy

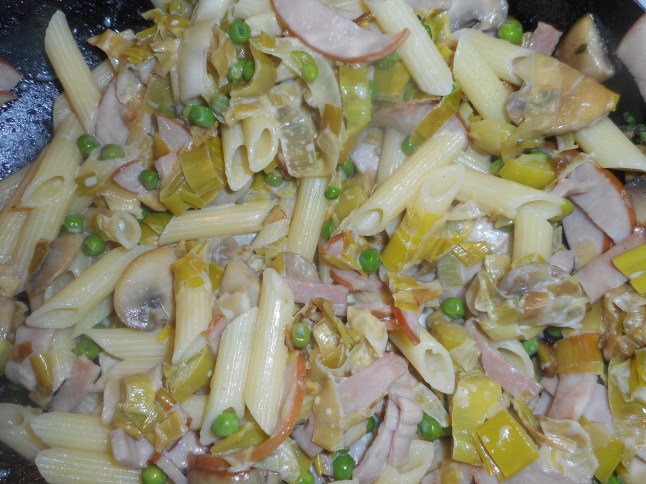
Lots of you probably have never ever eaten a leek.  You might not know what the heck it is.  Imagine an overgrown scallion with a mellow onion flavor.  It is a member of the allium family: more information can be found at this site: http://www.culinate.com/articles/culinate8/meet_the_alliums. Sold mostly in the fall and winter – as it takes a long time to grow one.  So now is the perfect time to try this great recipe which is built around the humble leek.  Generally the deep green leafy portions of a leek are not used.  I use the white and the lighter green. Leeks can be sandy or grimy; careful cleaning is critical. I rinse them a lot as I cut and pull off outer leaves. Cut off the root remnant and then slice into 1/3 inch slices. Discard the outer deep green leaves.  They are too tough and don’t have great flavor anyway.  I try to grow leeks but not too successfully as they seem rather too needy: long growing season, rich soil and lots of water all much required.  Buy them at a farm stand if possible; freshest source and probably cheaper. This recipe is the perfect way to introduce yourself to leeks; they will melt in your mouth and match perfectly with the creamy sauce and the bacon.

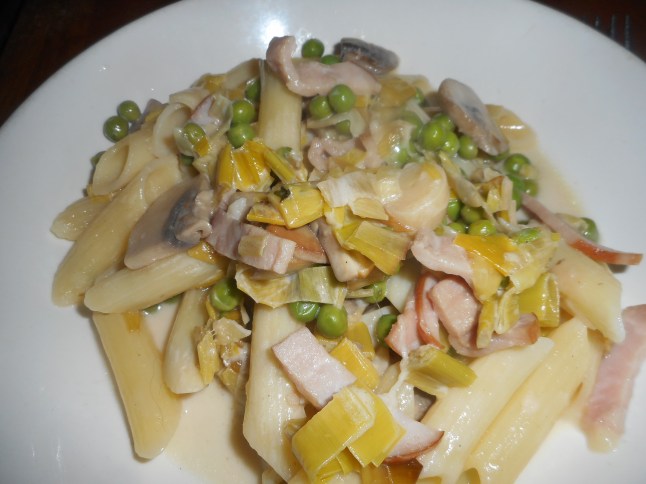
Anyway, enough of the wonder of leeks: this is a pasta sauce recipe too! Yes, the leeks are the predominant flavor but another major flavor is the Canadian bacon, you can use ham, prosciutto or thick cut bacon. I love it just as I made it with Canadian bacon; great flavor, easy to cut into strips and less fat than other choices.  Plus it was the only gluten free hammy choice I could find that day.  A lot of ham sold has gluten – used in the spices or the added liquids.  Annoying to have to read the labels of something you might think was naturally safe for celiacs like me.

I used penne as I was serving it to an elderly lady who couldn’t manage linguine or fettuccini as the original recipe suggested. Use whatever pasta floats your boat; the peas were cute as they stuck inside the pasta tubes so I think it worked great.  If you are not needing to eat gluten free use your favorite pasta by all means.

leeks with canadian bacon 003

Best quality Parmesan means it is a chunk you have to grate fresh; small grater side.  Jarred grated cheese will not do, this recipe depends on high quality ingredients to show off the delicate flavors it is chock full of. If you are a shroom hater; by all means leave them out but I loved the earthy meaty flavor contrasting against the cream and leeks. Can you tell I adore this dish? It is going to be a favorite of mine for sure.  The original recipe came from Epicurious but I jiggered it a bit with the peas and mushrooms and subbed in Canadian bacon for more fatty traditional bacon.

leeks with canadian bacon 008

Angie’s Leek and Bacon Sauce with Pasta

Ingredients

3 tbsp. EVOL

2 tbsp. butter

3 leeks cut crosswise into 1/3 inch rounds; white and pale green only

1 8 ounce package Canadian bacon cut across into 1/3 inch wide strips

6-8 oz fresh mushrooms sliced (not too thin)

¾ to 1 cup frozen tiny peas

2 tsp. fresh thyme leaves pulled off stems

¾ cup heavy cream

1 box gf penne or linguine (12 ounces)

¾ to 1 cup just finely grated good quality Parmesan cheese

Directions:

Start a big pot of water to boil for pasta, add salt.

Melt 1 tbsp. butter and 2 tbsp. EVOL, add the leeks, saute slowly until soft; may take 10 plus minutes. It should practically melt in your mouth. Set aside; can put them in a container and store in fridge a day or two.  If making dish right away, in a clean pan add rest of EVOL and rest of butter.  Add sliced mushrooms and saute until cooked fully, 5-8 minutes.  While that cooks make the pasta in that pot of boiling salted water.  Do not overcook; try to time it so it gets done when you add the peas to the dish. Reserve a cup of the pasta water for thinning the sauce. Add bacon, stir a couple minutes.  Add the peas and thyme. Stir well.  Add the cream, stir and when it is warm but not boiling add the leeks and the cooked pasta.  Stir well, add some of the pasta water, stir more to blend. Add enough water to make the sauce the thickness you desire; I didn’t need more than half the water but you know how you like your sauce. Taste and make sure your peas are done then add three fourths of the Parmesan cheese.  Serve the rest of the cheese to sprinkle on top.  Dive into leek and bacon loveliness!