Apple Sour Cream Cinnamon Cake

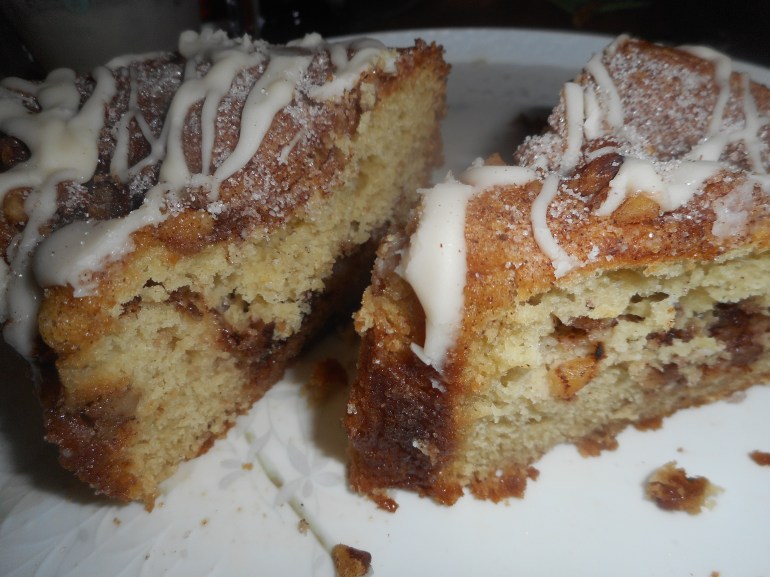
I am no longer a fan of the usual custom of the big fluffy iced birthday cake.  I have sure had some bad cake luck over the years, even when I COULD bake with regular flour!  So, I had a birthday cake to make one weekend, and I went a different direction. I made a cinnamon walnut apple cake.  Used that recipe before, and now I wonder why it took so long to make it again.  Addictively flavored with cinnamon and chopped walnuts. The thin layer of apples adds moisture and a delicate touch of apple. Yumm!

It is from my favorite cookbook by Annalise Roberts, Gluten Free Baking Classics.  To be honest it is more of a coffee cake but oh what a sweet and luscious treat it is; I swear you could feed it to anyone, and they would enjoy it. That cookbook is chock full of delicious recipes. I highly recommend it. My copy is much worn and floured! Might be time for a new copy!

Easy mixing up of dry ingredients, beat the eggs and sugar with electric mixer and combine all.  Layer it up with thin slivers of raw apple and the nut/sugar mix.  In all it has about a half cup less sugar than most birthday cakes and if you frost the cake, you are adding a lot more calories than my simple glaze.  The cake is fine without glaze, but I felt it added a lovely finish and great complexity to the flavors of this treat.

I didn’t take many pictures; my fingers were sticky with dough, and I really had to just put the cake together; my assistant was only 4 years old and he was more important to me than taking pictures when I made this the other day. Next time I will take shots as I put it together and add them to this posting.
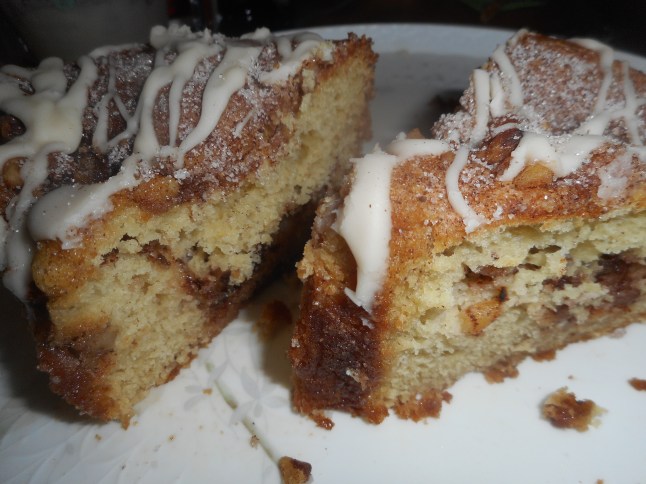
coffee cake 049

coffee cake 077

Sour Cream Coffee Cake

½ cup chopped walnuts

2 tsp. cinnamon

1 ½ cups sugar, divided

1 medium apple; peeled, cored and cut in 8 wedges and each in 8 slices.

2 cups brown rice flour mix

1 ½ tsp. baking powder

1 tsp. baking soda

¾ tsp. xanthan gum

½ tsp. salt

2 large eggs, room temp

2 tsp. vanilla extract

1 cup sour cream, room temp

1/3 cup canola oil

Directions: Preheat oven to 350 degrees. Put rack in center of oven.  Spray a 9-inch tube pan with removable bottom with cooking spray.

Mix walnuts, cinnamon and half cup of the sugar in a small bowl.

Whisk rest of dry ingredients in a small bowl.

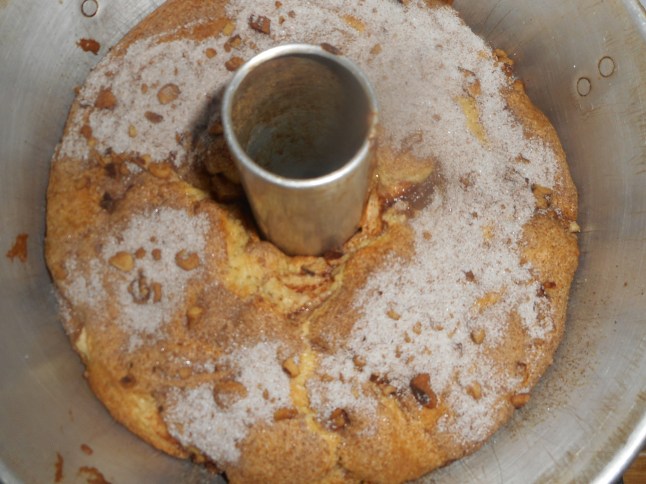
Beat eggs in the large bowl of an electric mixer until well blended; 2-3 minutes.  Add the rest of the sugar one tbsp. at a time beating well until creamy colored and fluffy. Add vanilla, sour cream, oil and flour mixture and then beat at low speed for 30 seconds, medium low if your mixer has a very low speed, should be well blended. Spread half that batter in the pan, top with apple bits and half the nut/sugar mix.  Spread rest of batter on top evenly; I plop small bits trying not to get too much in any one area. Cover with rest of sugar/walnut mixture. Don’t worry if it doesn’t seem even; it will rise and form into a cohesive cake.

Bake 50 minutes (Do NOT open until 45 min) until cake tester comes out clean.  Cool in pan on a cake rack for 20 minutes.  Cut down with a thin bread knife around the outside and the center tube and remove from pan; cool completely before slicing underneath to release the cake from the tube.

I made a simple glaze to drizzle over the top; 1 cup confectioner’s sugar, 1 tsp. vanilla extract, 2-3 tbsp. cream or milk.  Add the vanilla and 2 tbsp of milk; add more milk to thin it to the consistency that will allow you to drizzle from a spoon onto the cake.  Slice with a bread knife for perfect serving of this yummy treat.

Brown Rice Flour Mix base mix
2 c brown rice flour

2/3 c potato starch

1/3 c tapioca flour

King Arthur GF Flour

Some months ago I heard that King Arthur Flour’s GF blend was just the same as the blend I use out of Annalise Roberts’ cookbooks.  So I started including that on all my blog postings that used her flour blend.  I must have told my sister that as she got me a box of the baking blend as a Christmas gift; so I would have flour ready to use in a hurry without measuring. I was pleased with that thought.  Opened it the other day and started using it.  king arthur flour baking mixBefore I scooped any I did read the package label.  It does have the same 3 flours as my fav blend but there are some additional ingredients; xanthan gum, baking powder, baking soda, salt and a few other things.  She gave me the baking mix.  A different beast indeed.

Hmmmn I was a bit distressed by that finding.  But I really didn’t have any more blend on hand so I went with the box.  I added more leavening than was already in but not the full amount the recipe specified.  For example; if it said 3/4 tsp. xanthan gum  I used half a teaspoon.  And if it wanted 1 3/4 tsp. baking powder I put in a slightly over the tsp. measure of it.  Without knowing the percentage of those add ins I felt I should add some but not really all; I went with about 3/4 of what the recipe asked for.  I have made a couple of things; cookies and crust.  All turned out fine.  So you can use it in my recipes; just cut back slightly in those three items; baking powder, salt and xanthan gum.

If you really want the exact blend that I prefer you need to buy King Arthur’s mult-purpose GF flour blend; it appears to not have those leavening additions.  king arthur blendFrom now on I may make that suggestion at the bottom of my posts so you can use the King Arthur ready made baking blend if you want or have to.

I am hoping to make some thumbprint cookies later today; sure that they will be gobbled up.

Happy New Year folks!


Stuffed Squash for Winter Supper

Chilly days and nights demand hearty suppers. But your main dish does not have to be expensive or fattening. It can be gluten free and still tasty. This recipe is naturally gluten free.

I had some leftover hot Italian sausage. I had a sweet dumpling winter squash and a big red bell pepper. Some quinoa and an onion and I was in business to throw together a homey flavorful main dish. Add a salad on the side and it is a well balanced supper that can be baked and then seconds enjoyed for lunch. This makes 3 servings, can double the recipe easily, just bake it in a bigger pan.

sweet dumpling squash

sweet dumpling winter squash

stuffed squash 12-14 001

stuffed squash 12-14 002


I had the sweet dumpling on hand but I have made this same recipe with an acorn squash and with a delicata squash. A delicate is a small oblong squash with orange and green stripes on yellow skin.delicatasde

All three are great vessels for this riff on stuffed peppers. I happened to have a big red pepper and stuffed it as well.

Stuffed Quinoa Squash or Pepper

Ingredients:

1 sweet dumpling or acorn winter squash
1 large red pepper or another squash
2/3 cup plain quinoa, rinsed well
1 medium onion, diced
2 hot Italian sausage links
1 tbsp EVOL (extra virgin olive oil)
1 garlic clove, minced

Heat oven to 400 degrees. Cut the squash from the tip to the blossom end. You probably should cut off that stem bit first; makes the cut easier. Scoop out the seeds and stringy stuff. Spray a small rimmed baking sheet with cooking spray and place the cut squash halves cut side down. Roast 30-45 minutes; check by piercing with a fork; remove when tender enough to stick the fork in but don’t cook it so far that it collapses. After the squash has been in 15 minutes add the red pepper squash which you have cut the lid off, emptied the seeds out and cut up the top third into small dice. Reserve the dice for later. The lower two thirds is a tasty vessel to hold more quinoa sausage filling.

Meanwhile, as the squash and pepper bake…. Heat 1 and a 1/3 cup of water, ½ tsp. salt and then add the quinoa, cover and cook 14-15 minutes.

While that cooks, put the EVOL in a frying pan, add the links which you have liberated from their skins. Cook 4-5 minutes, chopping them up as they cook. An alternative is loose sausage meat; 1/3 to a half pound should do it. Stir them up, flip to cook all sides. Should be browned but not burnt. After you flip them over add the chopped onion, cook about 3-5 minutes stirring often. Add the minced garlic and the top 1/3 of that red pepper cut into small cubes. Keep stirring and when the onions and red pepper bits are softening add the quinoa. Leave any liquid in the pan.

Stir the quinoa/sausage/veggie mixture. Heap it into the squash halves and the pepper half. Mound half the extra filling into a small 1.5 quart round baking dish. Place the three stuffed veggies on top and pour over the rest of the filling as well as any quinoa liquid in the pot. Cover with foil and bake at 400 degrees for 35-40 minutes. The veggie filling should be bubbling when it is done and the squash is tender to a fork.

Enjoy with a side salad. I reheated some of the leftovers for lunch the next day. It gives you something much better than something cold for your mid day meal.

If you don’t like red pepper; make it with 2 small winter squash and just leave the chopped pepper totally out. You could sub in half a chipped carrot for the red pepper bits. Use a mild Italian sausage if you prefer it less spicy or leave the sausage out to make the dish vegetarian. I am guessing you could try to bake it in your crock pot; maybe like 2 hours on high. If you try that let me know how it turns out. It is a versatile recipe for sure!

Republished from last winter in my blog (early 2015).

Homemade Sauerkraut for 2016

In the Lehigh Valley and many other places in the USA there is a tradition of pork and sauerkraut for New Years Day dinner for good luck in the new year. I don’t know about that although I am making just that for lunch on Friday. But what I do now know is how to make my own kraut. A few post ago I wrote about kefir which is full of fantastic probiotics. A promise was made to give you a post about another food full of probiotics.

Well…this is it! How to make homemade sauerkraut. Guessing that you are cringing at the very thought of it but honestly it is quite a simple project and the taste is strangely addictive. I like to eat a couple forkfuls every day for increased gut health, a concern for those of us with celiac disease. In the past I was not a huge fan of store sauerkraut but homemade is a different animal. It is zingy on the tongue and I really just enjoy it. Knowing it is so good for me is the icing on the cake. You may say why bother but the truth is that store kraut is pasteurized and all the good probiotics are cooked right out of it. Buying raw kraut is a bit hard to find and quite pricy. Being a DIY sort of gal I enjoy that sort of fun and wanted to give it a try. Call me hooked!

christmas baking 2015 019

chicken with dates and olives 038

Ready to eat!

Angie’s Sauerkraut.

1 large head of cabbage
3 tbsp. fine sea salt (Mortons will do as well I imagine)

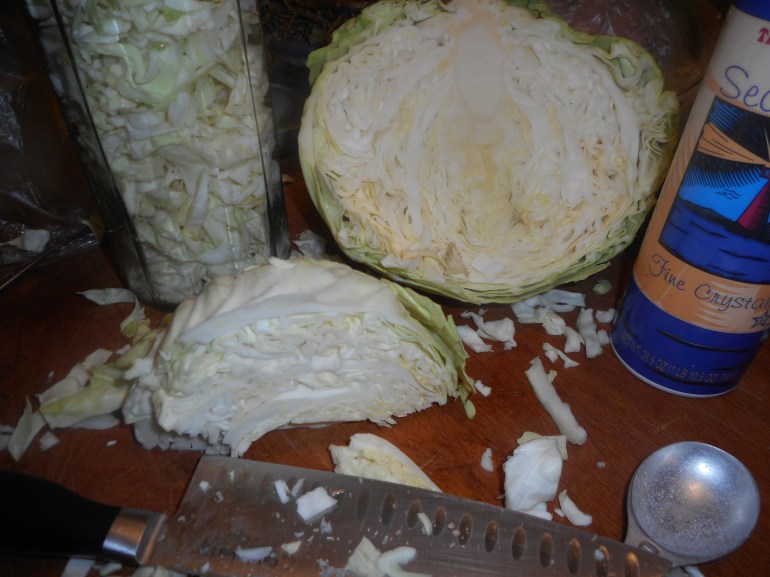
Directions: remove the outer layer of leaves and cut in half. Use your coarse blade on a food processor or a slicer and chop it up. Not too fine. In my first batch I did half by hand and half in my Kitchen Aid shredder. I found the machine chopped cabbage was too fine although quite edible. Better to have it a tad coarse is my feeling but entirely up to you. I use a big sharp chef’s knife and hand chop quarters of cabbage into thin shreds and cut again once or twice across to shorten the strands. Do remember to cut out the core; too hard for making into kraut.

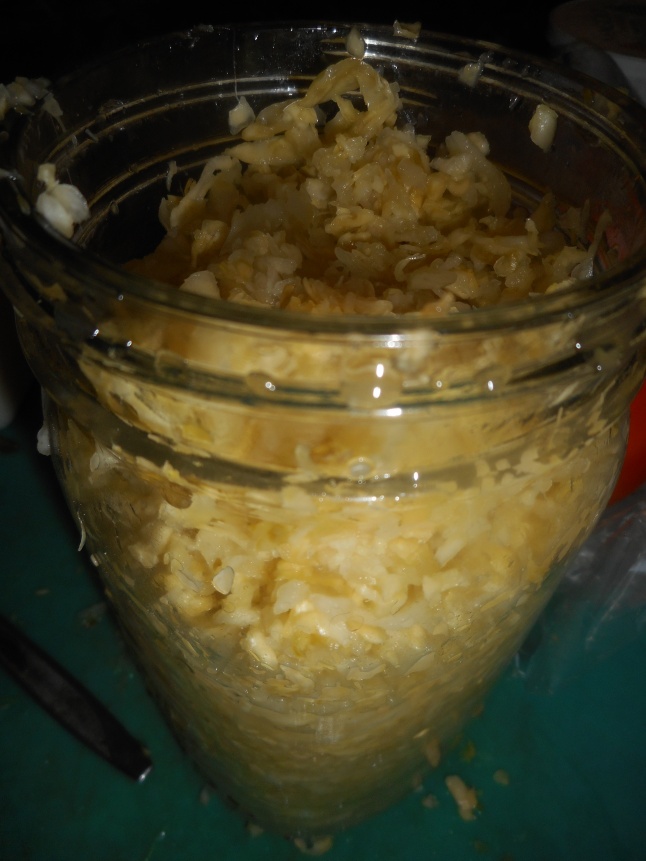
As you get a pile chopped load it into a big wide mouth jar. I have a tall glass canister I use for kraut production. You need a glass or ceramic jar. No metal. I wouldn’t suggest plastic either. You can buy a special sauerkraut maker jar with a fancy lid that vents the jar. Or you can go low tech and put a layer of olive oil on top the loaded jar to keep the air off the kraut. As you load it sprinkle each big clump with the salt. Fill it to the top using up the salt. I press down after adding each clump of shreds. The salt will cause the cabbage to release water. Fill the jar as full as possible. I like to use an empty glass canning jar to press down the cabbage.  In a few hours it will have released enough liquid to cover the cabbage. You can’t allow the cabbage to be above the liquid. Put a lid on top to keep dust out. Do not refrigerate; the process won’t work well if it is chilled before four weeks passes.

Now comes the hard part. The waiting…30 whole days, it should be edible after about 20 but it tastes more krauty after 30, actually I like it best by about 40 days. So be strong and wait until the thirty days is up. It will be a touch sour and take some getting used to but I really love the crunchy flavor which is missing in that pasteurized stuff you buy in the grocery store.

I include a link to a webpage on how to make kraut: http://www.vegetable-gardening-online.com/making-sauerkraut.html

And just for extra help: a webpage to use in trouble shooting your kraut and to reassure you that you are doing it right as well as giving some great ideas for how to make sauerkraut at home. http://www.foodrenegade.com/3-biggest-fermenting-mistakes-youre-already-making/

If you are a DIY sort, this will be a fun winter project. It is too close to New Years Day so if you want sauerkraut with your pork you should toddle off to the grocery store and buy a bag or a can. I am doing that because I don’t have enough kraut on hand for the making of that time honored New Years Day recipe. Enjoy and Happy New Years to all my readers.

Kefir: Do Your Tummy a Favor

This post is for my friends who want to have a healthier gut. I know, I know, that doesn’t sound like a barrel of fun or like a tasty food such as I usually blog about but I really have to say it can be both of those things. A number of months ago I was reading about ways to make your gut healthier. FYI: this is especially important if you have celiac disease as the digestive system is all messed up by it. A lot of people with celiac take probiotics on a daily basis. So do other folks with a variety of digestive disorders. Probiotics help keep beneficial flora and fauna in your gut. Most folks are purchasing expensive probiotics pills plus they have to keep the pills refrigerated and to remember to take them daily. Some seem more effective than others and you are relying on that company to give you what they claim is in their product. Too many negatives for me.

So, I decided to go another route. There are actually several ways to improve the health of your gut. Besides the aforementioned probiotic pills, you can eat a number of foods with beneficial elements for your gut. One that is easy and really healthy is kefir. I make kefir every few weeks; it is a fermented dairy beverage. Think yogurt and buttermilk get married and kefir is their cute baby! It is thick and sour. I like it with some juice added. Don’t be scared if it curdles a bit when you add juice; still tastes great!

To make it I got some dehydrated kefir at a health foods store; Fry’s Better Foods to be exact. I hear you can even make kefir with coconut, almond or soy milk.

pots 003

kefir 001

Just poured into the glass jug.  Now ready to ferment!

How? Easy peasy: I heat a quart of milk near to boiling, 2 percent works great but you could make it luxurious with whole milk. Let it cool to about 75 degrees, scoop out a cup of milk and mix that well with the packet of dry kefir. Pour back in and stir to blend. Pour it into a glass pitcher, put a covering of plastic wrap on top and let it stand on the counter top for an entire day. Yes, a full day unrefridgerated. It will not look much different until the last couple of hours when the milk mysteriously begins to thicken. Put it in the fridge after 24 hours and chill well. Drink some every day. It makes a nice filling afternoon snack.

kefir 002

The great thing about kefir is that the probiotics in it stay in your gut for a long time. Most if not all probiotics in foods, for example: yogurt, disappear from your gut within a day. Not so for kefir; that’s really great for your digestive health. Some say it is a valuable tool in avoiding leaky gut. I say it tastes great, feels good in my tummy and if you make it yourself it is not that expensive. A box of the freeze dried stuff costs about $8-9 and makes several quarts. Just a quart of milk and you are in business. You can buy it in most grocery stores; between $3 and $7 a quart. As you know I tend to be a do-it-yourself kinda gal so I started making my own kefir a few months ago.

I made some yesterday. It doesn’t take much more then 4-5 active minutes to make it; rest is time for the milk to cool to the right temperature and a day for it to culture. It is worth every bit of effort for the good it will do for your tummy. Do your gut a favor, make some kefir…seriously.

Next week I will give you one more way to help your gut stay healthy in this season of overeating and excess.