Pear Crumb Tart

This recipe I recently created is for all the pear lovers out there.  I know, I know, pears are under ripe one day and then rotting the next. They are tricky to catch just right.  But it’s worth the effort, if you enjoy the delicate flavor of a ripe pear.  I used Bartlett pears as that was what I had on hand plus they are quick to use because you can leave their skin on for this recipe.bartlett pears I am a fan of the bosc pear but you usually need to peel them.  They also might need to bake an extra five or ten minutes depending on how ripe they are. bosc pears

Only four or five good sized pears make this tart;  one more if they are on the small side. They should be somewhat firm but not hard; close to the eating state of ripeness.

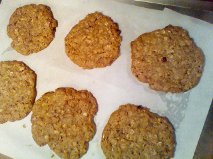
I used a slight variation on my GF tart shell crust which is from Annalise Roberts’ book; Gluten-Free Baking Classics.  It is very easy; hand pressed into your tart pan.  I call this is a cookie crust; sweet and slightly crumbly, very yummy.

thanksgiving meal 016

Angie’s Pear Tart

Crust

1 cup brown rice flour mix

¼ cup sugar

1 tsp. xanthan gum

½ tsp. cinnamon

5 tbsp. cold unsalted butter, in 5 chunks

1/2 tsp. vanilla extract

½-1 tsp. water

Directions:

Mix the dry ingredients in a stand mixer, cut in the butter by mixing it at a med low speed until crumbly.  Add vanilla and mix well.  If it is really dry looking add the tsp. of water.  Press into the bottom and up the sides of your tart shell as evenly as you can make it.

For this recipe I use a 9 inch tart pan with a removable bottom.   I think any low pie pan or tart pan will work.  Bake it at 350 degrees for 10 minutes unless you have a bottom heat oven like I do; skip that step if you have a pizza oven.

Filling

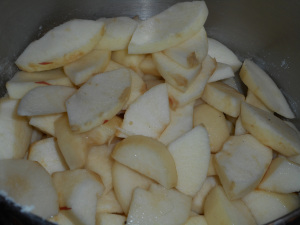
4-5 ripe Bartlett pears, sliced – not thick or too thin

¼ cup sugar (1/3 cup if you like it more sweet)

1 tbsp. GF flour or 2 tbsp. instant tapioca (I prefer tapioca)

The grated peel of one small lemon

The juice of half that lemon

More directions: Slice the pears right into the mixing bowl, cutting out the center core and seeds. Pour or squeeze the fresh lemon juice over the fruit. Mix the sugar, peel and flour and sprinkle over the pears.   Turn them over with a big spoon and gently dump the mixture into the crust.   Spread it so there an no low spots or high areas. It doesn’t have to look perfect, slightly disarrayed is just fine. Make the crumb topping.

Crumb topping

Put all four ingredients in the same mixing bowl you made the bottom crust in and mix well with mixer paddle until crumbs form.

¾ c brown rice flour mix

½ c granulated sugar

½ tsp xanthan gum

1/3 c cold butter cut into six chunks

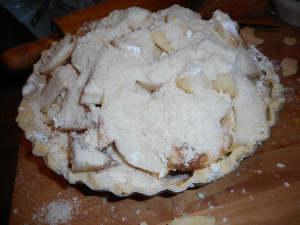
Final steps: Sprinkle lots of crumb topping all over your pears, don’t skimp! Bake 35-40 minutes until the pears are soft if pricked with a fork.  Do not over brown the crust. thanksgiving meal 013

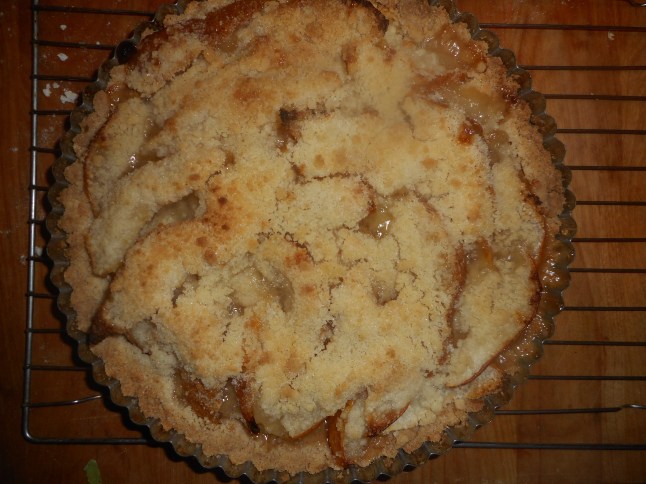
Let cool before serving.

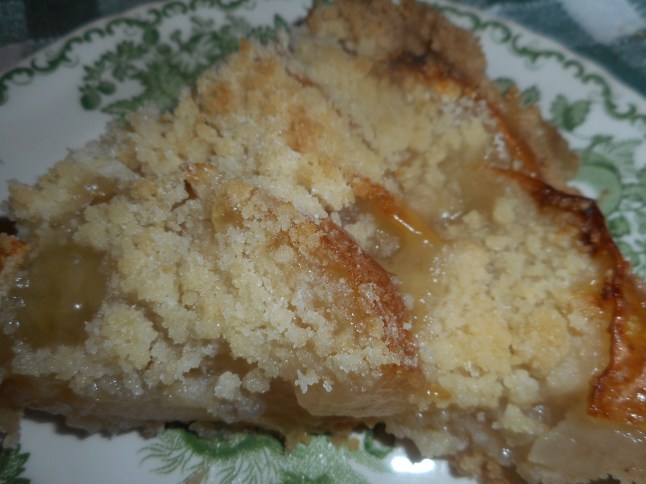
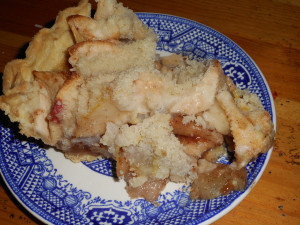
This tart might be just perfect with a scoop of vanilla ice cream on the side.  Pear heaven for those of us who crave their lush flavor! My dad adored pears – I guess that is where I get my love of them.  The cinnamon crust and the lemon add just a touch of complexity to the finished tart.


Brown Rice Flour Mix  Identical to King Arthur’s gf blend.
2 c brown rice flour (finely ground)

2/3 c potato starch – Not potato flour!

1/3 c tapioca flour

Apple Pear Carmel Pie Perfection

Pie has always been a classic holiday dessert. But sometimes we want something a bit different. Maybe, right now you are frantically looking for an alternative to pumpkin pie or apple pie; they seem kinda ho hum. Look no further, apple pear caramel crumb pie to the rescue!

Fresh tasting, locally sourced fruits are exactly in the spirit of Thanksgiving. The apple is the predominant flavor but the pear adds sweetness and a special flavor. The sugars, spices and lemon peel create a yummy caramely sauce. It is not that really sweet caramel of sauces; just enough sweetness to tease your palette.

This pie is fantastic with a scoop of vanilla ice cream on the side. I even tried a slice with some sharp cheddar in the British pie tradition; it was nice but I really like it best all alone, so the delicate fruit and spices show their winning flavors.

apple pear pie, squash, chicken and dumplings 010

apple pear pie, squash, chicken and dumplings 011

This is the dry blend you mix the fruit slices with before pouring in the crust.

apple pear pie, squash, chicken and dumplings 012

Loaded with crumb topping and ready for the oven!

This recipe is a blending of my own pie filling and the pie crust and crumb recipes from Annalise Robert’s cookbook, Gluten-Free Baking Classics. I used less sugar, more fruit, and made a few other changes to create my own special pie using apples and pears. Her cookbook is a fabulous resource and I can’t recommend it enough to anyone trying to bake gluten free for a family member. There is nothing like the classic desserts that we traditionally enjoy at celebrations and feasts to comfort a celiac who can’t eat what they used to.apple pear pie, squash, chicken and dumplings 019

Angie’s GF Apple Pear Crumb Pie

Crust:
1 c plus 2 tbsp brown rice flour mix (at bottom of recipe)
2 tbsp sweet rice flour
1 Tbps. granulated sugar
½ tsp xanthan gum
¼ tsp salt
6 Tbps. cold butter cut into 6 chunks
1 lg egg
2 tsp fresh orange or lemon juice

Spray 9 inch metal pie pan with cooking spray, dust with white rice flour.

Mix dry ingredients in bowl of stand electric mixer. Add butter and mix until crumbly and resembling coarse meal. Add egg and juice. Mix until it comes together into big chunks. Shape into a ball with your hands. Put it on a crust sized piece of wax paper (14 x 14 inches more or less), flatten the crust ball some; put on top of it another piece of wax paper and chill it all in your fridge 15-20 minutes while you chop the peeled and cored fruit into ¼ to 1/3 inch slices.

Filling:

5 cups peeled, cored, and thin sliced cooking apples (4 big apples)
2 cups (2 large pears) bosc pears; peeled, cored, and sliced thin – place in medium bowl

Mix the following in a small bowl and pour over the sliced apples and pears:
1/4 cup granulated sugar
1/4 cup light brown sugar
2 tbsp. tapioca flour
1/4 tsp. nutmeg
1 tsp. cinnamon
1 tsp. grated or zested lemon peel (I zested)

Roll out pie crust between the two sheets of wax paper; try to get the thickness even, no thick middle! Peel off one side of paper and place in pie pan, centered. Remove other slice of wax paper. Crimp edges all around. Fill with sweetened fruit mix. Sprinkle the lemon peel evenly over top and pour the crumb topping (1 to 1½ cup) evenly over this mixture. The more crumbs the thicker the crust they will form; for a really thick crust use all the crumbs from the recipe below.

If you love your pie really sweet add another ¼ cup granulated sugar to the dry mix part of the filling. I found the pie to be plenty sweet but everyone has their own sweetness level.

I put a pie guard under my pies to contain any oven accidents. If you make many pies it is a must. pie guardBake in a preheated 375 degree oven for 30 minutes with a piece of aluminum foil on top of the pie, then 30 more minutes uncovered until bubbly and the crust is light brown. Cool at least 2 hours before serving at room temperature.

Note: I bake pies in my bottom heat pizza oven and it gives me a great browned crust. If your oven isn’t bottom heat you might want to pre-bake the crust 10 minutes before filling and topping the fruit.

Crumb topping

Put all four ingredients in the same mixing bowl you made the bottom crust in and mix well with mixer paddle until crumbs form.

¾ c brown rice flour mix
½ c granulated sugar
½ tsp xanthan gum
1/3 c cold butter cut into six chunks
Brown Rice Flour Mix (same as King Arthur GF blend)
2 c brown rice flour
2/3 c potato starch (not potato flour)
1/3 c tapioca flour

Cranberry Crackle Tart: Light and Flavorful

I discovered this recipe on line, back before last Thanksgiving, at splendidtable.com. I loved the look and sound of it but didn’t find time to make it until last Christmas. Love at first bite. Like a fruit tart and a pavlova had a baby: this is the felicitous result. Light and delicate making it perfect after a hearty Thanksgiving feast. It is really guilt free if you eat it minus any toppings. I devoured it with vanilla ice cream on top at last year’s Christmas luncheon, nice flavor combination. I want to make one for Thanksgiving, maybe this time I will be serving it like you do a Pavlova, with lightly sweetened real whipped cream on top. Yumm!

It is really easy to throw together. If you are gluten free you can use the recipe provided below, which I adapted the splendid table recipe to make it gluten free. At holidays like Thanksgiving and Christmas Wegmans often has gf redi-made crusts. So does Frey’s Better Foods in Hellertown. If you are a wheat eater use whatever cookie tart crust you like. I added the cinnamon to my crust and found it added a lot to the complexity of the flavors. The crust absolutely needs to be prebaked before you put the tart together.

I should say I seldom use fresh cranberries; I generally make a fresh relish – old family recipe – for Thanksgiving but never got it made last November. So I had the bag of cranberries in the fridge in the fruit bin. Yeah, it sat there a month: I did have to pick through it (you always should) after I rinsed them and remove and squishy ones. There are usually a few of those mixed in and they aren’t great for anyone to eat. Let the picked over berries dry. Anyway, my point is; this tart is fantastic tasting even if you aren’t a huge cranberry fan.

I used some smooth raspberry jam (what I had) but you could probably use most any jam. Just chose one full of real fruit in a flavor you like as you can definitely taste the jammy flavor mixed in with the crust and the meringue topping. I loved it with raspberry jam, a favorite flavor for me.

crackle tart 006crackle tart 007

Sweet Cookie crust

Place the following in a stand mixer bowl and combine

1 cup GF flour (recipe below)
¼ cup granulated sugar
1 tsp xanthan gum
½ tsp. cinnamon
Add 5 tbsp cold butter, cut into 6-7 chunks. Mix on low until the butter is just crumbs blended in.
Add 1 tsp. vanilla extract and 1 tbsp water. Blend well.

Pour the crumbs into a ten inch tart pan that was sprayed with cooking spray. Or a glass pie pan. Spread it up the sides. Press gently in so it is a cohesive crust but do not press really hard or it will be like concrete when you finish baking it!

Bake at 350 degrees for 18 minutes. Set the crust on a rack to cool to room temperature. Do not let it get more than light brown.

Brown Rice Flour Mix (Same as King Arthur’s GF Blend)
2 c brown rice flour
2/3 c potato starch
1/3 c tapioca flour
Filling

2 tablespoons chunky cherry, raspberry or strawberry jam
2 large egg whites, at room temperature
Pinch of fine sea salt
1/2 cup sugar
1 1/2 cups cranberries (if they’re frozen, don’t thaw)
Confectioners’ sugar, for dusting

Directions: When you’re ready to fill and bake the tart: Preheat the oven to 300 degrees F.

Gently spoon the jam on top of the crust and spread it evenly over the bottom, I used the back of my big spoon for this operation. In a large bowl with a hand mixer, beat the egg whites with the salt at medium speed just until they are fluffy and fairly opaque. With the mixer going, add the sugar in a slow, steady stream, then keep beating on high until the whites are shiny and form definite peaks; they will look like marshmallow. This is a meringue.

Pour the cranberries into the bowl of meringue and, using a flexible spatula or spoonula fold them into the meringue. Try to distribute the fruit evenly, but don’t mix too much– you want to keep the meringue fluffy. Spoon the meringue over the jam and spread it to the edges, making it swirly if you’d like. The jam might push up around the sides of the meringue, and that’s fine. Don’t fret if it looks like not enough filling, it will puff up in the oven to fill the pie pan.

Bake the tart for 1 hour, at which point the top will be light beige and cracked here and there. (If you’d like more color, you can bake it a bit longer or even put it under the broiler.) I did not go there! Transfer the tart to a cooling rack and cool to room temperature. I did cut it while slightly warm and we all thought that was just perfection. If you’d like, and I do, dust the tart with confectioners’ sugar before serving. Whipped cream on top is also great.

Storing: The tart is best the day it’s made, although it’s still pretty nice the next day. Leave the tart at room temperature, covering only the cut part with a piece of wax paper or plastic wrap. I doubt you will have any the second day anyway. It is that tasty.

Blueberry Nutella Smush – Heavenly Ice Cream Treat

There are times when nothing but ice cream will do.  After a long tiring day and not much in my tummy I ate an omelet for supper.  It was pretty good but I had seen this article on ice cream blends in a food magazine at the library and was craving to try one. There were more than a dozen mixtures pictured, all based on vanilla ice cream and fruit and at least one or two other ingredients like a sauce and cookies/nuts. nutella

There was one combination I was sure I had all the ingredients, ice cream, bananas, nutella sauce and cornflakes.  Seemingly simple with clean, clear flavors.  Upon some reflection I decided to replace the banana with some fresh blueberries I had purchased at a farm stand. Bananas seemed too bland and I adore blueberries with ice cream. Continue reading

The High Cost of Gluten Free = DIY Baking!

Everyone knows gluten free foods cost more.  They cost more partially due to higher costs for some ingredients and partially the extra cost in the process to avoid cross contamination.  The rest of the increased cost is the greed of manufacturers who know they have us gf types over the proverbial barrel.

I, myself, find that baking my own treats and desserts is much more fun than buying expensive stuff that can taste like cardboard.  It is an adventure to bake gluten free.  Sometimes the desserts can be even tastier than they were with all purpose flour.  It is so rewarding when that happens!  Some recipes are easier than others.

This post was inspired by my friend Cortney who is gluten free but says she isn’t much of a baker.  My goal is to encourage her and others in the same boat to get baking.  Begin with something easy and build your baking confidence.

brownies

A good starting point would be brownies.  The recipe I use; see post recipe from March 28, 2014, is very easy to put together and they are crazy good.  The method is actually identical to how I made my classic version when I used all purpose flour years ago.

2024-11-05 apple muffins 008muffin close up 002

Another fairly easy thing to make – muffins. I have posted a number of excellent muffin recipes over this past year.  The recipes are very similar to each other. Basically, you mix the dry ingredients and keep dumping in the rest of the ingredients in the order listed.  Stir briefly to combine and spoon into greased muffin tins and bake.  One point: don’t use more than two kinds of fruit or the flavor will be confused. Muffins are tasty, useful and easy peasey.

oat muffins 007xmas cookies 002xmas cookies 006cowboy cookies

Once you get comfortable with brownies and muffins then you can upgrade to making cookies.  I have found a few great ones and some of them aren’t too difficult. Russian teacakes are very similar in technique to the wheat flour based version but are actually better in texture and flavor.  Another great cookie is the cowboy cookie; see my post last fall. Please try cookie baking, they are much yummier than ones you can buy and frankly cheaper.

rolls

When you get more confident you can try making rolls. I have posted a recipe or two I use often.  The puffy ones I make in muffin pans are so so easy and everyone loves them.  I guarantee it!

Once you get rolls down you can think about that bread thing.  I like making gf french bread.  You do need that special pan with the tiny holes and the rolling shape for cradling the dough/loaves.  The recipe I love is from food.com. Easy peasy and great for family dinners.

blueberry peach pie slice

Then there is pie; I really love the crusts I use for regular pie and the cookie crust for gf tarts.  Both are made in the mixer and the texture and flavor is very good. The crumb crust is so easy and I dump together the crust ingredients in my stand mixer to stir it up.  Chill briefly and roll out between wax paper, parchment paper or in a pie bag (my choice!) Check some of the recipes I have posted for pies or tarts.

These suggestions should get you started in the right direction to conquer gluten free baking. I will give you a few months to get down those six suggested baking areas for beginners.  Then we can revisit and go for trickier stuff!

You CAN do gf baking even if you are not much of a baker.  There isn’t any kneading and not as much shaping or forming as with white wheat based flours.  Don’t be psyched out by your fears of the freaky gluten free flours.  Don’t buy every flour under the sun like I did! I use that brown rice blend for a lot of my recipes. Two very good choices for a ready made mix are Better Batter or Cup 4 Cup.

PS: I read an article recently that is full of great advice; if you are new to gluten free or struggling with it; read this twice! I did…. http://www.moneytalksnews.com/21-delicious-ways-eat-gluten-free-budget/?all=1

Bake on my friends, bake on!