This re-post is one of my most popular posts ever. I don’t think any other product review even comes close. We had them for supper tonight. As great tasting as ever. So here it is again!
I bought the package of 4 uncured Bavarian bratwurst at Aldi’s. They were pale and unexciting looking in the shrink wrap but when I pan fried them in a bit of olive oil they browned up nicely. Each brat was still juicy and tender with a delicate flavor I was very impressed with.
I have bought brats before at other grocery stores and found them rather dull and pedestrian. These are thinner, longer and far tastier. Uncured means they have less junk added in the curing process of many sausages. Definitely a yummy and healthy-ish choice for sausage in any recipe. They cook in about 8-10 minutes. They make a quick supper with some pan-fried potatoes and a veggie. And grilling them is on the package as an alternative to the frying pan. I need try them on my grill. Maybe for camping next year…
They are imported from Germany, and I have heard that they are very authentic compared to most of the brats made in the USA. I give these an A plus in every category. Enjoy!
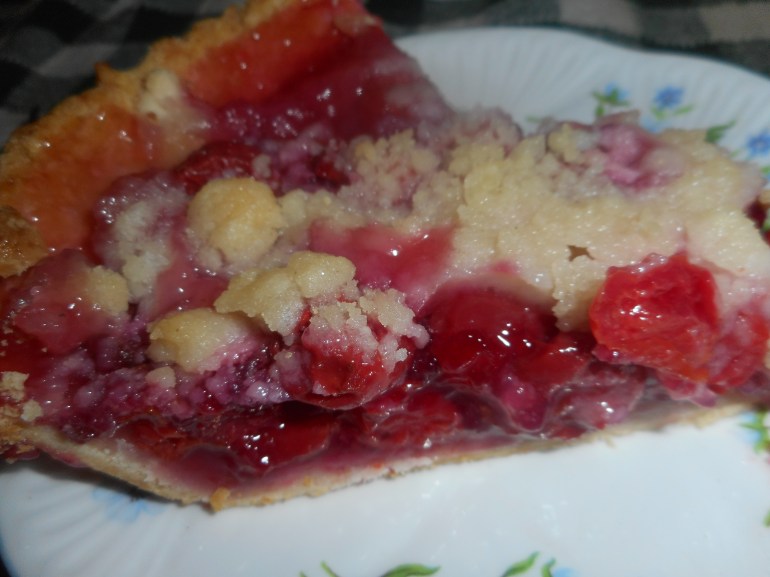
Pie is a classic American dessert, who doesn’t like a big slice of juicy pie? Cherry pie is perfect for the weeks before and after the Fourth of July or anytime you can get frozen sour cherries. My sister sometimes uses jarred cherries but I prefer fresh or frozen sours. You can make it gf easily with this recipe – my crust is really tasty; my family practically cheers when I serve homemade pie and my family does not need to eat gluten free.
Fresh tasting, locally sourced fruits are exactly in the spirit of summer. I have picked mine at an orchard down in New Jersey around Milford about 25 minutes SE from Hellertown.
The sugar, cinnamon and almond extract create an intense cherry flavor. If you prefer a lattice it can be made by doubling this pie crust and some careful construction work. I tend to go the easy route of the crumb as everyone loves it. You could make a smaller 8 inch pie; use a cup less fruit and cut the sugar some, ditto for the tapioca. This pie is fantastic with a scoop of vanilla ice cream on the side.
This recipe is a blending of my own pie filling and the pie crust and crumb recipes from Annalise Robert’s cookbook, Gluten-Free Baking Classics. I used a touch less sugar, more fruit, and made a few other changes to create my own special pie. Her cookbook is a fabulous resource and I can’t recommend it enough to anyone trying to bake gluten free for a family member. There is nothing like the classic desserts that we used to enjoy seasonally to comfort a celiac who can’t eat what they used to.
Angie’s GF Cherry Crumb Pie
Crust:
1 c plus 2 tbsp brown rice flour mix (at bottom of recipe)
2 tbsp sweet rice flour
1 Tbps. granulated sugar
½ tsp xanthan gum
¼ tsp salt
6 Tbps. cold butter cut into 6 chunks
1 lg egg
2 tsp fresh orange or lemon juice
Spray 9 inch metal pie pan with cooking spray, dust with white rice flour.
Mix dry ingredients in bowl of stand electric mixer. Add butter and mix until crumbly and resembling coarse meal. Add egg and juice. Mix until it comes together into big chunks. Shape into a ball with your hands. Put it on a crust sized piece of wax paper (14 x 14 inches more or less), flatten the crust ball some; put on top of it another piece of wax paper and chill it all in your fridge 15-20 minutes while you pit the fruit.
Filling:
6 cups pitted fresh sour cherries: place in medium bowl (If frozen do not defrost and bake the pie maybe ten extra minutes until good and bubbly)
1/4 tsp. almond extract (I add that to the pitted cherries before the dry mixture)
Mix the following 3 ingredients in a small bowl and pour over the cherries:
¾ cup granulated sugar
3-4 tbsp. tapioca flour
1/4 to ½ tsp. cinnamon
Roll out pie crust between two sheets of wax paper or in a pie bag; try to get the thickness even, no thick middle! Peel off one side of paper and place in pie pan, centered. Remove other slice of wax paper. Crimp edges all around. Fill with sweetened fruit mix. Sprinkle the crumb topping (1 1/4 to 1½ cup) evenly over this mixture. The more crumbs the thicker the crust they will form; for a really thick crust use all the crumbs from the recipe below.
NOTE: If you love your pie really sweet add another ¼ cup granulated sugar to the dry mix part of the filling. I found the pie to be plenty sweet, but everyone has their own sweetness level.
Bake in a preheated 375-degree oven for 30 minutes with a piece of aluminum foil on top of the pie, then 15-20 more minutes uncovered until bubbly and the crust is light brown. If you use frozen berries, don’t defrost them more than halfway and you might have to cook the pie up to 15 extra minutes; make sure it is bubbling and light brown before taking it out of the oven. Cool at least 2 hours before serving at room temperature.
Note: I bake pies on the bottom rack of my oven, and it gives me a great browned crust. If your oven isn’t great at the bottom crust getting brown, you might pre-bake the crust 10 minutes before filling and topping the fruit.
Crumb topping
Put all four ingredients in the same mixing bowl you made the bottom crust in and mix well with mixer paddle until crumbs form. Don’t over mix or you will get a soft dough; not a good thing…done it and not happy with myself…
¾ c brown rice flour mix
½ c granulated sugar
½ tsp xanthan gum
1/3 c cold butter cut into six chunks
Brown Rice Flour Mix (Same as King Arthur GF blend)
2 c brown rice flour
I am not the biggest fan of Gordon Ramsey; he is a bit too boisterous, and his food is kinda old school rich with butter and cream and expensive ingredient rich. But I recently saw this article which said he makes this 10 minute recipe every week for his family and decided to give it a try. It was more than 10 minutes for me; more like 20-25 minutes. Still, I loved the crispy sagey breadcrumbs on top and the hint of lemon in the cream sauce. The leeks add a wonderful undertone of delicate onionish-ness. You might find this a bit rich with cream; I didn’t but I suppose you could try light cream or half and half. I have made this before with chicken and had trouble finding it on my blog so I decided to do a turkey version. I did use ground turkey as it was on sale this week at Aldi’s. I forgot the lemon zest and it was still delicious! And I only had one shallot so I used half a very small red onion and it worked almost as well as a shallot. Winner winner turkey dinner; definitely making this again!
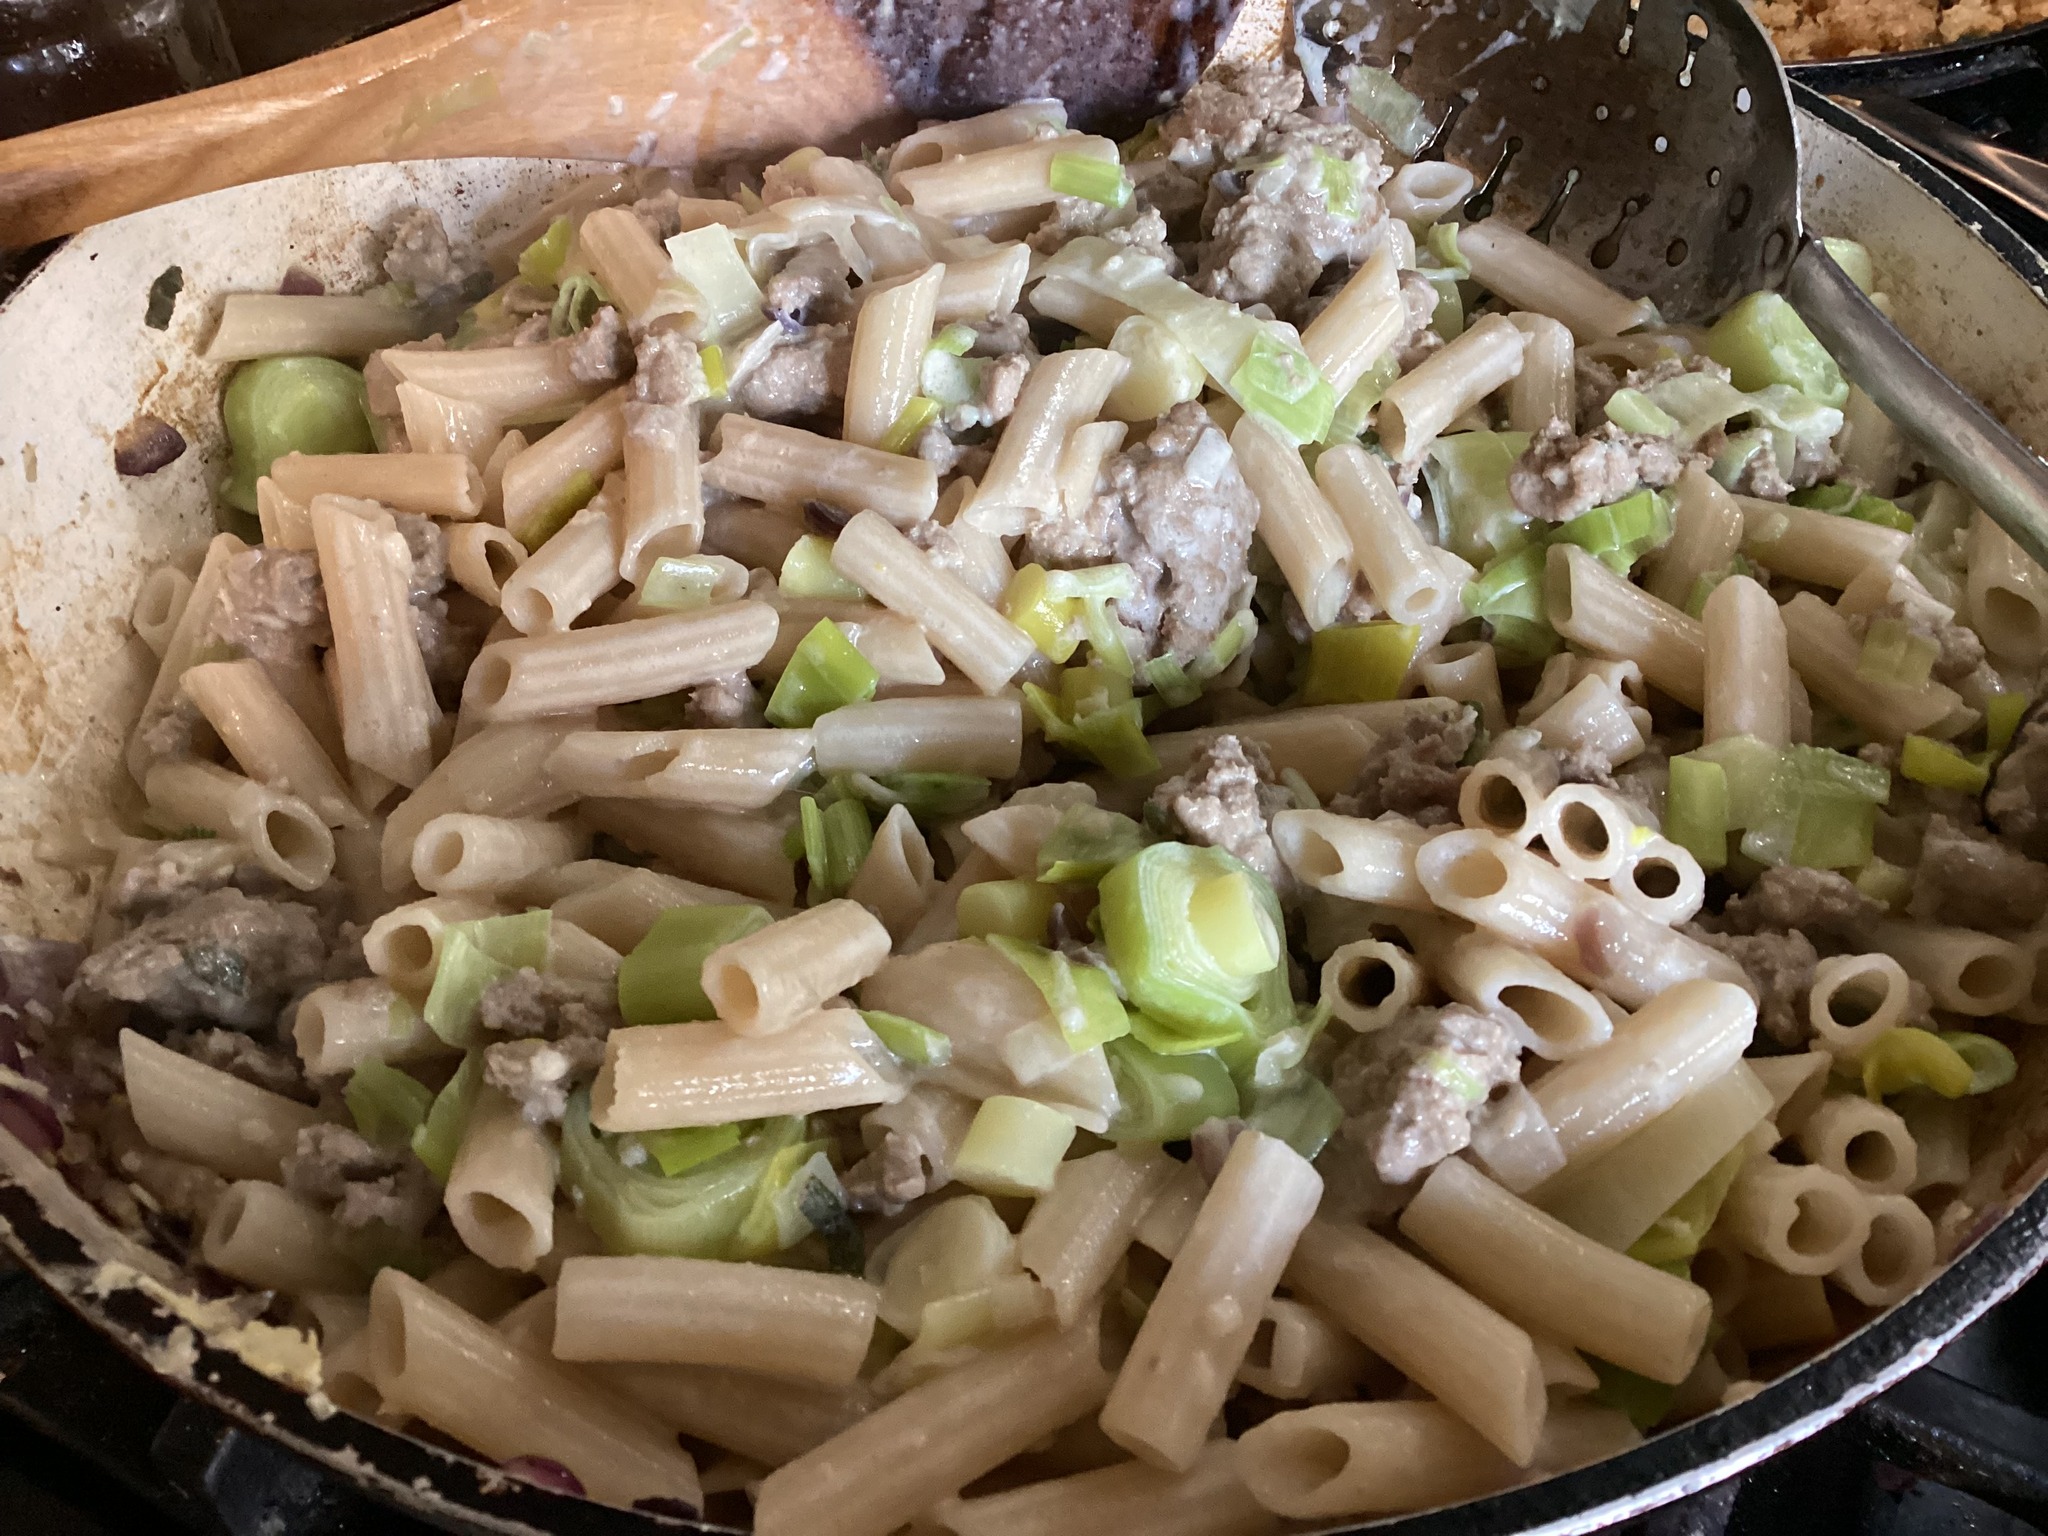
So, you can probably sub in any ground meat; let me know how that turns out. The leeks and shallots add a delicate presence that plays so well with the rest of the ingredients. I wouldn’t mess too much with the ingredients if I were you, not the first time anyway.
Creamy Turkey and Leek Pasta before plating
Ingredients
1o -12 ounces dried penne; I did 9.5 ounces
14-16 ounces ground turkey (16 oz for me)
4 Tbsp. mild olive oil, divided
2 banana shaped shallots; minced finely
2-3 leeks; I had one gigantic one; about 2 cups of sliced white parts; I put mine in water to soak for 5 min to get out any grit
3 garlic cloves, minced
6 sage leaves, divided
zest of one lemon
3-4 tbsp. minced parsley
3/4 cup heavy cream
Breadcrumbs: 3 or 4 of the above listed sage leaves minced, 8 tbsp fresh breadcrumbs; I tore up 2 small slices of gf sourdough bread
2 of the tbsp of olive oil from above
Freshly grated parmesan cheese to serve on top of each plate.
Directions:
First: heat a large pot of salted water for pasta
Do some prep work. Slice up the leeks into 1/3-1/2-inch-wide sections and soak briefly in filtered water to get any grit out. Mince the peeled shallots. I put the peeled garlic through a garlic press.
Heat half the olive oil in a Dutch oven. When close to hot add the shallots and garlic. Cook 2 minutes medium heat. Add the ground turkey and 3 minced sage leaves. As that cooks add the leeks (drained first!) to boiling water. Cook a minute. Add the pasta to the leeks. Cook as long as package says. I dipped out 3-4 cups of water to decrease the volume, so it returned to a boil super fast (A little trick you might try.)
When the chicken looks done add in the cream and cook on low for a few minutes. Do not boil! While it cooks make the breadcrumbs; put 2 tbsp. oil in a smallish frying pan and when hot add the breadcrumbs and the rest of the minced sage leaves. Stir for a couple of minutes; it will clump up and brown; watch it closely: DO NOT LET BURN! Add the drained cooked pasta and leeks when the pasta is al dente. And the lemon zest. Stir. Sprinkle with finely chopped parsley. To plate, put some on your plate/dish, top with freshly grated parmesan cheese and some of the breadcrumbs. Enjoy!!
It’s still rhubarb season, at least at my house and garden. This dessert is super easy and super yummy. I swear it tasted like there were cherries in there! I never made rhubarb crisp until last spring; I make apple crisp all the time in the fall and winter…so glad I tried it. I am sharing this tasty quick dessert with you once again. Makes a yummy breakfast too!
It keeps about 3 days depending on humidity. I have a glass baking dish with a plastic lid for keeping things fresh; works great.
Notes: any gf flour blend will do, I use King Arthur blend. You can use sliced or slivered almonds. Or no nuts! Tried it with both nuts and I prefer walnuts. I think the walnuts add a hint of cherry flavor to the result. But great with no nuts too…
Rhubarb Crisp
Ingredients
Fruit layer
4-5 cups rhubarb cut into ½ inch bits (I do 5 cups)
¾ cup sugar (could use up to a cup if you like it sweeter)
¼ cup tapioca starch (or cornstarch if you chose)
3/4 tsp. cinnamon
Topping
½ cup gf flour blend
1 cup gf rolled oats (not quick ones!)
½ cup light brown sugar
½ tsp. cinnamon
¼ cup brown sugar, not packed
¼ cup butter, cold
½ cup walnuts (optional)
DIRECTIONS:
Heat oven to 350 degrees. Spray the inside of 8×12 glass baking dish; any dish roughly that size will do. In a large mixing bowl dump all the dry ingredients; sugar, starch and cinnamon. Mix a bit; add rhubarb, mix well. Dump into baking dish.
Dump all dry ingredients left except nuts into the bowl of a stand mixer, blend briefly. Add butter which you have cut up into about 12 or more tiny bits; a few cuts with a knife do it quick. Blend a minute or so until you can’t see the butter. Add nuts. Pour over the rhubarb. Bake on middle shelf for 35 to 40 minutes; the thicker the layer of fruit is the longer it takes; you want it bubbling and the top lightly browned. Let cool at least 15 or 20 minutes. Goes great with vanilla ice cream or plain Greek yogurt on top. Store with a tight lid on top. Enjoy!
I save egg whites in the freezer and within a few months I use them for this delectable treat; angel food cake. Defrost a cup and a half of those whites and I have everything else in the fridge or pantry to make this most delicate cake: angel food cake. I found the recipe in my 1970s Betty Crocker, a great standard cookbook I would never want to be without. Was making it for many years before my diagnosis with celiac so once I got comfy baking gf I figured I could make it gf and it is perhaps even better than it was with gluten-based flour.
I used to make them for a boss’s birthday and for my mom who could hardly believe the first gf one was indeed gf.
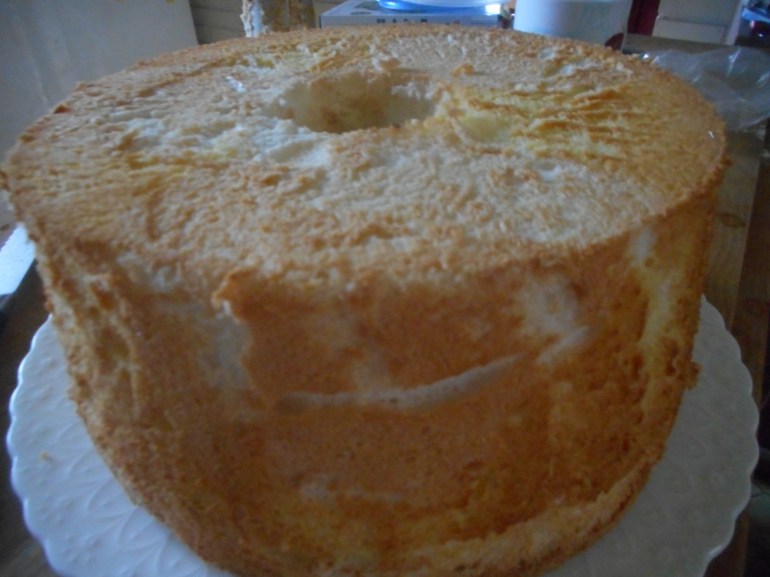
So, all you gluten free disbelievers, this cake will change your mind. It is tender, moist and delicately flavored, not to mention very pretty and perfect for a diabetic (which my dad was). It makes a wonderful birthday or party cake; you could put a thin vanilla powdered sugar glaze on top to make it fancy for such an occasion.
Notes: I save egg whites; in a Tupperware container in the freezer, until I have a cup and a half of them. Then I am ready to put this beauty together. Or just use enough eggs to make 1.5 cups of whites. If you don’t have guar gum you can use xanthan gum.
A few words on separating eggs: this can be tricky, and I have learned from bad experiences not to separate directly into the measuring cup full of whites; do it into a small bowl and dump. You can NOT get ANY egg yolk in the whites, or they won’t beat properly. Best to set any egg that breaks or becomes contaminated with even a speck of yolk aside and make an omelet for supper! I crack each egg on the edge of my counter, split its shell in half and dump it over one cupped hand. The white flows through into the bowl underneath and I drop the yolk into the mixing bowl. Be gentle so the yolk does not break. Don’t use old, tired eggs or the yolks are more likely to break; fresh is best but they need to come to room temperature before cracking, so the whites beat to a high volume. FYI: When baking gf all ingredients should be room temperature unless the recipe tells you otherwise.
Put the 1 ½ cup total egg whites in a large mixing bowl or stand mixer bowl I know, a crazy lot of eggs in this but remember, no fat what-so-ever! Angel food cake is a good choice for your diabetic friends, or so they say. I just think those folks love a good angel food cake.
GF Angel Food Cake
1 1/2 cup egg whites (room temp)
1 ¼ cup powdered sugar
1 cup brown rice flour blend (recipe below) (sift before measuring)
½ tsp guar gum
1 ½ tsp. cream of tarter
¼ tsp salt
1 tsp. pure vanilla extract
½ tsp. almond extract
1 cup granulated sugar
Directions:
Heat oven to 375 degrees. Put baking rack on second slot from the bottom. You need a ten-inch tube pan with removable bottom, do not spray. The part with the center hole goes inside the bigger piece.
Mix and sift the powdered sugar, flour, guar gum together in a bowl at least once.
Pour the egg whites (1 ½ cups) into a stand mixer bowl, add cream of tarter and salt. Start at medium speed. Beat until foamy, increase speed until high, wait for soft peaks and add cup of granulated sugar a tbsp or two at a time as it beats. No bowl scraping or stopping. Beat at highest speed until you have stiff peaks. Beat briefly after adding the two flavoring extracts.
Fold the flour mixture into the egg whites, I do about a quarter cup at a time sprinkled all over the top and I fold it with a spatula or spoonula. Be gentle and smooth; don’t worry if it isn’t perfectly smoothly mixed.
Put big glops of the mixture into the baking tube pan; using it all up. Gently stir through the pan with your spoonula to get rid of empty spaces and smooth the top with the spoonula.
Put into preheated oven, bake 35 minutes, until when you press gently on the top it springs back.
Remove from oven, turn it over and hang on an empty wine bottle neck or a big funnel. Let cool totally in this upside-down state before cutting it out of the pan. I use a sharp serrated bread knife, cut around the outside edge and the center tube. Lift it out and then slice under the cake all around. Place a cake plate over the top and gently flip it.
I store it in a plastic cake saver or just in the microwave away from humidity and hungry fam. You could wrap it in plastic wrap too. It is best eaten within 3 days. It generally doesn’t last that long around here.
Brown Rice Flour Mix base mix
(This mix is the same as King Arthur’s basic gf blend) 2 c brown rice flour
2/3 c potato starch
1/3 c tapioca flour
Yes, this is a lovely way to enjoy an angel food cake: freshly whipped cream and sliced strawberries
We had it with whipped cream sweetened only with vanilla extract and sliced strawberries…delicious


 Uncured means they have less junk added in the curing process of many sausages. Definitely a yummy and healthy-ish choice for sausage in any recipe. They cook in about 8-10 minutes. They make a quick supper with some pan-fried potatoes and a veggie. And grilling them is on the package as an alternative to the frying pan. I need try them on my grill. Maybe for camping next year…