Pan Fried Ravioli with Spring Veggies

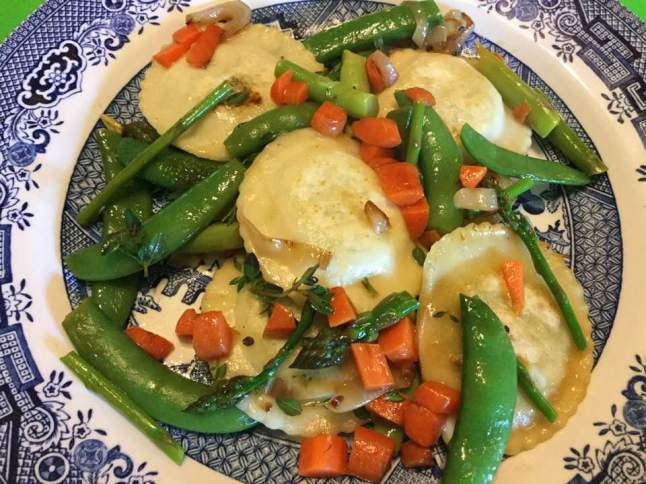
Sometimes I want a quick light meal; homemade and gf of course. I used some fresh asparagus from my garden, a small carrot, a small shallot, some EVOL and a few frozen ravioli to create this simple meal. No sides, two pans and it is quick to throw together; like 15 minutes tops.  People always want to pour red sauce over their ravs but I think they shine in a simple preparation. I used spinach and cheese ravioli but you can use what ever ravioli or even perogies. Yeap; there are gf perogies.

This recipe is for one serving, use a bigger frying pan and you can easily double this recipe.

Notes: first time I made this I used the capers, no carrots, second time no capers as I was out. Both yummy. If you don’t have shallots use a small onion. Sugar snaps were great; could use snow peas or even frozen peas.

Angie’s Pan Fried Ravioli and Spring Veggies

One serving

Ingredients

4-5 frozen ravioli

1 Tbsp. EVOL

1 small shallot

1 small carrot diced

1 small garlic clove, minced

Handful of pea pods, cut off any hard ends

3-5 spears asparagus cut into 1 to 2 inch lengths

1 Tbsp. dry white wine or vermouth

2-3 Tbsp. chicken broth

1 tsp. fresh thyme leaves off the stems

squeeze of lemon juice; maybe a couple tsp. and some zest if desired

1-2 tsp. capers if desired

2-3 tsp. butter if desired

Directions.

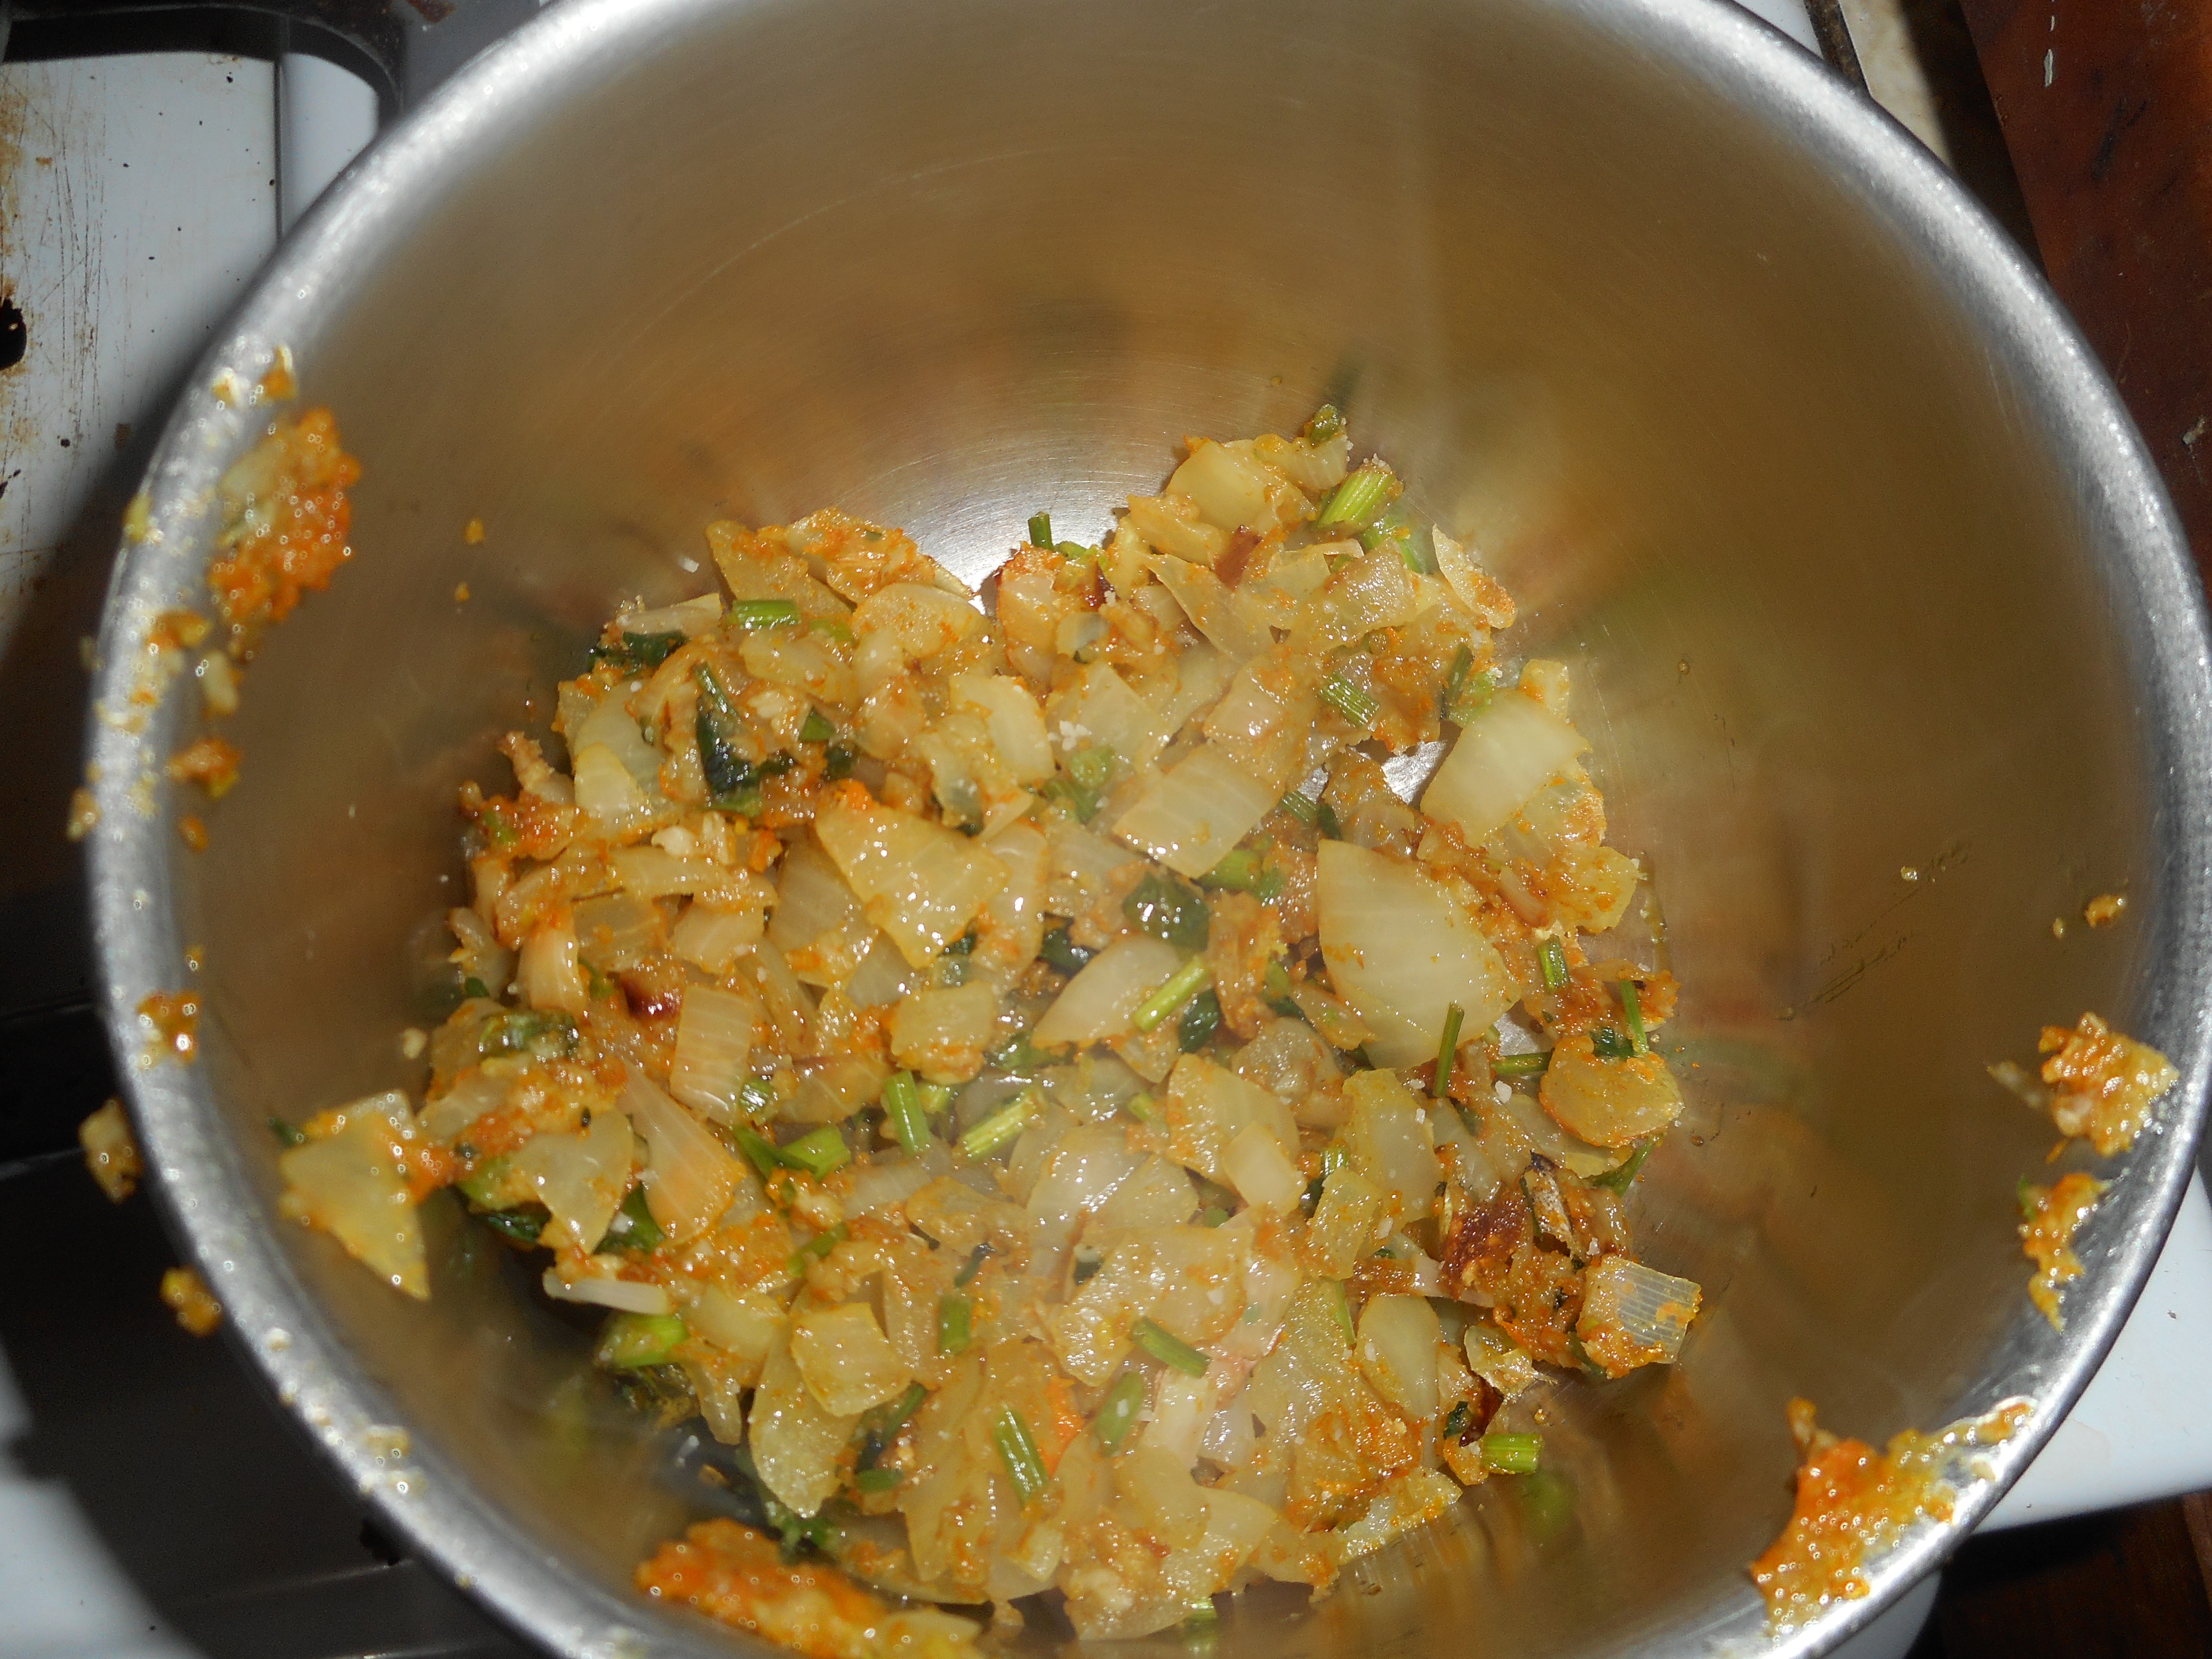
Heat a pot of salted water, cook ravioli according to package; mine said 6-8 minutes so I did 6 minutes. Drain. While that is cooking cut up the carrot and slice the shallot across into ¼ inch thick rounds. Heat the EVOL in a medium frying pan. Add the carrot, stir around, then add the shallot and the peas.  Cook 1-3 minutes; add the garlic, stir, add the vermouth. Cook one minute. Add the drained ravioli.  Cook a couple minutes on each side.  Add the asparagus when you turn the ravs.  They don’t need to brown but that would be yummy! You can add a touch of capers if you like. Add the thyme leaves and lemon juice at the end of the cooking.  Optional; add a Tbsp of butter and let that melt in. Can add a bit of lemon zest; maybe 1/2 to 1 tsp.  Add some of the cooking water instead of broth if you so desire. I did just that but added a tsp. of concentrated chicken broth. Enjoy!  rav with spring vegges plated

Rhubarb Cobbler – Tender and Tasty

My spring mission: to convince you rhubarb haters to try one of these recipes.  This one is delicate in flavor with a fluffy yet satisfying cobbler topping and no sour ickiness as some say rhubarb can be.  It takes a bit less fruit than a pie and goes together in just a few minutes.  And it is gluten free for all of you who must avoid gluten which means wheat, rye or barley flours are a no-no in baking.

This recipe is the same basic one I posted about for peach cobbler in the past; it is modified from a muffin dry mix in Bette Hagman’s book, More from the Gluten-Free Gourmet and uses a flour mix that will give you 4 cups of the dry ingredients.  One cup will make an 8×8 pan of cobbler topping.  I keep the rest of my dry mix in the freezer and a pan of cobbler can be thrown together in less than 10 minutes plus baking time.  What a time saver this mix is! I make all sorts of cobblers with it.

I always get the fruit part cooking before putting the topping together so the fruit is hot and ready for the topping and can go right into the oven.

My mom and I enjoyed this on this past Sunday. She really loved the rhubarb flavor and the cobbler topping.

rhubarb cobbler

Angie’s Rhubarb Cobbler

Dry Cobbler Mix – use one cup for this recipe and freeze the rest

2 ¼ cups white rice flour

½ cup potato starch (not potato flour!)

½ cup tapioca flour

1 tsp. baking soda

4 tsp. baking powder

1 tsp salt

1 tsp. xanthan gum

1/3 cup sugar


Fruit Filling

4 cups sliced rhubarb

½ tsp. almond extract

½-2/3 cup sugar –add more or less depending on how sweet you want it

2 tbsp. GF flour

1/4 tsp cinnamon

Directions:

Mix the fruit and almond extract in a sauce pan. Stir together the sugar, cinnamon and flour and mix into the fruit.  Cook on the stove top for 5-10 minutes until it is thickened and hot.  Pour into a buttered 8 inch square pan, top with big blobs of the cobbler topping.

Cobbler Topping

1 cup dry baking mix

2 eggs

2 tbsp melted butter or canola oil (both work fine)

1/3 cup milk/buttermilk (I skimp a tbsp off to keep it from being runny)

½ tsp. vanilla

Mix the wet ingredients and then add to the dry mix in a big bowl.   Mix briefly: do not over-mix for best texture.  Use a big spoon to plop it right away on the hot fruit.  Bake immediately as baking soda and powder can’t stand around waiting or they lose their umph!

Bake at 350 degrees for 25 minutes.  The top should be light brown and spring back when you poke it with your finger.  If it looks damp or squishy bake it 5 more minutes.

Let cool 5-7 minutes before serving as it will burn your mouth right out of the oven!  Some people love it with a scoop of vanilla ice cream.  This tender rhubarb cobbler is perfect just on its own.

Reposted with minor changes from June 2015.


Squash, Pancetta and Chard Pasta


This colorful pasta dish is pretty healthy and very tasty. Not too tricky either. Have enjoyed it many times in the past 5-7 years. I actually thought it was on my blog; not so. Hence this post. I made it this week and it made 4 lovely servings.

It showcases roasted cubes of butternut squash and tender melt in your mouth swiss chard. My amounts are somewhat approximate. It will keep a few days in the fridge. I used gf fettuccine noodles. Don’t overcook them! You could buy pre-peeled and cubed squash to save time. I used some I grew last fall and honestly it didn’t take long to peel and cube it. I suggest you roast the cubes from a whole squash and use as much as you think works for you. Valley Farms has great fresh swiss chard; that’s where I get mine if I don’t grow it myself.  I have made this recipe with thick cut bacon, if that is what you have; go for it.  I got a package of chopped pancetta at Aldi’s pretty cheaply.


Butternut, Pancetta and Chard Pasta

Ingredients:

1 bunch swiss chard, I like the red stemmed variety, rinsed off

3-4 tbsp. EVOL

1 cup or so of diced red onion; one decent sized one

1 lg garlic clove minced

1 small- medium butternut squash; peeled, seeded and cubed; at least a pound

4 oz pancetta, diced

12 oz dried gf fettucine noodles.

Good quality Parmesan cheese to grate on plated entree

Directions:

Roast the squash; heat the oven to 400 degrees, spray a rimmed baking sheet with olive oil cooking spray; spread the cubed squash, drizzle with 1-2 Tbsp of EVOL and ½ tsp. kosher or sea salt, bake at 400 degrees for 45 to 60 minutes; turn cubes every 15 minutes with a metal spatula to help them cook evenly, a bit of crunch is nice! Start the rest of the recipe as they approach doneness or bake the squash a day before if that works for you. Have done it both ways. Crunchier if made right before serving


Heat a large pot of salted water for the pasta while you make the chard.  Chop it into 1 inch lengths; set the chopped leaves aside separately from the lower stem bits. Heat the EVOL in a large frying pan or smallish wok. Add the stems and cook 2-3 minutes, add garlic, stir, add the onion; cook 3-5 minutes until softening. Add rest of chard in 2-3 handfuls letting it cook down for a minute before stirring and adding the next third. Then push the veggies up the sides or to the edges and add the pancetta. Push the veggies gently back around and over the pancetta. Cook 2-3 minutes until the pancetta is hot and the chard is soft.  Meanwhile you have cooked the pasta to al dente. Add it to the pan with the chard, stir, add the roasted squash cubes. Stir. Serve with freshly grated Parmesan cheese on top; none of that pre-grated crappy cheese please! Enjoy!

swiss chard pasta plated


Not sure where I found this recipe but it is a keeper; we often enjoy it in the fall as chard and squash are fall harvest vegetables.

Pizza….GF and Homemade…AND Yummy!

ImageSince my last pizza post; that the local pizza place has stopped carrying gf pizza…sad face.

The best tasting GF pizza for me is one I make myself.  It is out of my favorite GF cookbook, G-F Baking Classics by Annalise Roberts. It has some millet flour in it which keeps it from shrinking as much and adds some flavor/texture.  I love that I can actually make it the night before, store it well wrapped overnight and then just top it and bake to melt the cheese and blend the toppings.  The recipe says you can make several and freeze them half baked.  Great idea!!

So give this easy recipe a whirl and see what you think.  It is relatively easy, just be sure to take the time to flatten the top of the dough when you spread it in the pizza pan.  If you get a hill in the center your sauce will slide down it! Not so good.

This is better than the stuff pizza parlors sell.  They tend to buy it completely made, sealed up and just pop it in their oven.  Not a fresh pizza.  Take the time to whip this up.  A stand mixer makes it happen fast and painlessly. Your family who eats GF with you will like its crunchy crust and fresh taste.  And you can personalize it with the toppings of your preference to replicate pizzas you always enjoyed before going wheat free.

GF Pizza Crust

Ingredients:

1 cup brown rice flour mix

½ cup millet flour

1 tsp xanthan gum

½ tsp salt

2 tsp sugar

2 tsp dry yeast granules

1 tsp olive oil

¾ cup warm water, maybe up to a tbsp more (110 degrees F)

Directions:

Spray pizza pan with cooking spray, lightly sprinkle cornmeal over entire pan.  (You could skip this if you are not a cornmeal fan.)

Mix all dry ingredients in your stand mixer bowl.  Pour wet ingredients in there, mix until just blended, scrape down bowl.  Beat at high speed for two minutes.

Spoon dough onto prepared pizza pan.  Use a metal cake spatula to move it around and make it smooth. Try not to get the center any thicker than the edges.  Push dough so it gets all the way to the  very edge of the pan.  Cover with a light cotton cloth and let rise in a warm place 30-40 minutes until doubled in height.  I warm my smaller oven to about 105 degrees and put it in there.

Sauce

I use an 8 ounce can of tomato sauce and add olive oil, some minced garlic, dried basil and oregano and cook 5-8 minutes, covered. Let cool a bit before using.

Baking

Move oven rack to lower third of oven.  I have a pizza oven so I use that (great bottom heat for a super crisp crust!) Preheat oven to 425 degrees.   Bake it for 15-16 minutes.  Remove from oven.  [This is the moment when you can let it cool and freeze it or chill in fridge if using the very next day. Be sure to wrap it tightly in plastic wrap.] If using now, flip over and put tomato sauce, then toppings and cheese of choice.  I like both mott and Parmesan cheese on mine! Bake 8-10 more minutes more or less until it is bubbly and browning.  Be sure the bottom is browned.

Cool a minute and cut with your pizza cutter. Enjoy!

FYI: Don’t freeze the shell for more than three weeks.

PS: I have been told that Matey’s Pizza in Fountain Hill makes a gf pizza; will have to try it.

Originally posted on my blog in 2014.


Orange and Red Lentil Soup

This soup did not disappoint me with its unusual flavors and I enjoyed every naturally gluten free spoonful. I think you will too.

I did modify it somewhat from the original recipe, of course!  I changed the cilantro for parsley as I am not fond of cilantro and there is a reduced amount of garlic and of orange juice.  I love the bright flavors in this potage and as a bonus it is very healthy with the fresh orange juice, lentil beans, garlic and onions. If you love cilantro, sub it in for the parsley by all means.

Note, the red lentils, which you can get at the health food store, turn a soft maize color when cooked.  I think some brands are more orange in color but mine usually turns that soft yellow. red lentils

This recipe is a bit spicy but light as there isn’t any dairy or meat in this soup.  You will find this a great spring soup. If you use veggie broth it becomes vegetarian.

quiche 002

These are the sauted onions resting in a bowl before going back into the soup.


quiche 001

Broth in the soup, lentils are low in the pot!

quiche 005

Red Lentil and Orange Soup

Ingredients

  • ½ a bunch (1-inch-diameter bouquet at stems) fresh parsley
  • Extra-virgin olive oil
  • 3 medium onions, chopped into 1/4-inch dice
  • Salt and fresh-ground black pepper
  • 2large garlic cloves, fine chopped
  • One1/2-inch piece fresh ginger, peeled and fine chopped
  • 2 teaspoons ground coriander seed
  • Zest and juice of 1 medium orange
  • One 14-ounce can chicken or veggie broth
  • 2-1/2 cups water
  • 3/4 cup red lentils, rinsed and sorted
  • Juice of 1/2 to 1 lemon

Instructions

Wash and dry the bunch of parsley. Cut off the bottom 2 to 3 inches of the stems and chop them fine. Set them aside. Coarse-chop half of the remaining parsley leaves, refrigerating the rest for another dish.

Generously film the bottom of a 3 quart saucepan with olive oil – like two or  three tablespoons and heat it over high heat. Stir in two-thirds of the onions, and season with salt and pepper. Sauté until the onions just begin to brown. Blend in the parsley stems, half the parsley leaves which you chopped, garlic, ginger, ground coriander seed, and the orange zest. Sauté all of that for about 20 seconds over high heat, until the pan smells fragrant. Scrape out into a bowl and set aside.

Pour the broth, water, lentils, and remaining onions into the same saucepan. Bring to a gentle bubble, partially cover, and simmer for 7 to 10 minutes, or until the lentils are nearly tender. Add the sautéed onions and seasonings and additional salt and pepper to taste. Cover the pot tightly and simmer for another 15 minutes to blend the flavors.

Stir in the juice from half a lemon, the juice of the zested orange, and additional water, broth or orange juice to taste, starting with 2/3 cup. Then warm and sample the soup for salt, pepper, and lemon juice, adjust them as needed.

Scatter the remaining parsley tops over the soup, and ladle it into deep bowls.

The original recipe before modifications came from The Splendid Table’s How to Eat Supper by Lynne Rossetto Kasper and Sally Swift, Clarkson Potter, 2008.

Originally posted March 2015. No changes to recipe.