This side dish of dandelion greens with a simple stovetop custard sauce flavored with bacon and apple cider vinegar is a PA Dutch classic. My Grammy Drake taught my mom how to make it when my parents were first married, and my mom gave me the recipe. I’ve made it before but not for a few years. I guess I got busy and somehow forgot how special a memory this homey mixture is. Actually, my mom used to make the custard minus the bacon, vinegar and greens and pour it onto a dinner plate; I would eat it still warm and it was very soothing and yummy if I had a tummy ache.
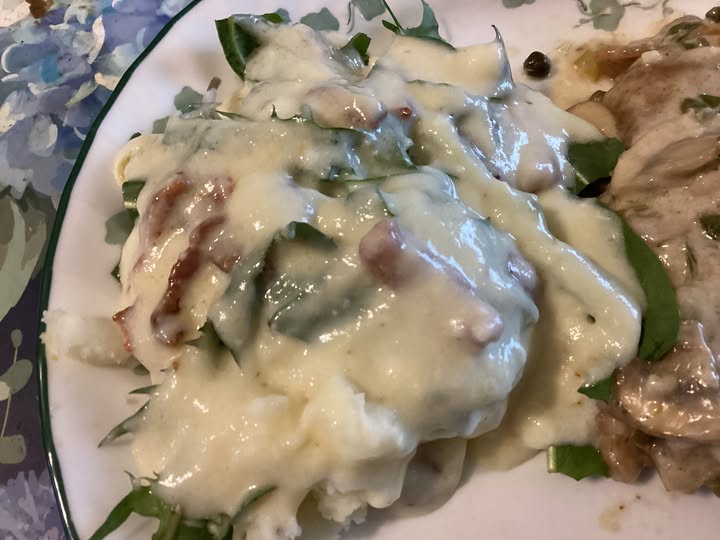
Back to this version that my father loved: the dandelion greens are slightly bitter; the bacon is salty and crisp if you add it at the very last moment. Mixed together with the tangy custard it is so delicious over freshly made mashed potatoes. It tastes like my childhood.
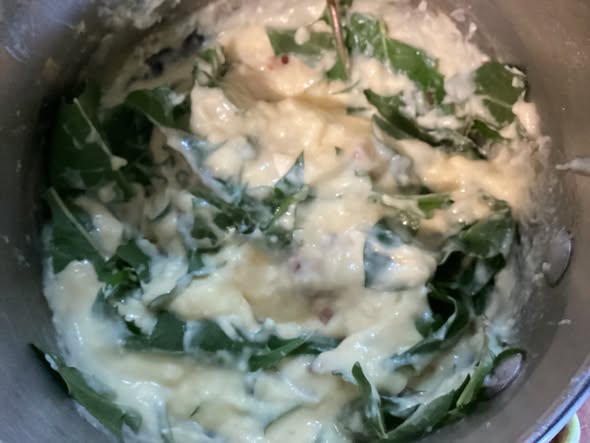
Notes: There are a few secrets to it. Use whole milk to get the proper thickness and rich flavor for your custard. Use real bacon and chop it up before frying. Pick tender greens and clean them well: rinse, remove any bloom stalks and dead or yellow leaves. Rinse again. Double check and rinse one last time. Spin in your salad spinner or dry in lint free kitchen towels. Finally, it’s critical to stir the custard often as it cooks and keep the heat low; it is pretty easy to scotch this delicate sauce.
Hot Dandelion Salad
Custard Ingredients:
2 Tbsp. rice flour
1.5 Tbsp. sugar
pinch of sea salt
1 cup whole milk
1 large egg, lightly beaten
2 Tbsp. apple cider vinegar
2 slices of bacon fried to crispy perfection – crumble after they cool
1 qt cleaned dandelion leaves, no flower stems, roots or brown/yellow leaves. Wash several times and spin dry in your salad spinner. Baby spinach makes a good substitute for dandelions.
Freshly made mashed potatoes
Directions: Mix the flour, sugar and salt in a 1 qt saucepan, preferably one with a heavy bottom. Add the milk and whisk together. Place over medium low heat and whisk in the egg. Cook slowly until it thickens quite a bit, could take 3-5 minutes. Remove from heat, cool for 5 minutes and add vinegar; whisk well. Add a tsp or two of the bacon fat and stir in the crumbled bacon and washed and torn dandelion greens. Serve while still warm over mashed potatoes. Goes well with roasted trout, fried heirloom porkchops or salmon fillets. Enjoy!